
In this easy drawing tutorial, you will learn how to draw sea otter using simple shapes and gentle curved lines. This step by step drawing is friendly for beginners, with each part building slowly from the face to the full body.
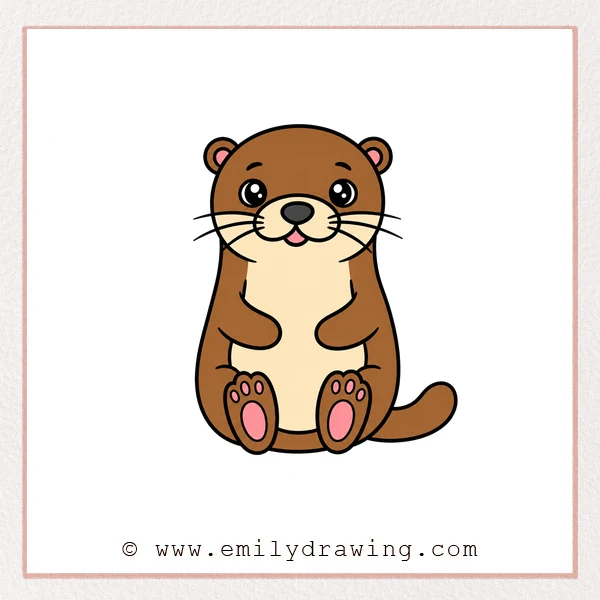
Take your time with each step, and keep your lines soft. A sea otter has a round, sweet look, so smooth curves will help your drawing feel warm and playful.
What You Will Need
- Pencil
- Eraser
- Black marker or pen
- Drawing paper
- Colored pencils or crayons
Here are my RECOMMENDED Art Supplies!
- Crayola Coloring Set (140 Pieces – Mega Value!)
- 24 Colored Crayon Set
- A4 Printer Paper
- Crayola Coloring Pencils
- HP Home Printer with Instant Ink!
Time needed:
12 minutes.
Step-by-Step Drawing Guide
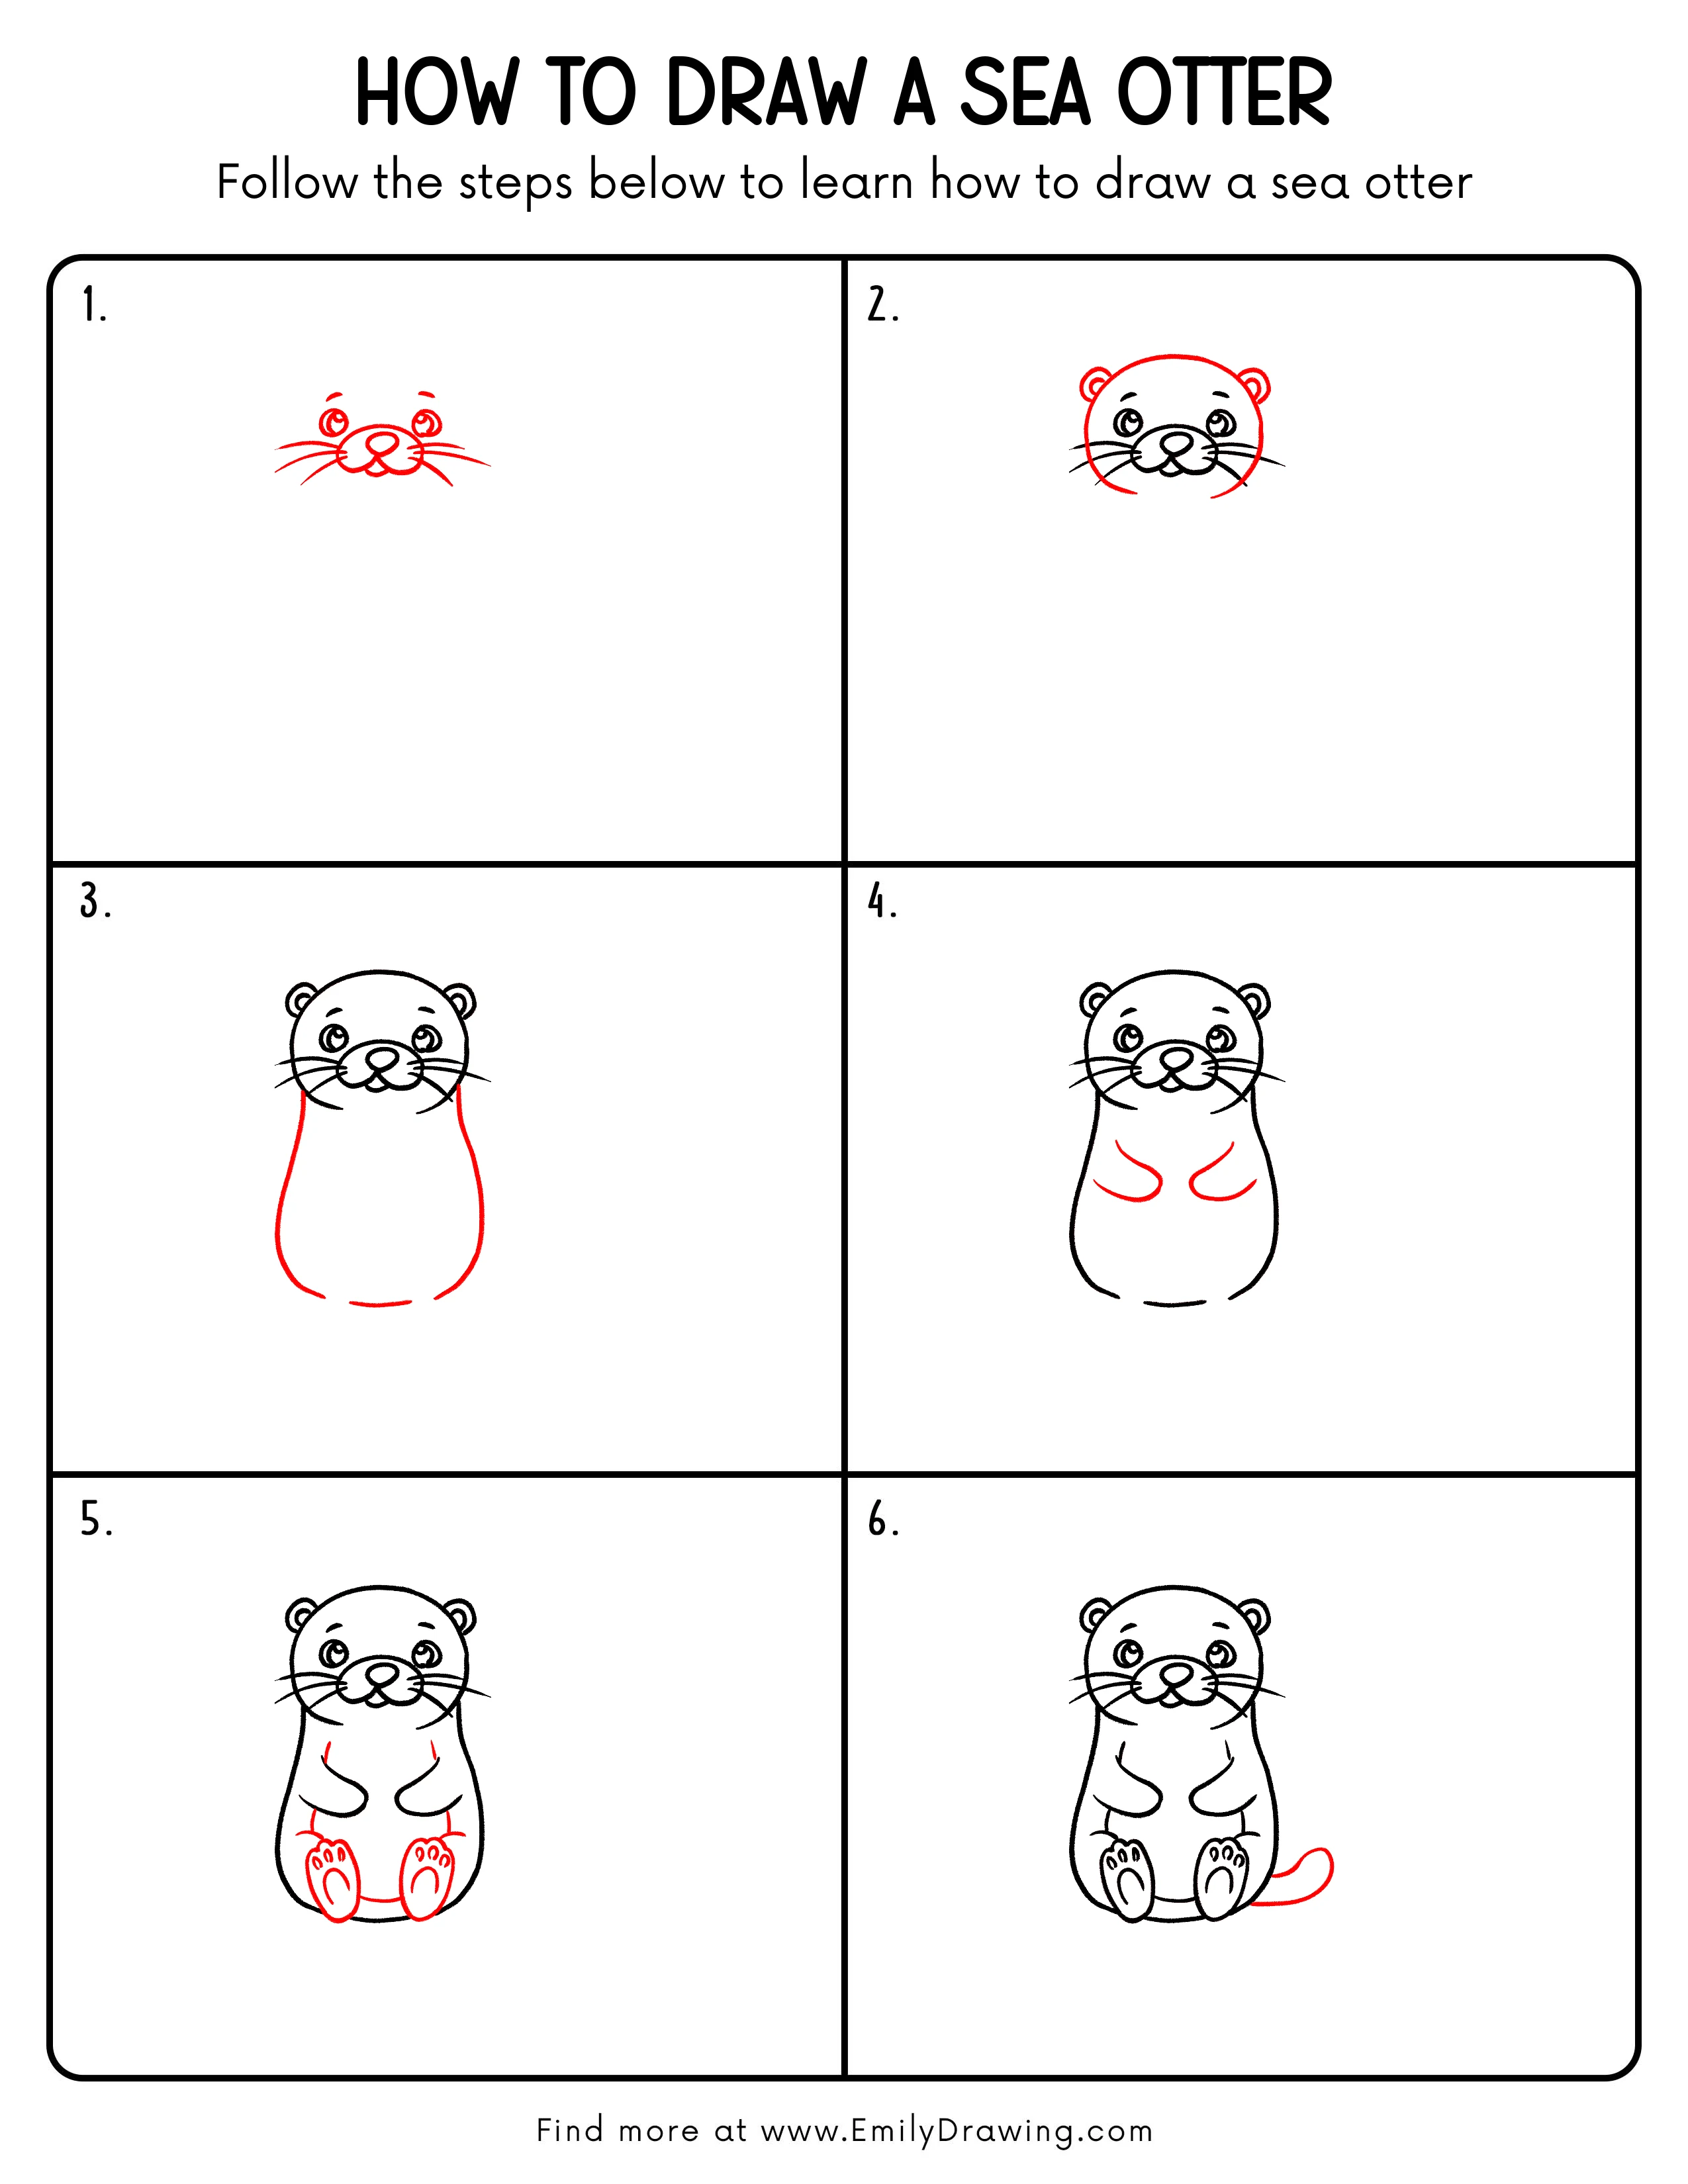
Step 1: Draw the Sea Otter’s Face Center
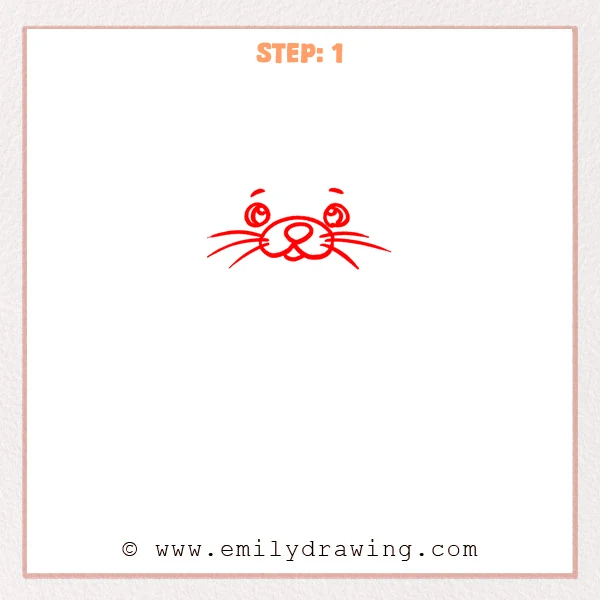
Start with two round eyes, leaving small highlights inside. Then add an oval nose, puffy cheeks, and a few long whiskers on each side.
Pro Tip: Keep both eyes and the nose balanced so the face looks extra cute.
Step 2: Add the Sea Otter’s Head and Ears
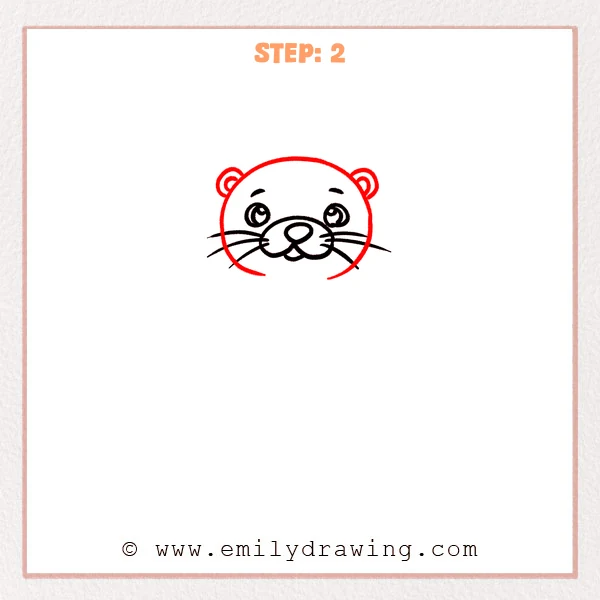
Draw a large curved outline around the face to form the sea otter’s rounded head. Then add small round ears near the upper sides, with a smaller inner curve inside each ear.
Pro Tip: Make the head curve a little wide so the sea otter looks soft and cute.
Step 3: Draw the Sea Otter’s Body Outline
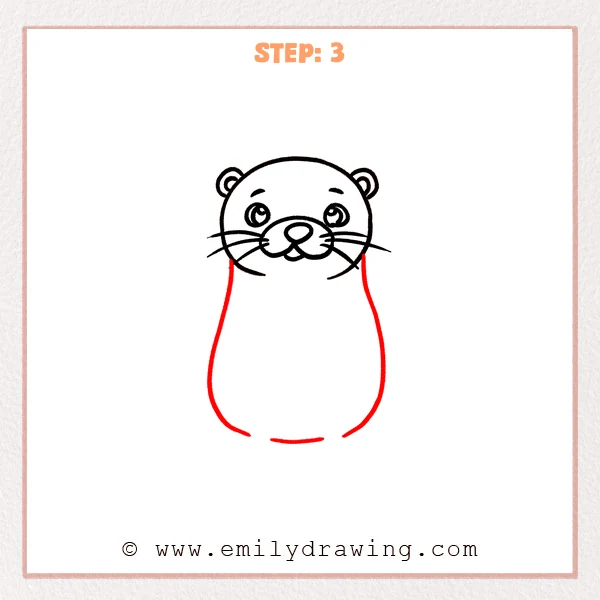
Draw two long curved lines downward from the sides of the head to form a plump body. Leave small gaps near the bottom, and add a short curve for the lower body edge.
Pro Tip: Let the body sides bulge gently outward so the sea otter looks round and steady.
Step 4: Add the Sea Otter’s Small Front Paws
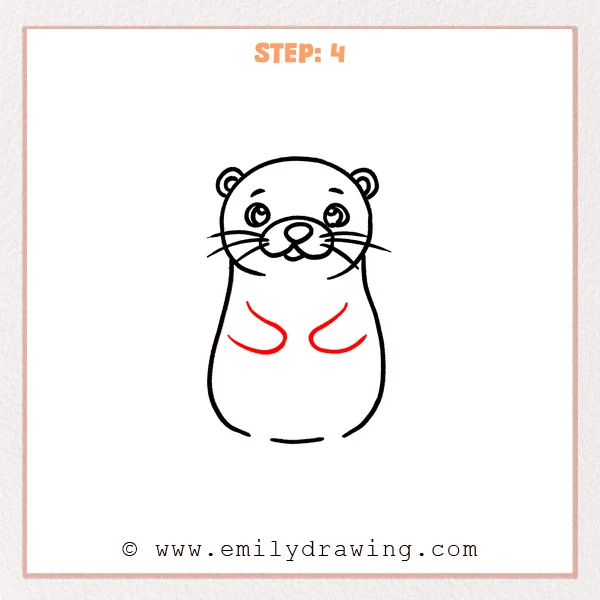
Draw two curved little front paws in the middle of the body, shaped like soft drops. Let the paws bend toward the center to show the sea otter holding them near its chest.
Pro Tip: Keep both front paws at about the same height so the pose looks natural.
Step 5: Draw the Sea Otter’s Feet and Toes
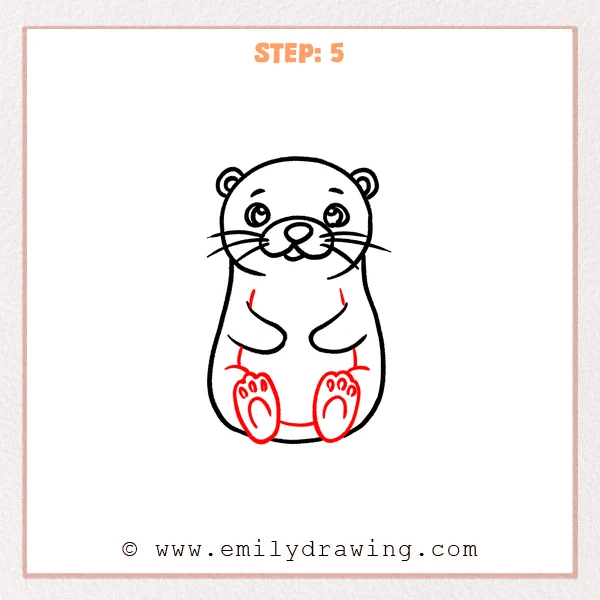
Add two rounded feet at the bottom of the body, then draw the small toes. Use a short curved line between them to connect the lower body and make the sea otter sit firmly.
Pro Tip: Make the feet a little larger so the overall proportions look cuter.
Step 6: Add the Sea Otter’s Tail
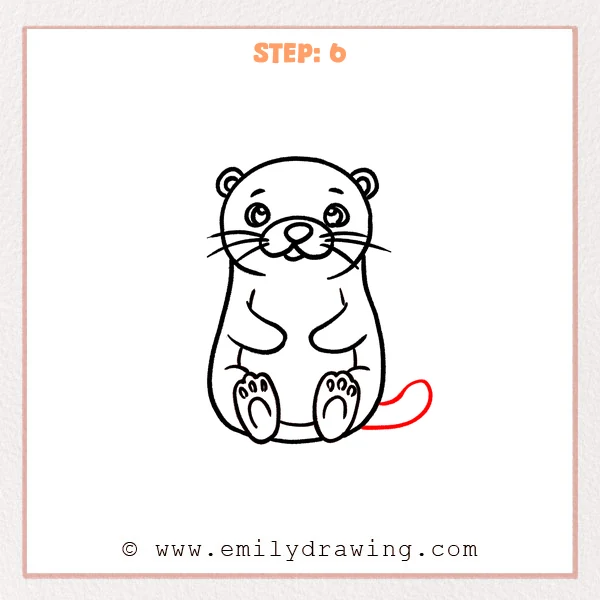
Draw a long curved tail from the lower right side of the body, stretching outward and curling back. Keep the tail close to the bottom of the body to show a relaxed sitting pose.
Pro Tip: Round the end of the tail slightly to make the sea otter look softer.
Step 7: Color in your drawing!
Fun Facts
Sea otters often float on their backs while resting in the water. Their thick fur helps keep them warm in chilly ocean habitats.
They are known for using small rocks to open hard-shelled food. This makes them one of the few animals that use tools in daily life.
Pin it now, Draw later!
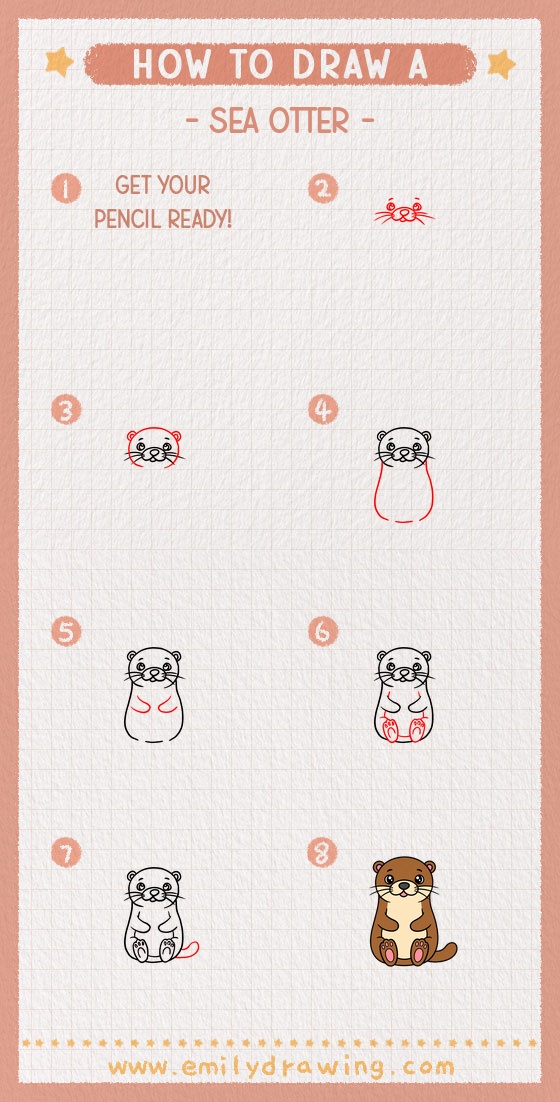
Now you know how to draw sea otter with a simple step by step drawing method. Trace your favorite lines with a black marker, then erase any extra pencil marks after the ink dries.
You can color the sea otter with soft brown shades and add gentle blue waves around it. Keep practicing this drawing for beginners, and try making each sea otter with a slightly different expression.
Get the FREE Printable Drawing Guide
FREE Download Printable Sea Otter Drawing Tutorial
Frequently Asked Questions
Is this sea otter drawing good for beginners?
Yes, this easy drawing tutorial uses round shapes and curved lines. It is a gentle way to practice animal drawing for beginners.
How can I make my sea otter look cuter?
Make the eyes round, the head wide, and the paws small. Soft curves will help the sea otter look friendly and sweet.
What colors should I use for a sea otter?
Use warm browns for the body and lighter tones for the face or belly. You can add blue around the tail to suggest water.



