
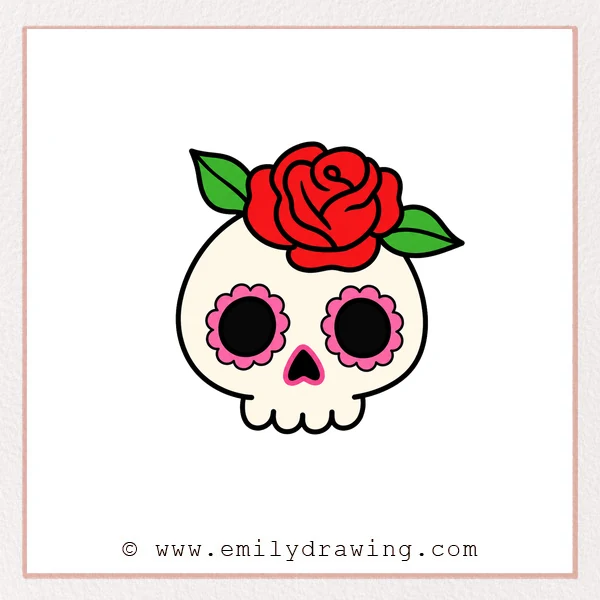
Learning how to draw rose skull can be simple and enjoyable. This easy drawing tutorial builds the artwork step by step, using rounded petals, leaves, and a cute skull shape. Take your time with each line, and keep the drawing light before darkening it.
What You Will Need
- Pencil
- Eraser
- Black marker or pen
- Paper
- Colored pencils or markers, optional
Here are my RECOMMENDED Art Supplies!
- Crayola Coloring Set (140 Pieces – Mega Value!)
- 24 Colored Crayon Set
- A4 Printer Paper
- Crayola Coloring Pencils
- HP Home Printer with Instant Ink!
Time needed:
22 minutes.
Step-by-Step Drawing Guide
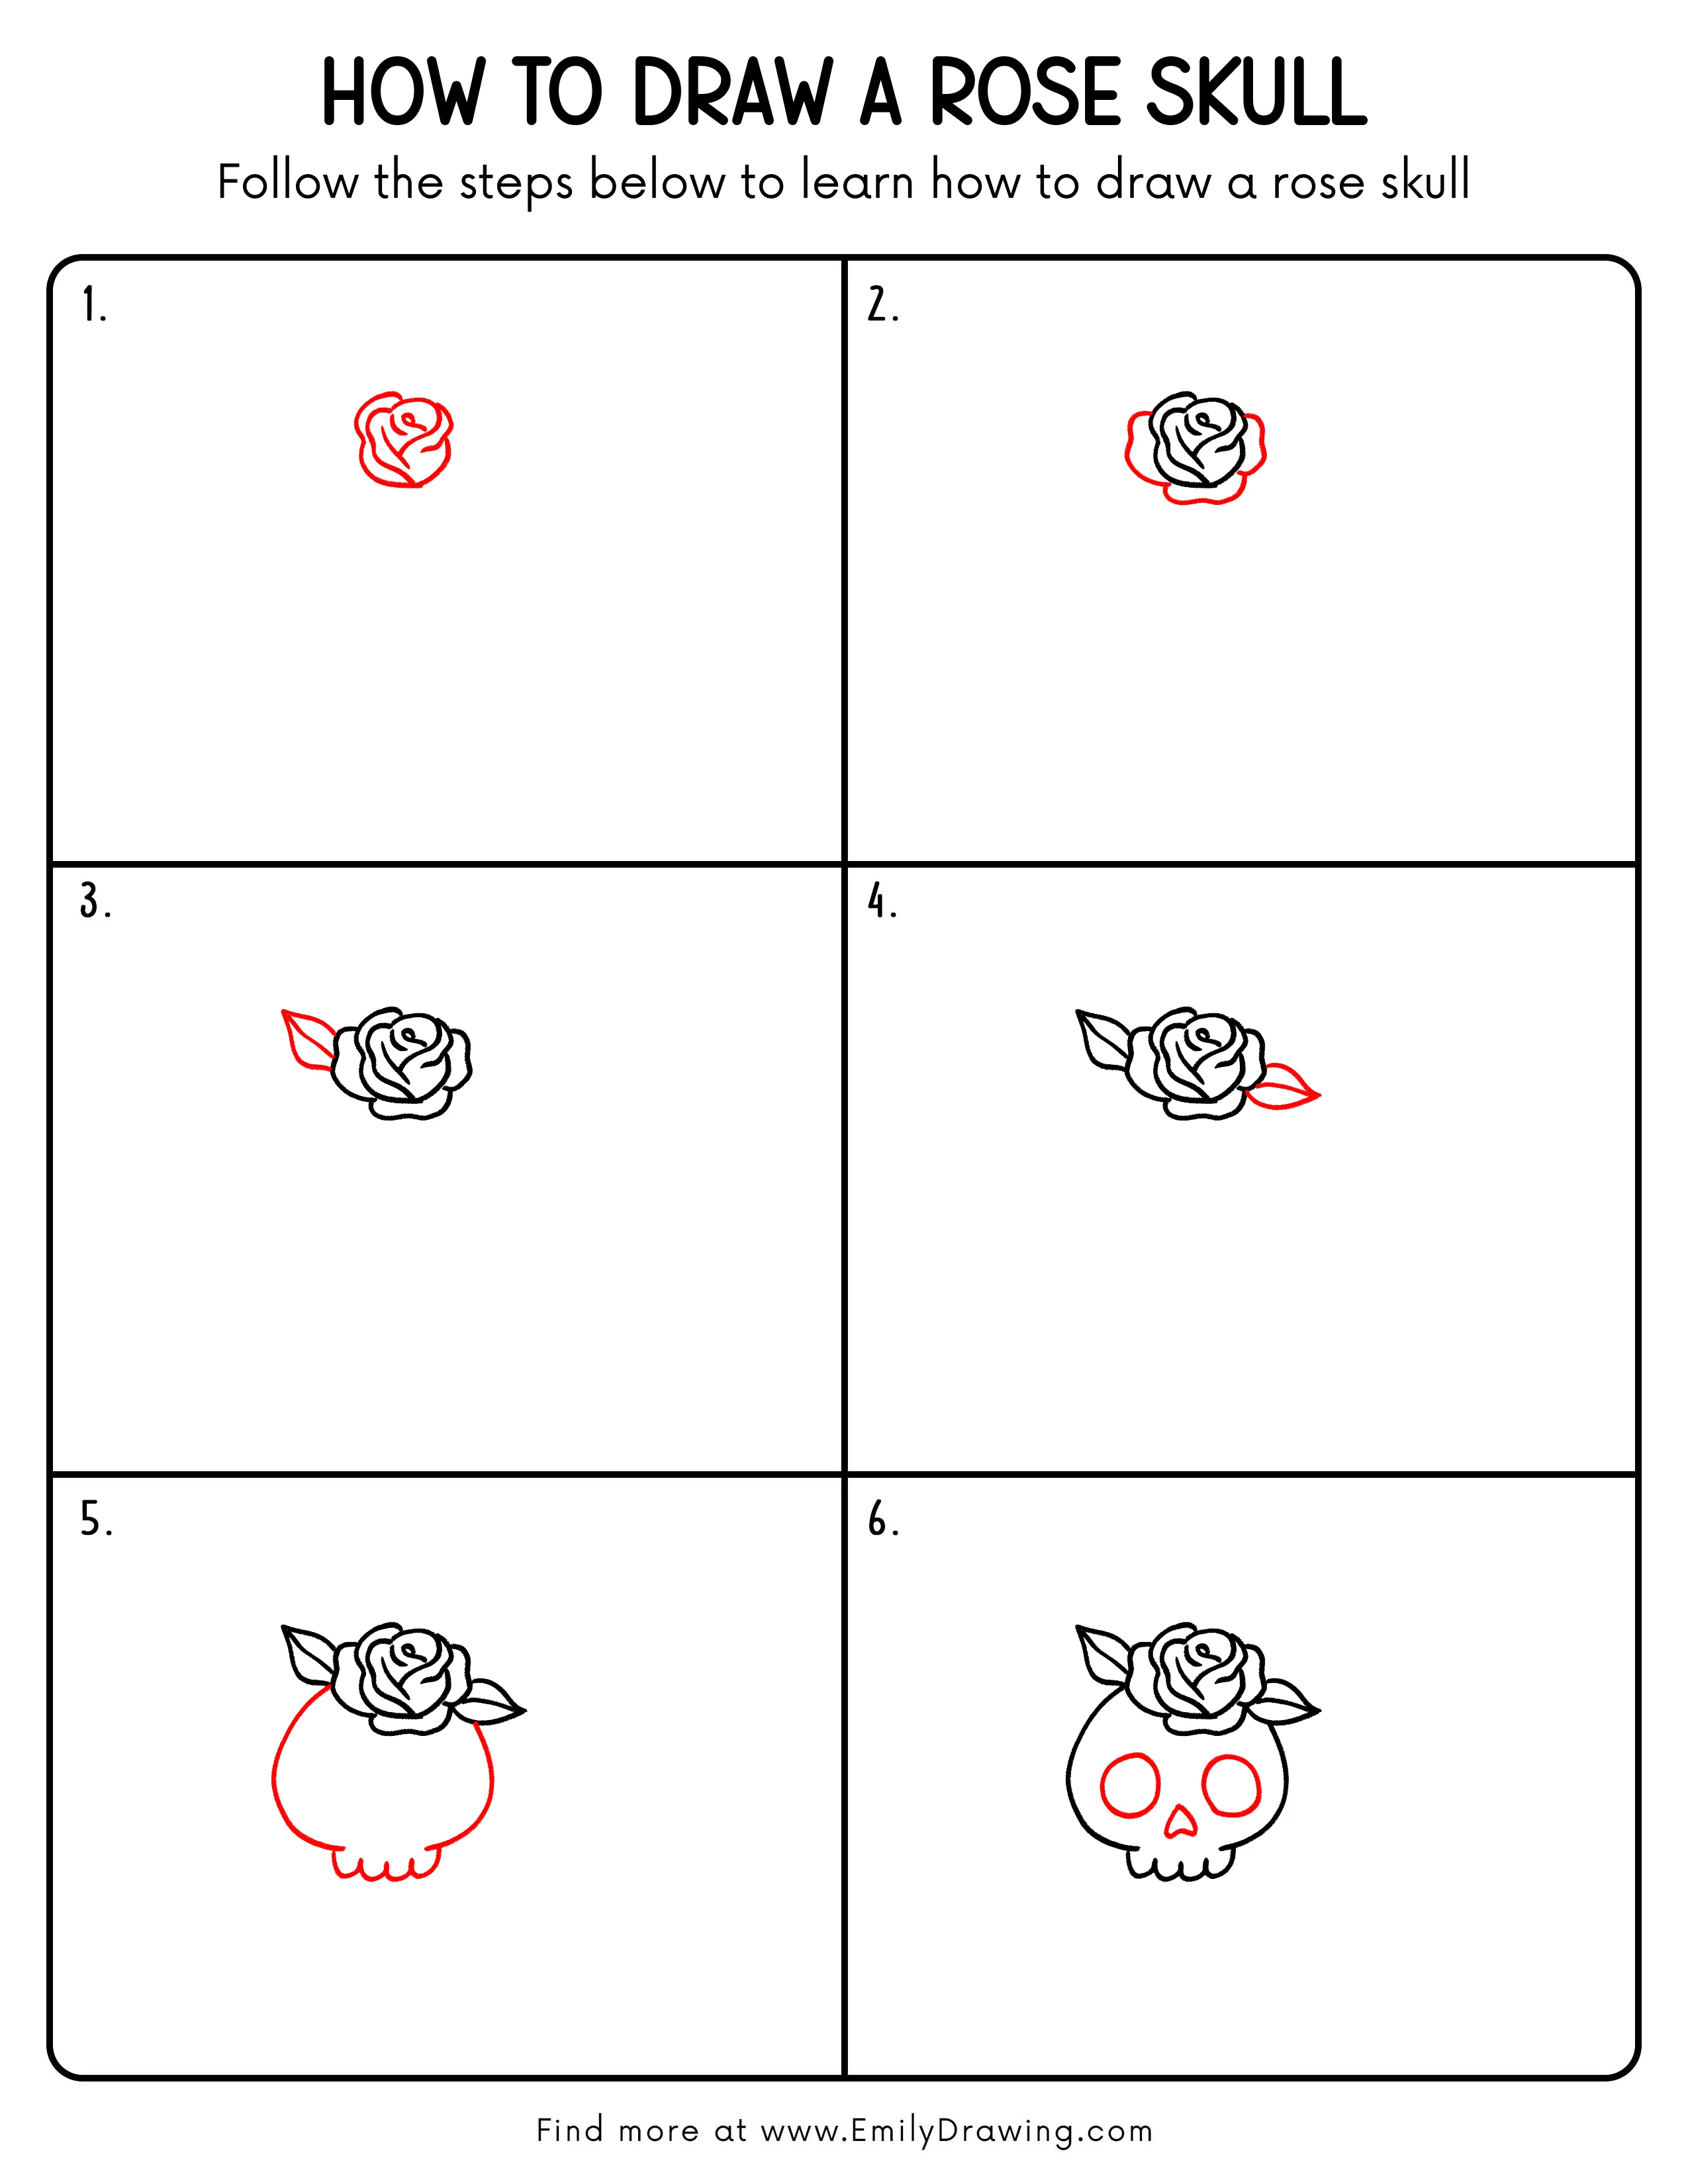
Step 1: Draw the Basic Rose Skull Outline
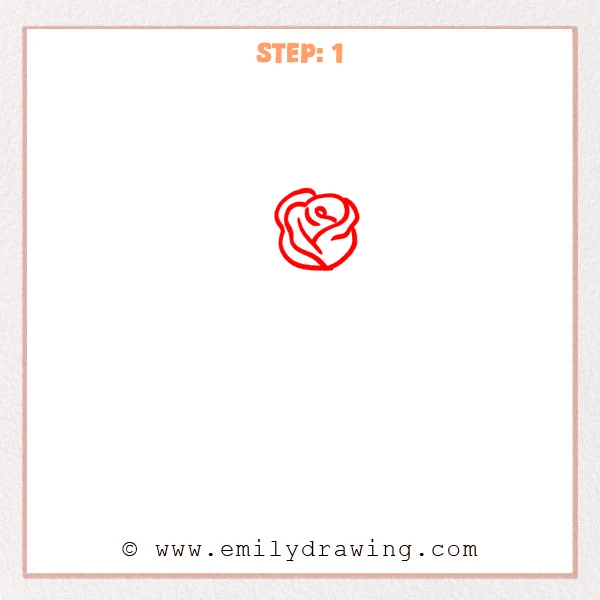
Start with curved lines to build the overall rose skull shape. Add a curled petal line in the center, making it look like a rose wrapping around the skull. Keep the lines soft, and do not worry about making them perfect yet.
Pro Tip: Set the overall size first, then slowly adjust the inner petal placement.
Step 2: Add the Outer Petals
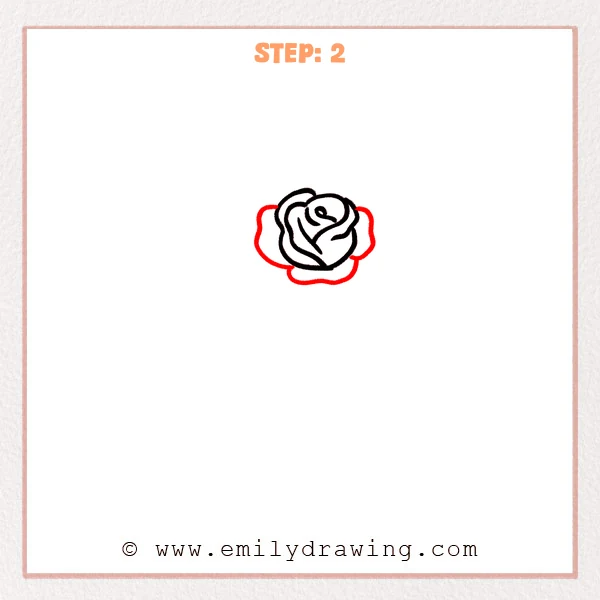
Around the original rose skull shape, draw larger wavy outer petals. Let one petal spread outward on each side, then add a soft petal edge along the bottom. These new lines make the rose look fuller and wider.
Pro Tip: Keep the outer petals larger than the center so the rose has more depth.
Step 3: Draw the Left Leaf
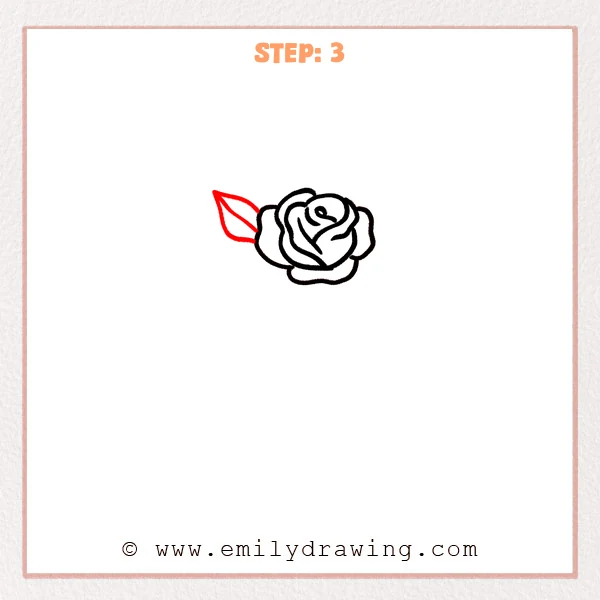
On the left side of the rose skull, add a pointed leaf stretching outward. Use two slanted lines for the outer leaf shape, then draw one center vein. This step gives the rose skull a stronger botanical feeling.
Pro Tip: Point the leaf tip slightly upward to make the whole shape feel more natural.
Step 4: Draw the Right Leaf
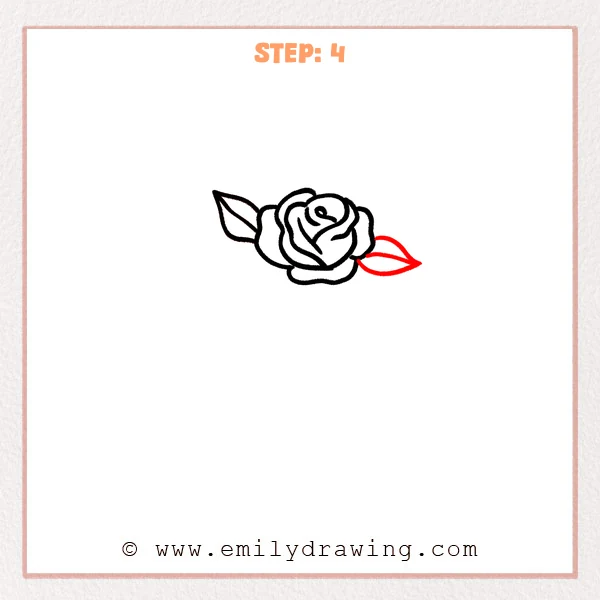
On the right side of the rose skull, add a pointed leaf stretching outward. Use two curved lines to connect it to the flower edge, then draw one center vein. This leaf helps balance the shape on both sides.
Pro Tip: Place the right leaf slightly lower to make the drawing feel more natural.
Step 5: Draw the Skull Shape
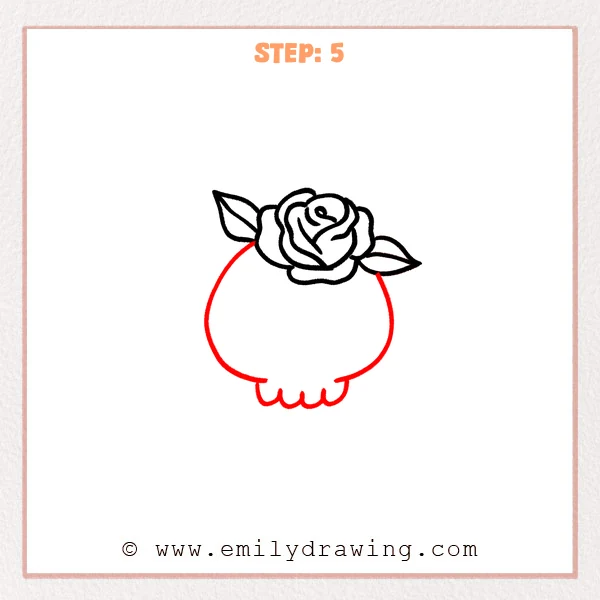
Start below the rose and draw a wide rounded curve for the skull sides. Add several small curves along the bottom to form the basic teeth area. Let the top of the skull hide behind the rose, keeping the flower in front.
Pro Tip: Keep the skull sides nearly symmetrical, but let the bottom teeth vary slightly.
Step 6: Add the Eyes and Nose Hole
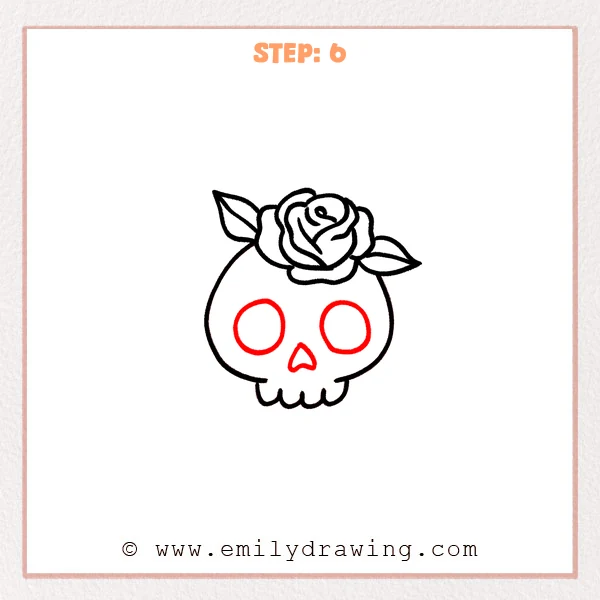
Draw two round eye sockets on the skull face, keeping them evenly placed. Below the eyes, add an upside-down heart shape for the nose hole. These new details make the rose skull expression much clearer.
Pro Tip: Lightly mark the eye positions first, then darken the lines for better balance.
Step 7: Color in your drawing!
Fun Facts
Rose skull designs often mix two opposite ideas: flowers and bones. Roses can suggest beauty and growth, while skulls can suggest mystery or remembrance. Together, they make a bold drawing for beginners who enjoy decorative art.
Skulls may look difficult at first, but this version uses simple circles and curves. The rose on top also helps soften the design and adds a creative focal point.
Pin it now, Draw later!
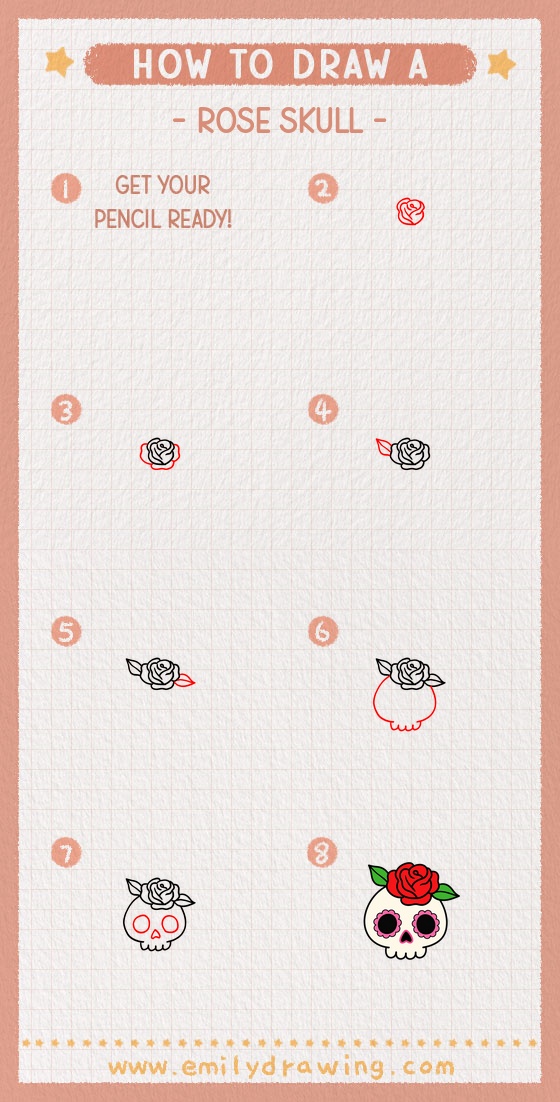
Now you have completed a rose skull step by step drawing. You can trace the final lines with a marker, erase extra pencil marks, and add color to the rose and leaves. Try shading the eye sockets lightly to give the skull more depth, then share your finished drawing with someone who enjoys art.
Get the FREE Printable Drawing Guide
FREE Download Printable Rose Skull Drawing Tutorial
Frequently Asked Questions
Is this rose skull drawing for beginners?
Yes, this rose skull drawing for beginners uses simple shapes and short steps. The rose petals, leaves, and skull features are built gradually.
How can I make the rose skull look cleaner?
Use light pencil lines first, then trace only the best lines with a pen. Erase slowly after the ink is dry.
Can I color this rose skull drawing?
Yes, you can color the rose red, pink, purple, or any shade you like. Keep the skull light, or add soft gray shadows for extra detail.



