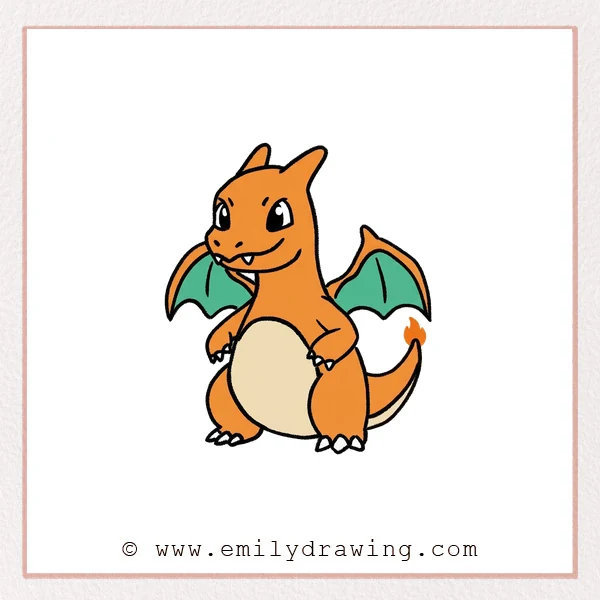
This easy drawing tutorial shows how to draw Charizard step by step. We will build the shape slowly, so drawing for beginners feels calm and clear. Take your time, and let each new line be a small win.
What You Will Need
- Pencil
- Eraser
- Black pen or fine liner (optional)
- Coloring tools (markers, colored pencils, or crayons)
- Paper
Here are my RECOMMENDED Art Supplies!
- Crayola Coloring Set (140 Pieces – Mega Value!)
- 24 Colored Crayon Set
- A4 Printer Paper
- Crayola Coloring Pencils
- HP Home Printer with Instant Ink!
Time needed:
20 minutes.
Step-by-Step Drawing Guide
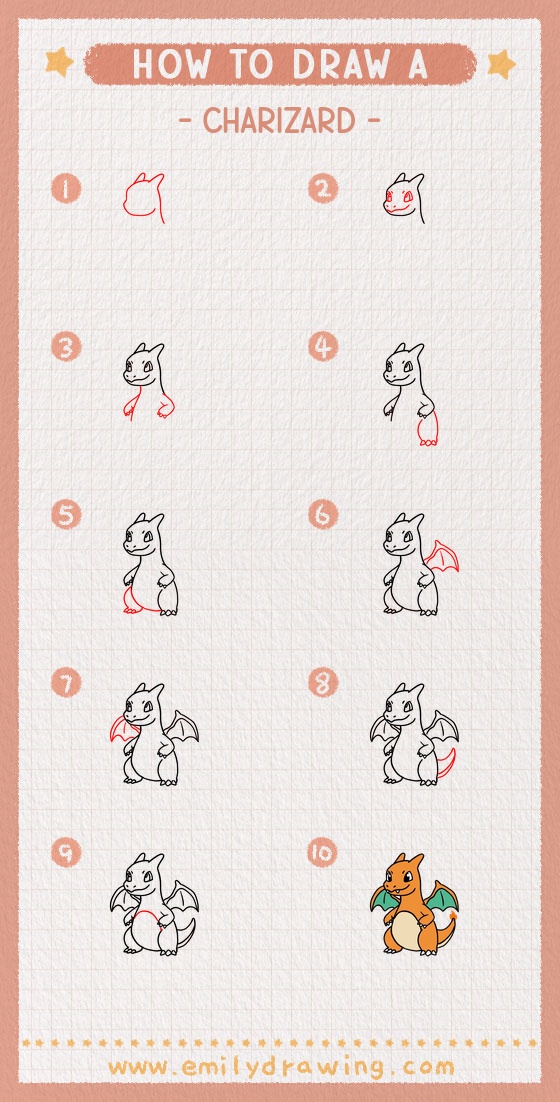
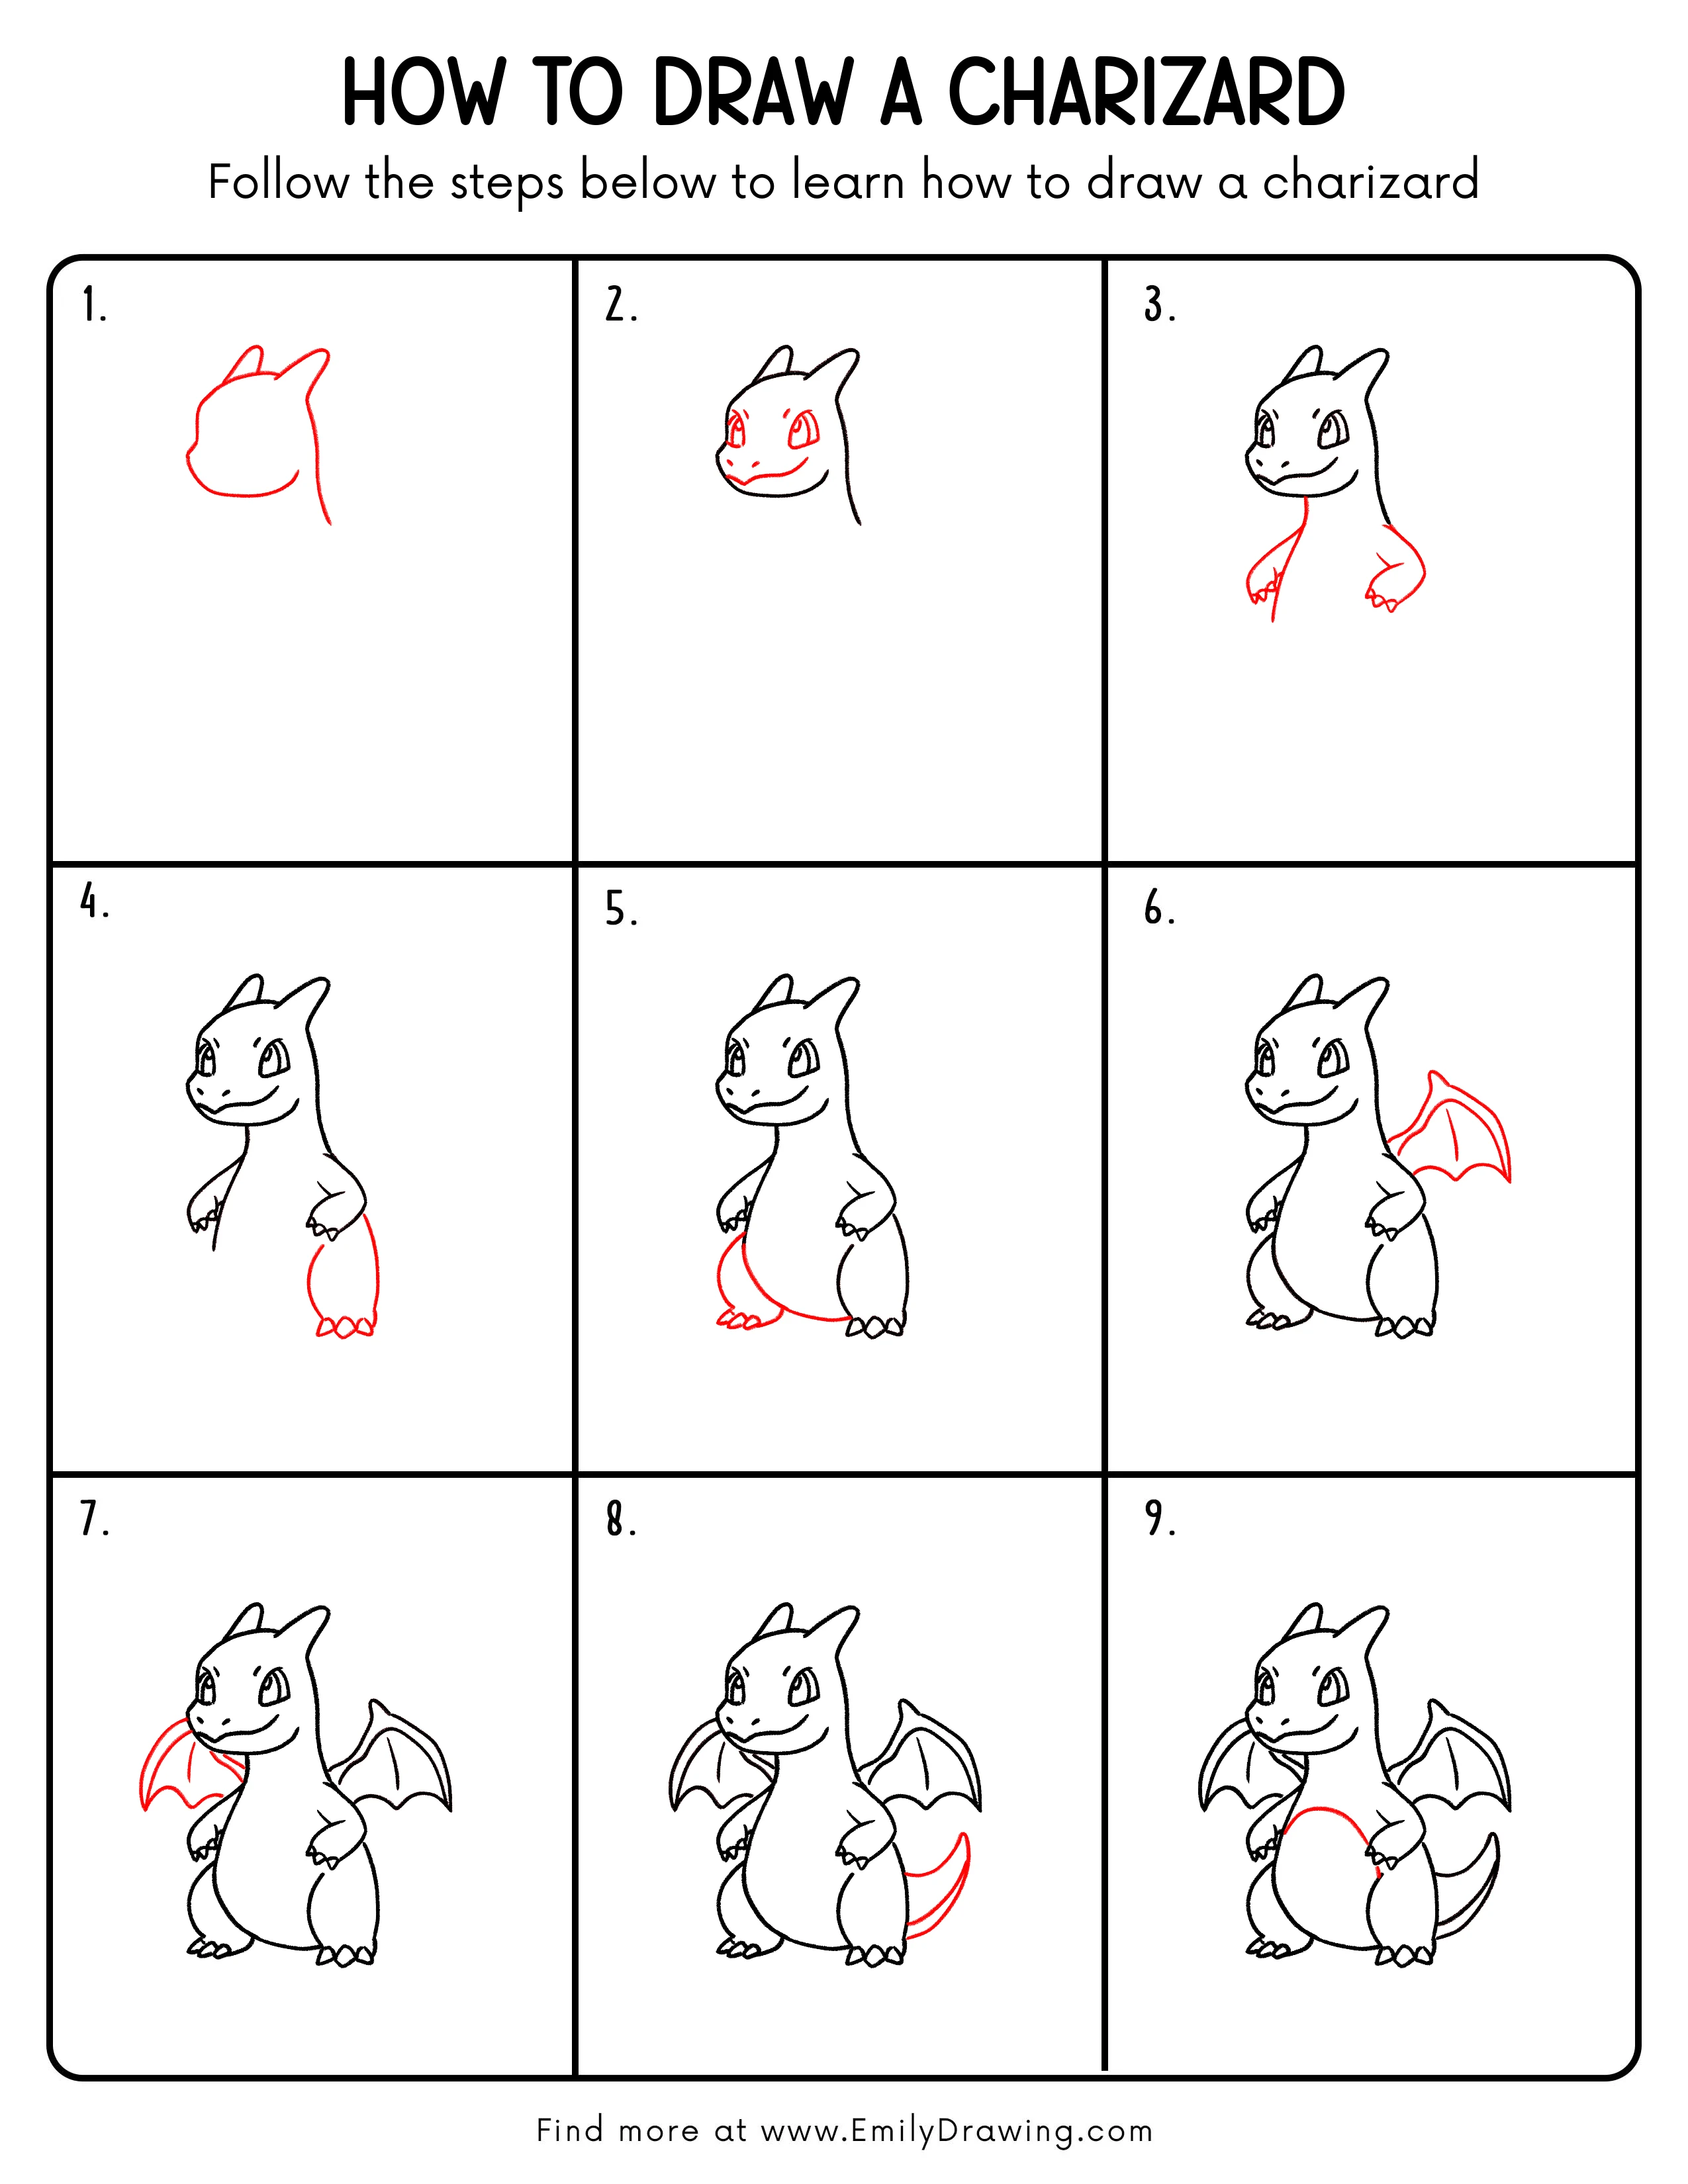
Step 1: Sketch Charizard’s Head Silhouette
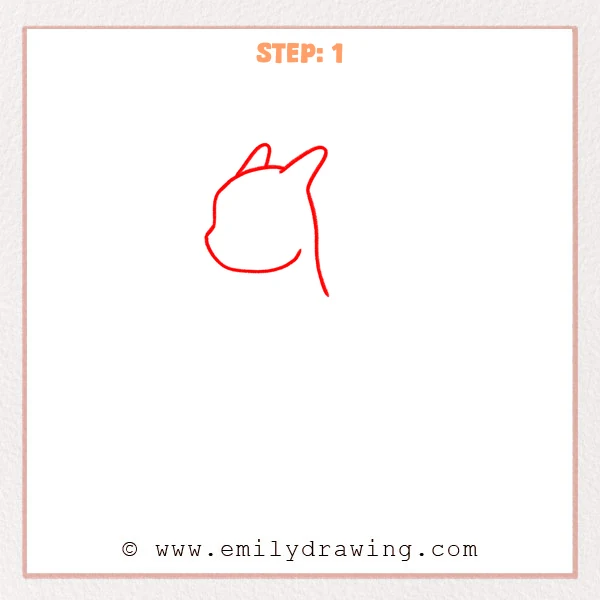
Start with a smooth outline for Charizard’s side-view head, keeping the cheek and jaw gently rounded. Add two backward-leaning horns on top, then pull a long curved line down for the neck.
Pro Tip: Make the horns slightly larger first; a backward tilt helps it feel like Charizard.
Step 2: Add the Eyes and Facial Expression
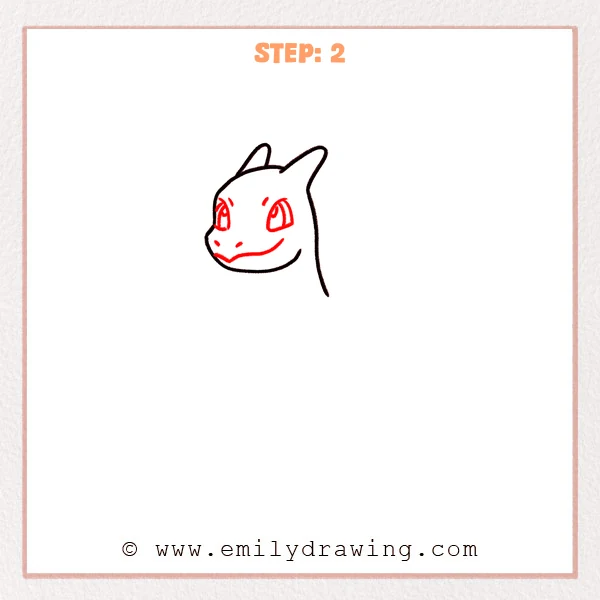
Add two large eyes near the front of the face using tall oval shapes, making the farther eye slightly smaller. Place tiny brow marks above, add two small nostrils near the snout, and clarify the curved mouth line for a gentle smile.
Pro Tip: Keep the back eye a bit smaller to create simple depth.
Step 3: Add the Upper Body and Small Arms
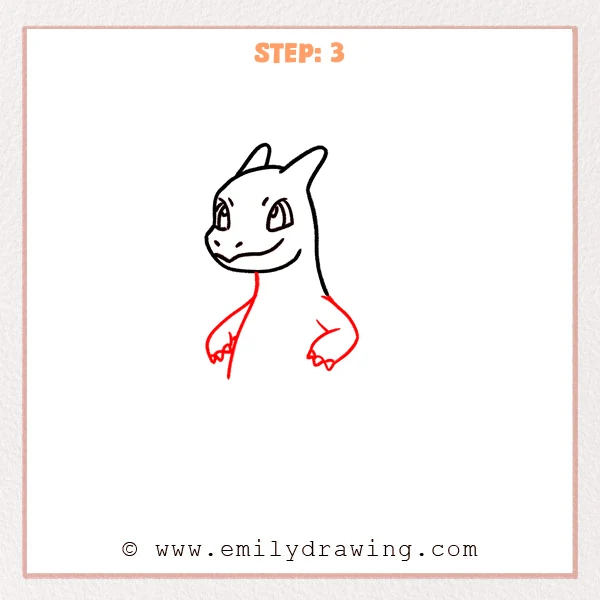
Extend a smooth chest line down from the jaw so the body widens like a soft teardrop. Add curved arms on both sides, shape each hand as a small rounded block, and finish with two to three short claws.
Pro Tip: Start arms as simple curves; shorter claws look cuter and stay clearer.
Step 4: Add One Strong Leg and Foot Claws
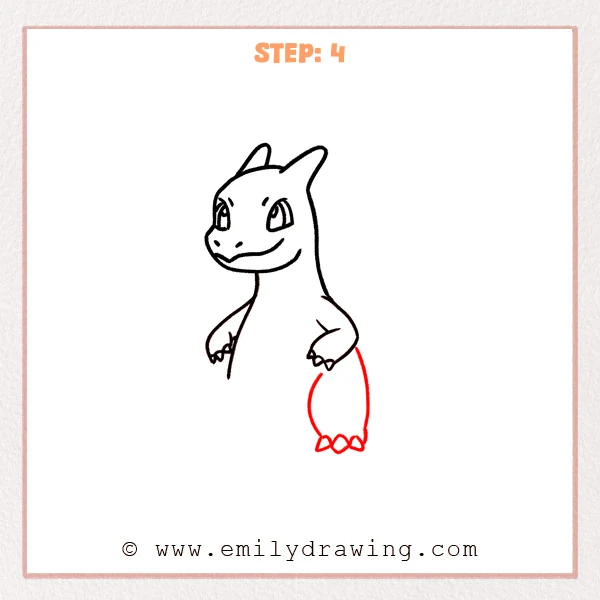
Attach a thick leg on the lower right side, shaped like a long bean that bulges outward. Flatten the bottom slightly, then add three small triangle claws at the toes for a sturdy stance.
Pro Tip: Make the bottom of the leg a bit wider for better balance.
Step 5: Add the Second Leg and Belly Bottom Line
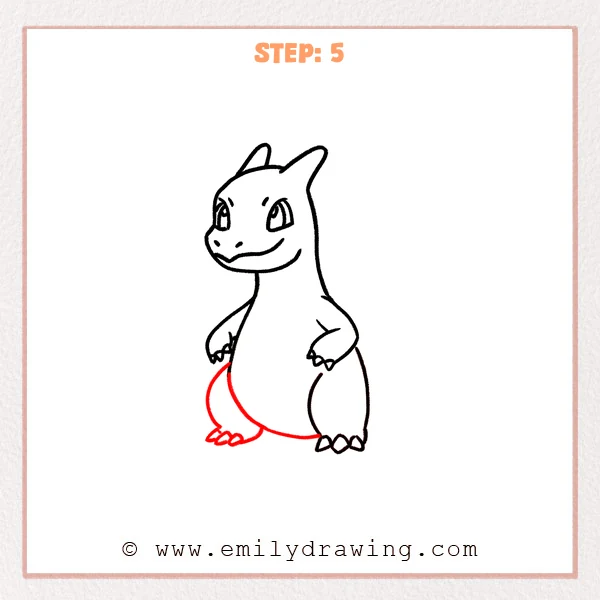
Attach the second leg on the lower left, letting it reach slightly forward to create a stepping pose. Connect the belly with a smooth curved line, then add three small toe claws on the left foot.
Pro Tip: Place the left leg a bit forward to make the pose feel more lively.
Step 6: Add the Wing Shape Behind the Back
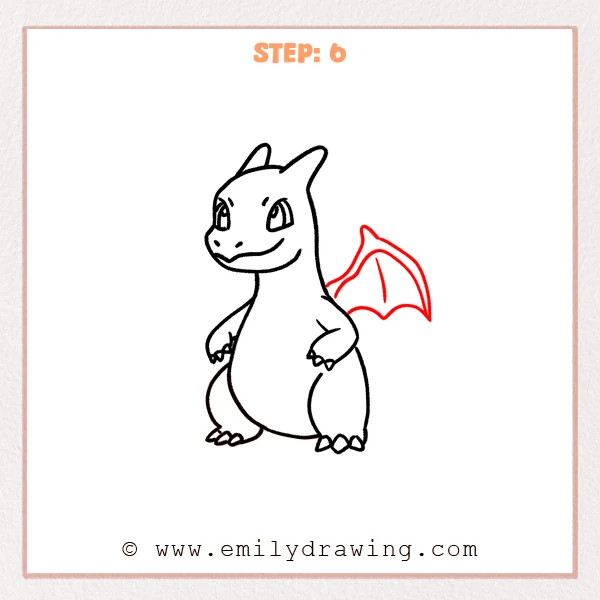
Start a wing from the upper back near the shoulder, drawing a pointed outer tip first. Connect the edges with curved lines to form a bat-like wing, then add a few inner lines to suggest the wing membrane.
Pro Tip: Aim the wing tip near the top of the head for a balanced look.
Step 7: Add the Second Wing
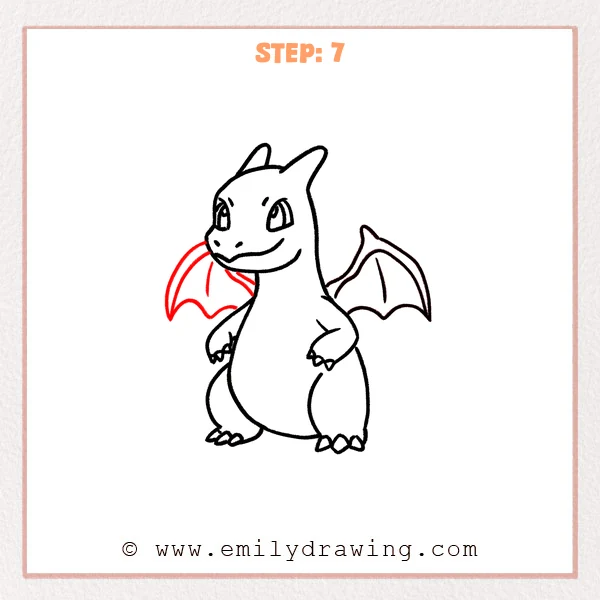
Draw a second wing peeking out behind the head and upper back, so it feels placed behind the body. Match the pointed tip and curved, wavy edge, then add one or two inner membrane lines.
Pro Tip: Keep this wing slightly smaller and shorter to show it sits farther back.
Step 8: Draw the Curved Tail Shape
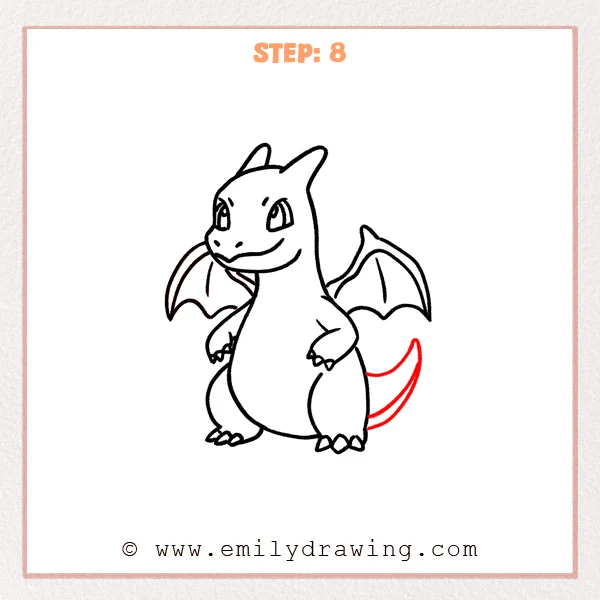
Attach a tail behind the right side of the body using two smooth curves that taper from thick to thin. Let the tip curl upward slightly, and keep the base wider where it joins the body.
Pro Tip: Avoid perfectly parallel lines; a sharper taper makes it feel like Charizard.
Step 9: Draw the Belly Patch Outline

Add a big curved line across the chest that wraps down into a rounded oval belly patch. Let the line taper gently between the legs without touching the toe claws, so the belly shape stays clear.
Pro Tip: Keep the belly line slightly inside the body edge for better depth.
Step 10: Color in your drawing!
Fun Facts
- Charizard is known for its powerful fire breath and strong wings.
- The wing shape is inspired by bat-like membranes, not feathered wings.
- A clear belly patch helps the character read well, even in simple sketches.
Pin it now, Draw later!
You now have a full Charizard shape with a face, wings, tail, and belly patch. Go over your favorite lines with a darker pen, and erase extra pencil marks gently. For coloring, try warm orange for the body, a lighter cream for the belly, and a deeper shade under the chin and belly curve for simple shading.
A common beginner mistake is making both wings the same size and placement, which can flatten the pose. Keep the back wing smaller so the body feels in front.
Practice this step by step drawing a few times, and try changing the pose or expression next. If you would like more drawing for beginners, keep sketching one new character each day.
Get the FREE Printable Drawing Guide
FREE Download Printable Charizard Drawing Tutorial
Frequently Asked Questions
How can I make my Charizard look more like it is standing firmly?
Widen the bottom of the legs slightly and keep the feet flat and clear.
What if my wings look uneven?
That is normal at first. Make the back wing smaller and let it “peek” from behind.
How do I color Charizard without making it look messy?
Color in light layers, then add one darker shade along the underside for depth.