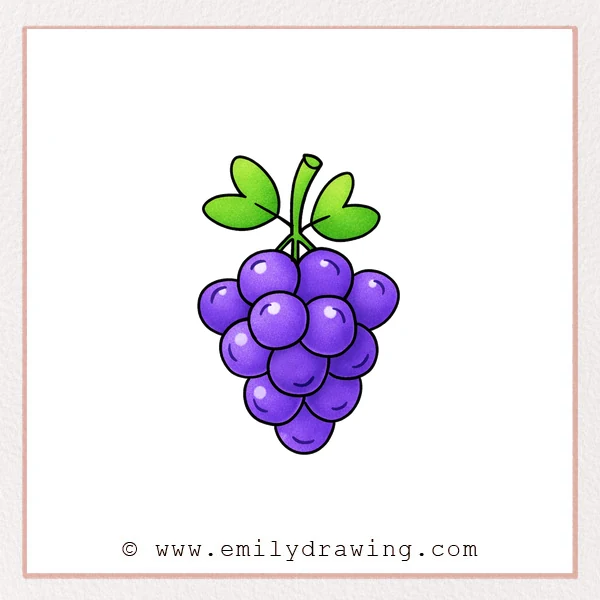
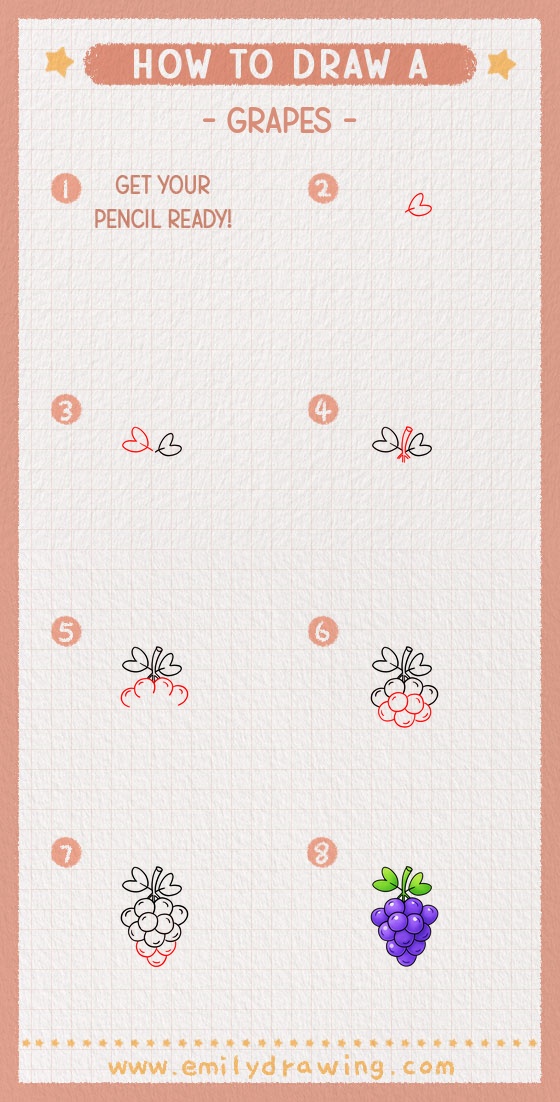
This easy drawing tutorial shows you how to draw grapes step by step in a calm and simple way. It is a good drawing for beginners because each part grows slowly from soft shapes. By the end, you will have a neat bunch of grapes with two leaves and a stem.
What You Will Need
- Drawing paper
- Pencil
- Eraser
- Black pen or marker
- Colored pencils or crayons
Here are my RECOMMENDED Art Supplies!
- Crayola Coloring Set (140 Pieces – Mega Value!)
- 24 Colored Crayon Set
- A4 Printer Paper
- Crayola Coloring Pencils
- HP Home Printer with Instant Ink!
Time needed:
18 minutes.
Step-by-Step Drawing Guide
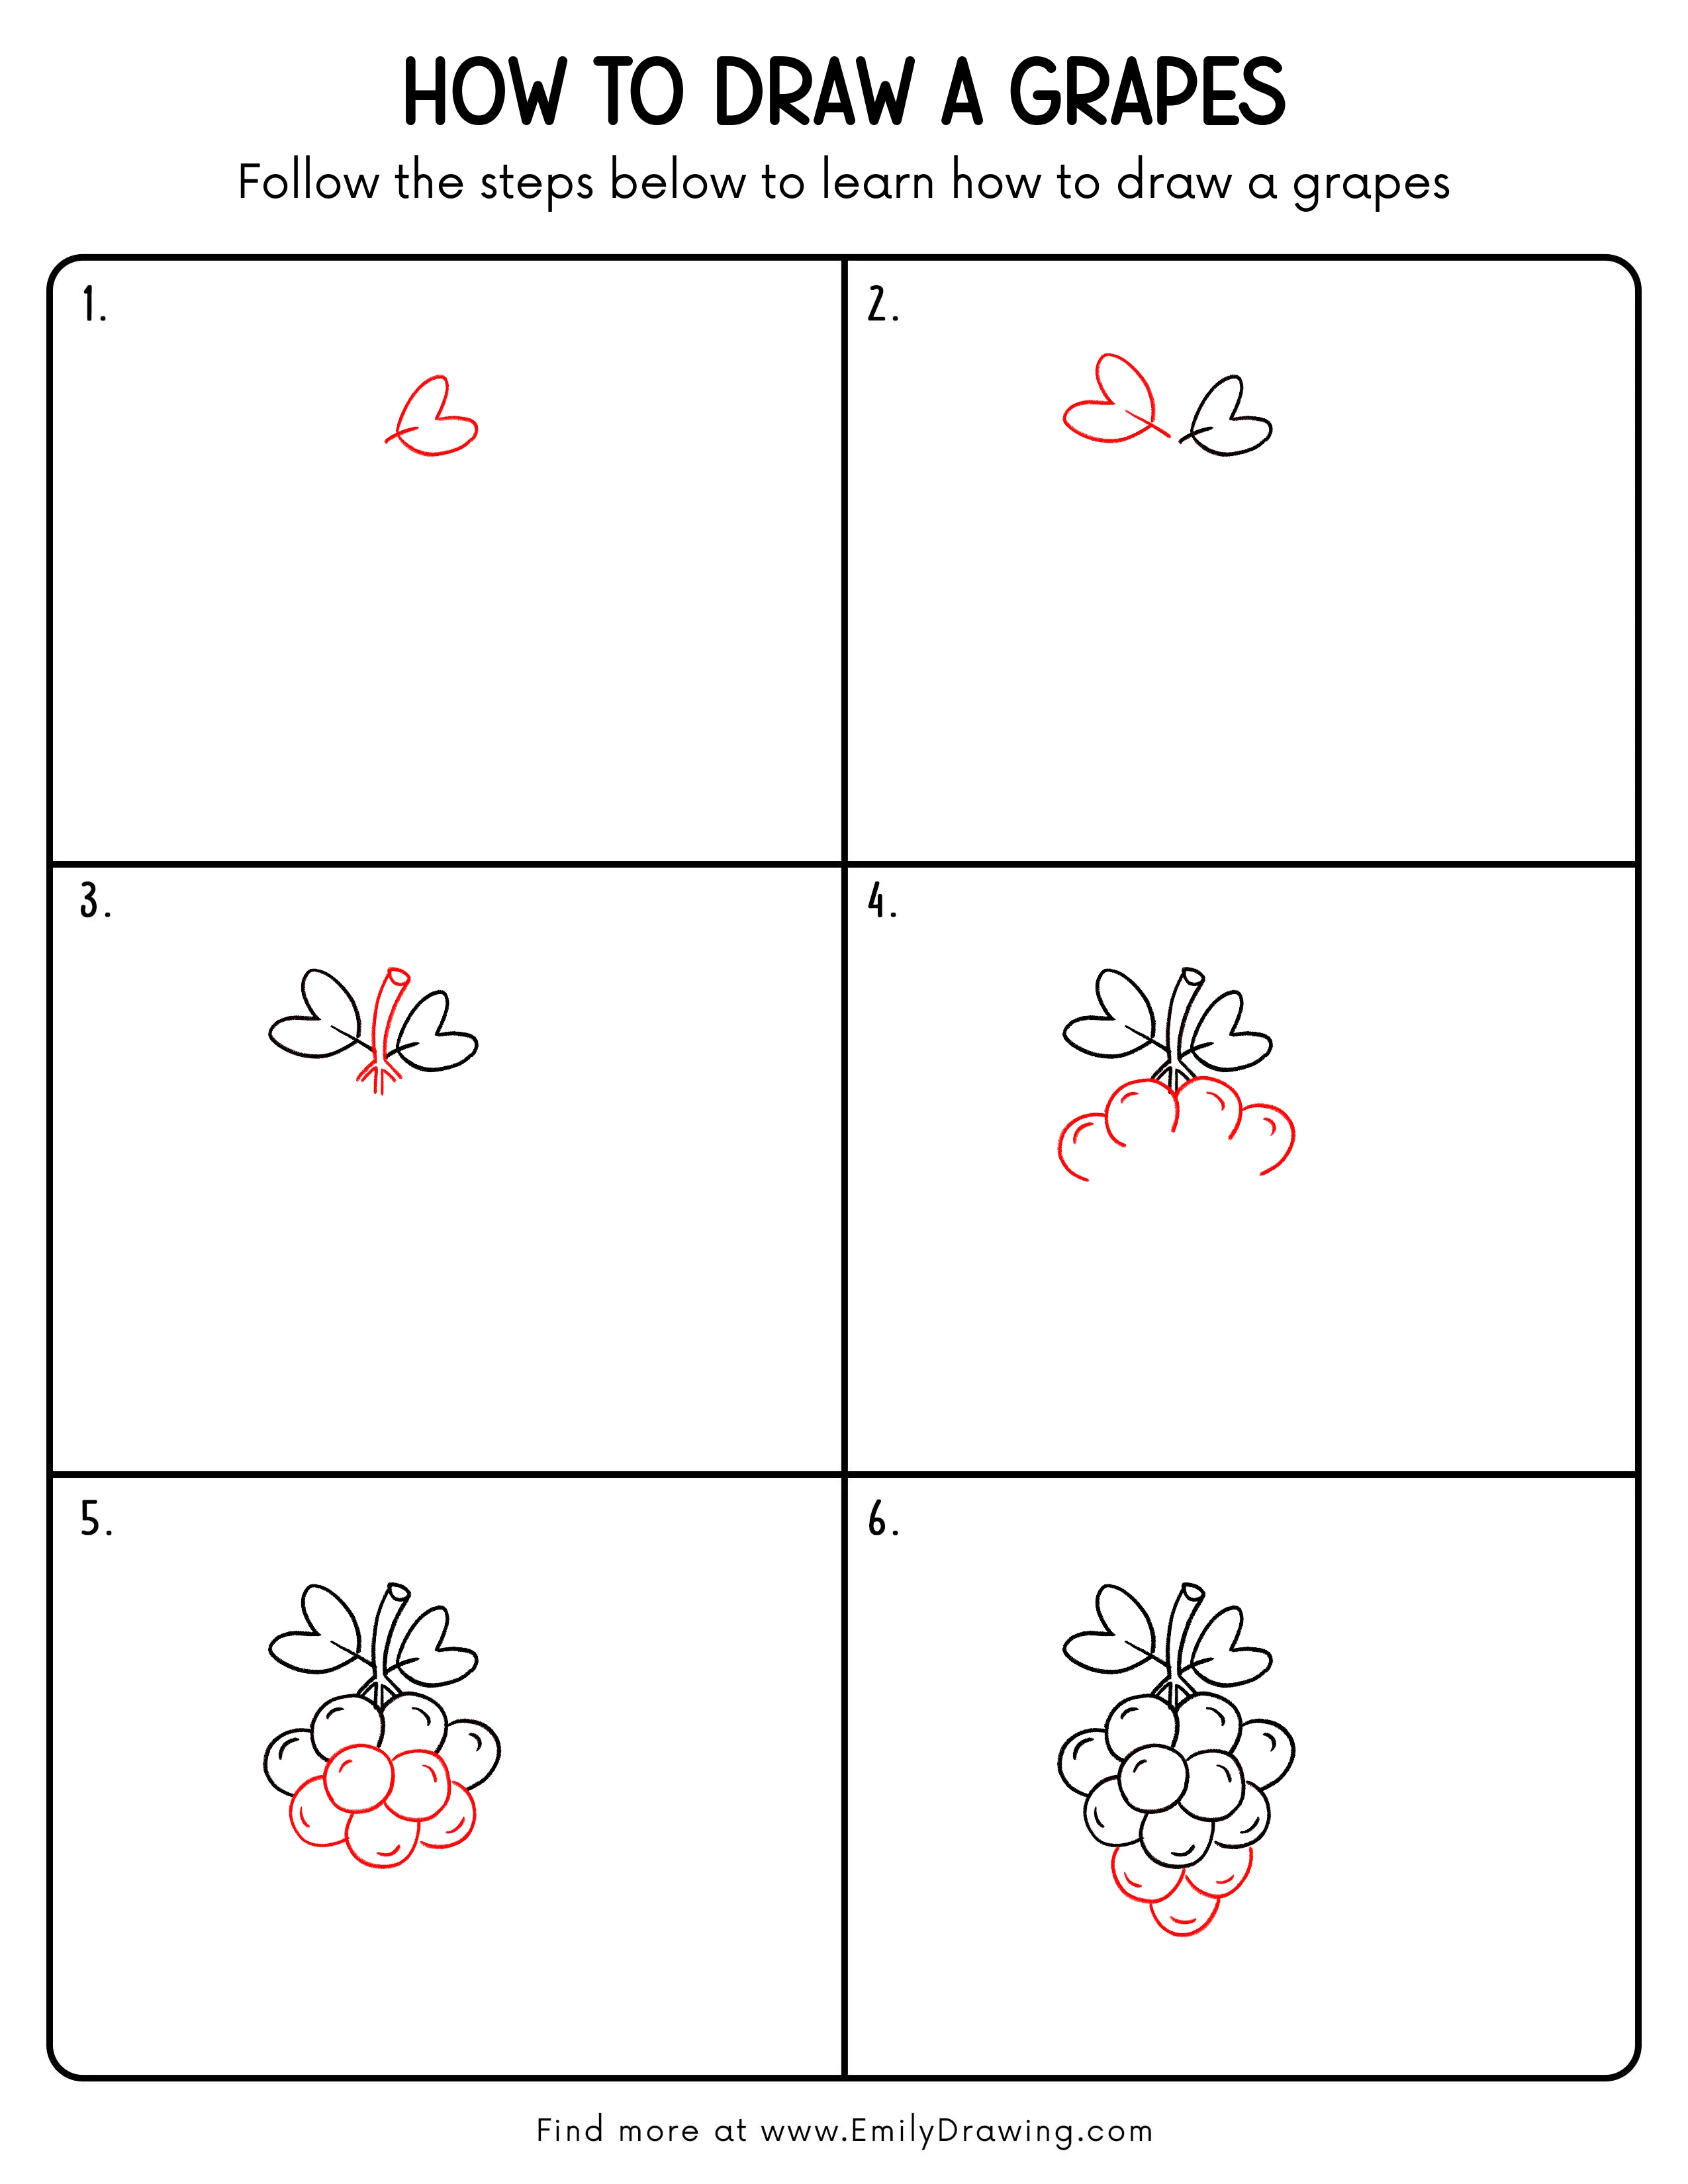
Step 1: Sketch the First Leaf Shape

Start near the upper middle of the page with a small curved shape that looks like a soft heart-shaped leaf. Leave a short crossing line on the left side, so it begins to feel like the place where the stem will connect. Keep the shape open and light at first.
Pro Tip: Use a light outline first, so both sides of the leaf stay balanced.
Step 2: Add the Second Leaf

Place a second leaf to the right of the first one, keeping it close in size so the pair feels balanced. Let the new short stem line point to the left, so the two leaves begin to look naturally connected. Keep a small gap between them for the center stem.
Pro Tip: Leave a little space between the leaves, so the middle structure is easier to place.
Step 3: Add the Main Stem in the Center
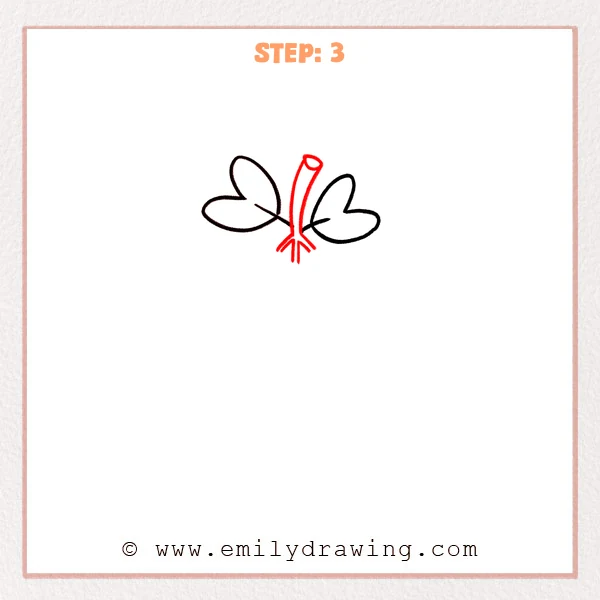
Between the two leaves, add a tall central stem that rises upward. Finish the top with a small open oval, so it looks like a cut vine stem, and add a few short branching lines at the bottom. This gives the grape drawing its main support.
Pro Tip: Let the main stem rise slightly higher than the leaves for a more natural grape shape.
Step 4: Add the First Row of Grapes
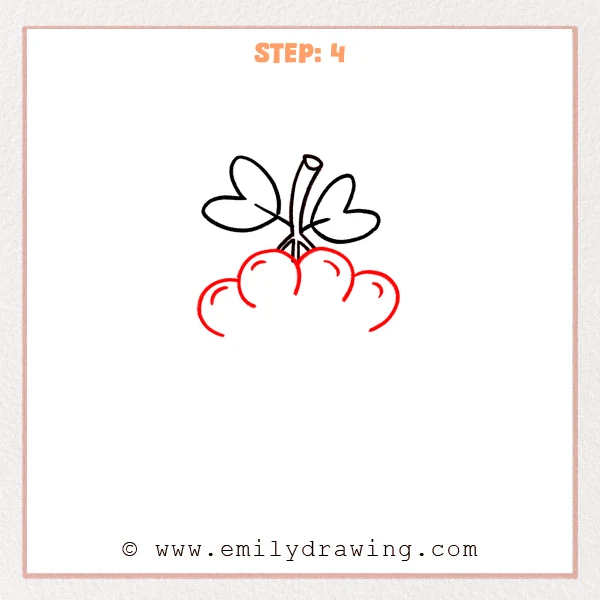
Just below the branch, start adding a few round grapes so they sit close together in a soft curved cluster. Let the middle grapes sit a little higher, while the outer ones spread gently to each side. The bunch should begin to feel full but still open underneath.
Pro Tip: Small size changes between the grapes make the bunch look more natural.
Step 5: Build the Front of the Grape Cluster
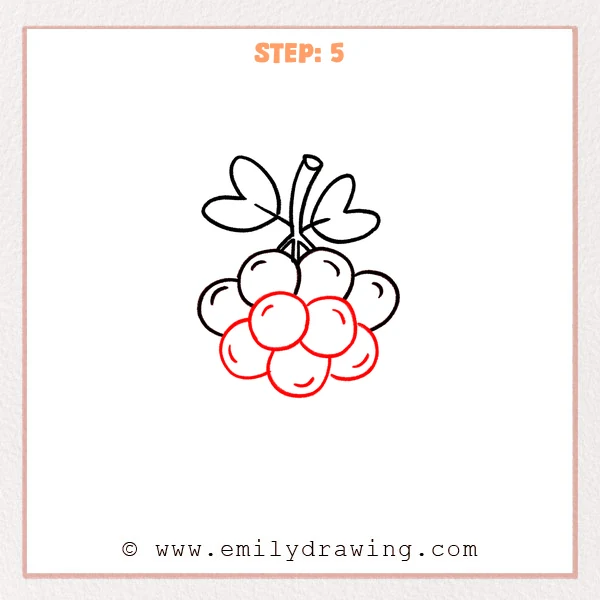
Add several more round grapes in front of the first row, placing them slightly lower so the bunch feels fuller and more compact. Let one grape sit at the bottom center, then place one on each side. This helps the cluster take on a natural hanging shape.
Pro Tip: Let the front grapes overlap the back edges a little, so the layers read clearly.
Step 6: Add the Bottom Grapes
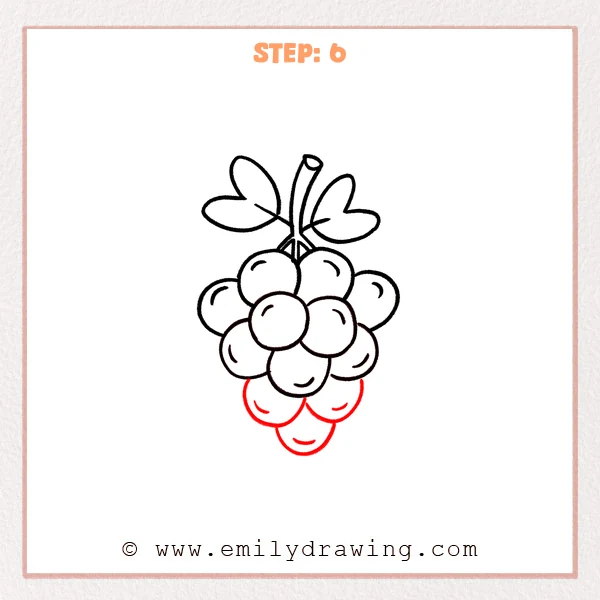
At the bottom of the bunch, add three more round grapes to gently narrow the shape into a small triangle. Let the middle grape hang the lowest, while the two side grapes tuck close to the grapes above. The grape cluster now looks complete and balanced.
Pro Tip: Make the bottom grapes slightly smaller, so the hanging shape feels softer and more natural.
Step 7: Color in your drawing!
Fun Facts
- Grapes grow in clusters on vines.
- A grape bunch can have many different sizes of fruit.
- Grape leaves are often broad and softly shaped.
Pin it now, Draw later!
You have now finished a simple step by step drawing of grapes by building the leaves, stem, and fruit one part at a time. Add color by using purple or green for the grapes and green for the leaves, then shade one side of each grape lightly to suggest roundness. One beginner mistake is making every grape the exact same size, which can make the bunch look stiff. Keep practicing this easy drawing tutorial, and try drawing more fruit to grow your confidence.
Get the FREE Printable Drawing Guide
FREE Download Printable Grapes Drawing Tutorial
Frequently Asked Questions
Is this grape drawing good for beginners?
Yes, this is a good drawing for beginners because it uses simple rounded shapes and a clear order.
Do all the grapes need to be the same size?
No, small changes in size help the bunch look more natural and full.
Can I color the grapes differently?
Yes, you can color them purple, green, or even mix both for a fun result.