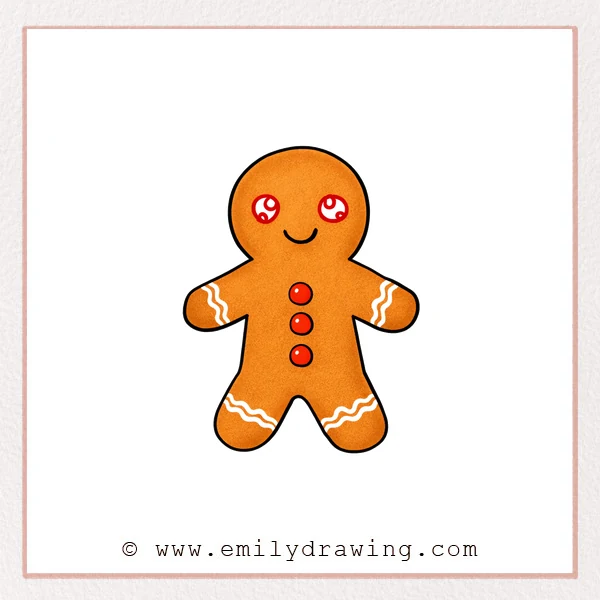
Drawing a gingerbread man is a calm and simple activity for young artists. In this easy drawing tutorial, you will build the character one gentle step at a time. This step by step drawing guide is designed for beginners and keeps each shape soft, clear, and easy to follow.
What You Will Need
- Drawing paper
- Pencil
- Eraser
- Black pen or marker
- Brown, red, or any favorite coloring tools
Here are my RECOMMENDED Art Supplies!
- Crayola Coloring Set (140 Pieces – Mega Value!)
- 24 Colored Crayon Set
- A4 Printer Paper
- Crayola Coloring Pencils
- HP Home Printer with Instant Ink!
Time needed:
15 minutes.
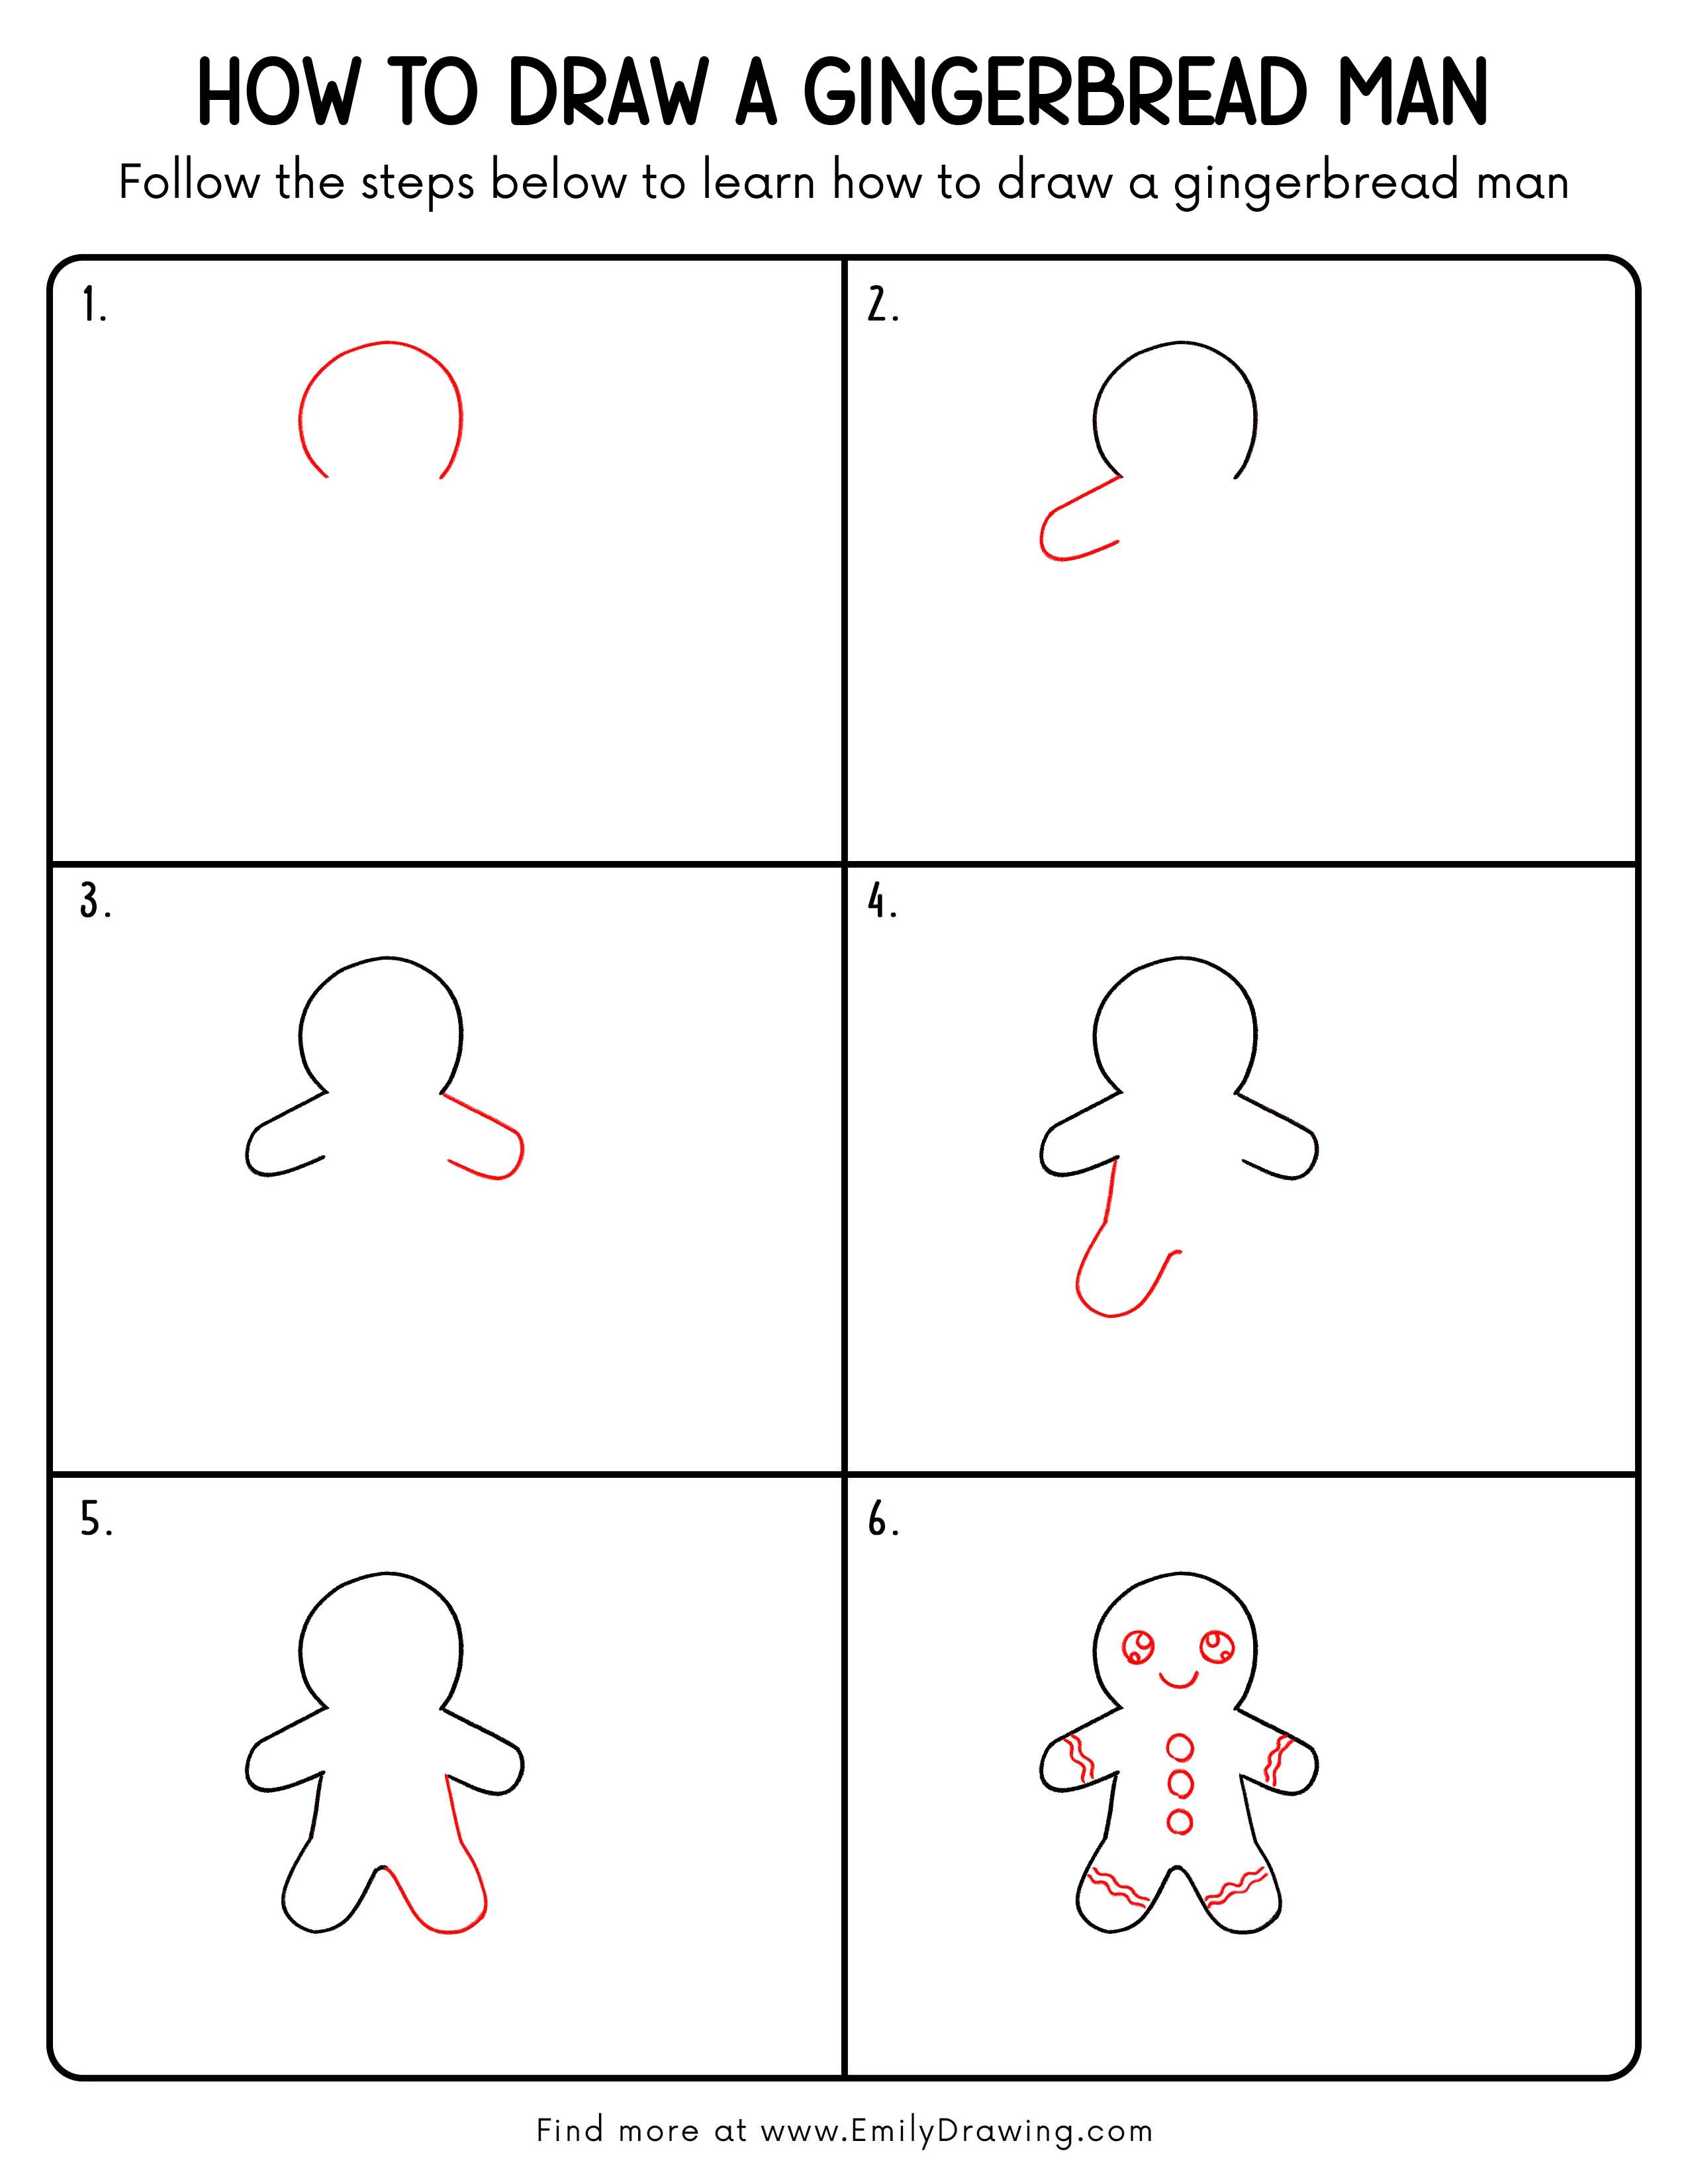
Step-by-Step Drawing Guide
Step 1: Sketch the Head Outline
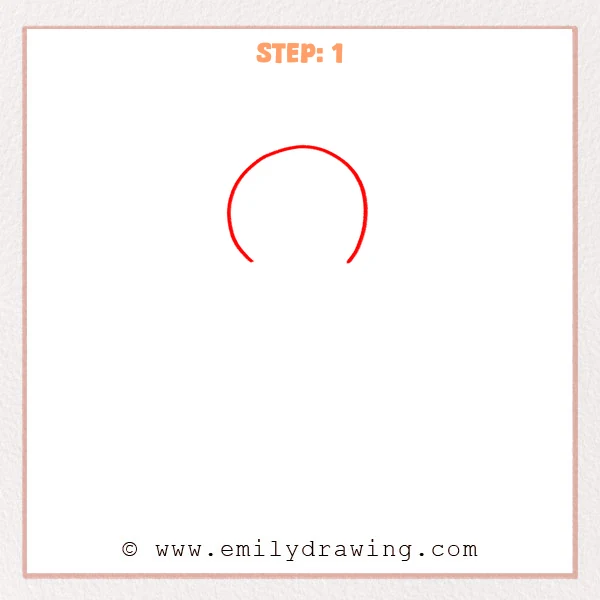
Start near the upper middle of the page and make a large curved line for the top of the gingerbread man’s head. Leave the two lower ends open for now, so the body can connect neatly in the next step.
Pro Tip: Try to keep both sides even, so the head looks round and balanced.
Step 2: Add the Left Arm Outline

Start from the lower left side of the head and extend a soft curved line outward to form the left arm of the gingerbread man. Let the line loop down in a rounded shape, then bring it back inward, leaving the inner side open for the body to connect later.
Pro Tip: Keep the end of the arm nicely rounded, so the gingerbread man looks soft and friendly.
Step 3: Add the Right Arm Outline
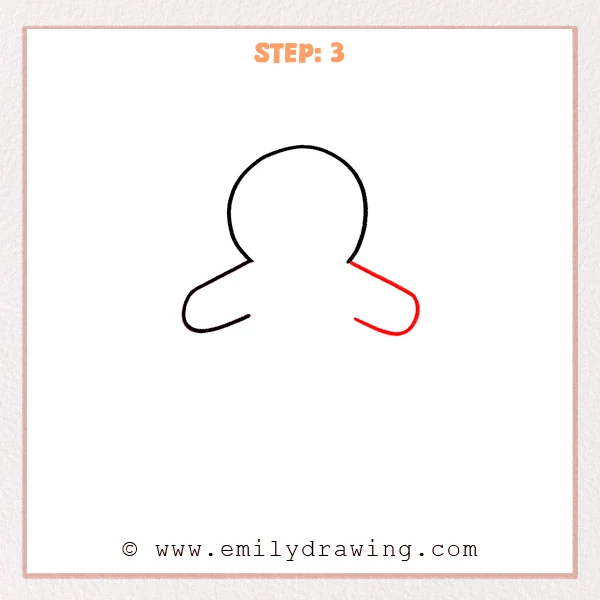
Continue from the lower right side of the head and shape the second arm so it stretches gently outward. Let it curve around into a rounded hand, then guide the line back toward the body, keeping it close in size to the left arm.
Pro Tip: Check the height of both arms before drawing, so the shape feels balanced on each side.
Step 4: Add the Left Leg and Lower Body
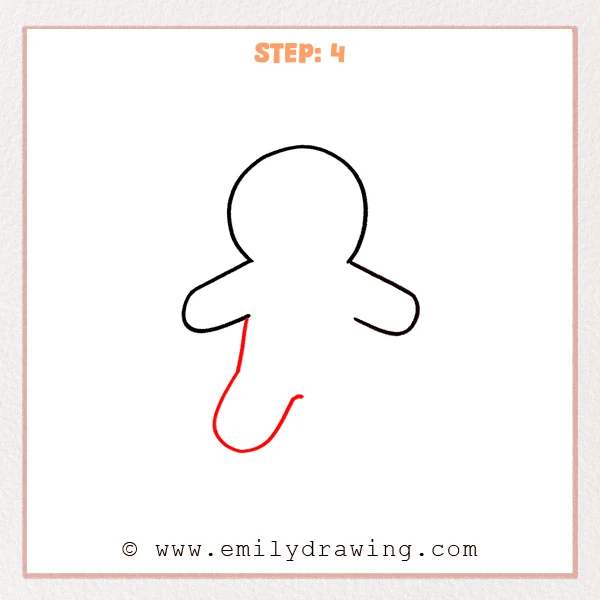
Start just below the left arm and bring the body line downward before turning it into the left leg. Let the foot curve around softly, then guide the line back up a little, leaving the middle open so the second leg can be added next.
Pro Tip: Keep the leg close in width to the arms, so the gingerbread man keeps a soft, even shape.
Step 5: Add the Right Leg and Close the Body

Start below the right arm and bring the body line down to shape the right side. Curve it into a rounded right leg, then guide the line inward to meet the center, so the full gingerbread man outline is complete.
Pro Tip: As you bring the line back to the middle, keep the curve close to the left side so the shape feels even.
Step 6: Add the Face and Icing Details
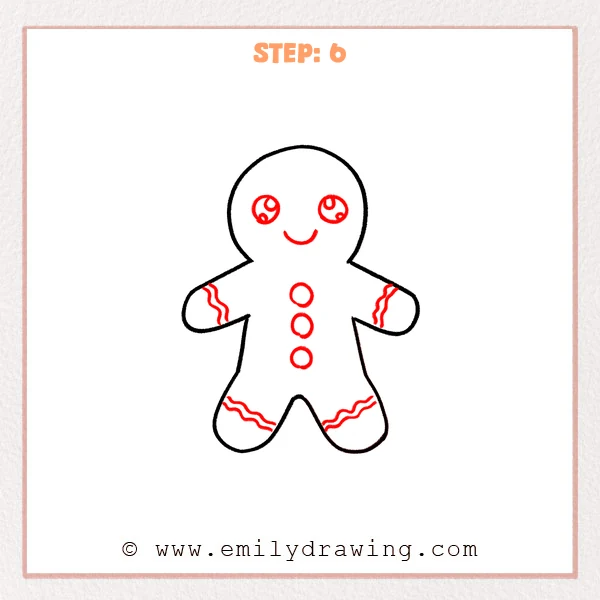
Start by adding two large round eyes and a small curved smile to give the gingerbread man a sweet, friendly expression. Then place wavy icing lines on the arms and legs, and add three round buttons down the center to finish the decoration.
Pro Tip: Try to echo the decorations on both sides, so the gingerbread man looks neat and nicely balanced.
Step 7: Color in your drawing!
Fun Facts
- Gingerbread cookies are often shaped like little people during holiday baking.
- Many gingerbread cookies are decorated with icing, buttons, and smiling faces.
- A gingerbread man is a fun subject for drawing because the shapes are round and simple.
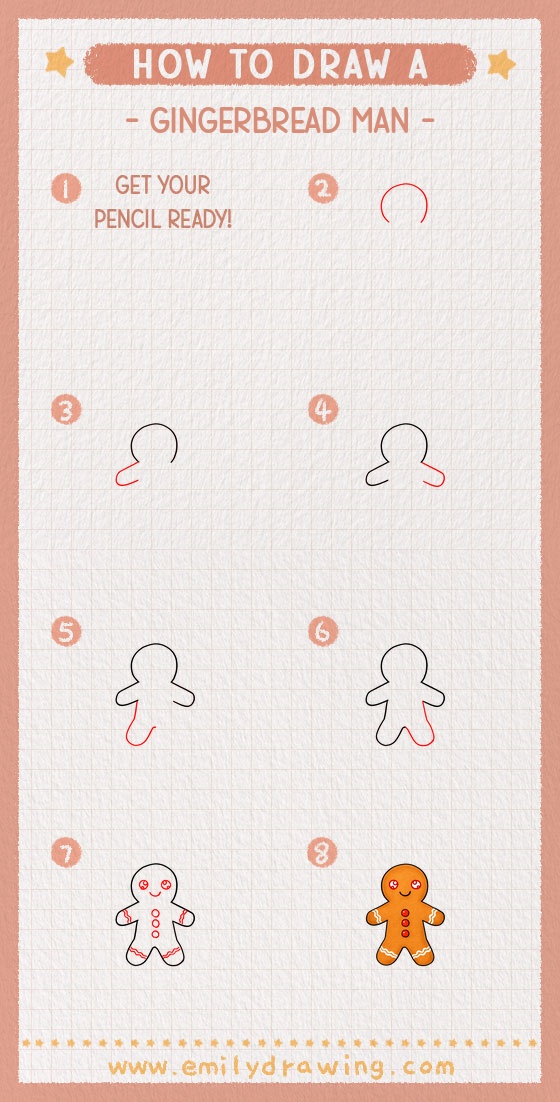
Pin it now, Draw later!
You now have a complete gingerbread man drawing made from easy, gentle shapes. Add brown color to the cookie body, then use red, white, or green for the icing and buttons. A common beginner mistake is making one arm or leg much larger than the other, so take your time and compare both sides as you work. Keep practicing this drawing for beginners, and enjoy trying more easy drawing tutorials step by step.
Get the FREE Printable Drawing Guide
FREE Download Printable Gingerbread Man Drawing Tutorial
Frequently Asked Questions
Is this gingerbread man drawing good for beginners?
Yes, it uses simple rounded shapes and clear steps that are easy to follow.
What colors should I use for a gingerbread man?
Brown works well for the cookie, and white or bright colors look great for icing details.
How can I make my drawing look neater?
Draw lightly first, check both sides for balance, and trace the final lines once the shape looks right.