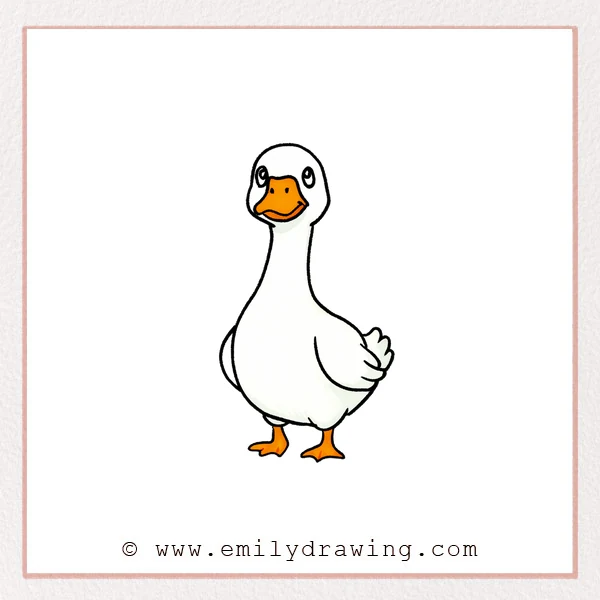
This easy drawing tutorial shows you how to draw a goose in a calm, simple way. If you are looking for a step by step drawing guide for beginners, this lesson helps you build the shape little by little. Take your time with each line, and enjoy watching your goose come together.
What You Will Need
- Pencil
- Eraser
- Black pen or marker
- Paper
- Colored pencils or crayons
Here are my RECOMMENDED Art Supplies!
- Crayola Coloring Set (140 Pieces – Mega Value!)
- 24 Colored Crayon Set
- A4 Printer Paper
- Crayola Coloring Pencils
- HP Home Printer with Instant Ink!
Time needed:
17 minutes.
Step-by-Step Drawing Guide
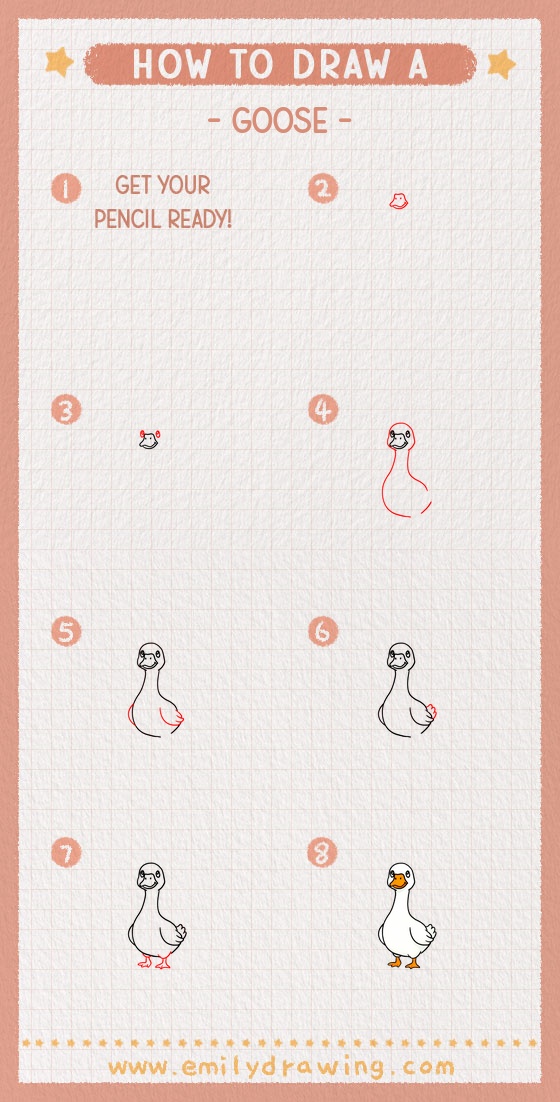
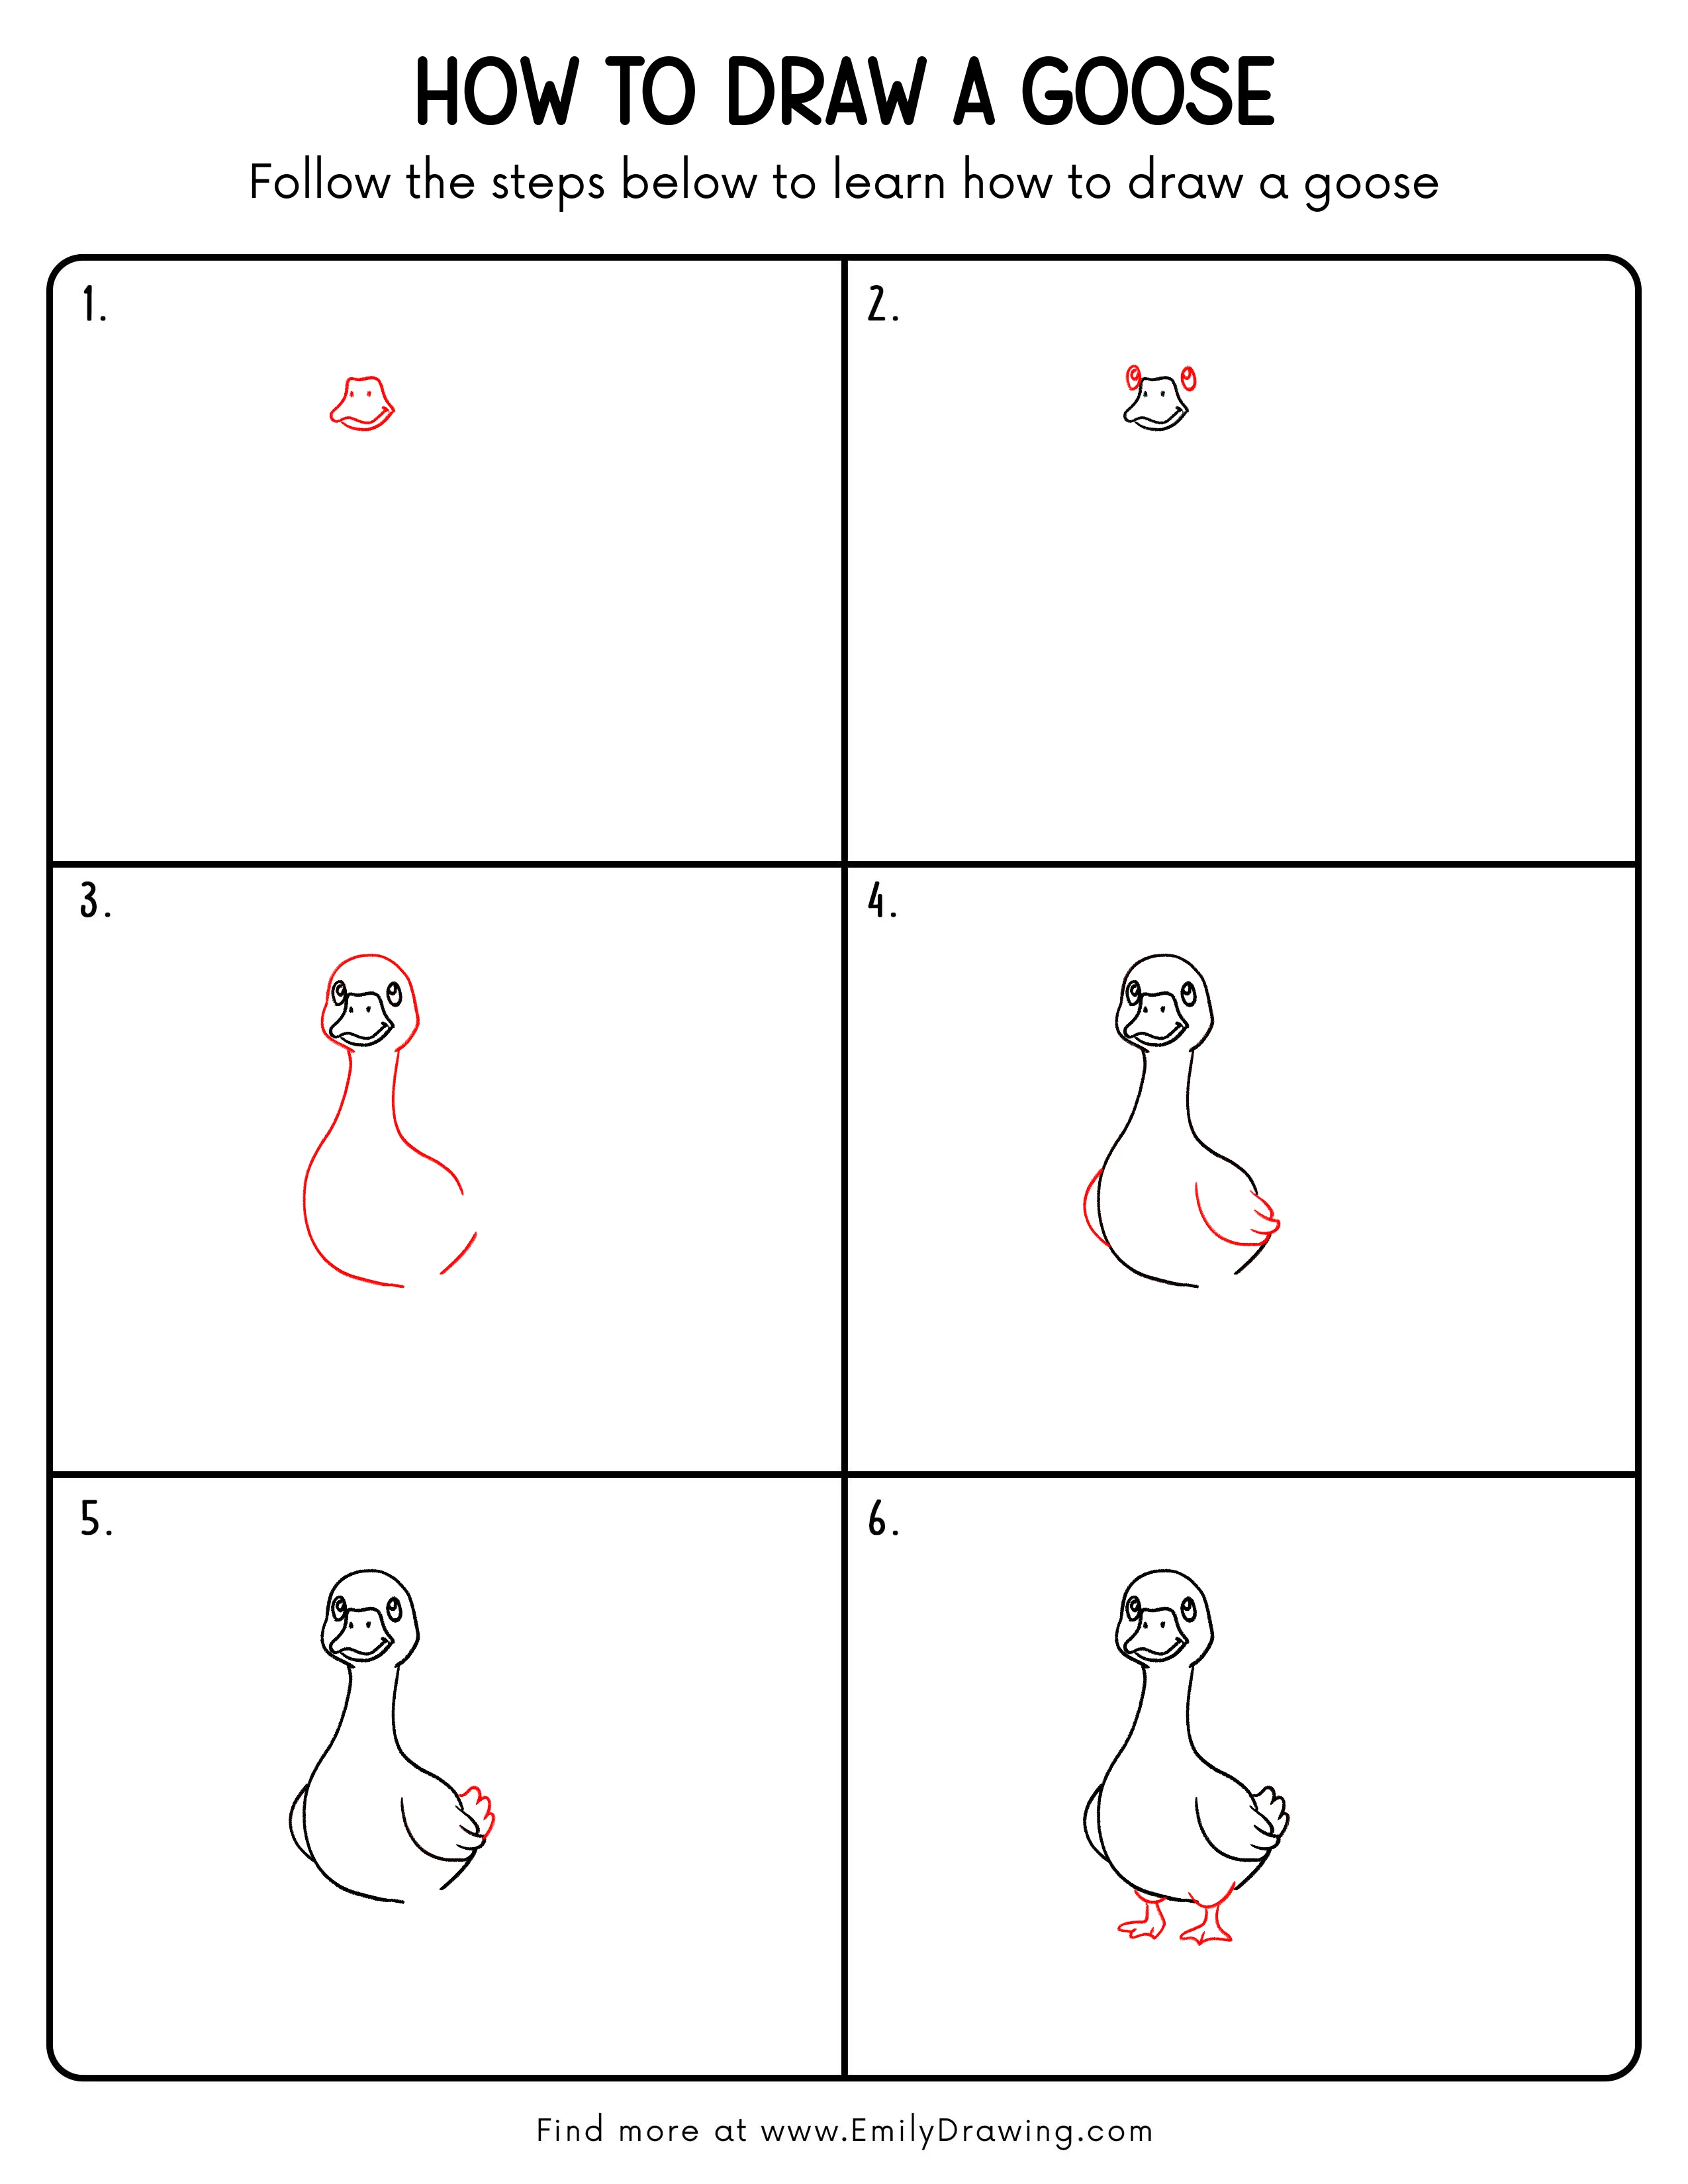
Step 1: Sketch the Goose Head and Beak
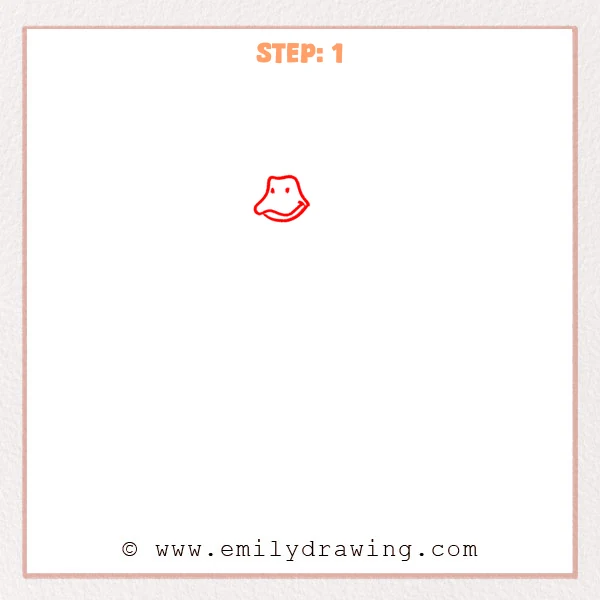
Start near the center of the page with a soft head outline that feels slightly flat on top and gently rounded at the sides. Then add a wide curved line below for the flat beak, and place two small eyes so the face begins to feel calm and clear.
Pro Tip: Keep the beak a little wider at first, because that helps the goose look balanced and recognizable.
Step 2: Add Rounded Shapes Above the Head
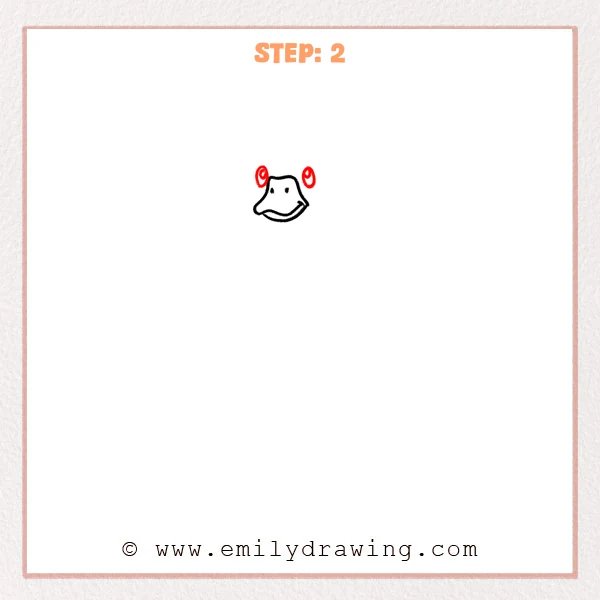
Place a small oval on each side above the head so the drawing begins to grow upward. Keep both shapes loose and balanced, as they mark clear spots for the next goose details.
Pro Tip: Keep the two ovals close in size, so later details will connect more smoothly.
Step 3: Extend the Long Neck and Shape the Body
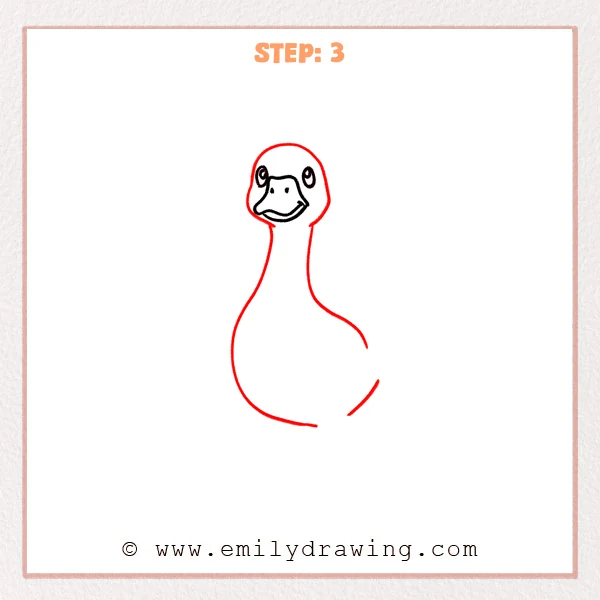
Start below the head and let two gentle lines flow down into a long neck. Then add a large rounded body with a full belly and a soft back curve, leaving a small opening near the tail for now.
Pro Tip: Keep the neck slightly narrow, so the body looks rounder and more balanced.
Step 4: Add the Wings on Both Sides
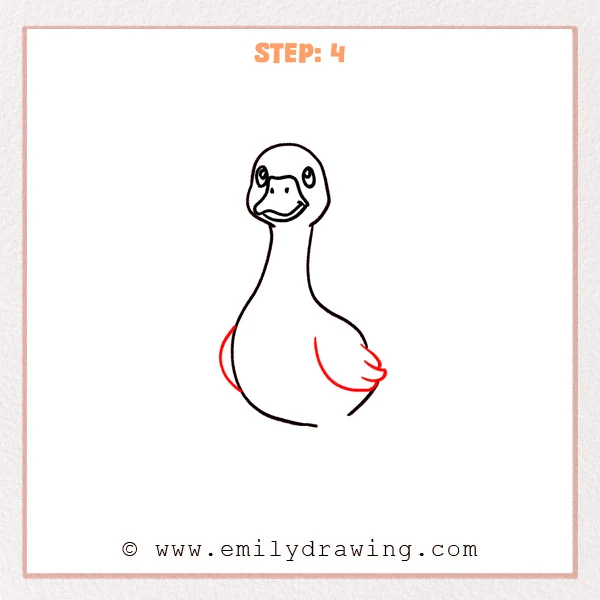
Add a wing on each side of the round body, keeping both shapes close to the body. Let the left wing show only a small section, and make the right wing clearer with a few soft feather lines at the end.
Pro Tip: The two wings do not need to match exactly, because a slight size difference makes the pose feel more natural.
Step 5: Add the Tail at the Back
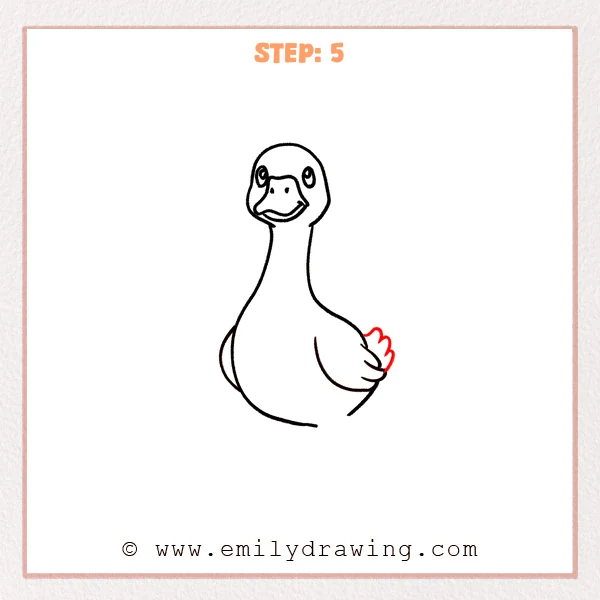
Behind the right wing, add a small tail using a few rounded curved lines. Keep it close to the back of the body and fairly small, so it looks like a soft cluster of feathers lifting upward.
Pro Tip: Keep the tail compact, so the round body shape stays clear and balanced.
Step 6: Add the Legs and Webbed Feet
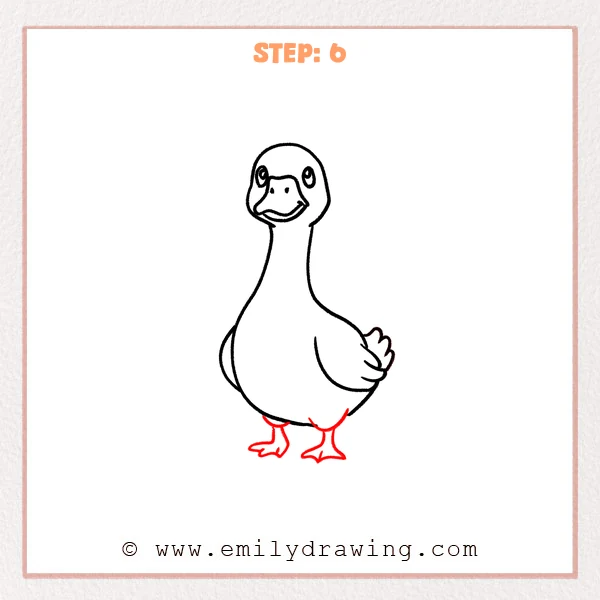
Start under the body and add two short legs so they sit naturally beneath the round belly. Then shape the wide webbed feet with small toes, helping the goose look steady and ready to stand.
Pro Tip: Let one foot sit slightly forward, so the standing pose feels more natural.
Step 7: Color in your drawing!
Fun Facts
- Geese are strong walkers and swimmers.
- Their webbed feet help them move through water.
- Many geese travel long distances during migration.
Pin it now, Draw later!
You have now finished a simple goose drawing by building the head, neck, body, wings, tail, and feet one step at a time. Add soft shading under the neck, belly, and wings to give the body a rounder look, and try light orange for the beak and feet if you want a classic goose style. One common beginner mistake is making the neck too wide, which can make the body lose its gentle balance. Keep practicing this easy drawing tutorial, and try drawing your goose in different poses next time.
Get the FREE Printable Drawing Guide
FREE Download Printable Goose Drawing Tutorial
Frequently Asked Questions
Is this goose drawing good for beginners?
Yes, this drawing for beginners uses simple shapes and gentle lines. It is a nice way to practice proportion and outline work.
How can I make my goose look more realistic?
Add light shading under the body and use softer curves around the wings and tail. Small changes in line weight can also help.
What colors should I use for a goose drawing?
You can use white or light gray for the body, orange for the beak and feet, and a little darker gray for shadows. Simple colors work very well for this step by step drawing.