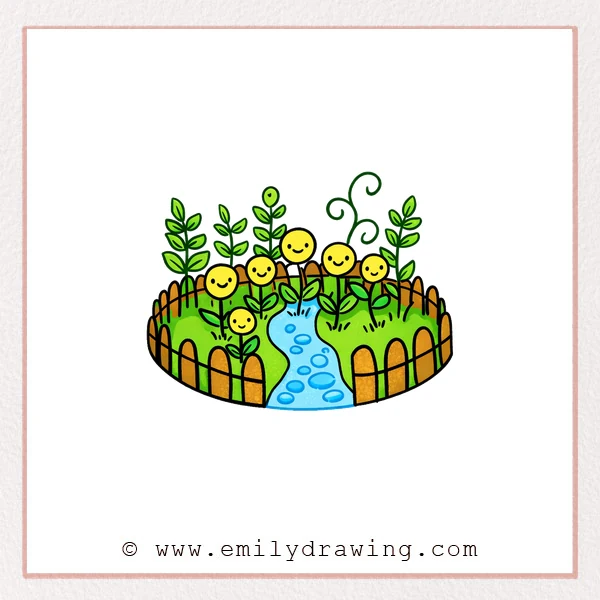
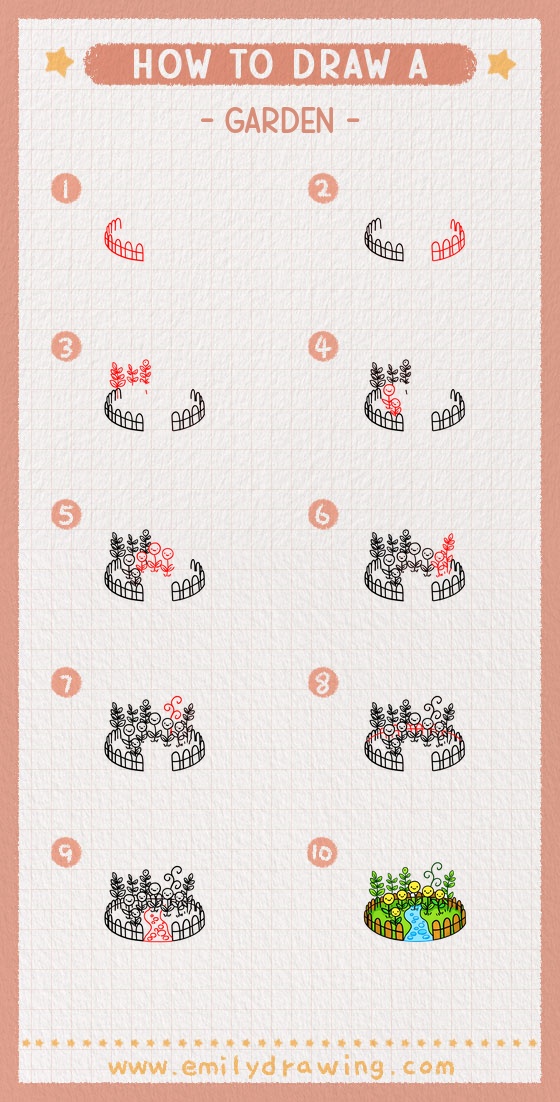
Drawing a garden can feel calm and enjoyable, especially when you build it one small part at a time. In this easy drawing tutorial for beginners, you will create a simple garden with curved fences, leafy plants, smiling flowers, a curling vine, and a winding path.
What You Will Need
- Drawing paper
- Pencil
- Eraser
- Black pen or marker
- Colored pencils or crayons
Here are my RECOMMENDED Art Supplies!
- Crayola Coloring Set (140 Pieces – Mega Value!)
- 24 Colored Crayon Set
- A4 Printer Paper
- Crayola Coloring Pencils
- HP Home Printer with Instant Ink!
Time needed:
24 minutes.
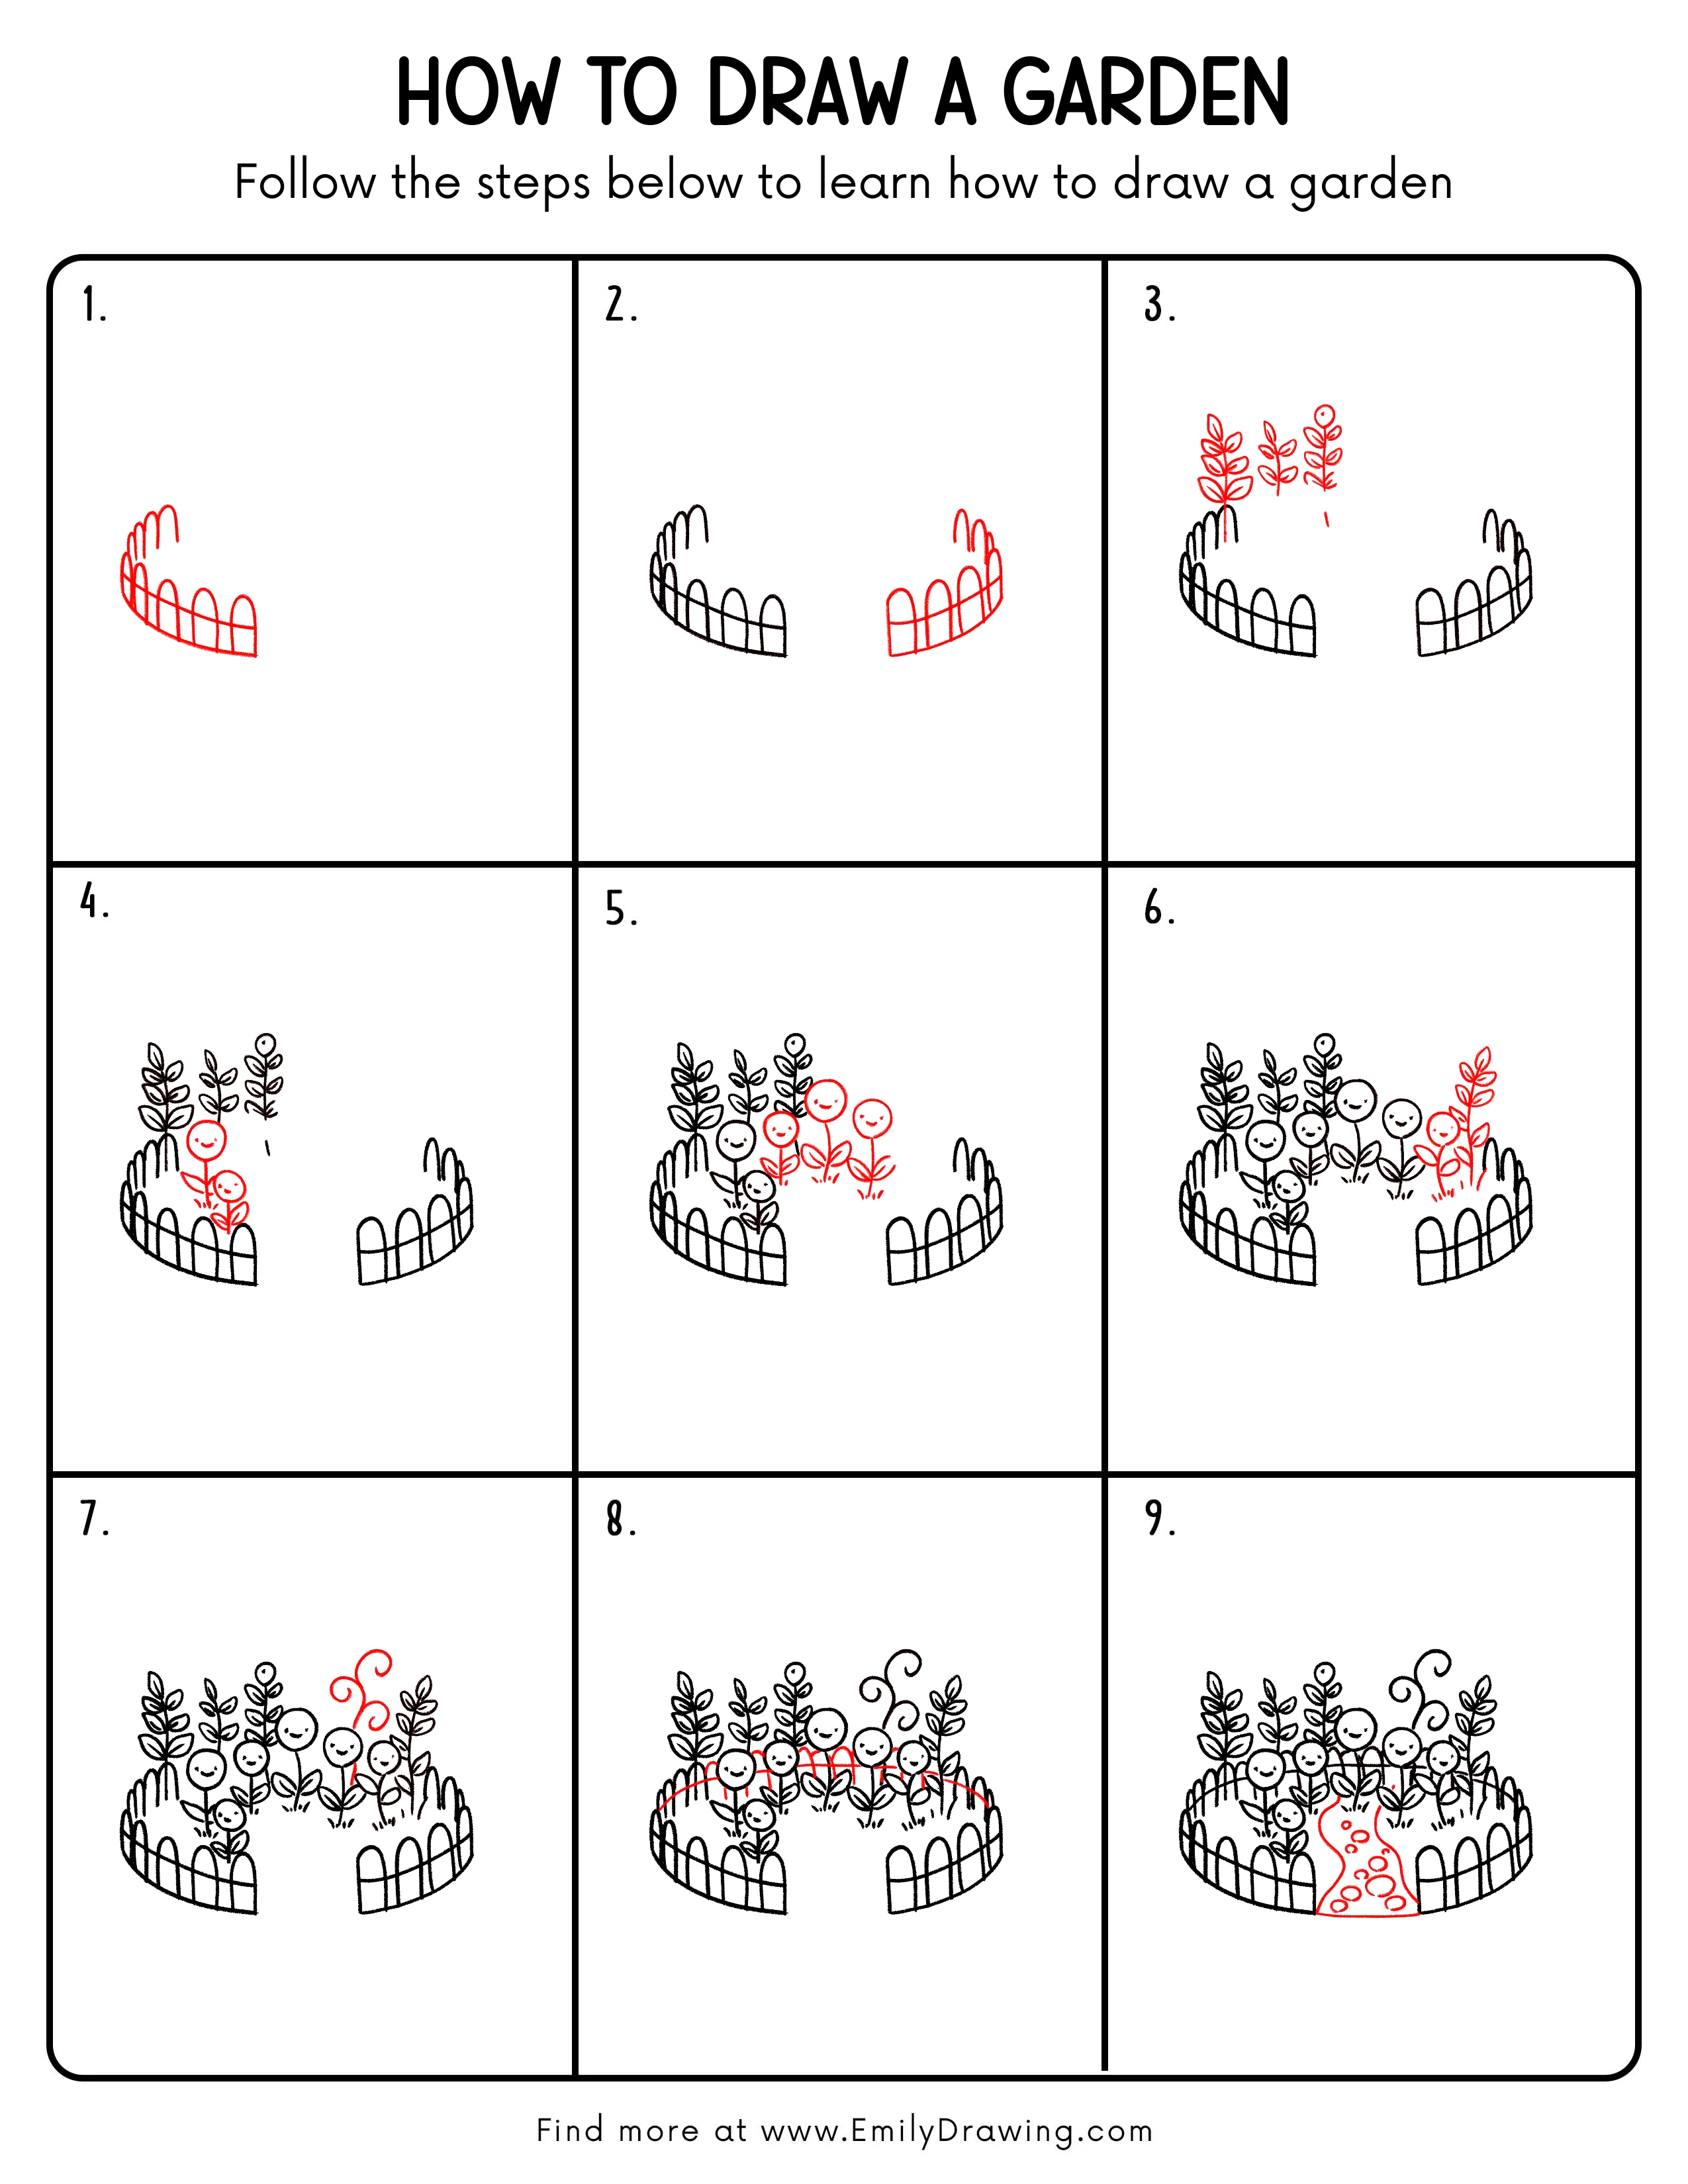
Step-by-Step Drawing Guide
Step 1: Sketch the Curved Garden Fence Base
Start near the lower left side and sketch a long, gentle curve rising toward the right for the top edge of the fence. Add a second longer curve below it, then place a row of rounded fence posts between the two lines so the fence looks like it bends softly through the garden.
Pro Tip: Start with very light lines so it is easier to adjust the width of each fence post.
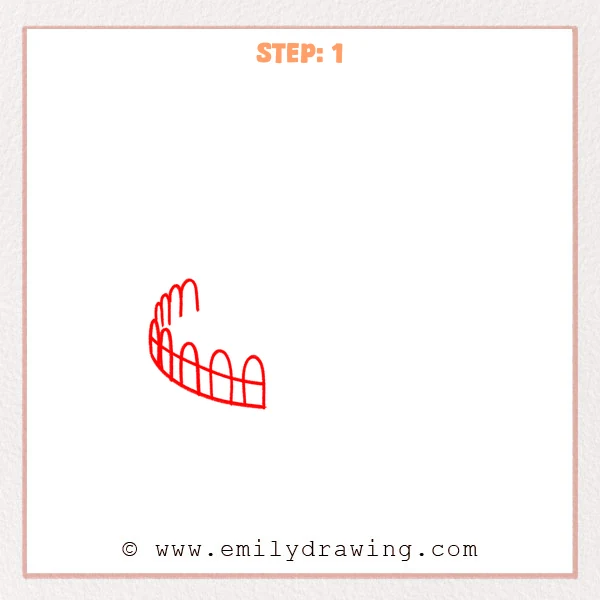
Step 2: Add the Curved Fence on the Right
On the right side, continue the shape with a matching curved section of fence so it balances the left side. Let the posts stay taller near the middle and grow smaller toward the outer edge, so the garden fence feels rounder and begins to enclose the space.
Pro Tip: Keep the curve on both sides similar so the fence looks neat and evenly shaped.
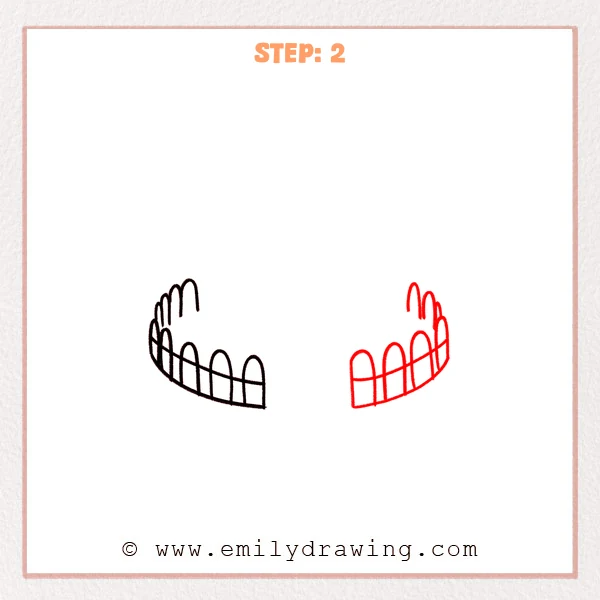
Step 3: Add Simple Plants Behind the Left Fence
Behind the fence on the left, start adding a few small plants that grow upward. Use slim stems with pairs of leaves, then place a small round bud at the top of the rightmost plant so the garden begins to feel fuller and more lively.
Pro Tip: Let the leaves vary a little in size so the plants look more natural.
Step 4: Add Two Round Smiling Flowers
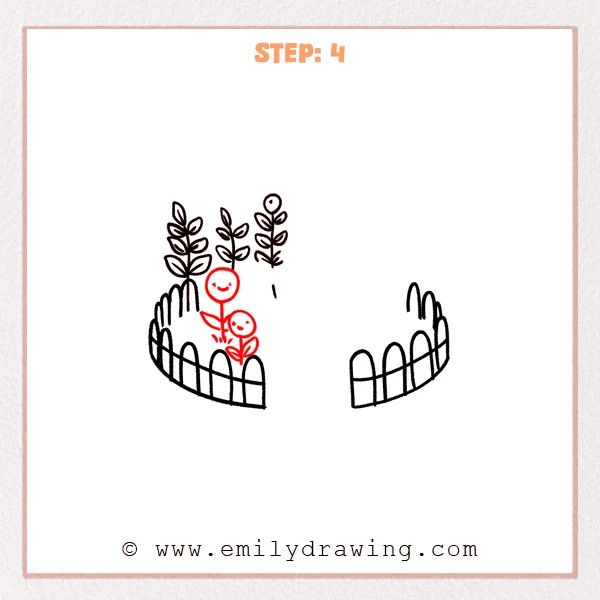
In the open space at the front left, add two simple flowers at different heights. Use thin straight stems with round flower heads, then add a few leaves and tiny smiling faces so this corner of the garden feels brighter and more cheerful.
Pro Tip: Vary the size and height of the two flowers a little so the garden looks more natural.
Step 5: Add More Smiling Flowers Across the Middle

Continue from the flowers on the left and add a few more round smiling flowers across the middle area. Arrange the flower heads at different heights, then add simple leaves and short grass marks so the open space starts to feel fuller and more lively.
Pro Tip: Avoid placing every flower at the same height, because small shifts make the garden feel more natural.
Step 6: Add a Plant and One More Flower on the Right
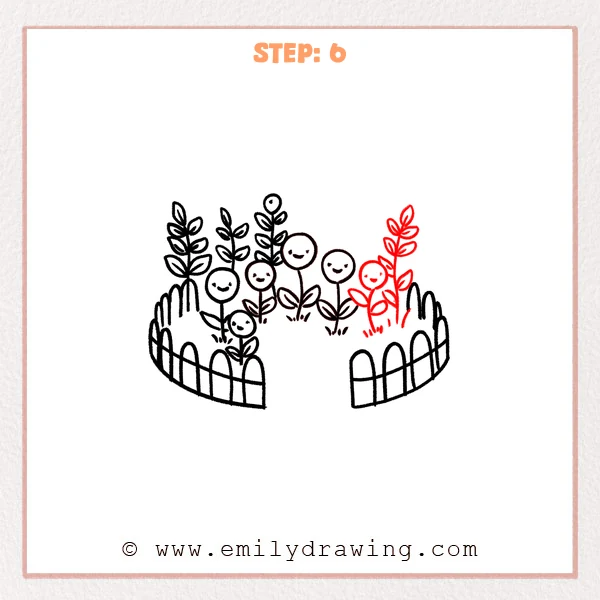
Along the inside of the right fence, add one taller leafy plant, then place a smaller round smiling flower in front of it. Add a few short grass strokes at the base so the right side feels balanced and the garden looks gently filled in.
Pro Tip: Let the right plant stand a little taller so it balances the growth on the left side.
Step 7: Add a Curly Vine Behind the Right Side
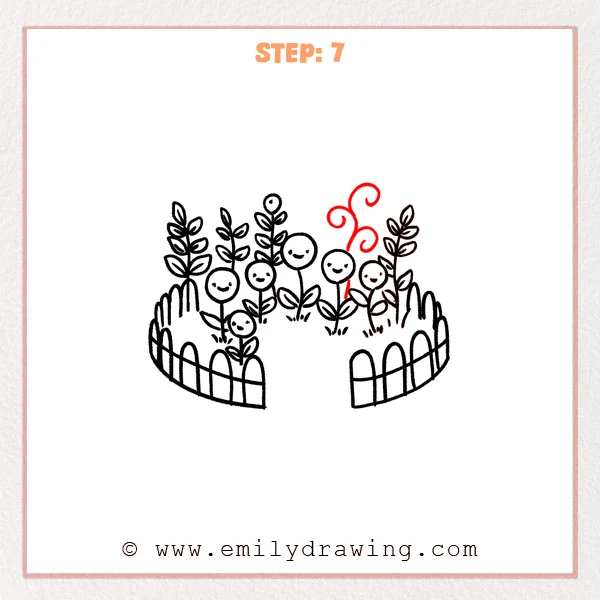
Behind the flowers on the right, add a thin stem rising upward, then let it branch into a few soft spiral curls. This gentle shape adds variety to the garden and helps the back area feel more lively.
Pro Tip: Keep the spiral lines loose and open so the vine looks soft and natural.
Step 8: Add the Middle Fence Behind the Flowers
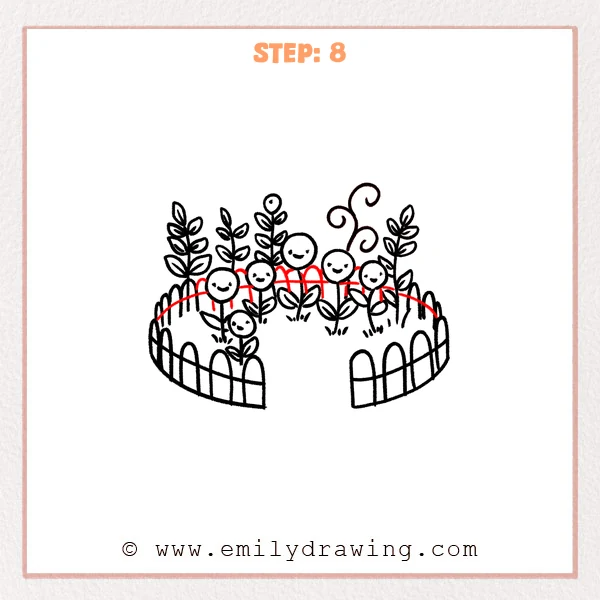
Behind the flowers in the center, add a soft curved fence line that connects the left and right sides. Then place a few rounded fence posts showing above it, so the back of the garden feels complete and enclosed.
Pro Tip: Let only the top halves of the back posts show so the front and back layers stay clear.
Step 9: Add a Winding Garden Path
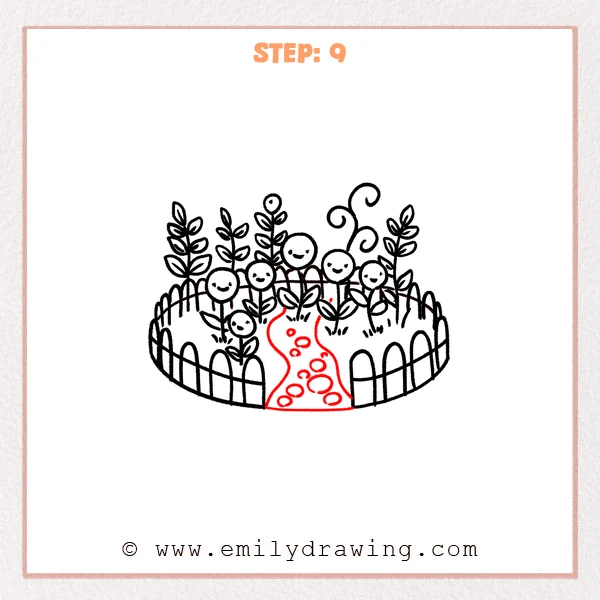
At the open space in front, add a soft path that curves inward toward the middle of the flowers. Then place small rounded stepping stones along the path, so the garden feels inviting and easy to walk into.
Pro Tip: Make the path wider at the front and narrower as it goes back to create a sense of depth.
Step 10: Color in your drawing!
Fun Facts
- Many gardens use curved paths to make small spaces feel bigger.
- Rounded fence shapes can make a drawing look softer and friendlier.
- Simple flowers with different heights help a garden scene feel natural.
Pin it now, Draw later!
You now have a complete step by step drawing of a cheerful garden with fences, plants, flowers, and a path. Add color by making the leaves different shades of green, and try warm colors for the flowers to make them stand out. A gentle shadow under the fence and along the path can help the drawing feel more grounded. One common beginner mistake is making every flower the same size, so keep small changes in height and shape as you draw. Keep practicing this easy drawing tutorial, and try creating more garden scenes with your own favorite flowers and shapes.
Get the FREE Printable Drawing Guide
FREE Download Printable Garden Drawing Tutorial
Frequently Asked Questions
Is this garden drawing good for beginners?
Yes, this drawing for beginners uses simple shapes like curves, circles, and leaves.
Do I need to draw every flower the same way?
No, small changes in size and height will make your garden look more natural.
How can I make my garden drawing look more colorful?
Use different greens for the plants, bright colors for the flowers, and light brown or gray for the path stones.