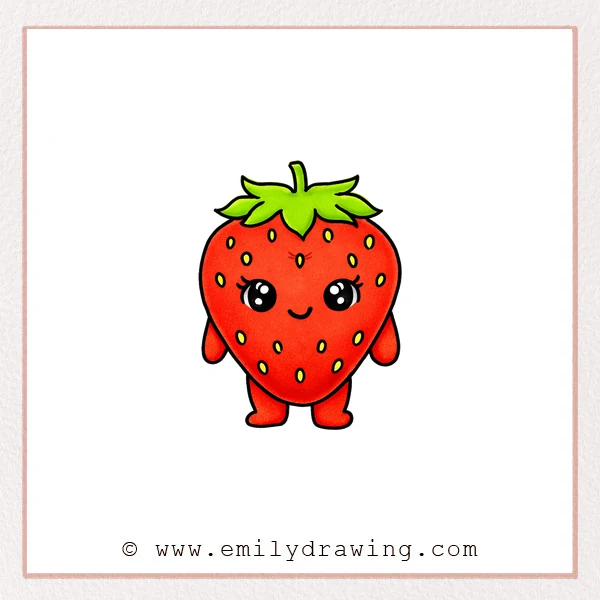
Drawing a strawberry can feel calm and simple when you take it one step at a time. This easy drawing tutorial is made for beginners and shows how to draw a cute strawberry character with clear shapes and gentle details.
What You Will Need
- Drawing paper
- Pencil
- Eraser
- Black pen or marker
- Red and green coloring tools
Here are my RECOMMENDED Art Supplies!
- Crayola Coloring Set (140 Pieces – Mega Value!)
- 24 Colored Crayon Set
- A4 Printer Paper
- Crayola Coloring Pencils
- HP Home Printer with Instant Ink!
Time needed:
16 minutes.
Step-by-Step Drawing Guide
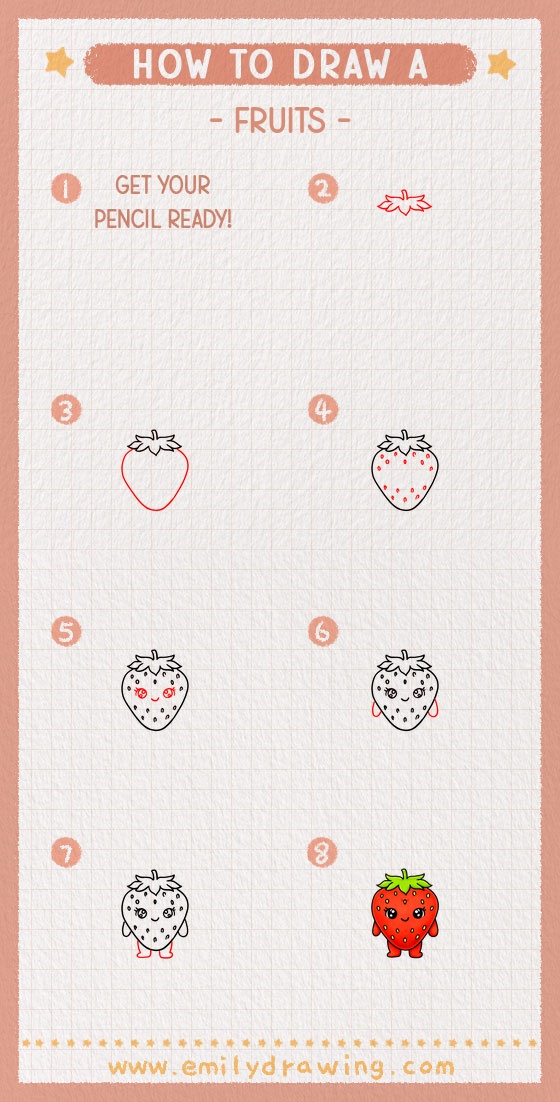
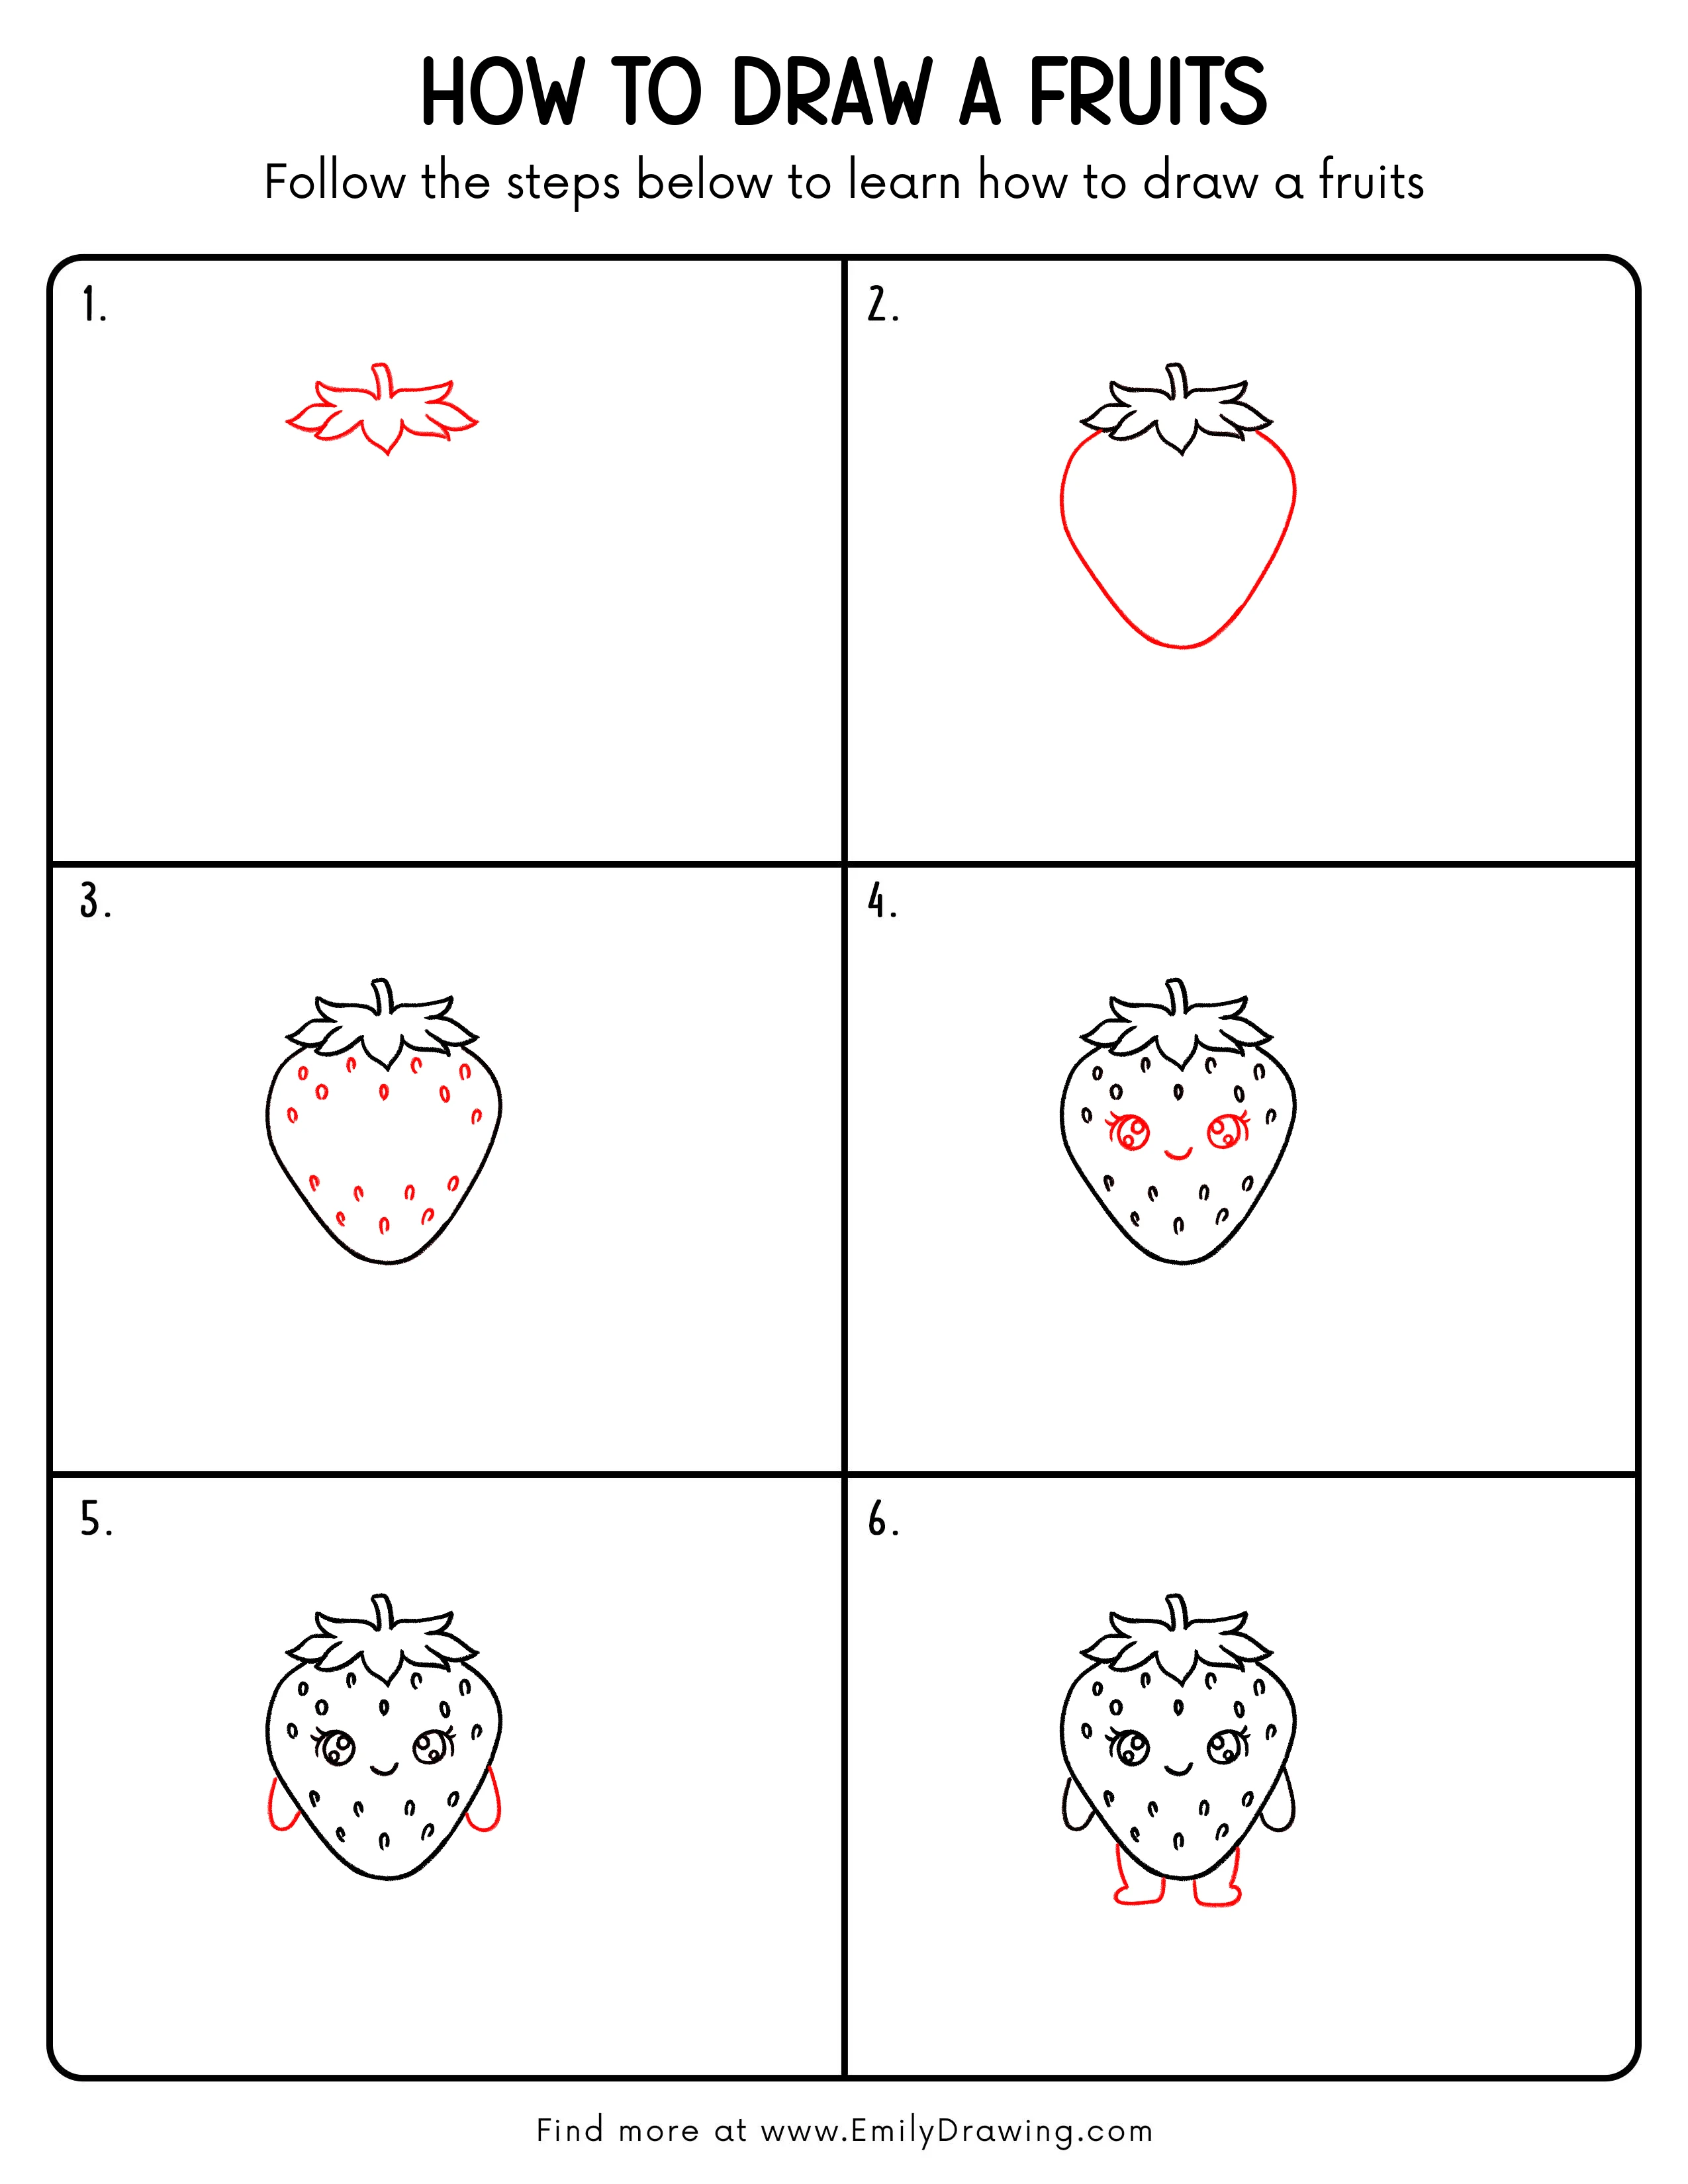
Step 1: Sketch the Top Leaf Cluster
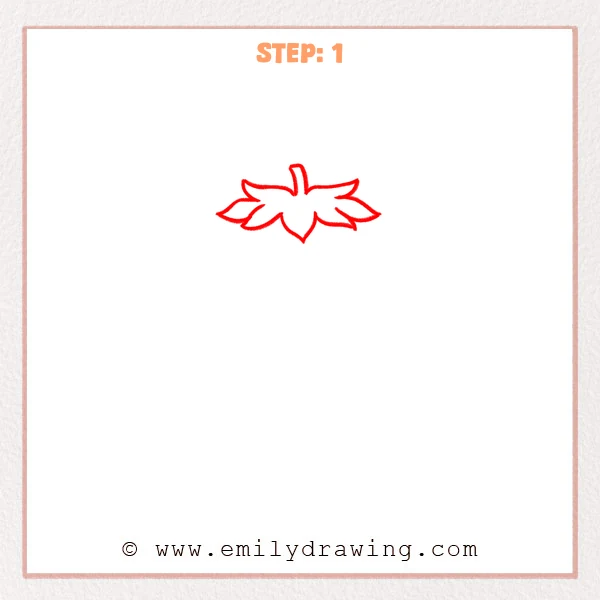
Start near the upper middle of the page and sketch a group of leaves spreading to both sides. Leave one pointed leaf dropping in the center, then add a short stem at the top so it looks like the leafy crown of a strawberry.
Pro Tip: The side leaves do not need to match exactly, but keep the overall shape balanced.
Step 2: Add the Strawberry Body
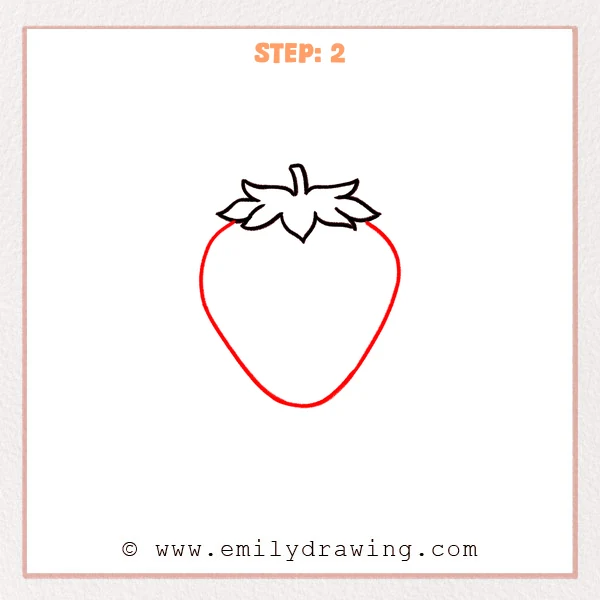
Under the leafy crown, extend one curved line down each side, letting both edges bulge out gently. Bring the lines inward toward the bottom and finish with a soft pointed tip to form the full strawberry shape.
Pro Tip: Keep both side curves close in length so the strawberry looks balanced.
Step 3: Add the Seeds on the Strawberry
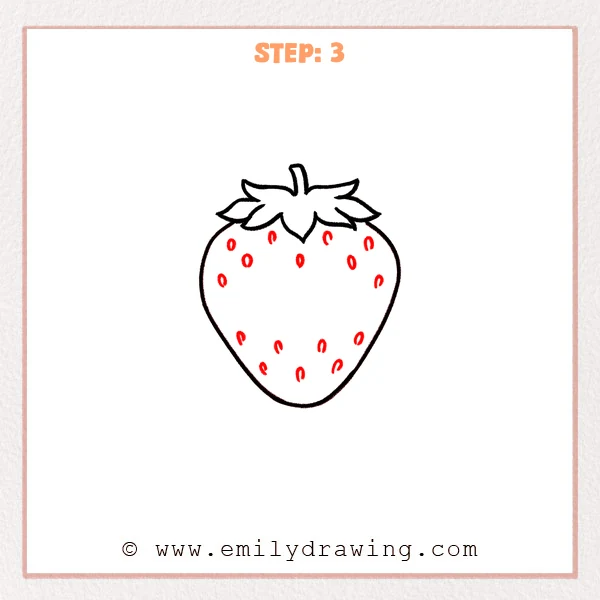
Place small oval seeds across the fruit, spacing them naturally over the top, sides, and lower area. Let each seed tilt a little in a different direction so the surface feels more lively.
Pro Tip: Leave small gaps between the seeds and avoid lining them up too evenly.
Step 4: Add a Cute Face
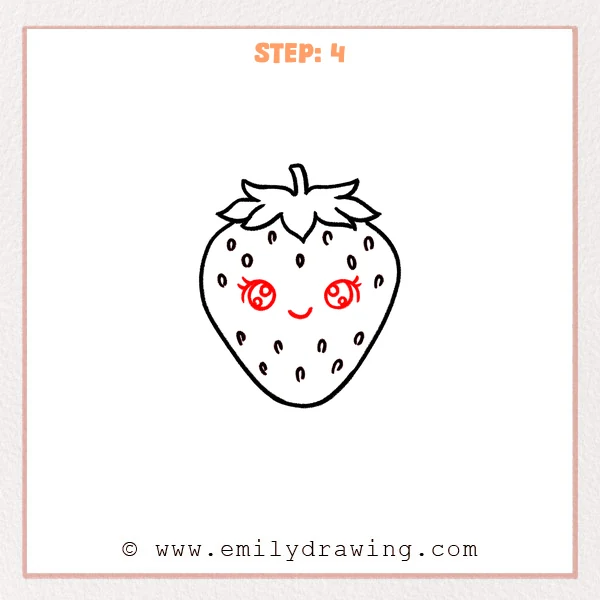
Near the upper middle of the strawberry, add two large round eyes with small highlights inside and short curved lashes. Then place a tiny smiling mouth below them so the strawberry looks sweet and friendly.
Pro Tip: Try to place both eyes at the same height so the face feels even and calm.
Step 5: Add the Little Arms
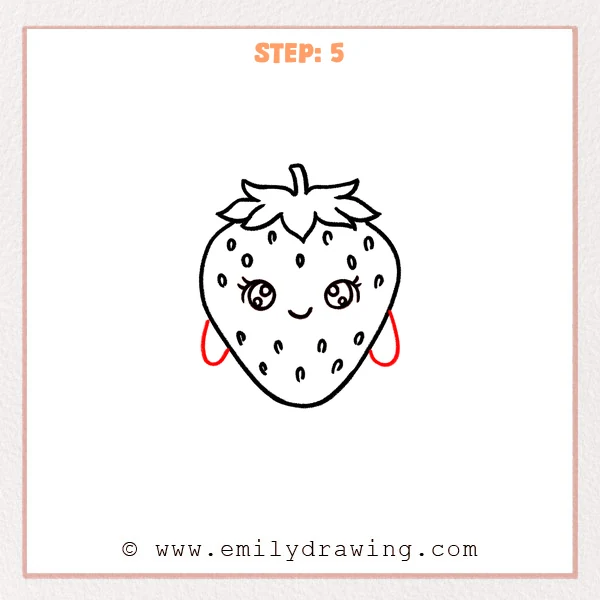
On the lower middle area of each side, add one small arm curving outward. Keep each arm like a narrow teardrop-shaped loop so the strawberry looks as if it is gently holding its arms open.
Pro Tip: Keep the arms close in size and let them open naturally from the sides of the body.
Step 6: Add the Little Feet
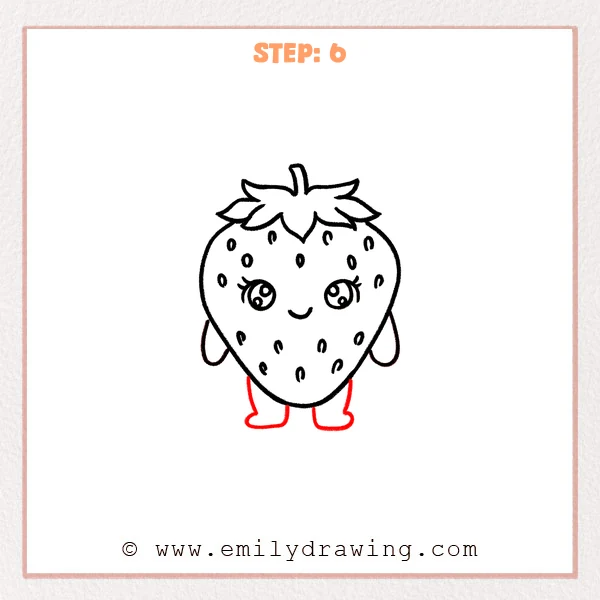
At the bottom of the strawberry, extend two short legs downward and finish each one with a rounded shoe shape. Let the feet open slightly outward so the character looks steady and cheerful.
Pro Tip: Try to place both feet on the same level so the character stands evenly.
Step 7: Color in your drawing!
Fun Facts
- Strawberries are not true berries in plant science.
- The tiny seeds on the outside are called achenes.
- One strawberry can have around 200 seeds.
Pin it now, Draw later!
You now have a complete cute strawberry drawing for beginners, built step by step from leaf crown to tiny feet. Color the fruit red, the leaves green, and add a little soft shading along one side to give it more shape.
A common beginner mistake is making the face too low on the strawberry, which can make the character feel unbalanced. Take your time, keep your shapes gentle, and practice this easy drawing tutorial again to make your next strawberry even smoother.
Get the FREE Printable Drawing Guide
FREE Download Printable Fruits Drawing Tutorial
Frequently Asked Questions
Is this strawberry drawing good for beginners?
Yes, this step by step drawing uses simple curves and easy details, so it works well for new artists.
How do I make the strawberry look cuter?
Use large eyes, a small smile, and soft rounded shapes to give the character a friendly look.
Can I color the strawberry in different ways?
Yes, you can use bright red, pink, or even pastel colors to create your own style.