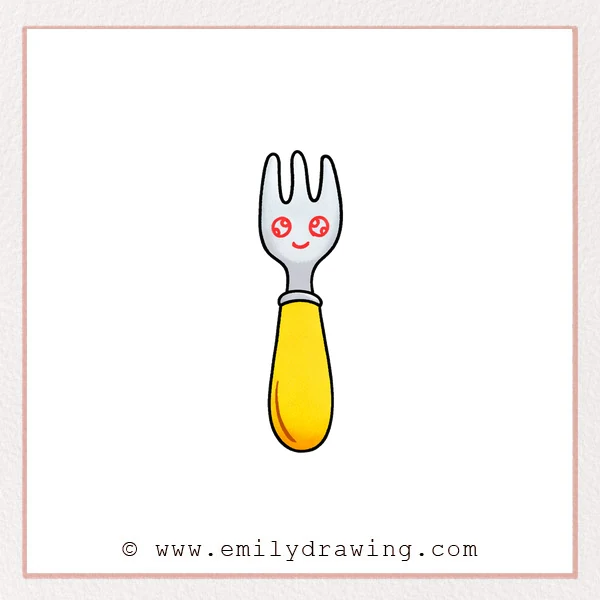
This easy drawing tutorial shows you how to draw a cute fork in a calm, simple way. It is a step by step drawing guide made for beginners, children, and anyone who wants a fun kitchen-themed sketch. Take your time with each shape, and let the fork grow little by little.
What You Will Need
- Drawing paper
- Pencil
- Eraser
- Black pen or marker
- Colored pencils or crayons
Here are my RECOMMENDED Art Supplies!
- Crayola Coloring Set (140 Pieces – Mega Value!)
- 24 Colored Crayon Set
- A4 Printer Paper
- Crayola Coloring Pencils
- HP Home Printer with Instant Ink!
Time needed:
26 minutes.
Step-by-Step Drawing Guide
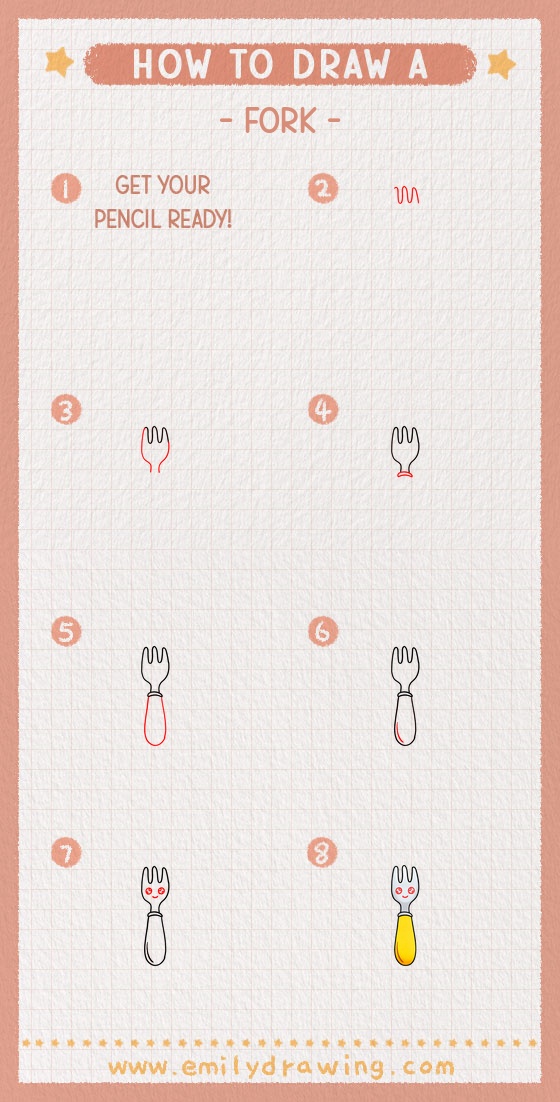
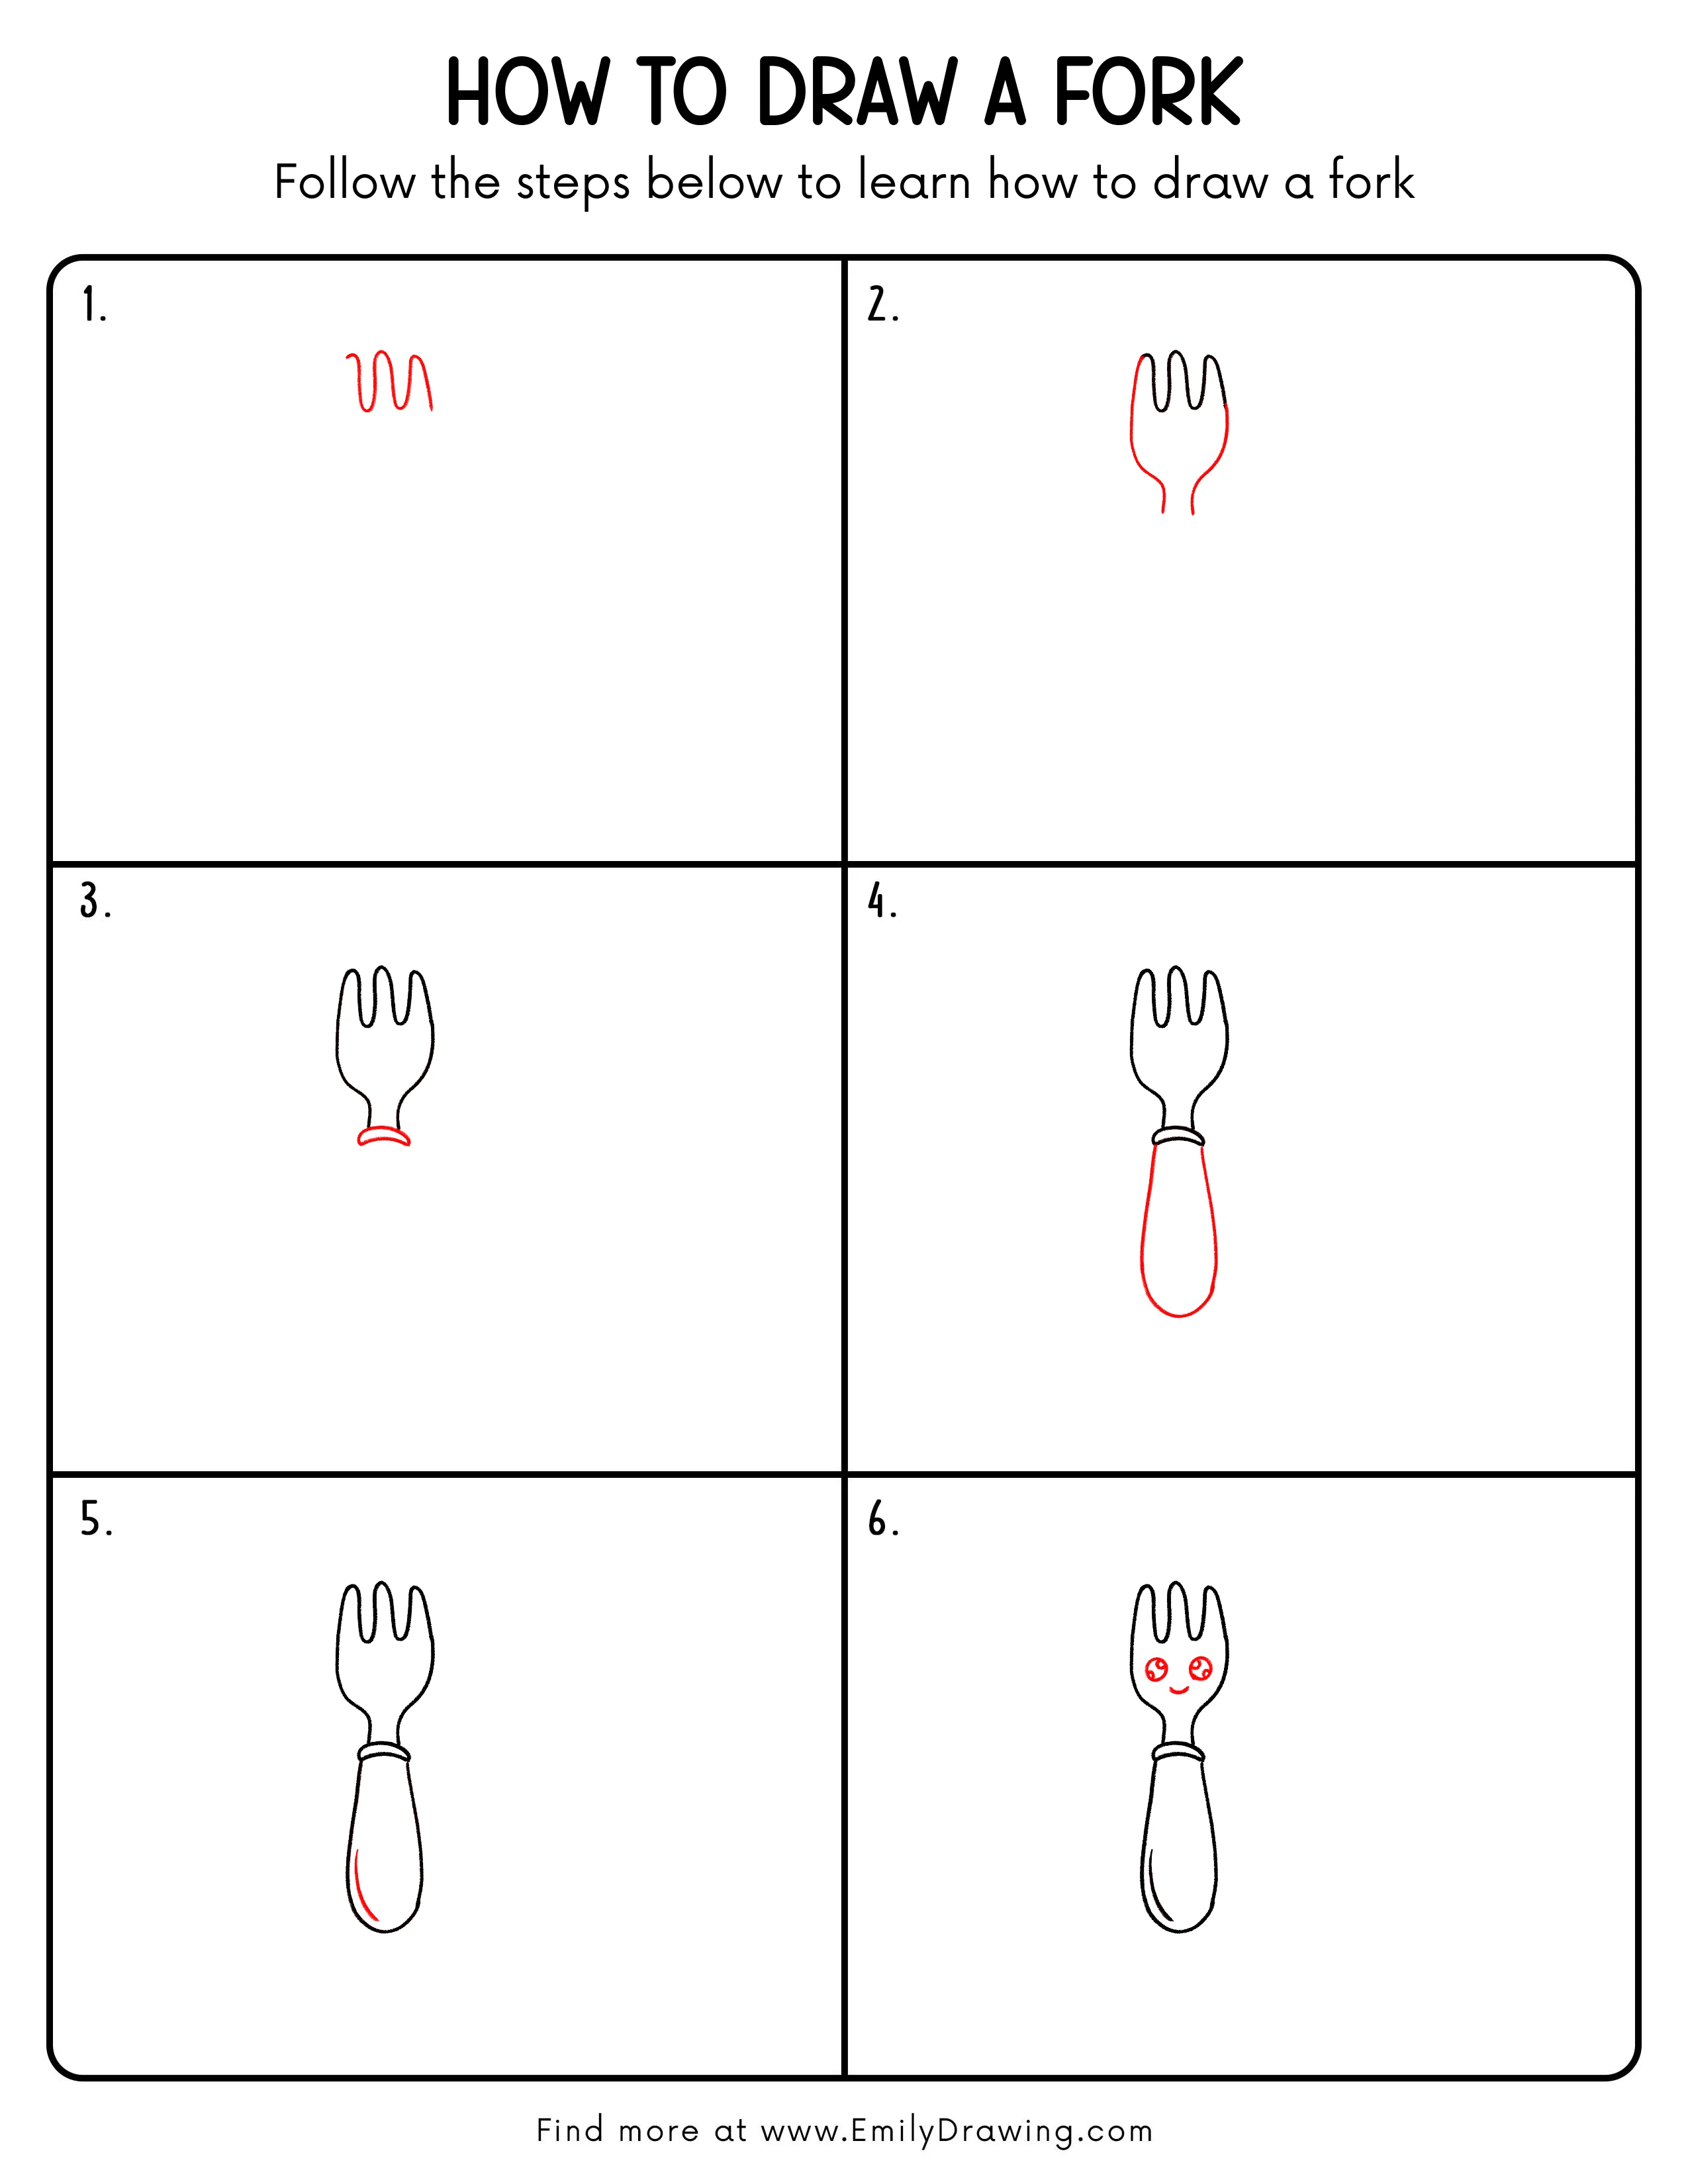
Step 1: Sketch the Wavy Top Guide
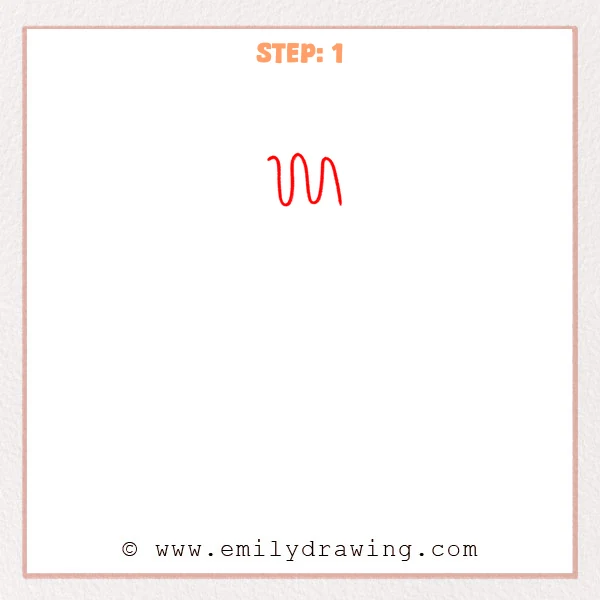
Start with a soft wavy line near the upper part of the page. Make three rounded up-and-down curves, like narrow U-shapes joined together. This helps place the fork’s tines in a simple and balanced way.
Pro Tip: Keep the three curves close in size so the fork top feels even.
Step 2: Add the Outer Shape of the Fork
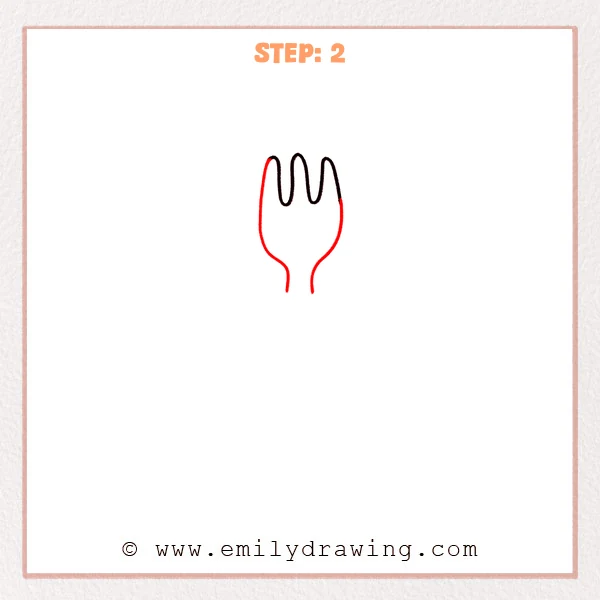
Continue from both sides and bring the lines downward to form the rounded body under the tines. Let the shape narrow gently at the bottom, then leave two short lines hanging down to begin the handle.
Pro Tip: Try to keep both sides balanced so the fork looks neat and even.
Step 3: Add the Curved End of the Handle
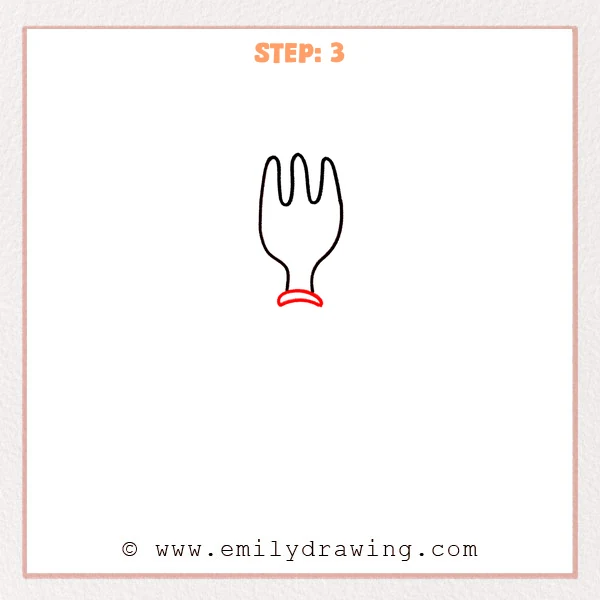
At the bottom of the narrow handle, add a small curved band across from side to side. Then place a second parallel curve inside it, so the end looks fuller and more finished.
Pro Tip: Keep the gap between the two curves even so the handle end looks tidy.
Step 4: Add the Rounded Handle Shape

From the small curved band, extend the handle downward with two long outer lines. Let the sides widen softly, then curve into a rounded oval end so the handle looks smooth and comfortable to hold.
Pro Tip: Keep the left and right curves similar so the handle feels balanced.
Step 5: Add the Inner Detail Line on the Handle

Place a slim curved line inside the lower left side of the handle. Let it follow the outer shape gently and stop before it reaches the bottom, so the handle looks more polished and dimensional.
Pro Tip: Leave a small gap from the edge so the inner line stays clear and neat.
Step 6: Add the Cute Face Details

In the open space of the fork head, add two round eyes with small highlight shapes inside. Then place a soft curved smile below them, so the fork begins to look friendly and cheerful.
Pro Tip: Try to keep the eyes at the same height so the face feels balanced.
Step 7: Color in your drawing!
Fun Facts
- Forks are kitchen tools used to pick up and hold food.
- Many forks have four tines, but simple cartoon forks can use fewer shapes.
- Cute food and kitchen drawings often use faces to make objects feel friendly.
Pin it now, Draw later!
You have now finished a sweet and simple fork drawing for beginners. Start with the top guide, build the body, shape the handle, and then add a friendly face. To finish, you can color the fork in silver, gray, pink, or any playful shade you like. Add soft shading along one side of the handle and under the curved band to give it more form. One common beginner mistake is making one side much wider than the other, so take a moment to compare both edges before outlining. Keep practicing this easy drawing tutorial, and try more step by step drawings to grow your skills.
Get the FREE Printable Drawing Guide
FREE Download Printable Fork Drawing Tutorial
Frequently Asked Questions
How can I make my fork look more even?
Lightly sketch the main shape first and compare the left and right sides before tracing the final line.
Can I color the fork in bright colors?
Yes, cartoon drawings look lovely in bright colors, pastels, or shiny metal tones.
Is this a good drawing for beginners?
Yes, this is a simple how to draw fork lesson with easy shapes and gentle steps.