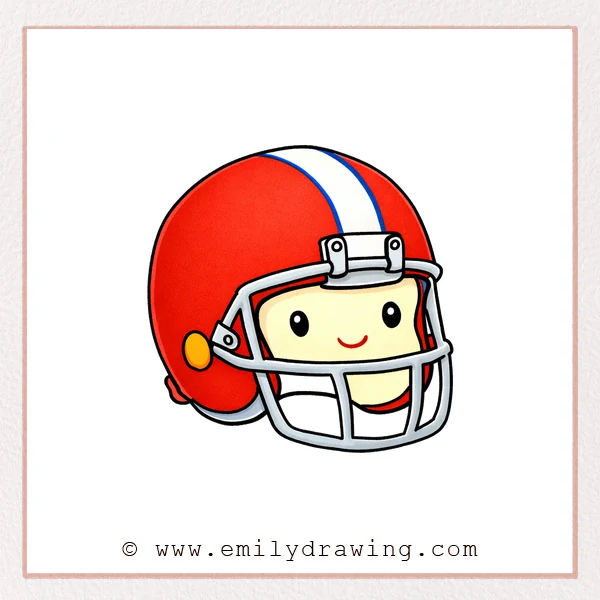
This easy drawing tutorial will show you how to draw a football helmet in a calm, simple way. It is a good step by step drawing lesson for beginners, children, and anyone who wants to practice clean shapes and clear details.
What You Will Need
- Pencil
- Eraser
- Black pen or marker
- Paper
- Colored pencils or crayons
Here are my RECOMMENDED Art Supplies!
- Crayola Coloring Set (140 Pieces – Mega Value!)
- 24 Colored Crayon Set
- A4 Printer Paper
- Crayola Coloring Pencils
- HP Home Printer with Instant Ink!
Time needed:
21 minutes.
Step-by-Step Drawing Guide
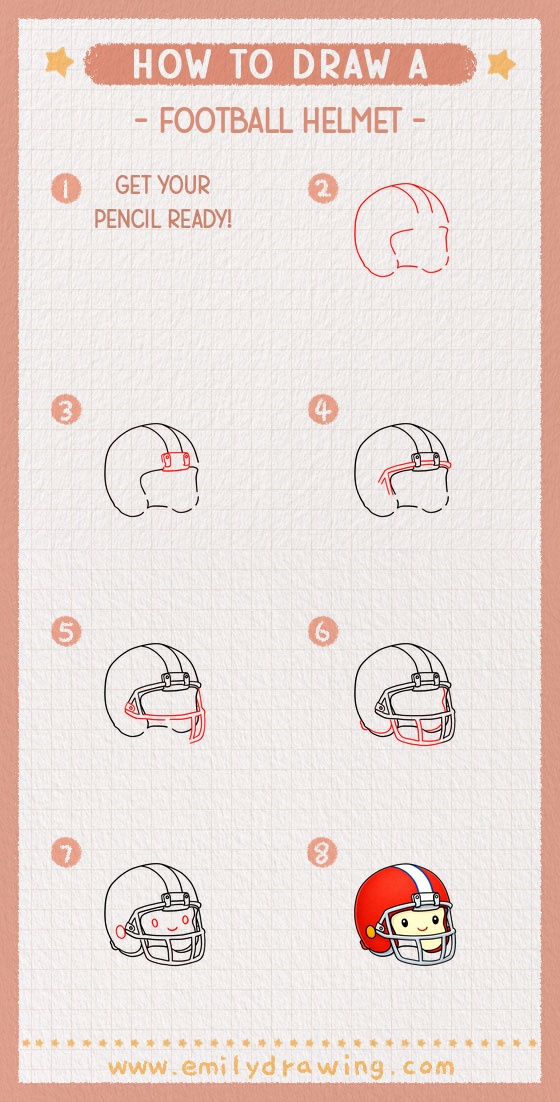
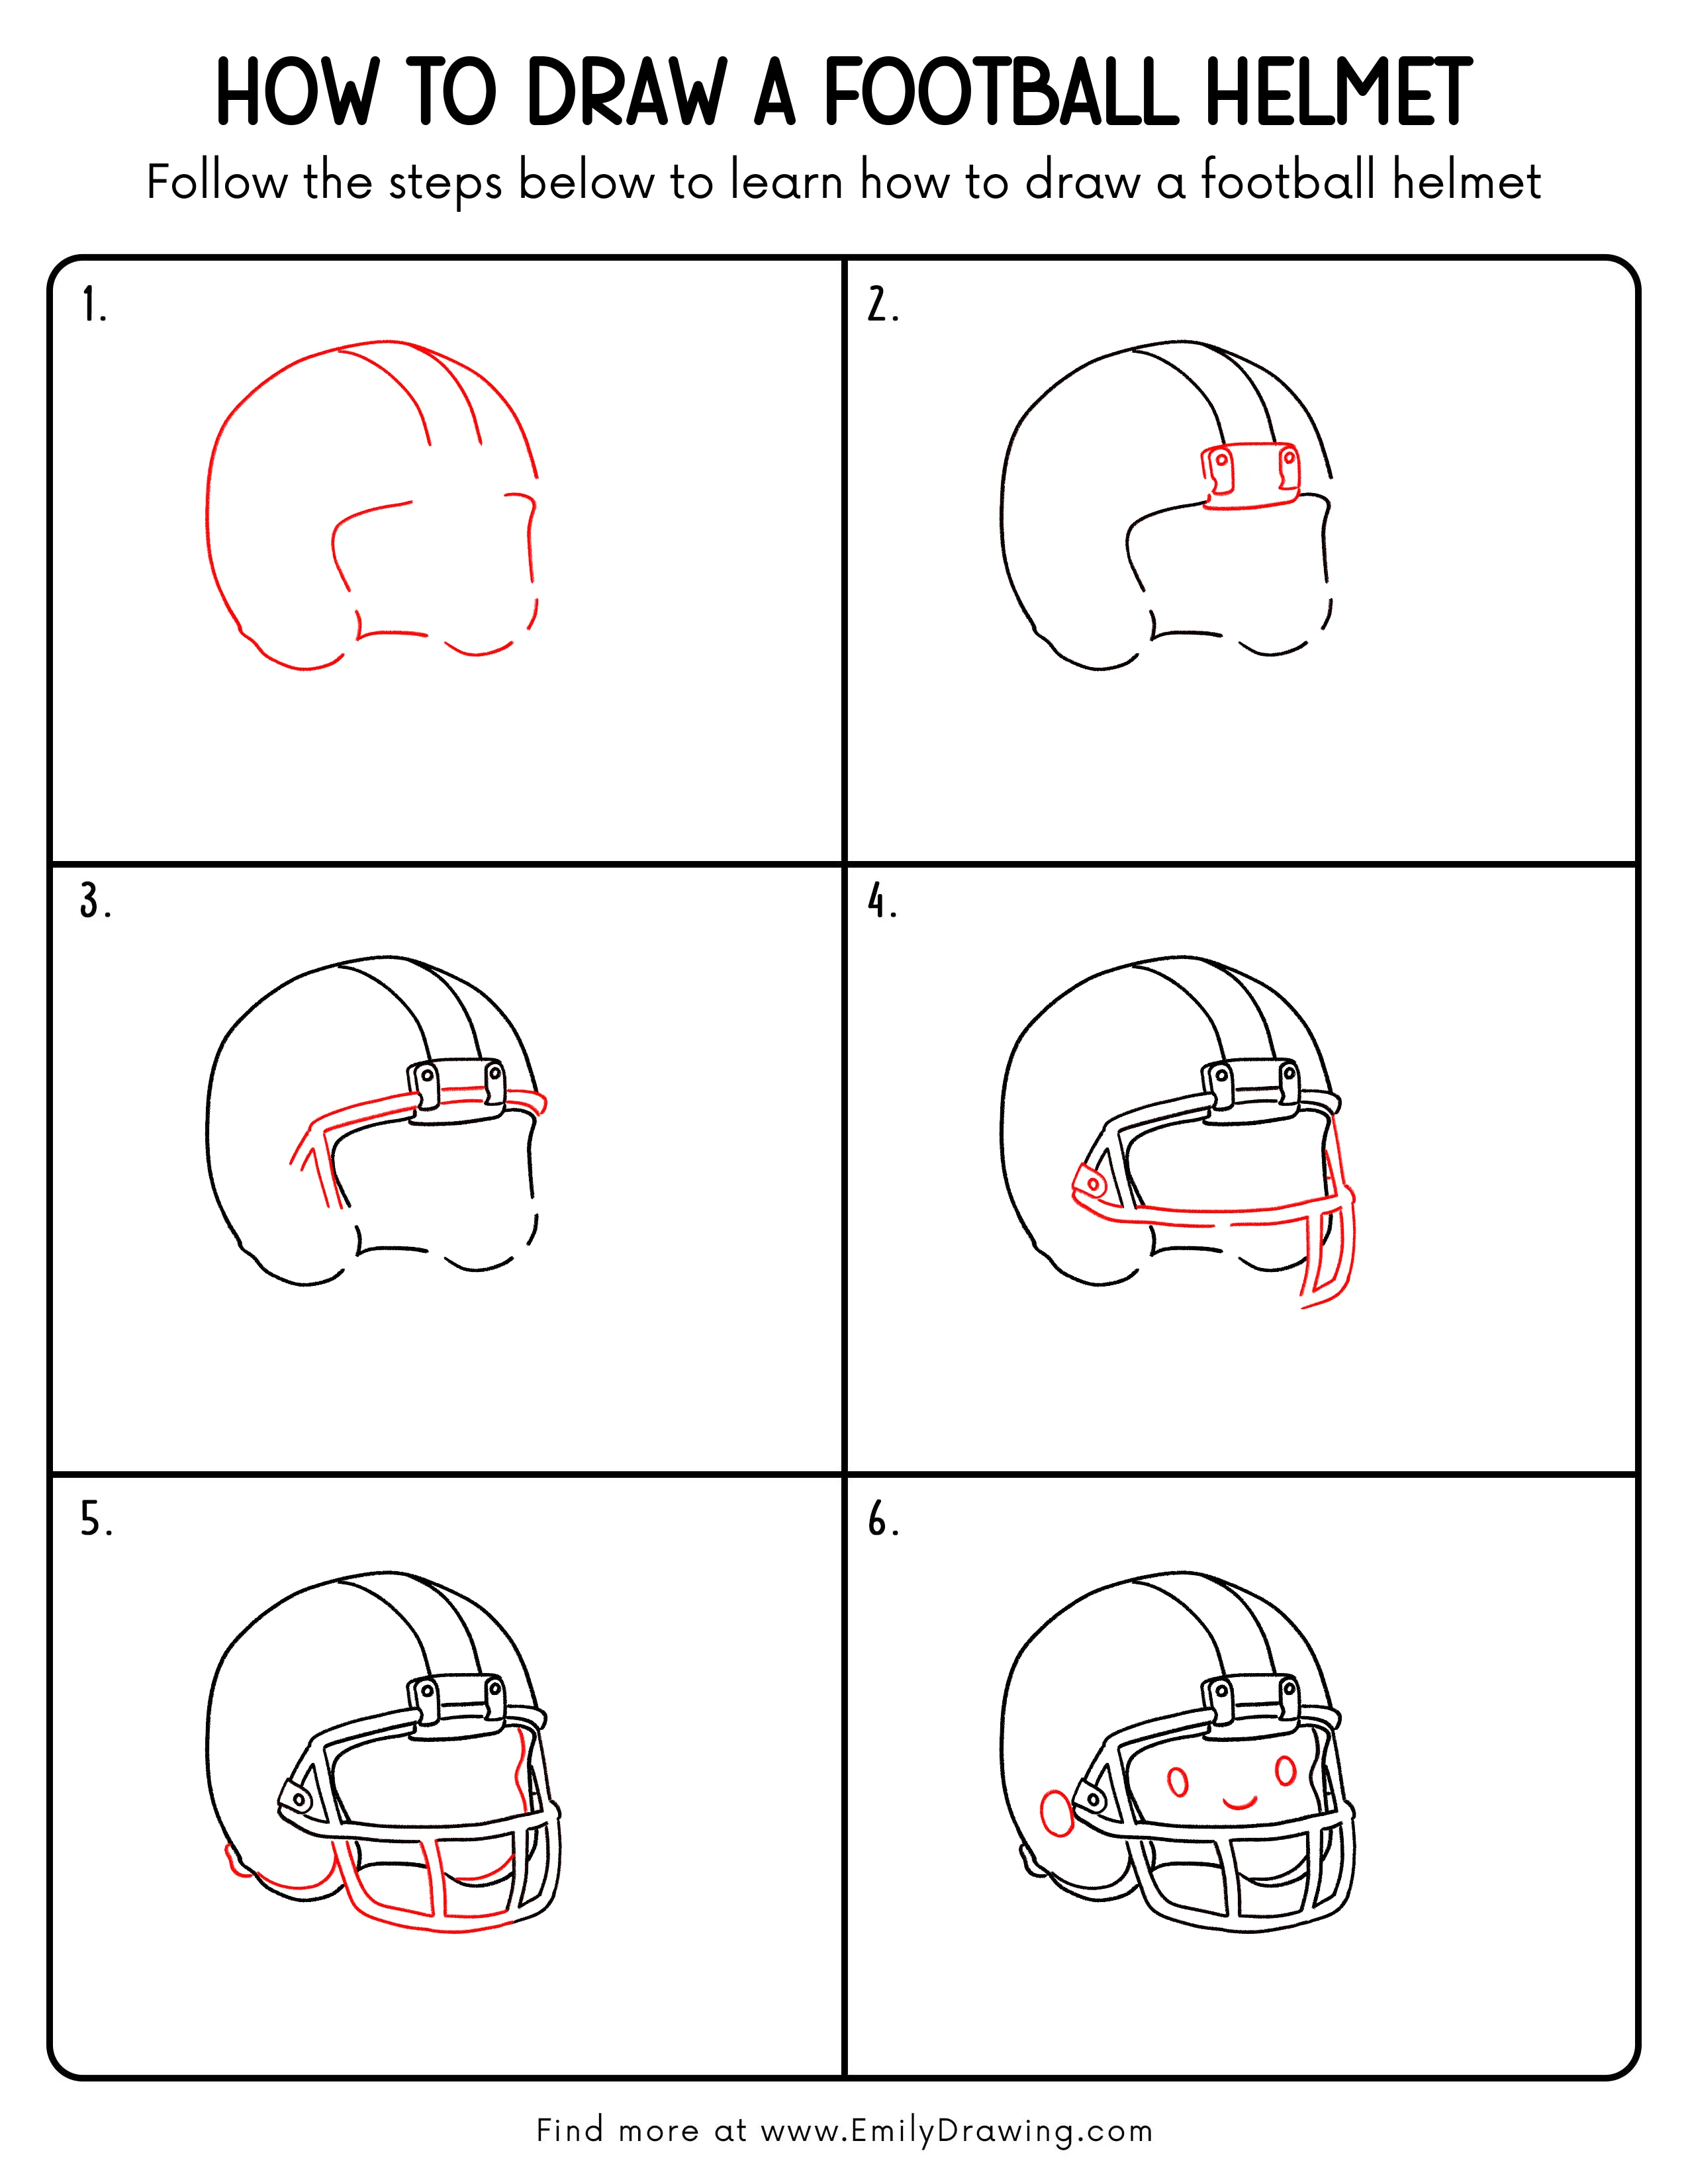
Step 1: Sketch the Main Helmet Shape
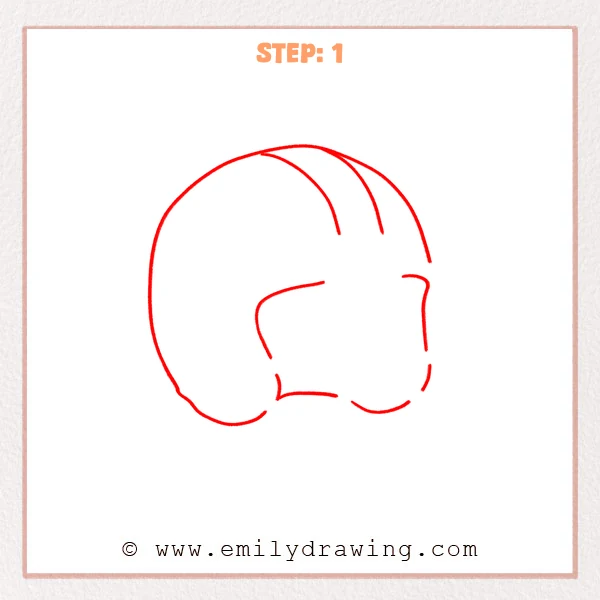
Start with a large rounded curve for the top and back of the football helmet. Leave an open space at the front for the face area, and add soft curved lines along the bottom so the helmet looks full and sturdy.
Pro Tip: Keep the outer shape slightly large at first, so later details fit more easily in proportion.
Step 2: Add the Front Mount Plate
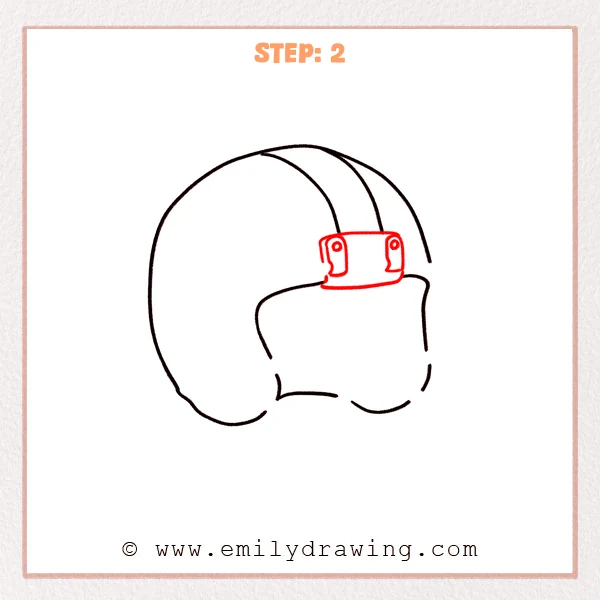
Place a horizontal rectangular mount above the face opening along the front edge of the helmet. Add a small screw hole on each side and shape the inner notches so the front section looks secure and clearly built.
Pro Tip: Try to keep the small side parts even, so the helmet feels balanced.
Step 3: Add the Upper Faceguard Bars
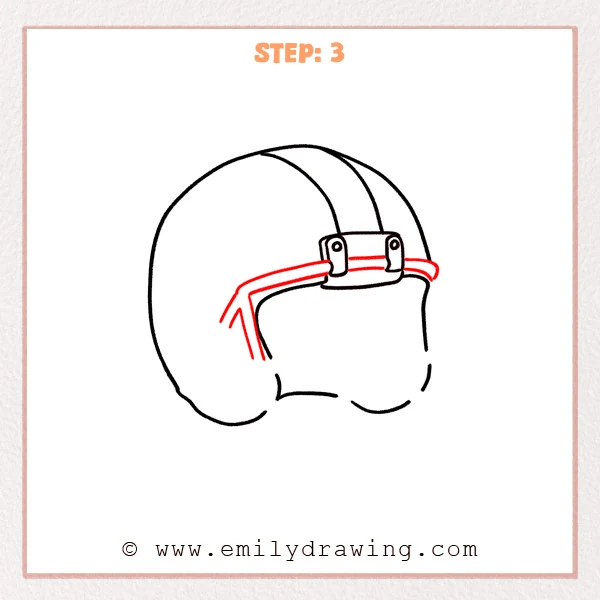
Extend two parallel curved bars outward from the front mount to begin the top of the faceguard. On the left side, let the lines angle downward into connecting bars so the protective frame starts to take shape.
Pro Tip: Keep the gap between the parallel bars steady for a neat result.
Step 4: Complete the Front Faceguard Frame
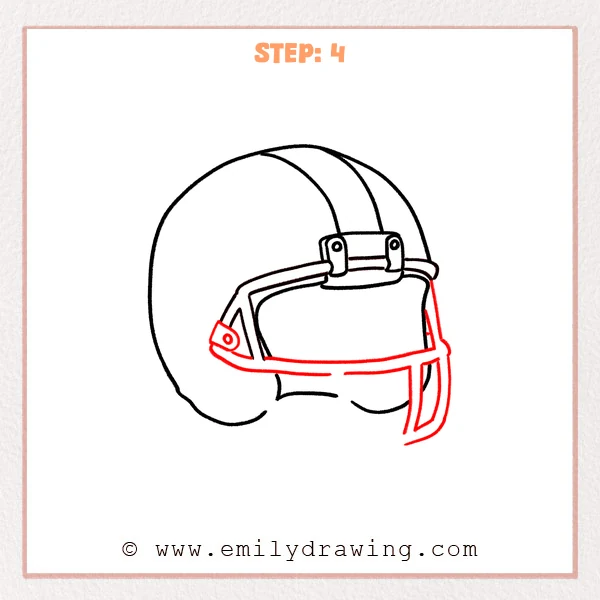
Add the long front bar across the face area and draw the curved vertical bar on the right side. Then place a small connector plate with a screw hole on the left so the faceguard looks strong and fully attached.
Pro Tip: Let the front bar stay smooth and fairly level to make the guard look sturdy.
Step 5: Add the Lower Guard and Support Details
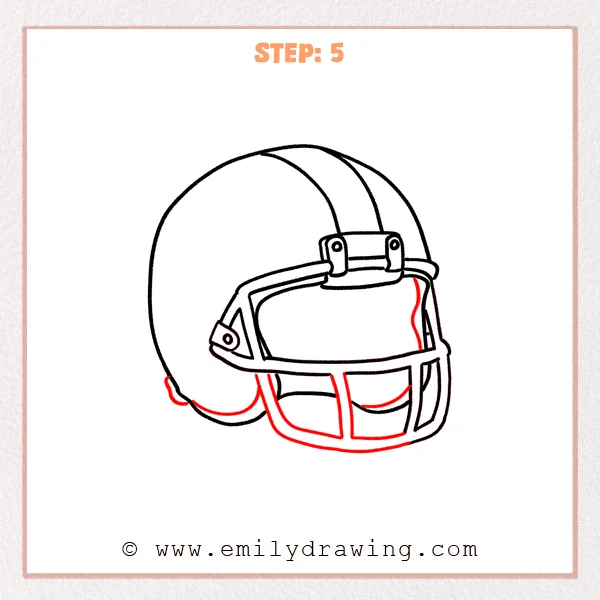
Draw a broad lower bar that curves from the left side down toward the lower right edge of the faceguard. Add the center vertical bar, the inner support on the right, and a small padded edge near the back lower side to make the structure feel complete.
Pro Tip: Use one smooth motion for the lower bar so the shape feels connected.
Step 6: Add a Cute Face and Side Circle Detail
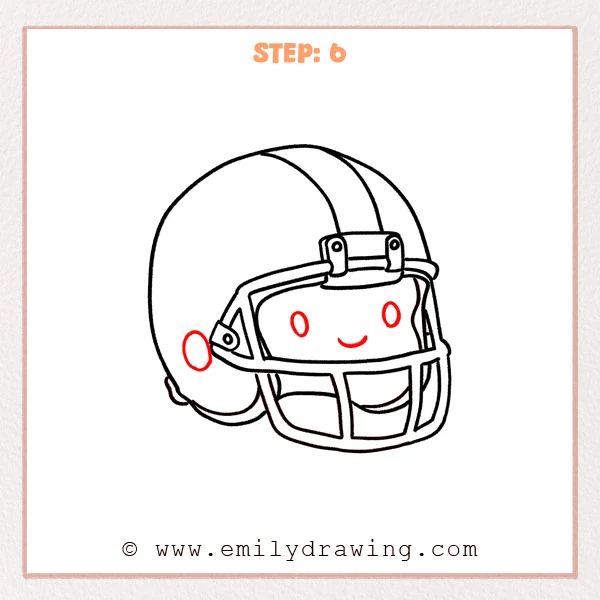
Inside the open front area, place two small oval eyes and a short curved smile. Add a round side detail on the left side of the helmet to finish the design with a friendly look.
Pro Tip: Keep the eyes and smile near the center so the expression feels gentle and balanced.
Step 7: Color in your drawing!
Fun Facts
- A football helmet helps protect the head during the game.
- Many helmets have stripes, logos, and faceguards in different styles.
- Players often choose helmets that fit closely for comfort and safety.
Pin it now, Draw later!
You now have a complete football helmet drawing with a rounded shell, strong faceguard, and a simple friendly face. Try adding team colors, light shading along the lower curves, and a darker tone under the bars to give the helmet more depth. A common beginner mistake is making the faceguard bars uneven, so take your time and compare both sides as you work. Keep practicing this easy drawing tutorial and enjoy trying more step by step drawing lessons.
Get the FREE Printable Drawing Guide
FREE Download Printable Football Helmet Drawing Tutorial
Frequently Asked Questions
Is this football helmet drawing good for beginners?
Yes, this drawing for beginners uses simple curves, rectangles, and smooth connecting lines.
How can I make my helmet look more realistic?
Add light shading, a team stripe, and careful line thickness around the faceguard and shell.
What should I do if the faceguard looks uneven?
Lightly sketch the bars first, then adjust the spacing before tracing the final lines.