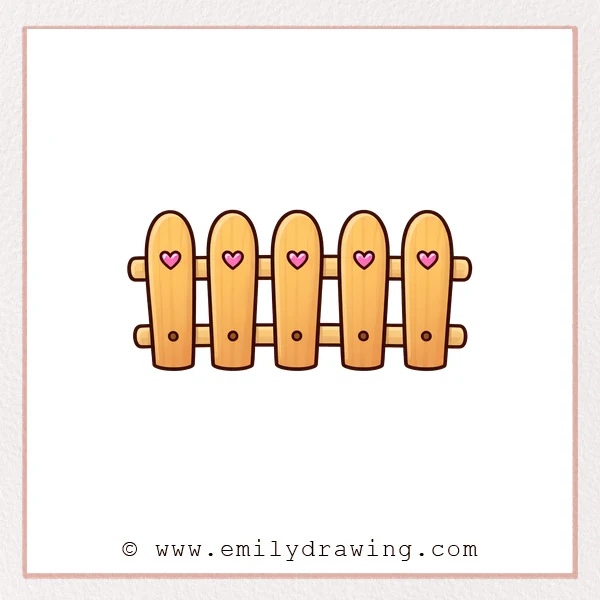
This easy drawing tutorial shows how to draw a fence with simple shapes.
You will build one post at a time, then connect them with rails.
Take your time, and keep your lines light until the end.
What You Will Need
- Pencil
- Eraser
- Black marker or pen
- Red marker (optional, for emphasis)
- Paper
Here are my RECOMMENDED Art Supplies!
- Crayola Coloring Set (140 Pieces – Mega Value!)
- 24 Colored Crayon Set
- A4 Printer Paper
- Crayola Coloring Pencils
- HP Home Printer with Instant Ink!
Time needed:
25 minutes.
Step-by-Step Drawing Guide
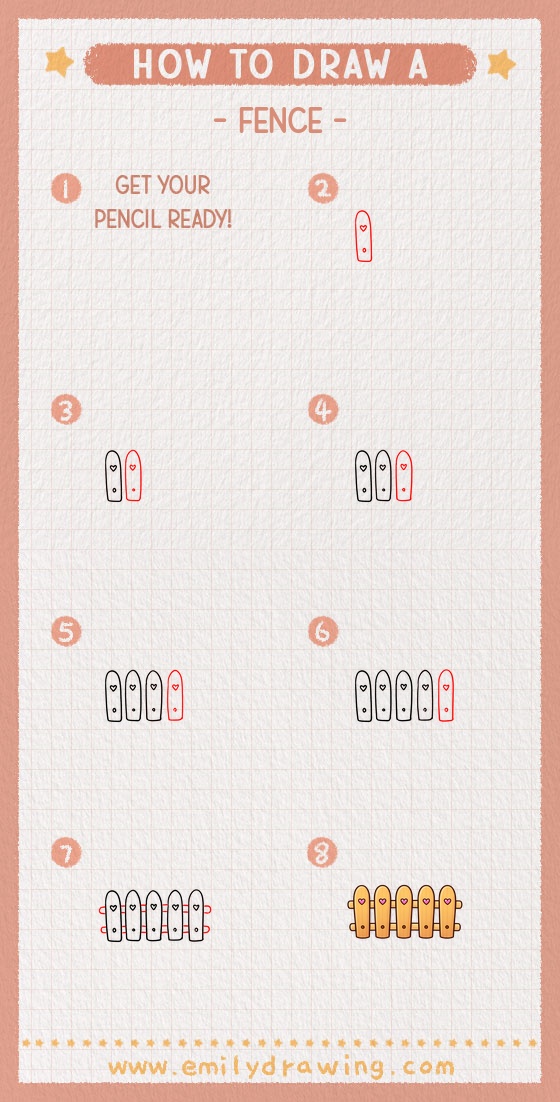
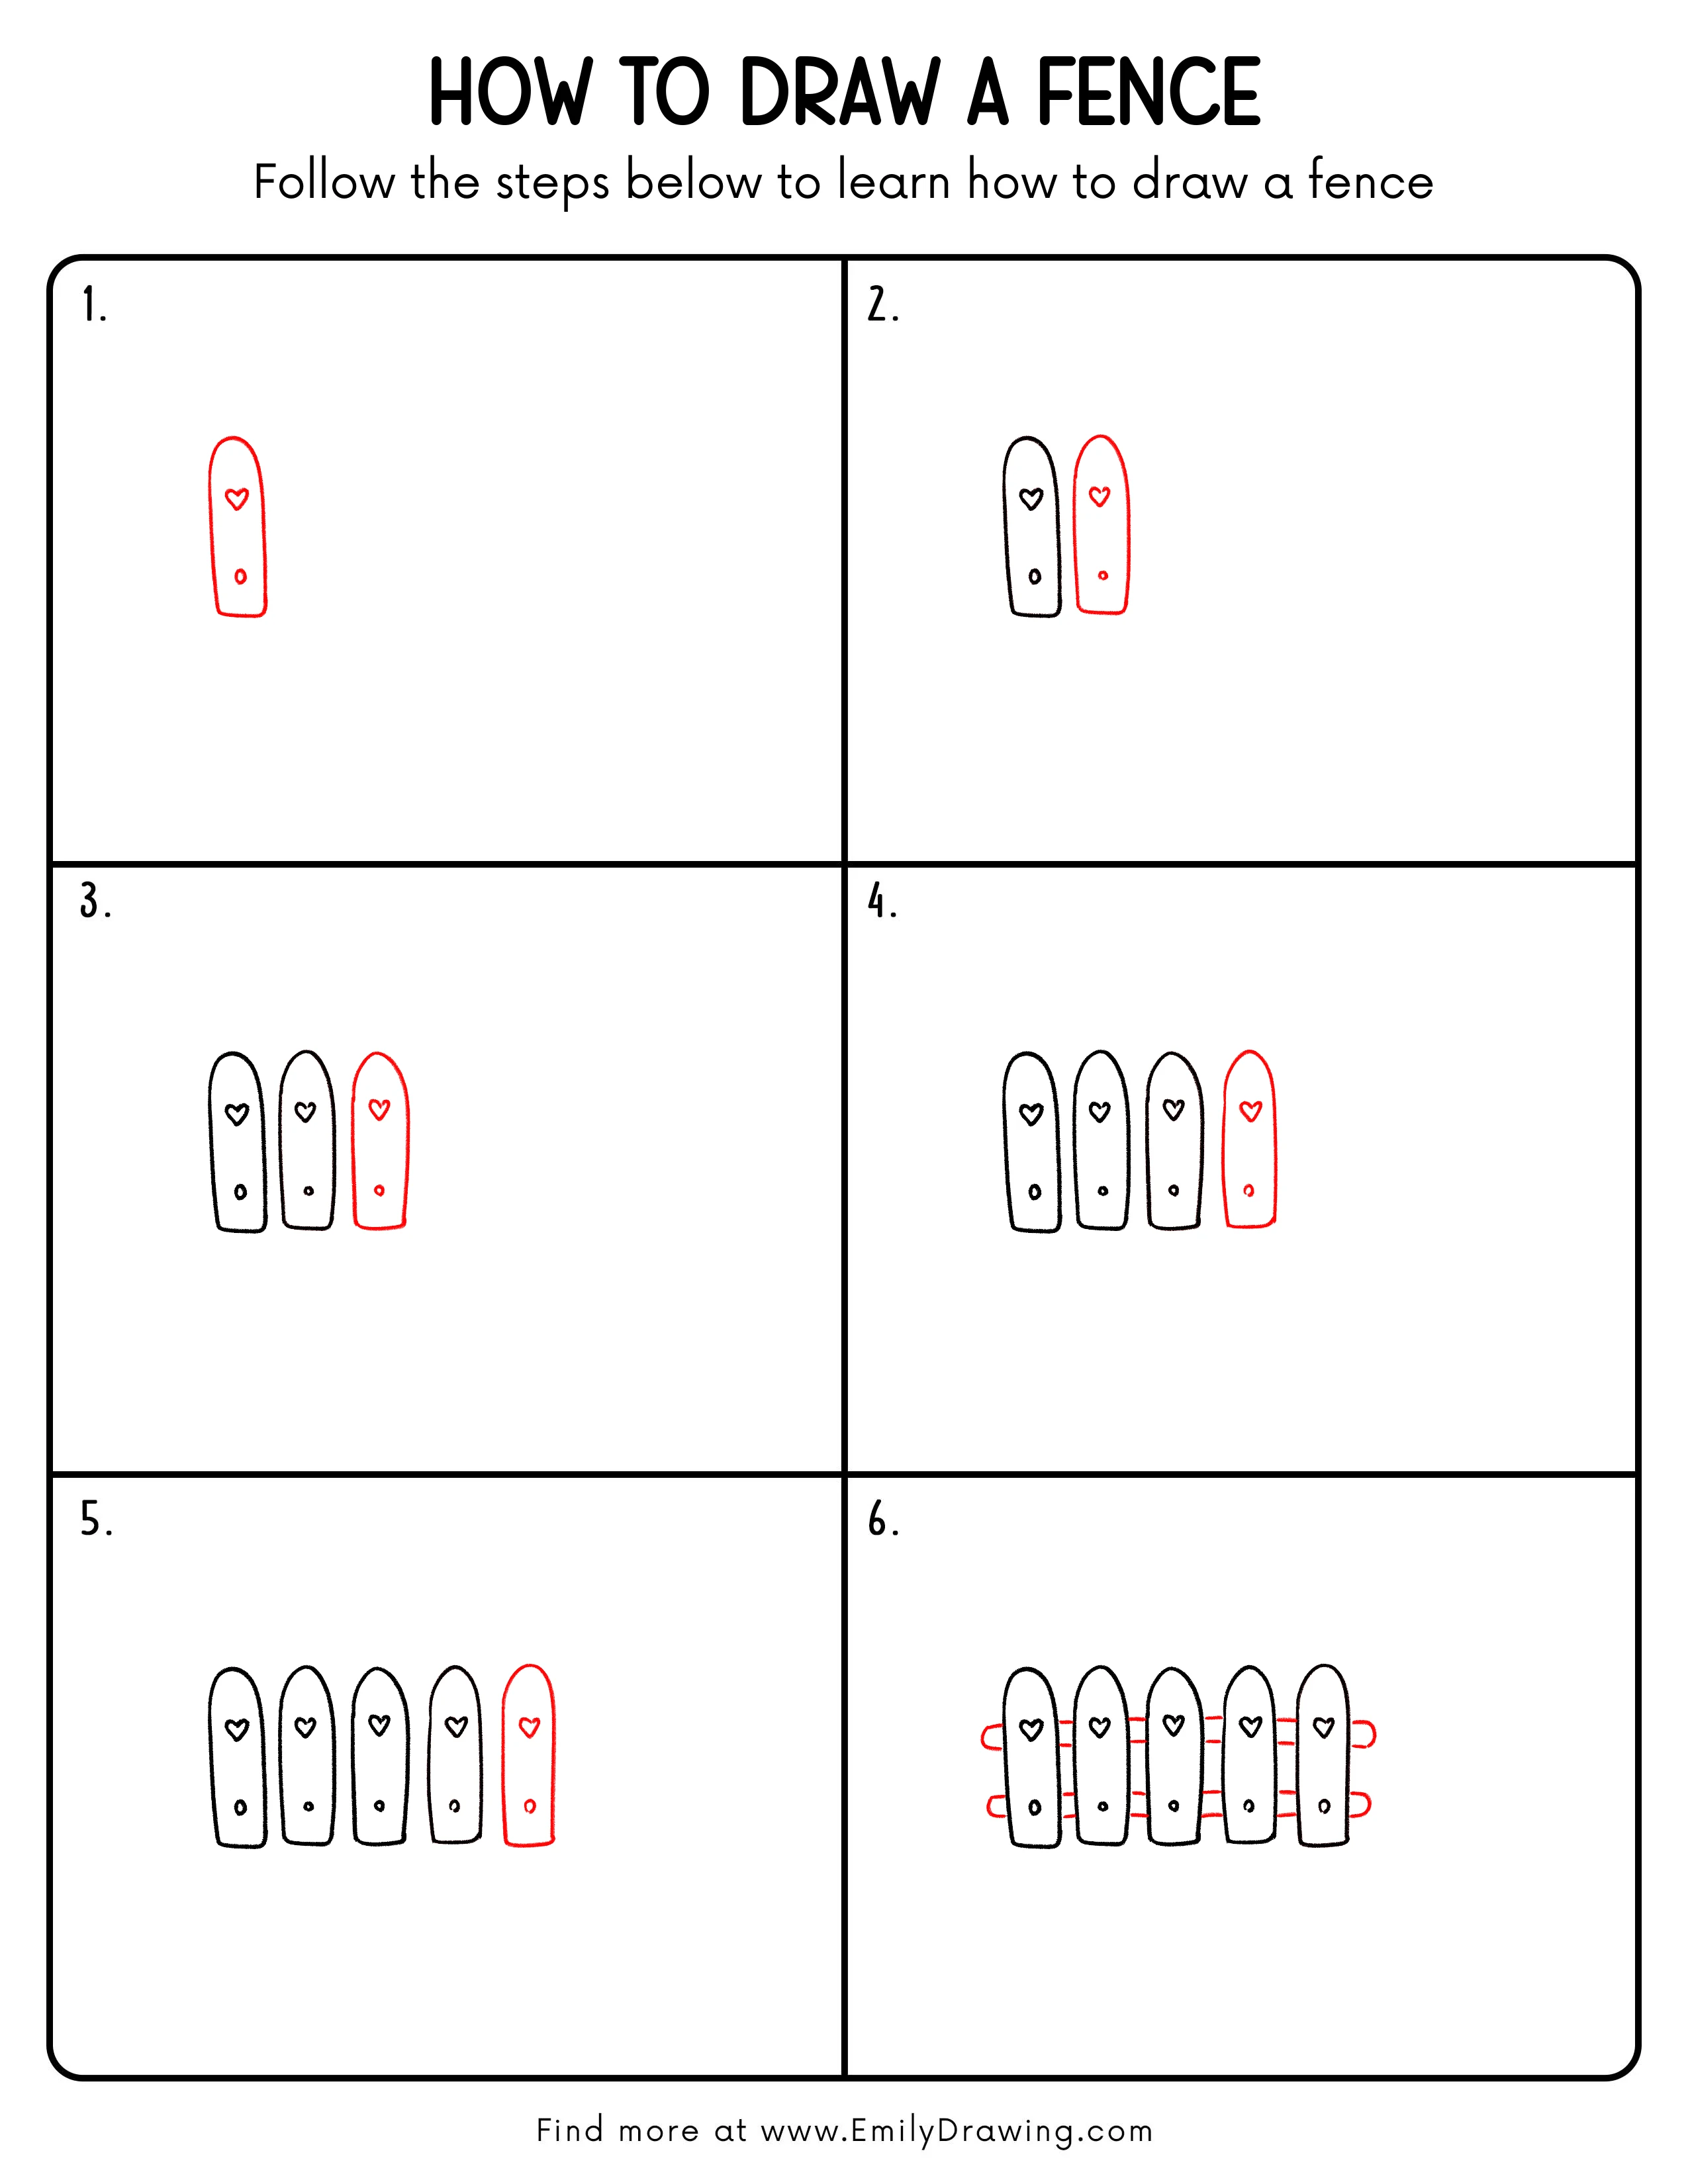
Step 1: Draw the Main Fence Post Shape
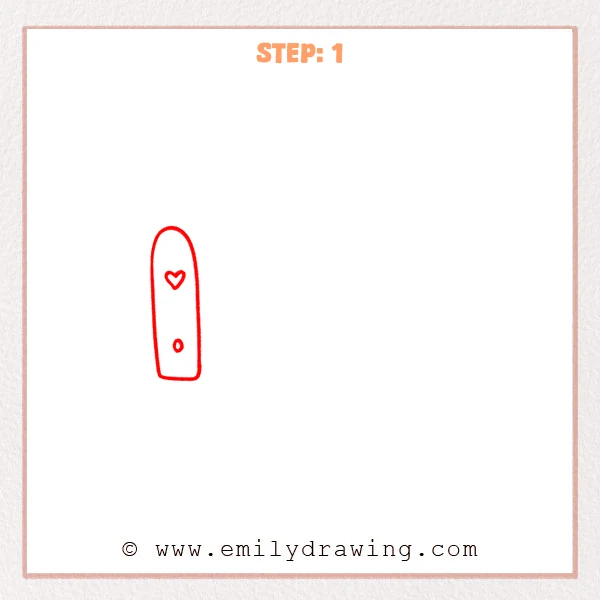
Start with a tall, narrow vertical shape and round the top into an arch.
Flatten the bottom slightly and keep both sides smooth and parallel.
Pro Tip: Lightly draw a center guideline first, then mirror both sides for a straighter post.
Step 2: Add the Second Fence Post

Draw a matching tall post to the right, with the same rounded top and slightly flat bottom.
Add a small heart on the new post, then place a tiny circle near the lower area.
Pro Tip: Keep both posts the same height and width, and leave an even gap between them.
Step 3: Add a Third Post in the Middle
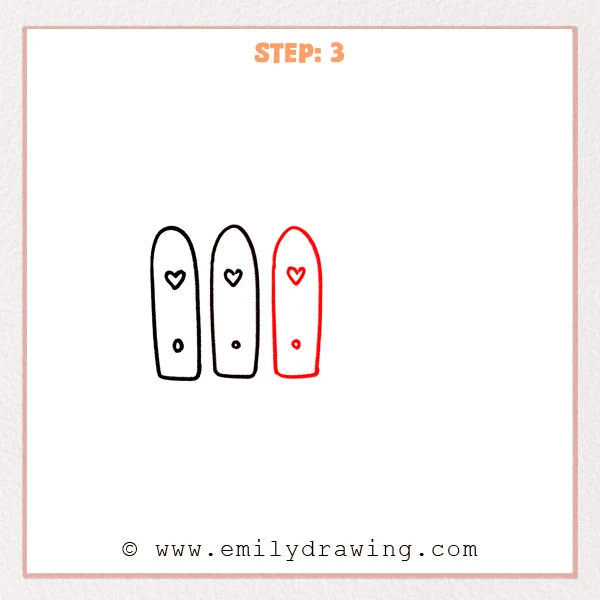
Draw a third matching fence post between the first two, keeping the same arched top and flat bottom.
Add the same heart detail and a small circle near the bottom so it matches.
Pro Tip: Lightly mark the center of each post first so the spacing stays even.
Step 4: Add a Fourth Post on the Right
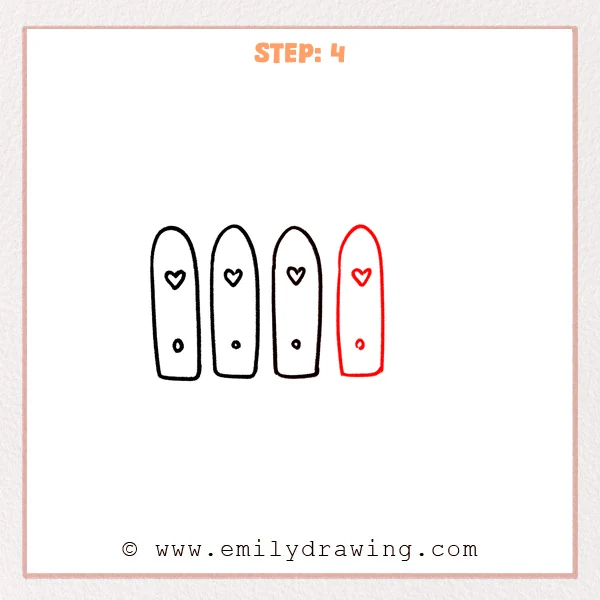
Draw a fourth matching fence post on the far right, keeping the same height and width.
Add the same heart detail and the small circle near the bottom to match the set.
Pro Tip: Align the top arch height first for a cleaner row of posts.
Step 5: Add a Fifth Post on the Far Right
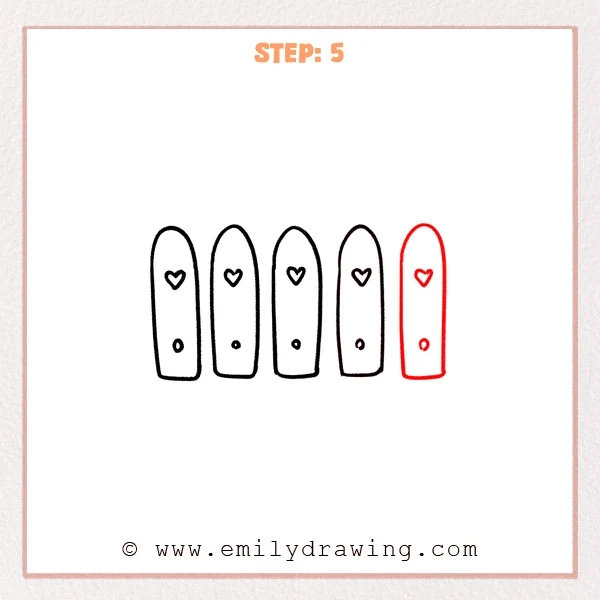
Draw a fifth matching fence post to the right of the fourth, keeping the same overall shape.
Add the heart near the top and the small circle near the bottom to keep the pattern consistent.
Pro Tip: Check that all five bottoms sit on the same level line, and adjust slightly if needed.
Step 6: Draw the Horizontal Fence Rails
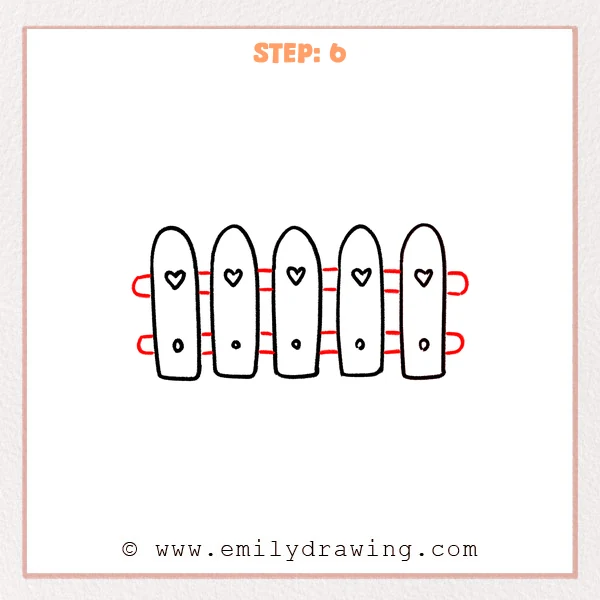
Add two horizontal rails behind the posts: one near the top and one near the bottom.
Round the rail ends on the far left and far right so they look like they extend past the posts.
Pro Tip: Keep both rails parallel with matching thickness and spacing for a neat fence.
Step 7: Color in your drawing!
Fun Facts
- Many fences use rails behind the posts for extra strength.
- Rounded post tops help rainwater run off more easily.
- Decorative cutouts and patterns can make fences feel friendly and welcoming.
Pin it now, Draw later!
Trace your final lines with a marker once you like the shapes.
Erase extra pencil marks, then add color or simple shading if you want.
Now you know how to draw a fence step by step—try adding grass, flowers, or a gate next!
Get the FREE Printable Drawing Guide
FREE Download Printable Fence Drawing Tutorial
Frequently Asked Questions
How do I make the fence look evenly spaced?
Lightly mark where each post center will go before drawing the outlines.
Can I draw a taller or shorter fence?
Yes—keep the post shapes consistent, and adjust the rail positions to match.
What if my rails don’t look straight?
Use a ruler or draw very light guide lines first, then trace your rails over them.