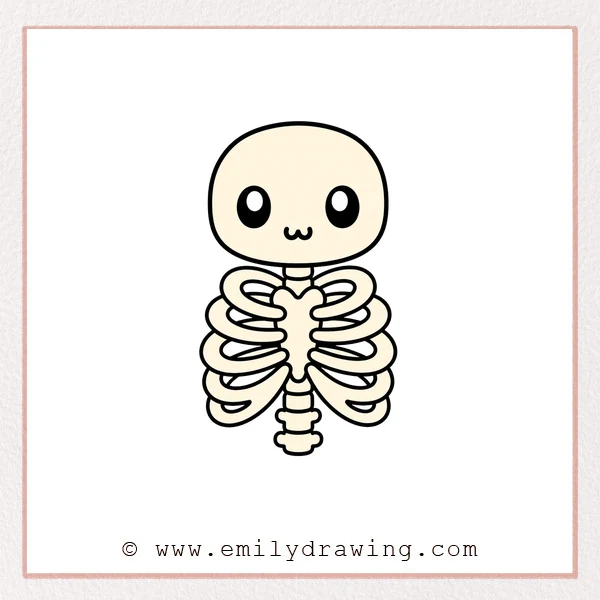
Learning how to draw rib cage shapes can be simple with clear steps. This easy drawing tutorial uses rounded lines and beginner-friendly forms. Take your time, and build the rib cage one part at a time.
What You Will Need
- Pencil
- Eraser
- Drawing paper
- Black marker or pen
- Red pencil or colored pencil for practice lines
Here are my RECOMMENDED Art Supplies!
- Crayola Coloring Set (140 Pieces – Mega Value!)
- 24 Colored Crayon Set
- A4 Printer Paper
- Crayola Coloring Pencils
- HP Home Printer with Instant Ink!
Time needed:
16 minutes.
Step-by-Step Drawing Guide
Step 1: Draw the Upper Bone Shapes and Center Notch
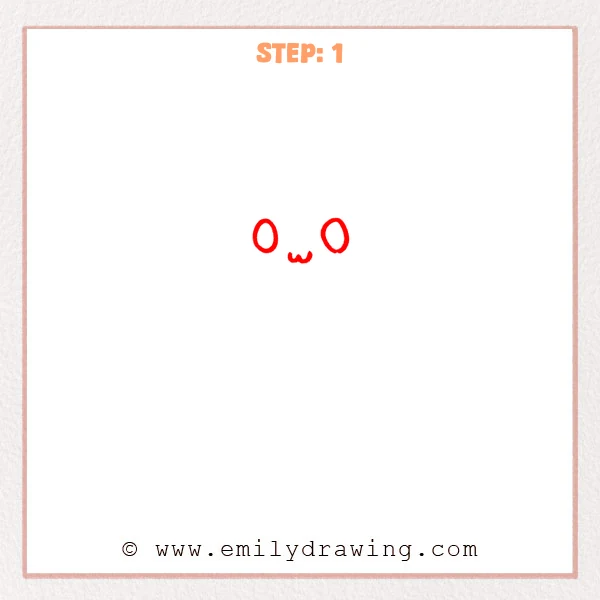
Start with two vertical ovals near the upper area, keeping space between them. Add a small wavy notch below the middle to mark the center connection of the rib cage.
Pro Tip: Keep the two ovals similar in size, with the notch centered between them.
Step 2: Draw the Outer Outline
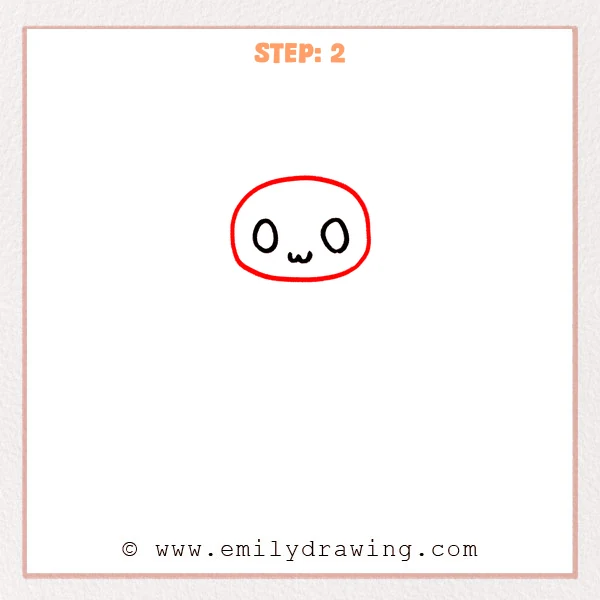
Around the two ovals and center notch, draw one large rounded rectangle. Let the top curve gently upward and keep the bottom slightly flatter to form the upper shape of the rib cage.
Pro Tip: Make the outer outline wider than the inner shapes, leaving even space around them.
Step 3: Add the Central Bone Segments
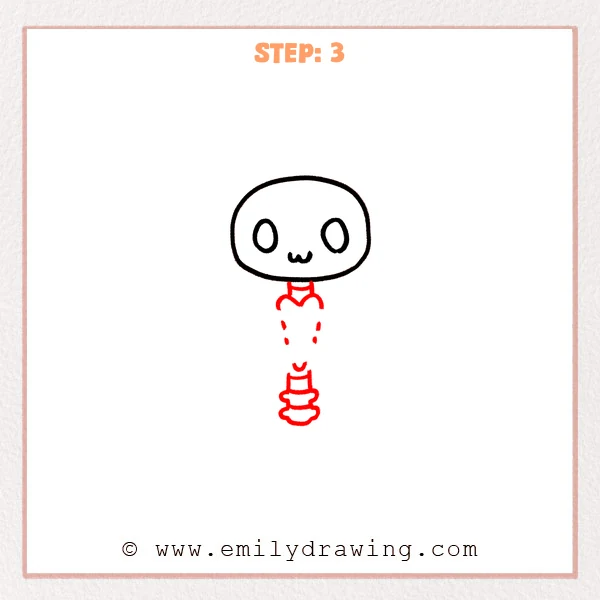
Begin below the upper outline and draw a row of small bone-like segments downward. Connect them with short vertical lines, curves, and rounded blocks to build the center structure of the rib cage.
Pro Tip: Keep these segments centered so the side ribs can look balanced later.
Step 4: Draw the Left Ribs
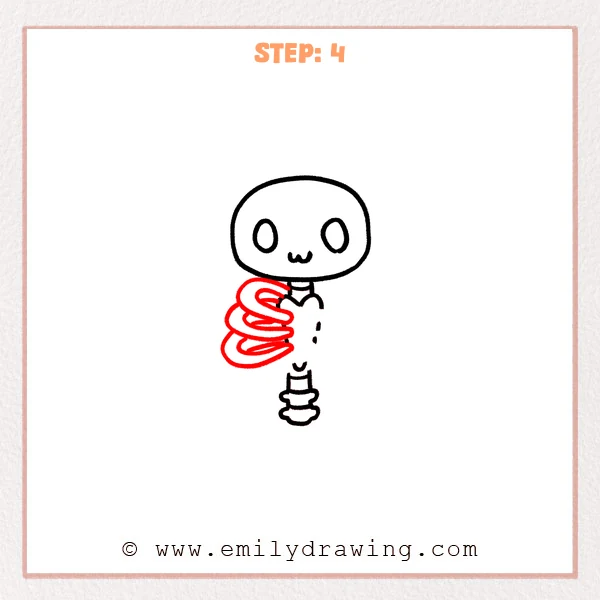
On the left side of the center structure, draw three long curves that sweep outward and return inward. Make each curve feel rounded like a soft loop, stacking them downward to form the left half of the rib cage.
Pro Tip: Let the upper rib be a little smaller and the lower ribs slightly wider for a natural look.
Step 5: Complete the Right and Lower Ribs
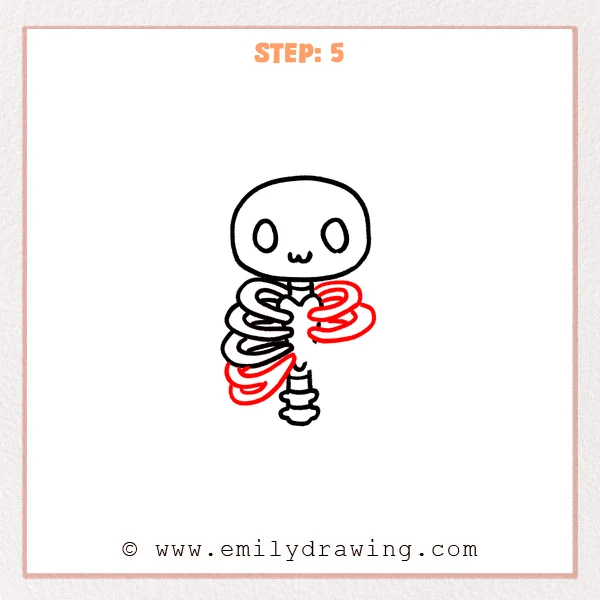
On the right side of the center structure, add several rounded rib curves that sweep outward and bend back. Add one lower curved rib on the left side to make both sides of the rib cage feel more complete.
Pro Tip: Let the right ribs echo the left side, but they do not need to match perfectly.
Step 6: Finish the Lower Right Ribs
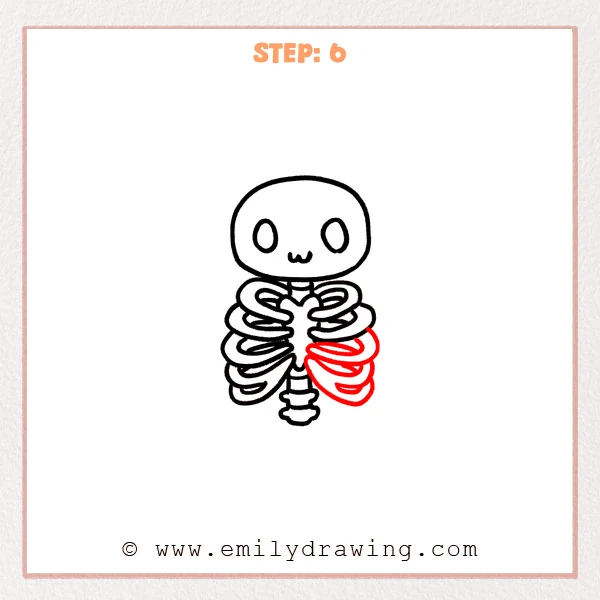
Continue adding curved rib lines on the lower right side, letting them wrap outward and return near the center. These new lines complete the lower right half of the rib cage and make the whole shape feel fuller.
Pro Tip: Let the lower right curves grow gradually larger to give the rib cage more depth.
Step 7: Color in your drawing!
Fun Facts
- The rib cage helps protect important organs like the heart and lungs.
- Ribs curve around the body, which is why rounded lines work well in this drawing.
- Using simple loops makes this rib cage drawing for beginners easier to follow.
Pin it now, Draw later!
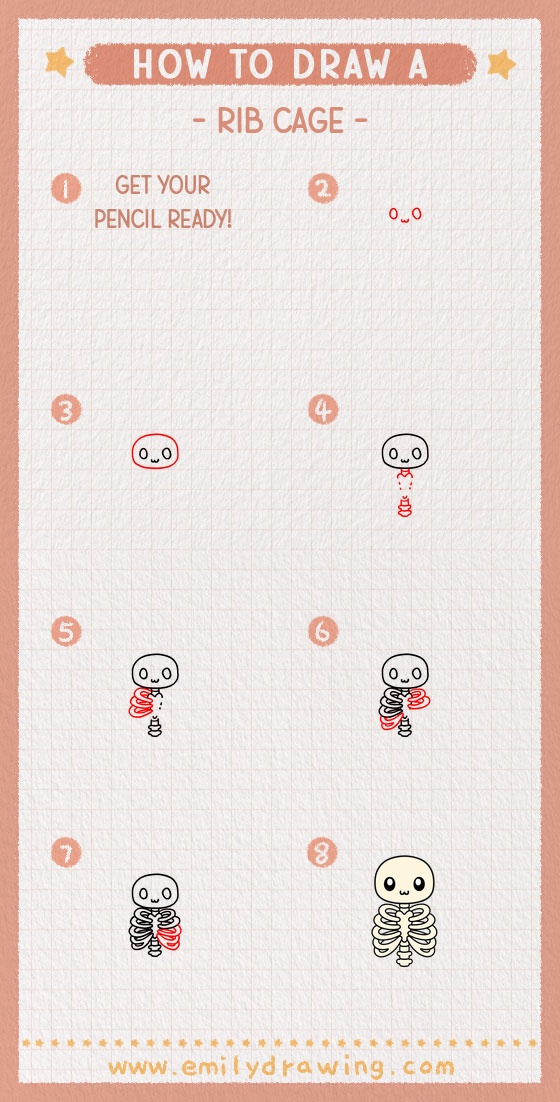
Trace your final lines with a dark marker when you are happy with the shape. Erase extra sketch marks gently, then add light shading inside the rib curves. Keep practicing this step by step drawing, and try drawing the rib cage again with smoother, more even curves.
Get the FREE Printable Drawing Guide
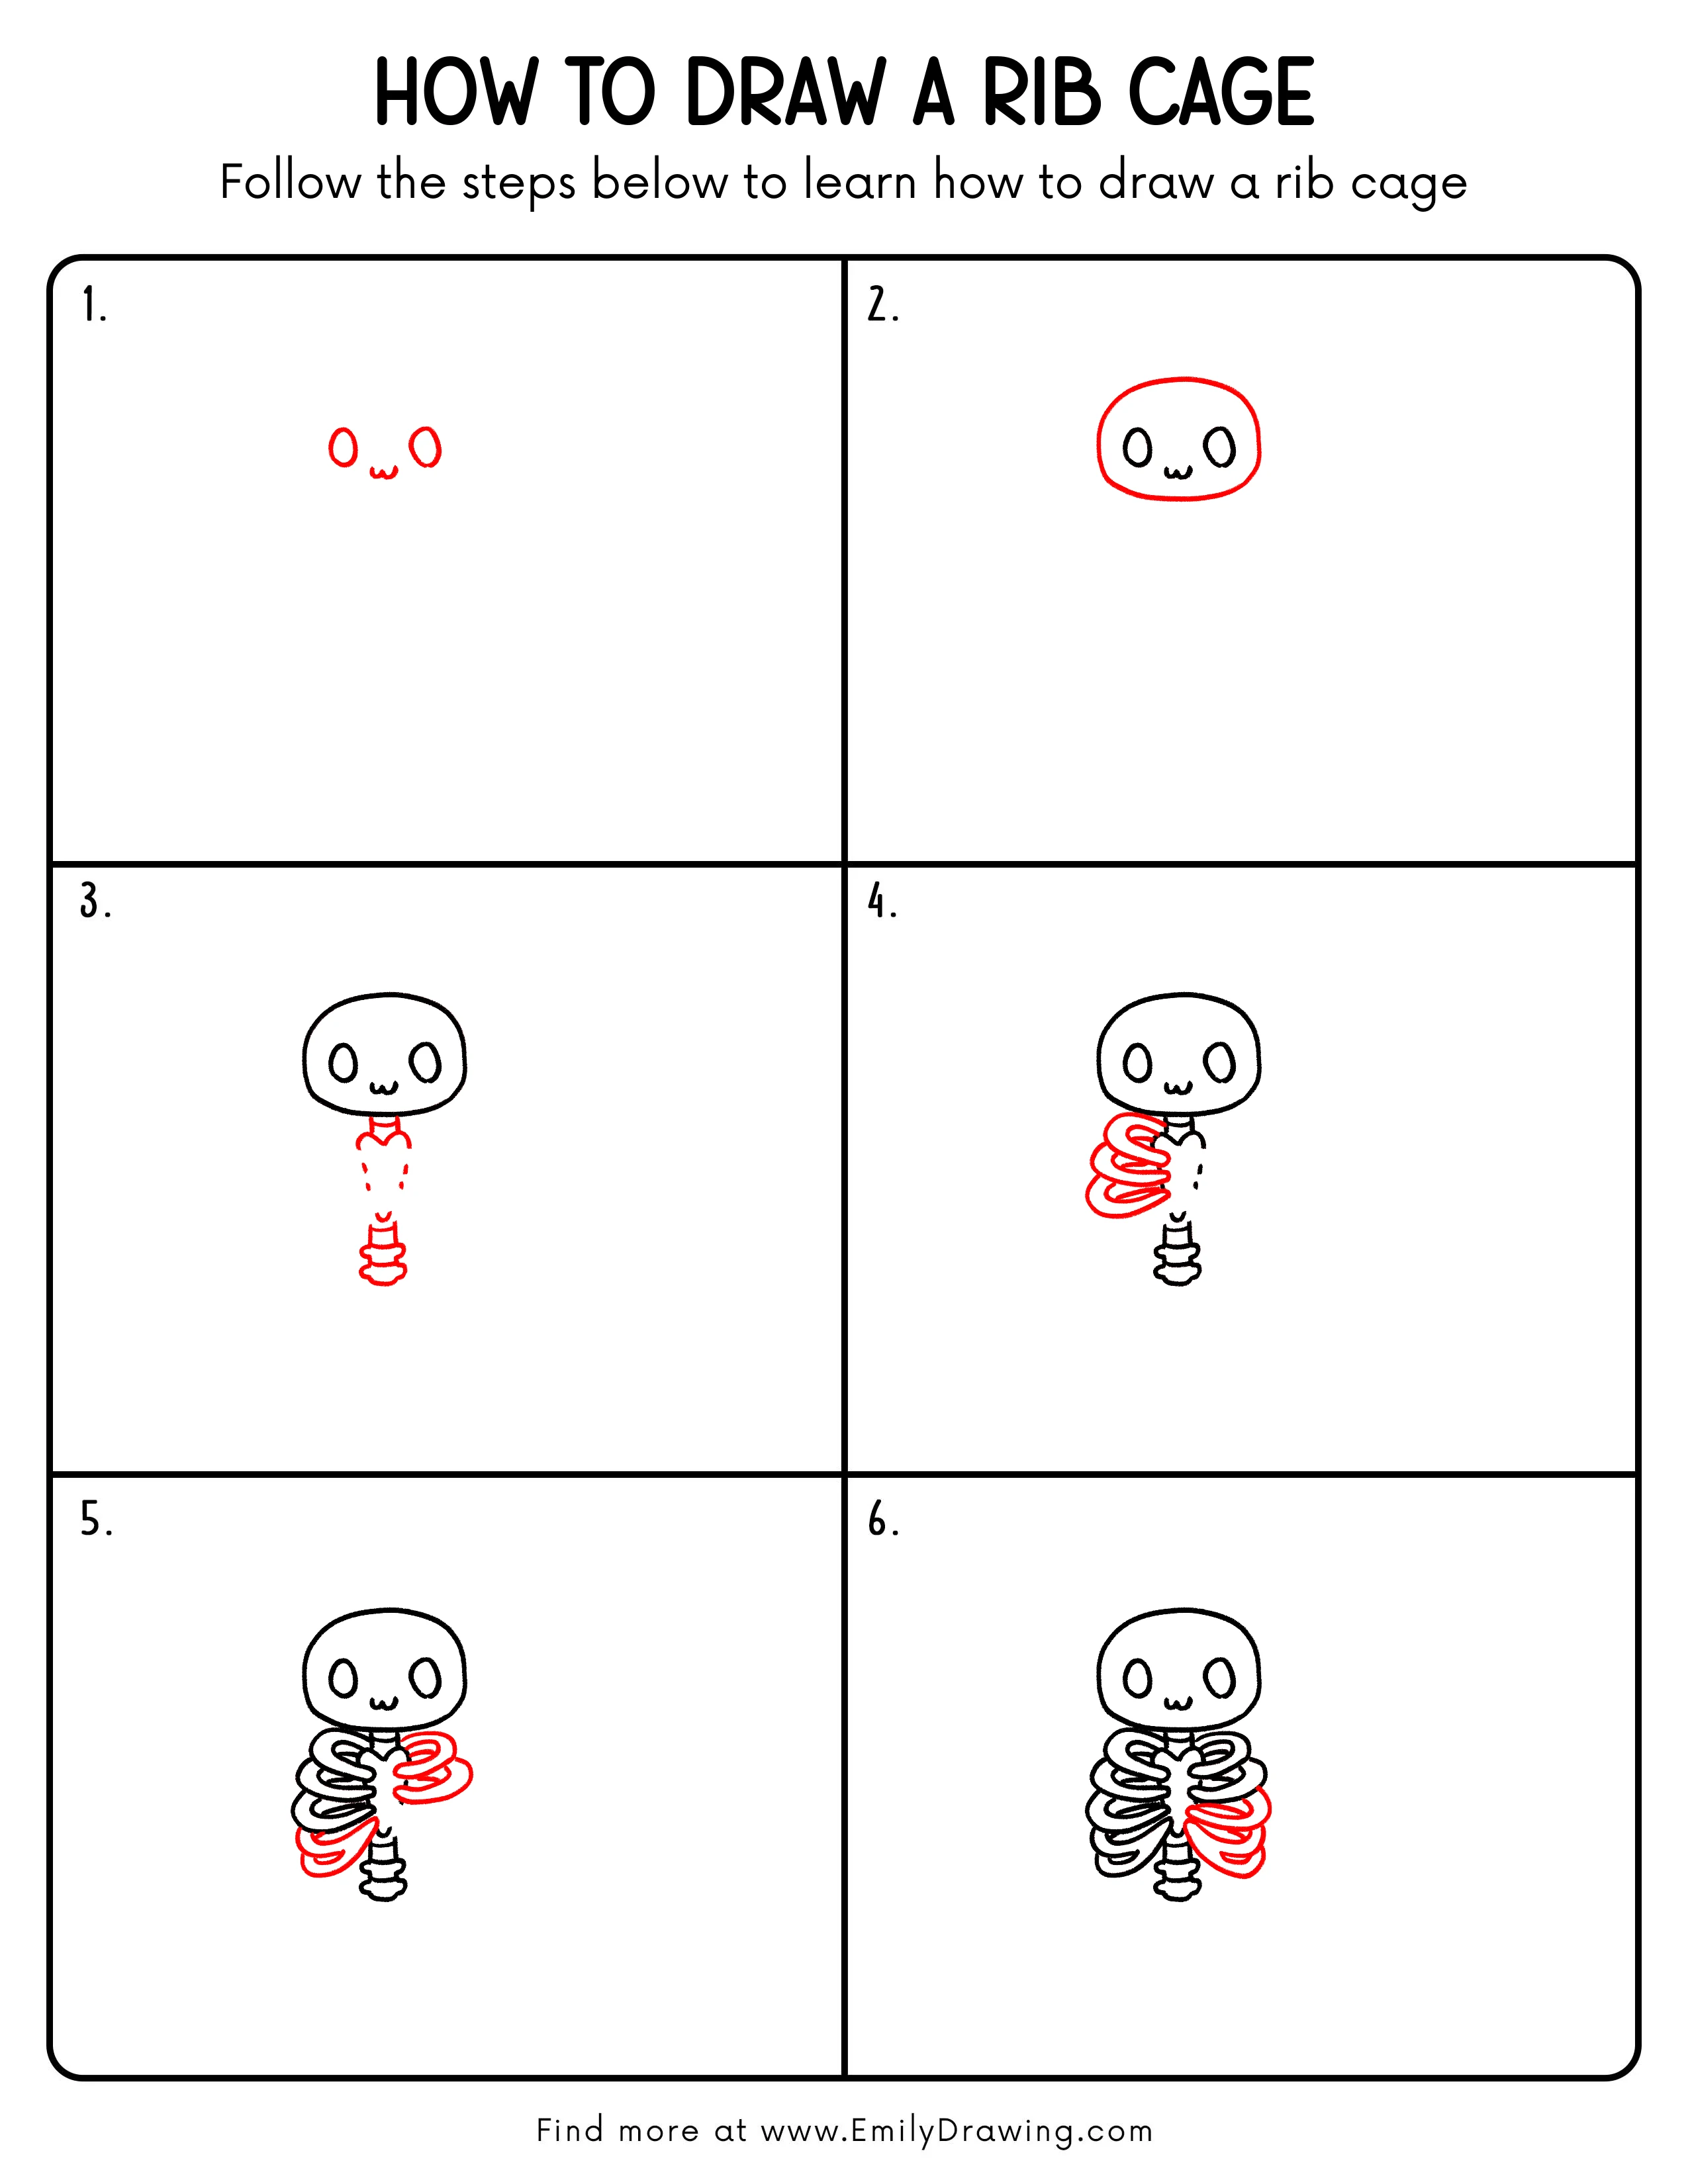
FREE Download Printable Rib Cage Drawing Tutorial
Frequently Asked Questions
Is this rib cage drawing good for beginners?
Yes, this tutorial uses simple ovals, curves, and rounded shapes. It is designed as an easy drawing tutorial for beginners.
How can I make the rib cage look more even?
Start from the center line and compare the left and right curves often. Small differences are fine, but the overall width should feel balanced.
Do I need to draw every rib perfectly?
No, you do not need perfect ribs for this beginner drawing. Focus on the curved rhythm and clear overall shape.