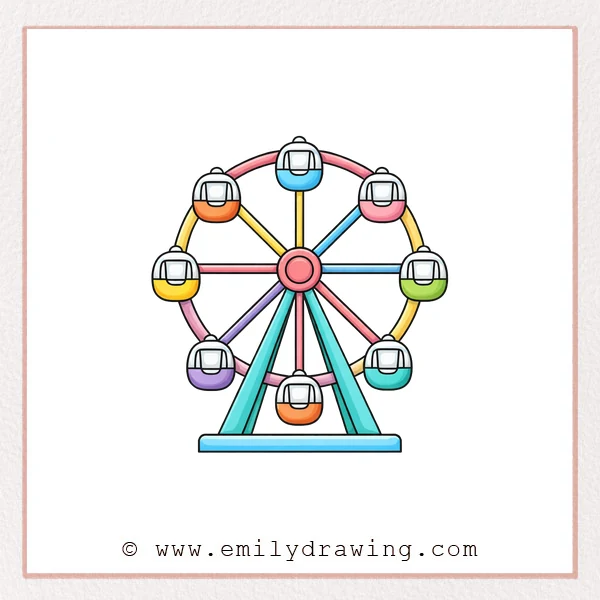
A ferris wheel is a fun subject because it uses simple shapes and clear symmetry. In this easy drawing tutorial, you will build the frame, add spokes, and finish with cabins around the rim. Take your time and keep your lines light until the end.
What You Will Need
- Pencil
- Eraser
- Black pen or marker (optional, for final lines)
- Paper
Here are my RECOMMENDED Art Supplies!
- Crayola Coloring Set (140 Pieces – Mega Value!)
- 24 Colored Crayon Set
- A4 Printer Paper
- Crayola Coloring Pencils
- HP Home Printer with Instant Ink!
Time needed:
28 minutes.
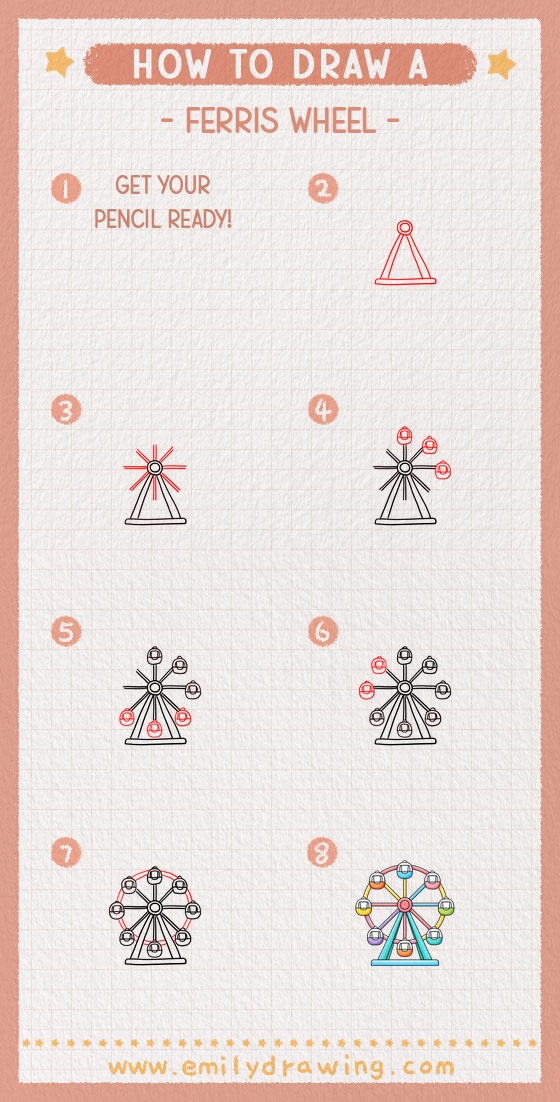
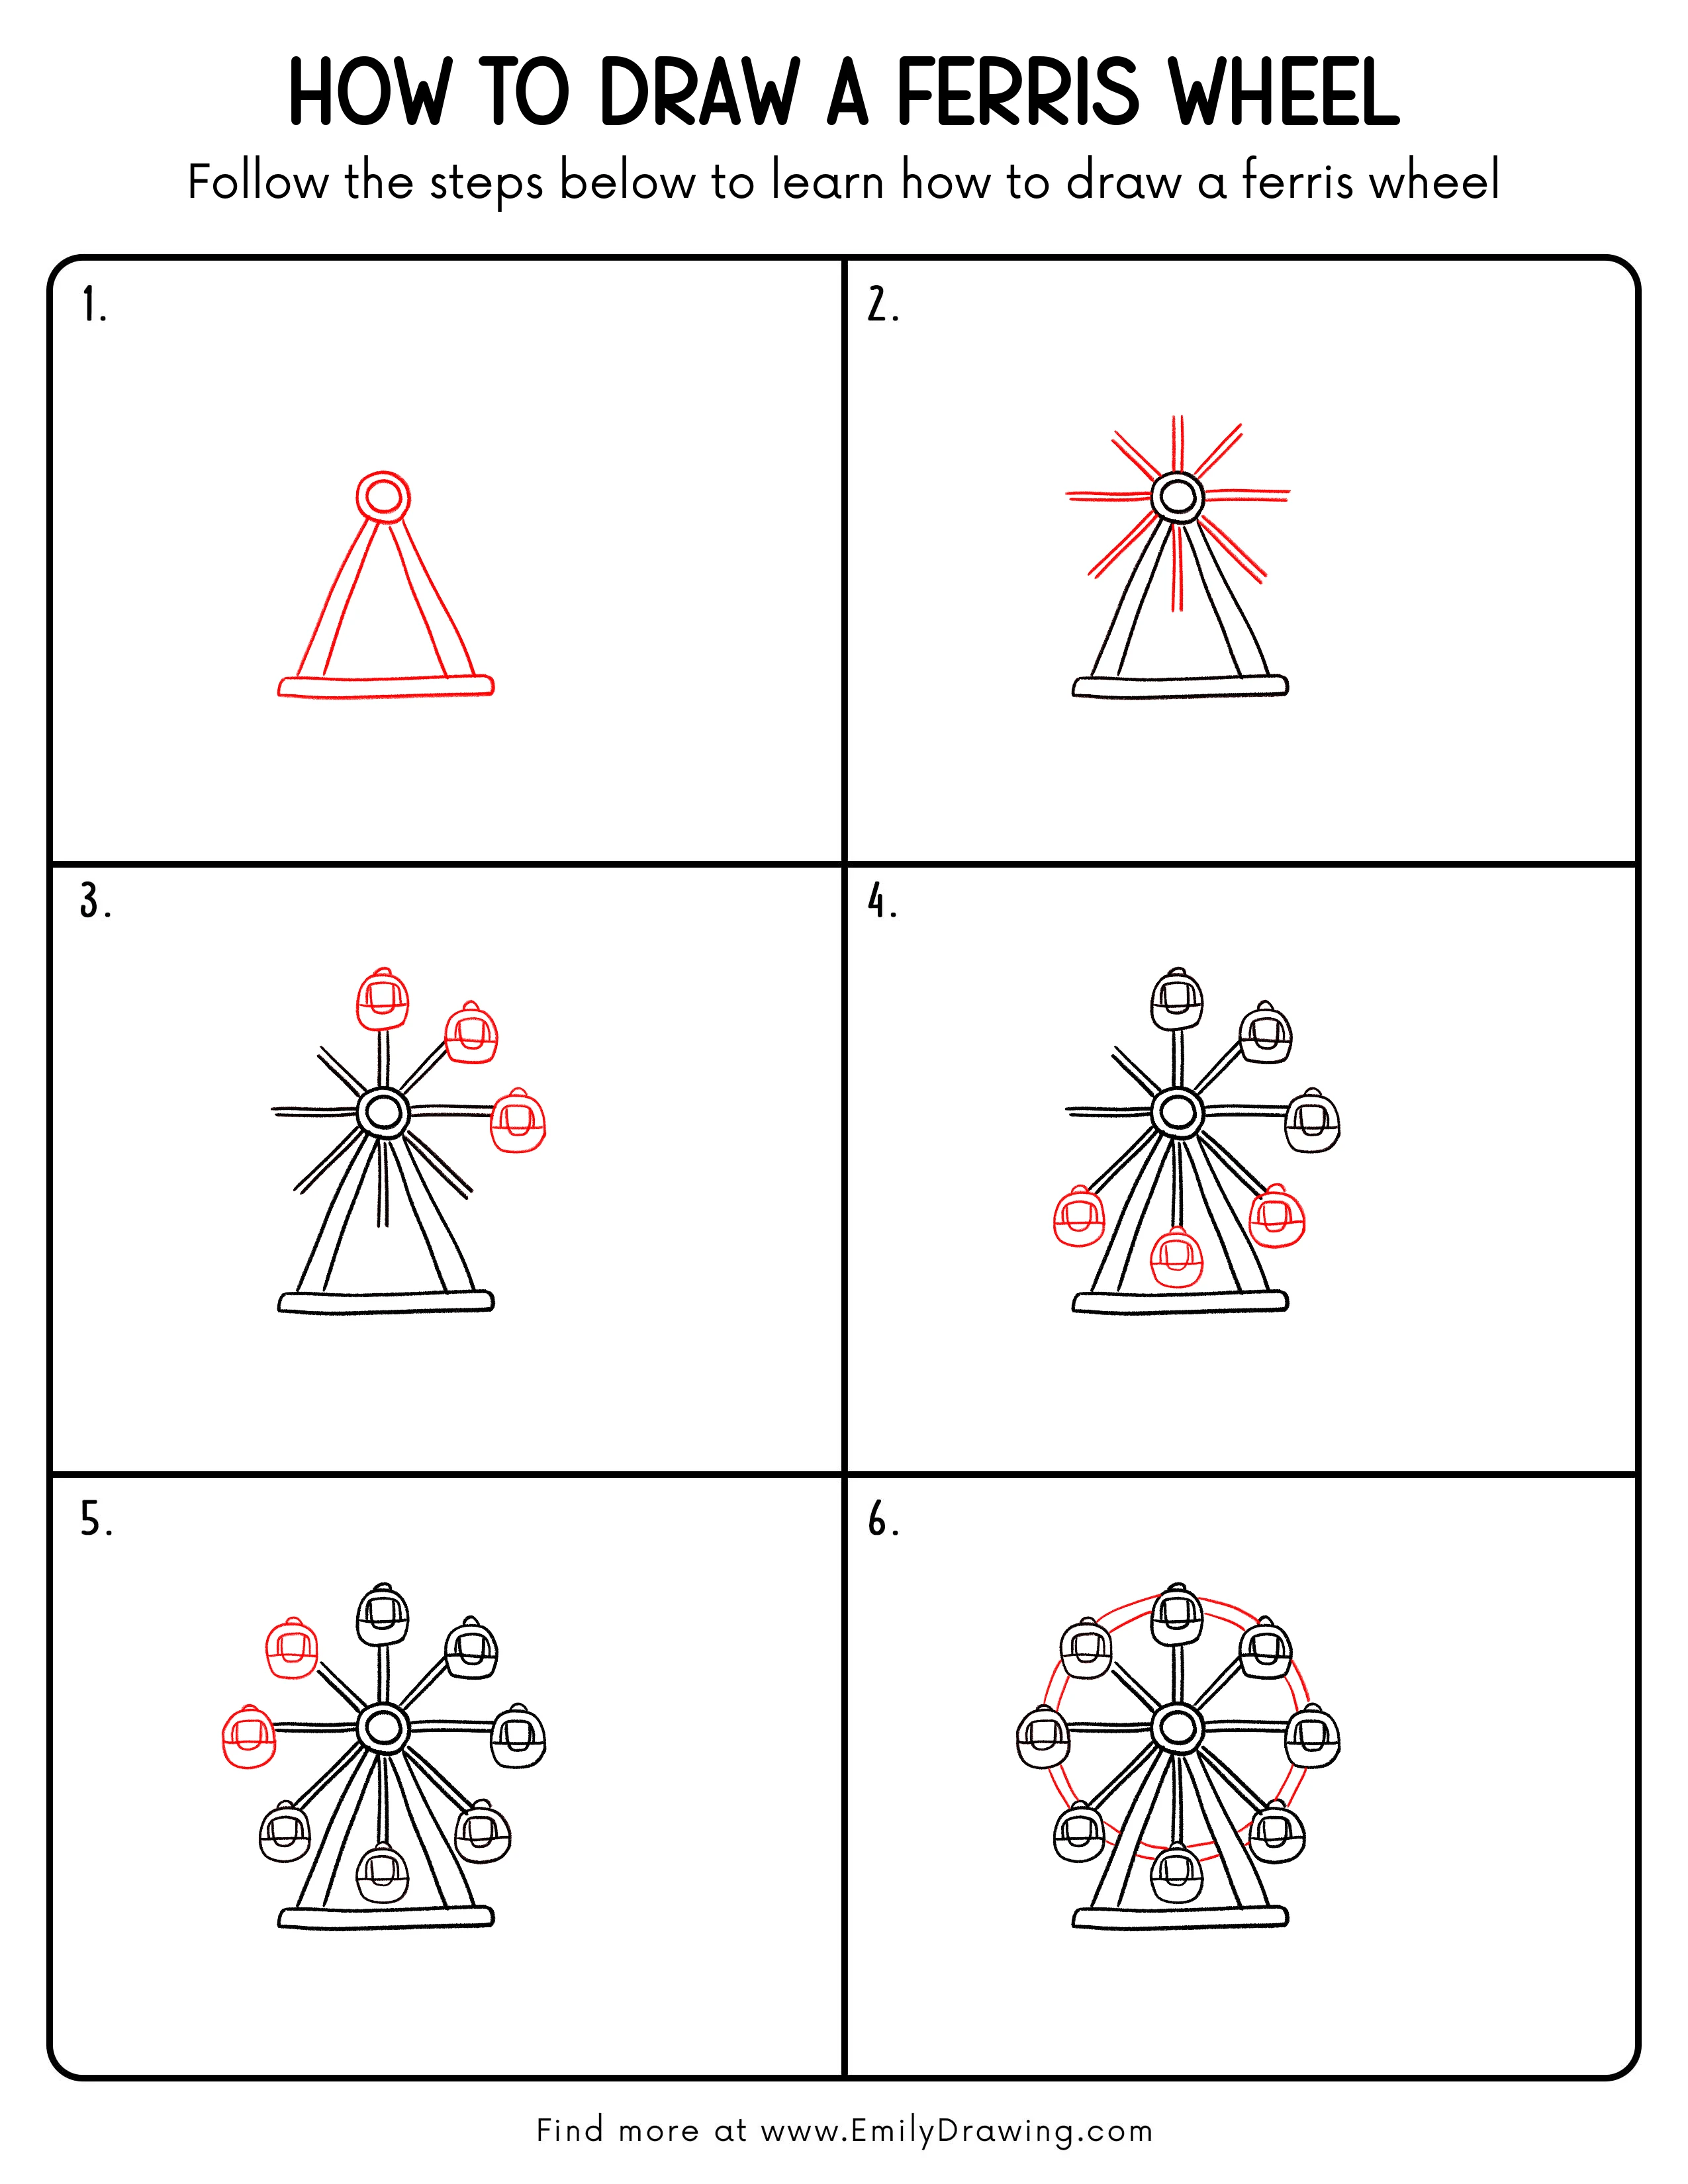
Step-by-Step Drawing Guide
Step 1: Draw the Support Frame and Hub
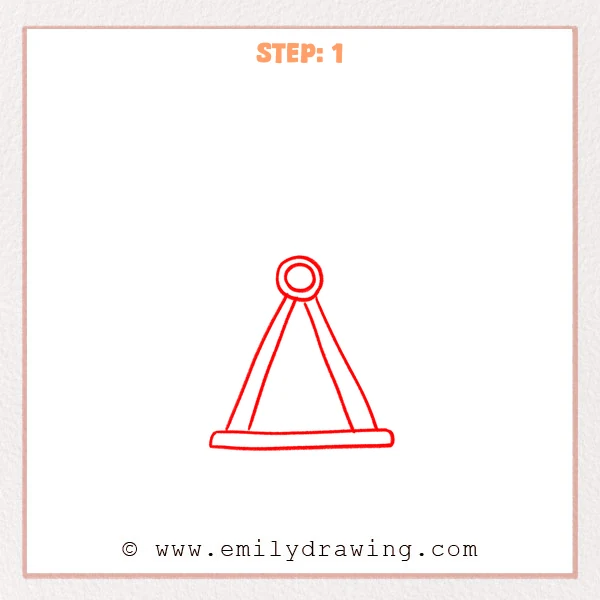
Start with two concentric circles near the top to form the ferris wheel hub. Draw two slanted support beams down from the hub, then add a long rounded base so the beams land neatly on it. Keep the shapes simple and centered.
Pro Tip: Keep both support beams the same length so the base looks stable and balanced.
Step 2: Add the Wheel Spokes
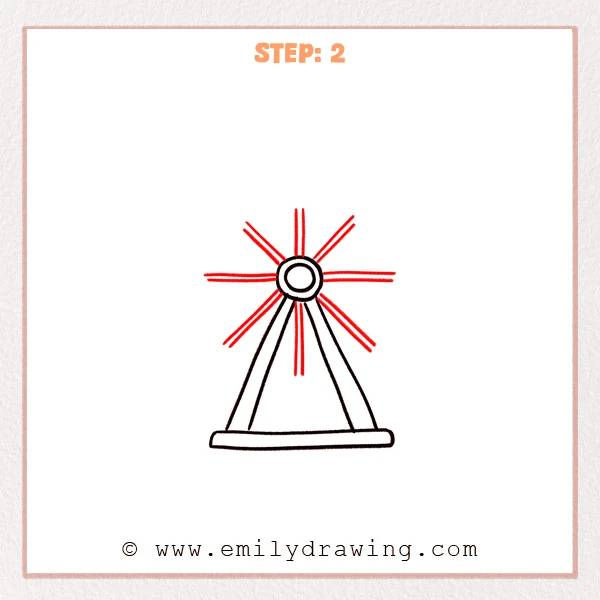
Starting from the hub, draw several straight lines radiating outward, spaced evenly around the circle. Make each spoke a pair of parallel lines to give it a sturdy, metal-like look. Leave room near the ends for the cabins.
Pro Tip: Draw the top, bottom, left, and right spokes first, then fill in the gaps evenly.
Step 3: Draw the Passenger Cabins
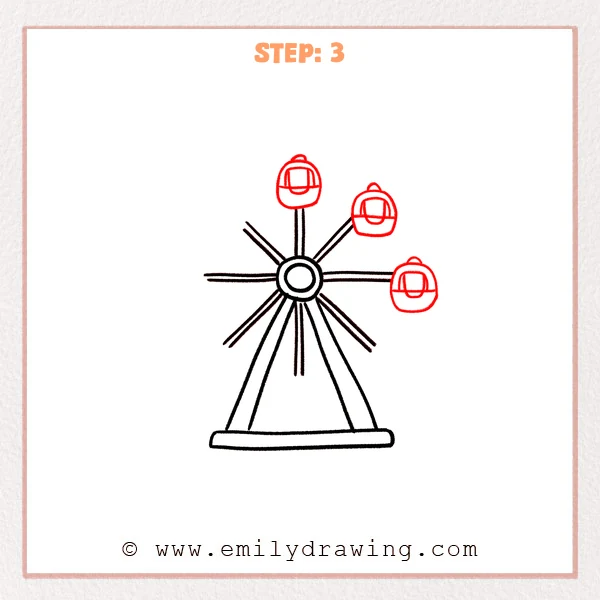
At the ends of a few spokes, draw rounded cabin shapes so they sit around the outer edge. Add a simple window frame and a seat line inside each cabin, plus a small connector on top to show how it hangs. Keep the cabin details consistent.
Pro Tip: Keep the cabins the same size and place them right at the spoke tips for a clean look.
Step 4: Add More Cabins
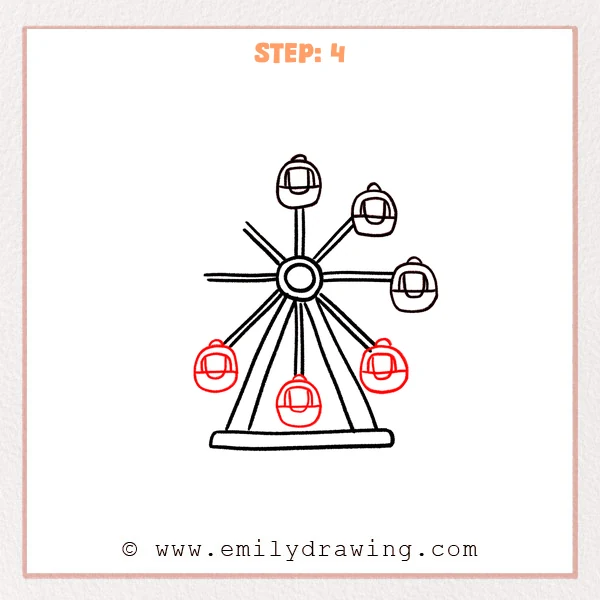
Add more cabins to the ends of the lower spokes so the wheel feels more complete. Keep the same rounded shape, then repeat the window frame and seat line inside each new cabin. This helps the wheel read as a full ride, not just a few seats.
Pro Tip: Align the new cabins along the same outer circle so they look evenly placed.
Step 5: Complete the Left-Side Cabins
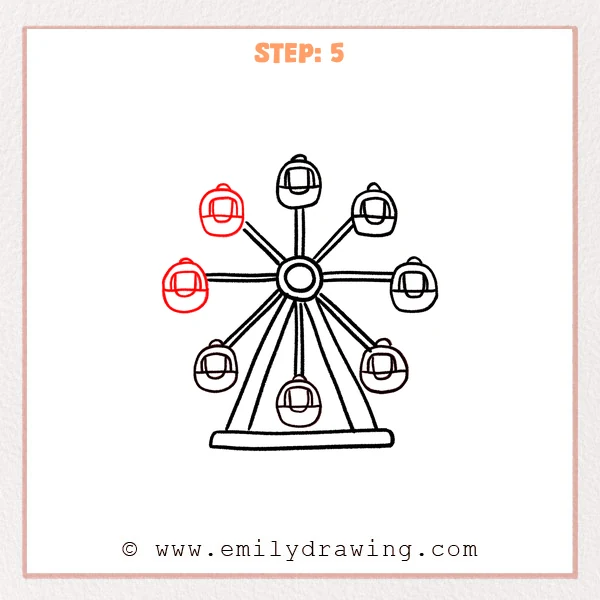
Add two more matching cabins at the ends of the upper-left and left horizontal spokes to fill the outer ring. Repeat the same window frame, seat line, and small top connector so the new cabins match the others. Check spacing so the cabins feel evenly distributed.
Pro Tip: Compare left and right spacing lightly so the new cabins sit on the same outer circle.
Step 6: Draw the Outer Rim
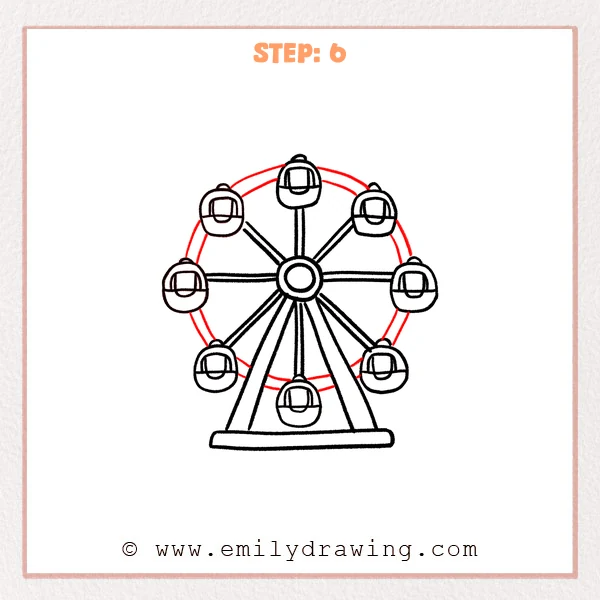
Draw a large circle around the cabins to connect the spoke ends into a full wheel rim. Add a second, parallel circle beside it to create a double-line rim and make the wheel look thicker. Let the rim pass behind the cabins so the layers feel clear.
Pro Tip: Let the rim lines pass behind the cabins so the wheel reads as layered.
Step 7: Color in your drawing!
Fun Facts
- Ferris wheels are named after George Washington Gale Ferris Jr., who built a famous early wheel for a world’s fair.
- The cabins are designed to stay upright as the wheel turns, often using gravity and pivot points.
- Many ferris wheels have lighting patterns that make the rim and spokes glow at night.
Pin it now, Draw later!
Trace your final lines with a pen, then erase any extra sketch marks. You can add small bolts on the hub, stripes on the base, or tiny reflections in each cabin window for extra detail. Now you have a clean, step by step drawing of a ferris wheel—try coloring it and drawing a simple fairground scene behind it.
Get the FREE Printable Drawing Guide
FREE Download Printable Ferris Wheel Drawing Tutorial
Frequently Asked Questions
How do I keep the ferris wheel symmetrical?
Start with the hub centered, then place spokes in opposite pairs (top and bottom, left and right). Light guidelines help you keep spacing even.
How many cabins should I draw?
Choose any number that fits your wheel, but keep the spacing consistent. If you add more cabins, make them slightly smaller so they do not crowd the rim.
My rim looks uneven—what can I do?
Sketch the rim lightly in short curved sections and adjust as you go. You can also redraw the circle using a round object as a guide.