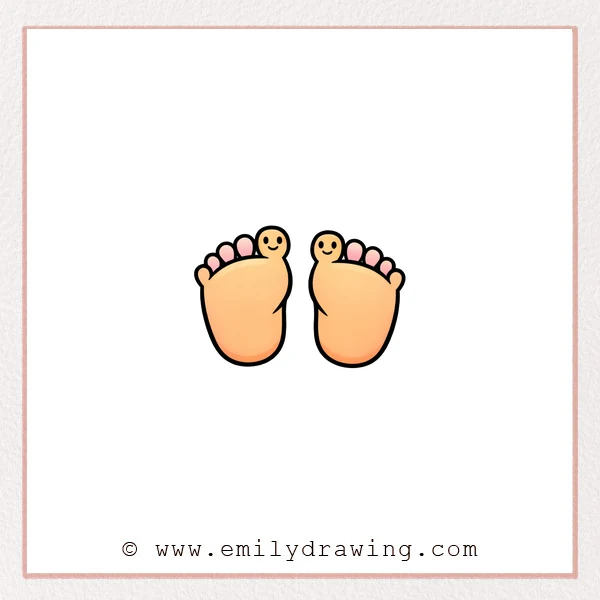
Learning how to draw feet can feel tricky at first, so we will keep it simple.
This step by step drawing guide uses smooth curves and friendly shapes.
Take your time, and focus on clean, rounded lines.
What You Will Need
- Pencil or marker
- Eraser (if using pencil)
- Plain paper
- Optional: colored pens for final outlines
Here are my RECOMMENDED Art Supplies!
- Crayola Coloring Set (140 Pieces – Mega Value!)
- 24 Colored Crayon Set
- A4 Printer Paper
- Crayola Coloring Pencils
- HP Home Printer with Instant Ink!
Time needed:
14 minutes.
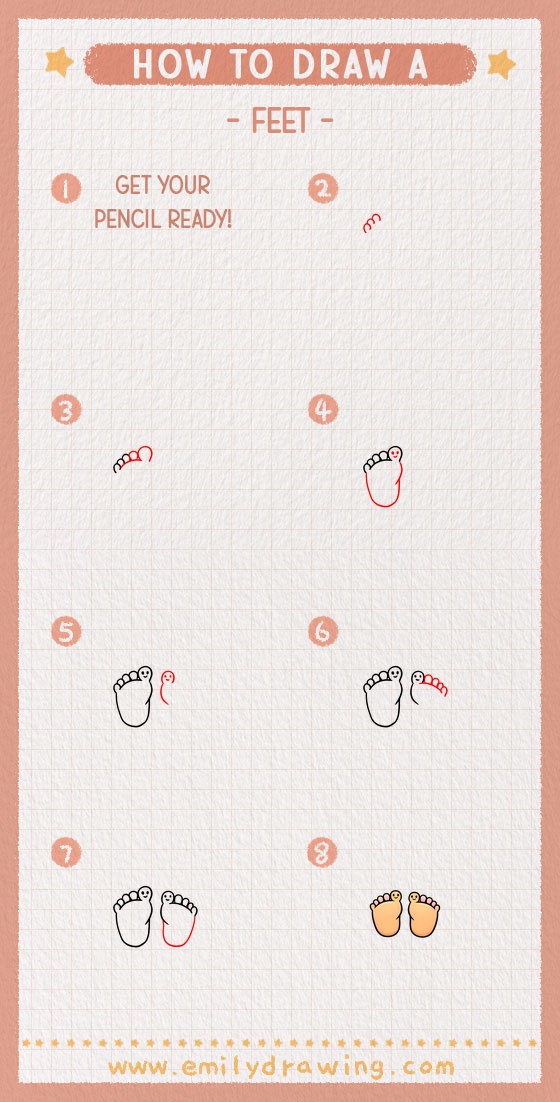
Step-by-Step Drawing Guide
Step 1: Sketch the Toe Curves
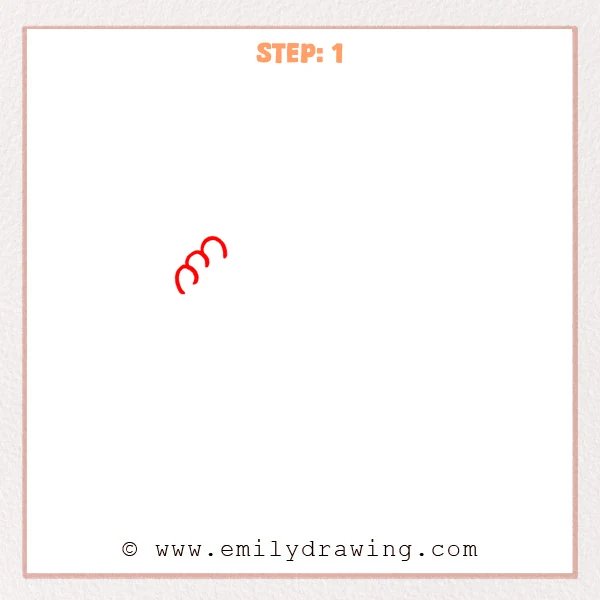
Start with one larger curved stroke to suggest the outer toe edge.
Add a few smaller curves beside it to form a row of toes that taper in size.
Keep the shapes open and light for now.
Pro Tip: Vary each curve’s height a little so the toes feel more natural.
Step 2: Complete the Toes and Add the Top Foot Curve

Add the remaining toe outlines so the row of toes feels complete.
Draw a long curved line across the toe bases for the top of the foot.
Make the big toe larger and rounder than the others.
Pro Tip: The big toe is usually tallest and widest, so keep its curve fuller.
Step 3: Outline the Sole and Add a Face
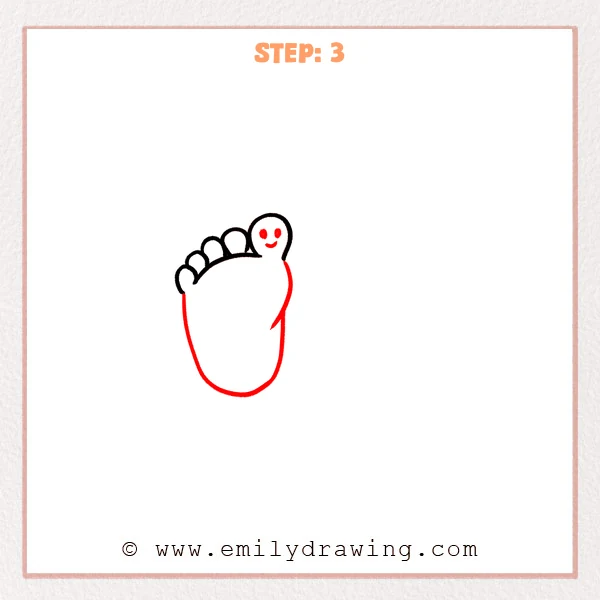
From beneath the toes, draw a long curve down and around to form the sole and heel.
Aim for a rounded, bean-like footprint shape.
Add two small eyes and a curved smile on the big toe for a playful look.
Pro Tip: Make the heel rounder and slightly wider than the forefoot for a footprint look.
Step 4: Ink the Main Footprint and Add a Little Buddy
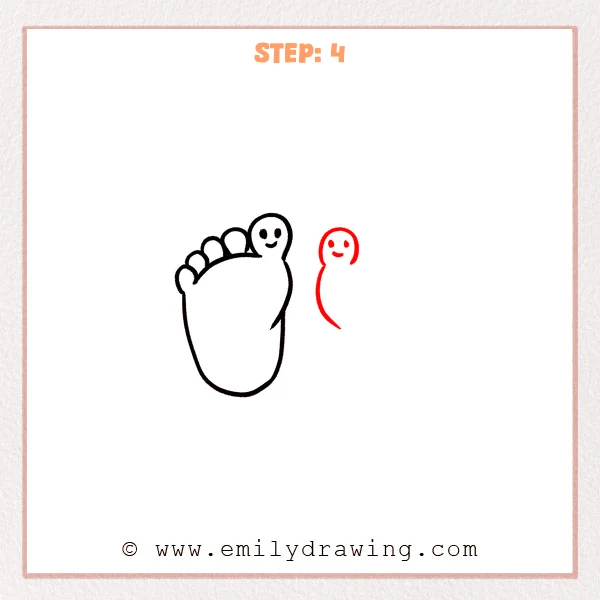
Trace the footprint outline and toe edges with cleaner lines to make it look finished.
Keep the curves smooth, and remove any wobbly sketch marks.
Off to the side, draw a small round head with a curved body line and a simple face.
Pro Tip: When inking, try longer smooth strokes to keep the lines steady.
Step 5: Start the Toes on the Second Footprint
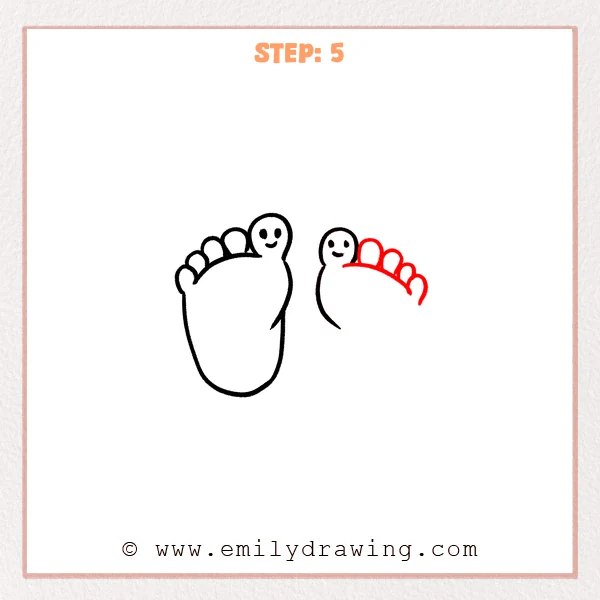
Next to the buddy, draw a curved line for the toe base.
Add several rounded toe half-ovals along the curve.
Let the toes taper smaller across the row, and extend the outermost toe a bit.
Pro Tip: Leave tiny gaps between toes so the shapes read clearly.
Step 6: Outline the Second Footprint Sole
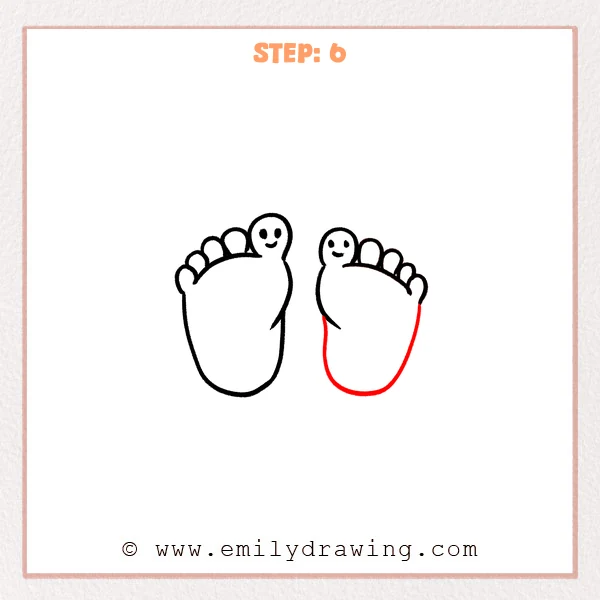
From under the new toes, draw a long curve down and around to form the second sole and heel.
Keep the bottom round and full, matching the style of the first footprint.
Add a small inward dip on the inner side to suggest the arch.
Pro Tip: Keep the second heel just as round so it matches the first footprint.
Step 7: Color in your drawing!
Fun Facts
- Most people have one foot that is slightly longer than the other.
- Footprints look wider at the heel and narrower near the arch.
- Toes usually get shorter from the big toe to the smallest toe.
Pin it now, Draw later!
You can thicken the final outlines to make the feet pop.
Try adding light color, patterns, or tiny accessories to the characters.
Now you know how to draw feet step by step, so draw a whole footprint family next.
Get the FREE Printable Drawing Guide

FREE Download Printable Feet Drawing Tutorial
Frequently Asked Questions
Why do my toes look uneven?
Toes often vary in height, so small differences are normal.
Keep your toe curves smooth and gently staggered.
How do I make the footprint look cute instead of realistic?
Use simple rounded shapes and keep details minimal.
Adding a small face or blush dots makes it feel friendly.
What is the easiest way to practice drawing for beginners?
Repeat the same easy drawing tutorial a few times in small sizes.
Each repetition will make your curves cleaner and more confident.