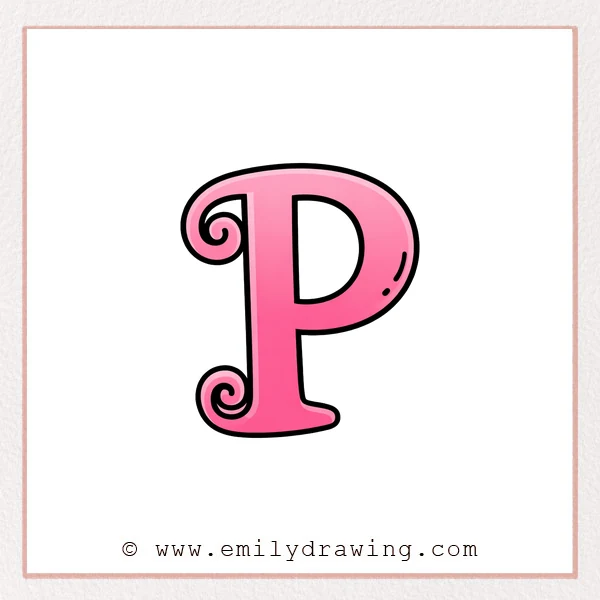
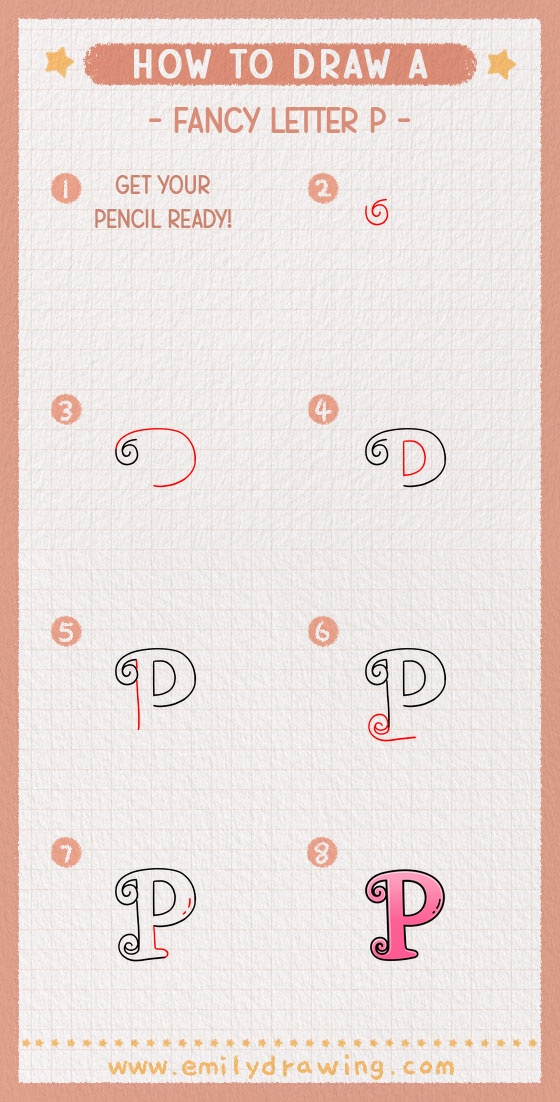
This easy drawing tutorial shows how to draw a fancy letter P with smooth swirls.
You will build the letter step by step, starting with simple curves and spirals.
Take your time, and keep your lines light until you like the shape.
What You Will Need
- Pencil and eraser (or a tablet and stylus)
- Black pen or marker for final lines
- A smooth sheet of paper
- Optional: a ruler for guiding the main stem
Here are my RECOMMENDED Art Supplies!
- Crayola Coloring Set (140 Pieces – Mega Value!)
- 24 Colored Crayon Set
- A4 Printer Paper
- Crayola Coloring Pencils
- HP Home Printer with Instant Ink!
Time needed:
25 minutes.
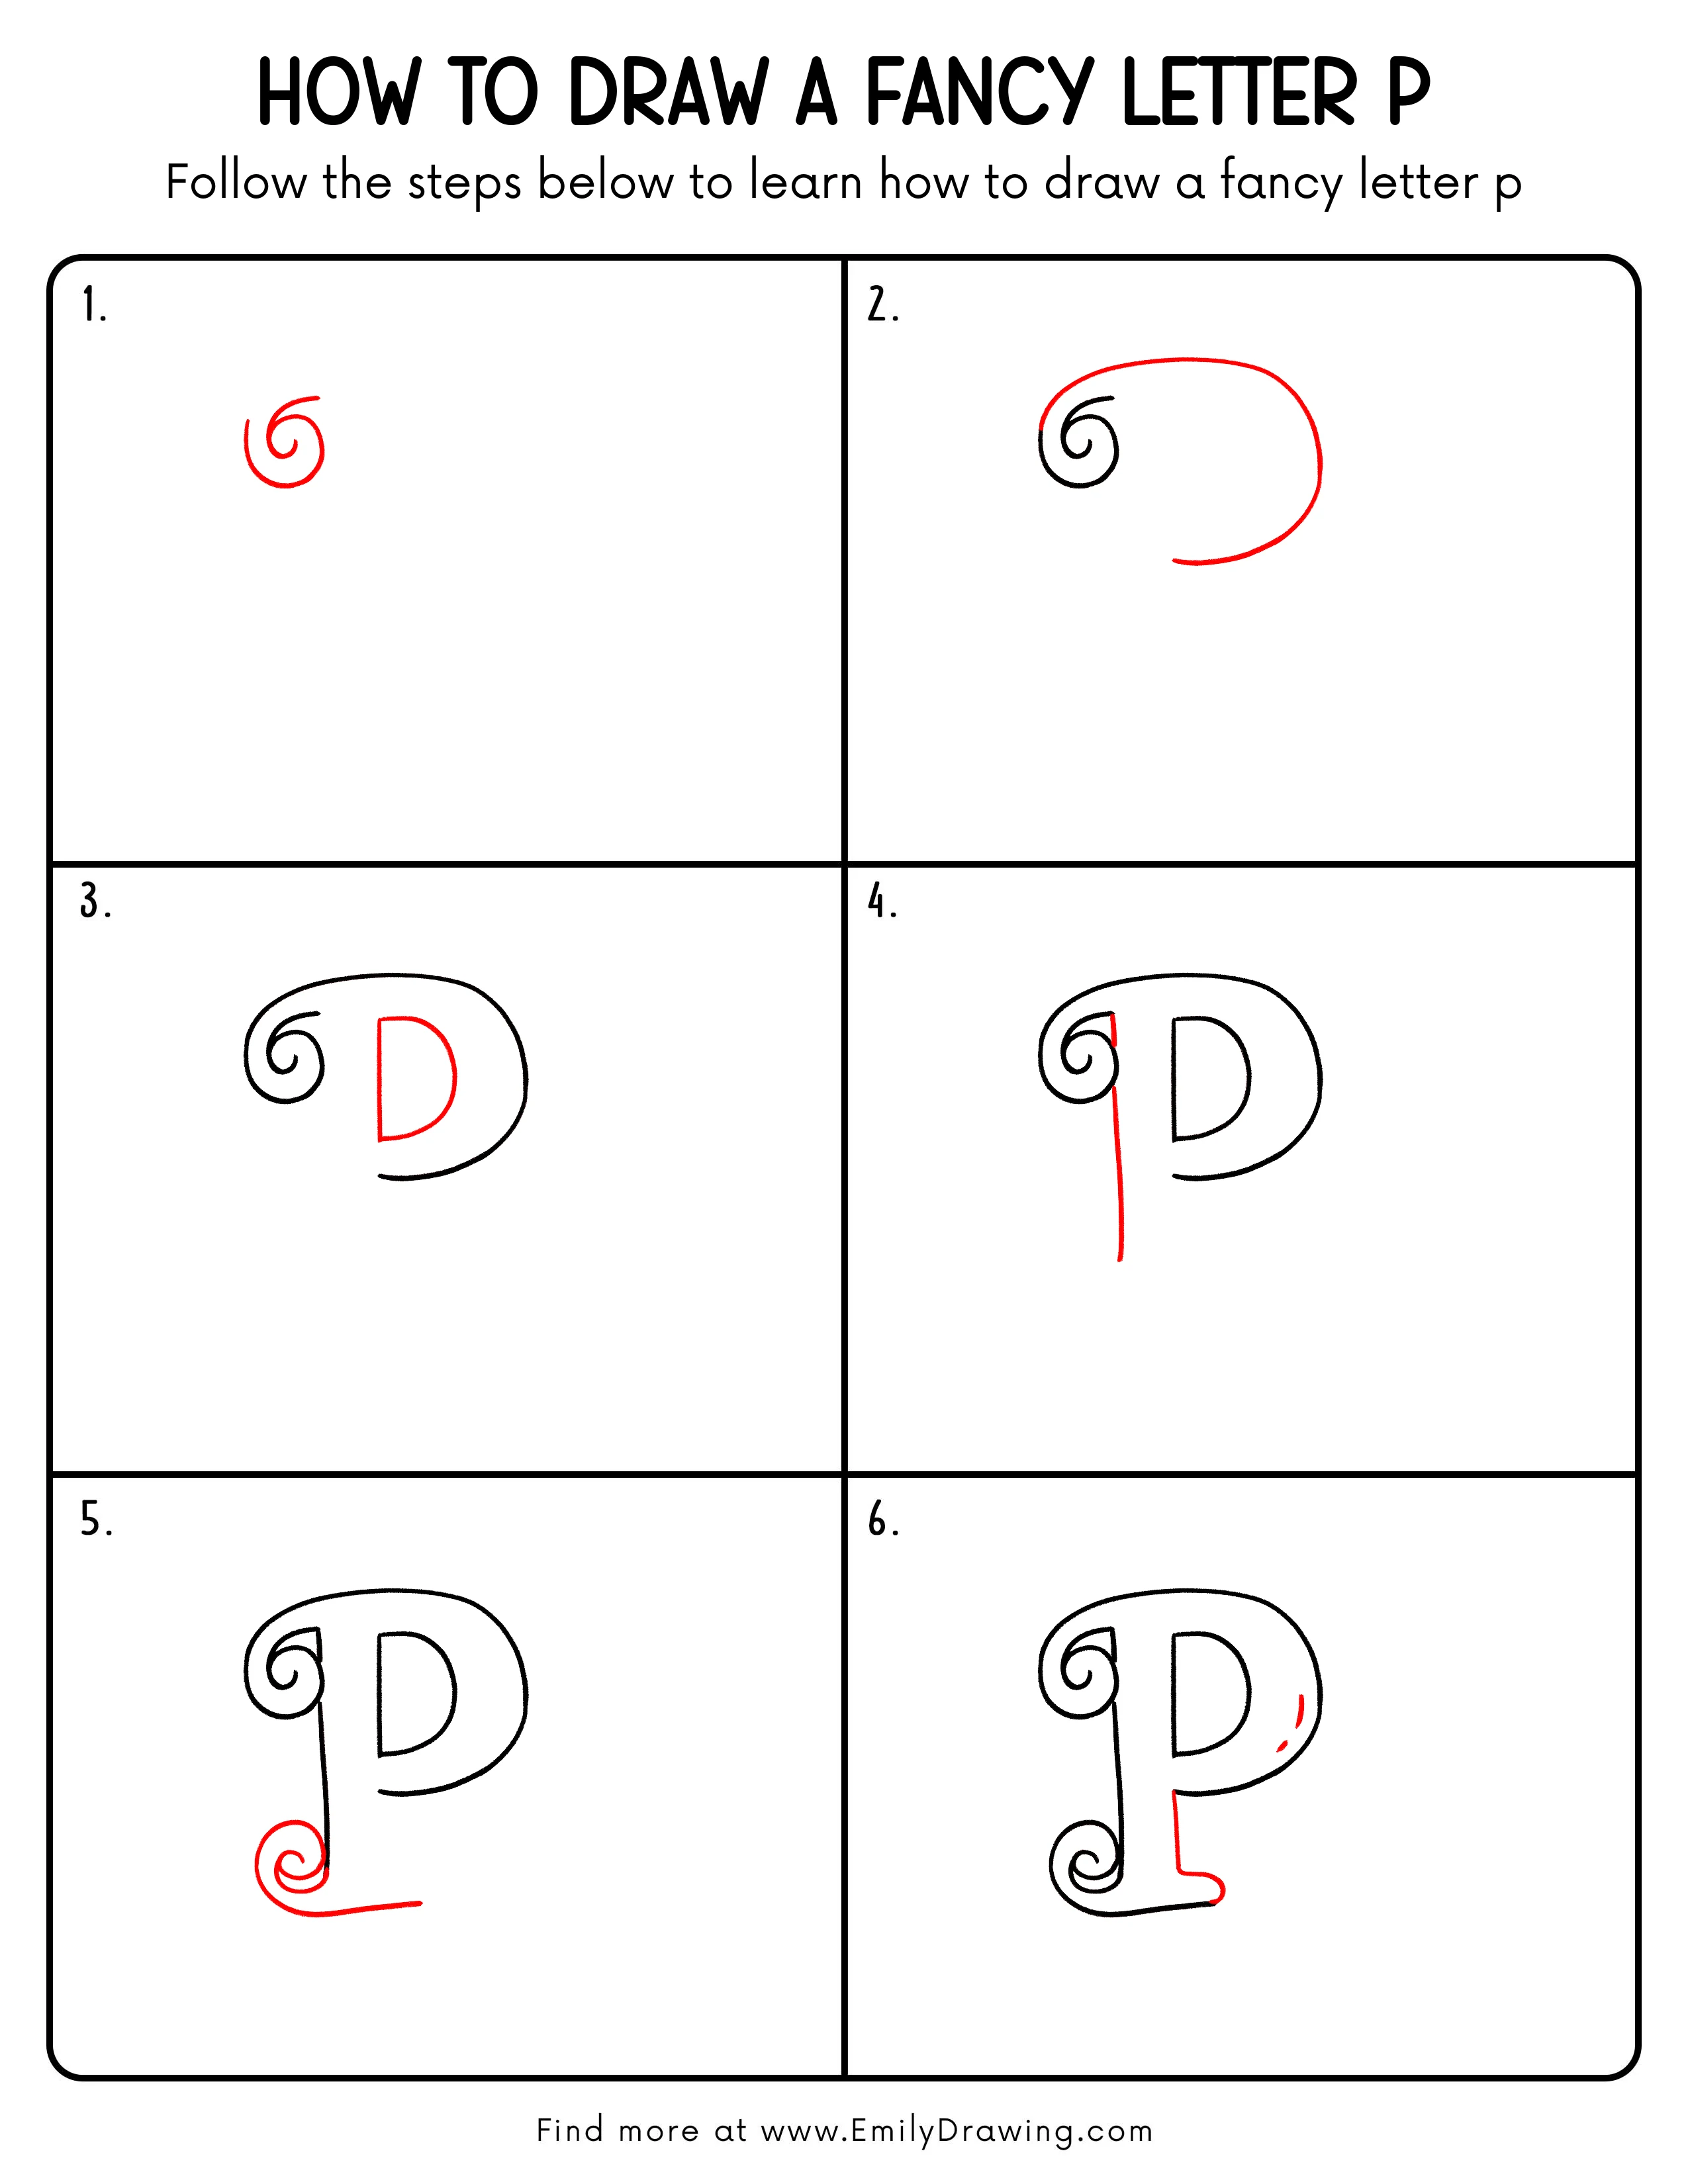
Step-by-Step Drawing Guide
Step 1: Draw the Main Spiral Stroke
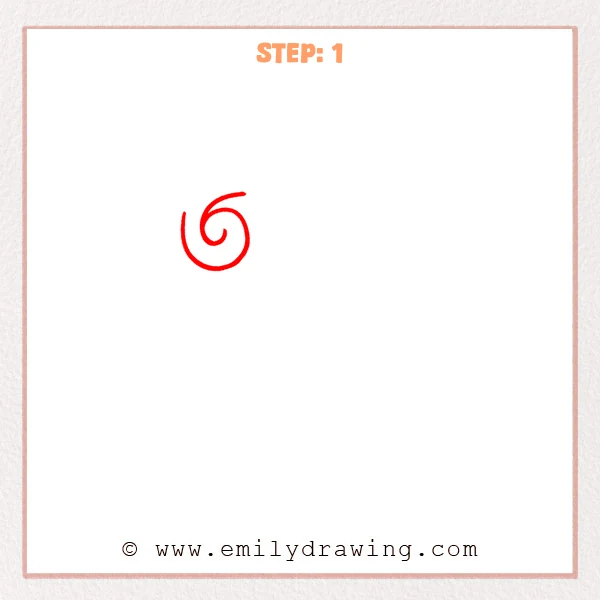
Start with one smooth spiral that curls inward to form an elegant center swirl.
Leave a wider outer curve around the spiral so the stroke finishes with a graceful sweep.
Pro Tip: Lightly plan a round path first, then trace it with thicker pressure for steadier curves.
Step 2: Add the Large Outer Curved Stroke

Extend a long curve from above the spiral, sweeping up and to the right like a big dome.
Keep the curve flowing down the right side and back inward, ending with a small open gap for now.
Pro Tip: Make the outer loop about two to three times larger than the inner spiral.
Step 3: Add the Main Stem and Bowl of the Letter “P”
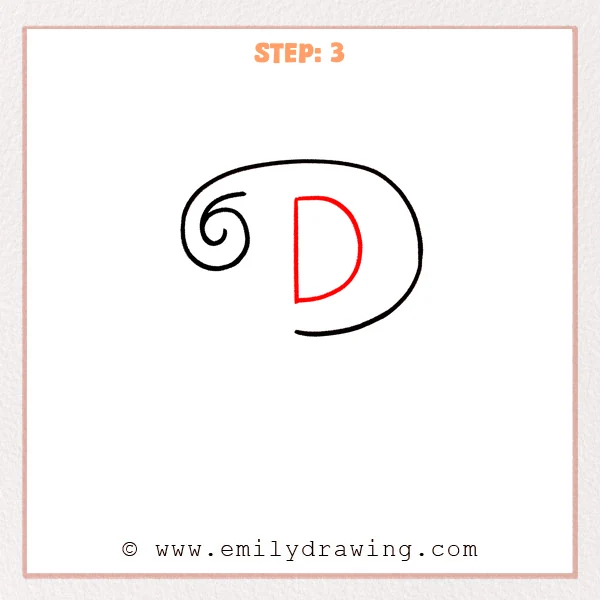
Inside the large outer flourish, draw a vertical stem near the center, slightly tapering at the bottom.
From the upper half of the stem, curve a rounded half-oval to the right and connect it back to the stem to form the “P” bowl.
Pro Tip: Line up the bowl’s widest point near the spiral’s center to keep the letter balanced.
Step 4: Add the Long Downward Stem Stroke
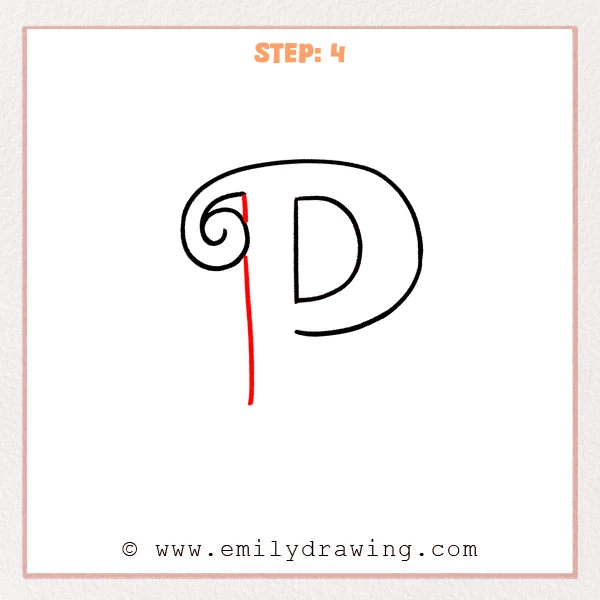
Next to the left spiral, pull a long straight line downward to form the extended main stem of the fancy “P”.
Keep the stem close to the flourish so it feels connected, but don’t squeeze the spiral.
Pro Tip: Aim for one confident straight pull, and lightly guide the vertical direction first if needed.
Step 5: Add the Bottom Spiral Flourish
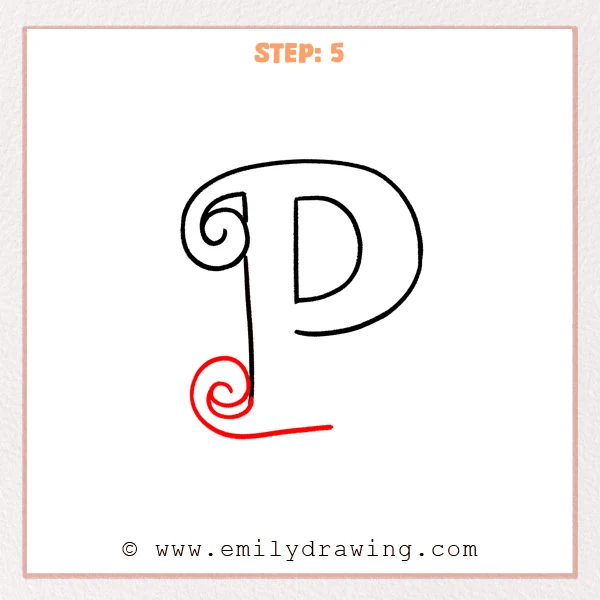
At the bottom of the stem, draw a small spiral that curls to the left and loops back near the stem.
From the outside of that spiral, extend a thin horizontal sweep to the right to create a graceful tail.
Pro Tip: Keep the bottom spiral smaller—about half the size of the top spiral for harmony.
Step 6: Add the Right Bottom Foot and Small Highlight Strokes
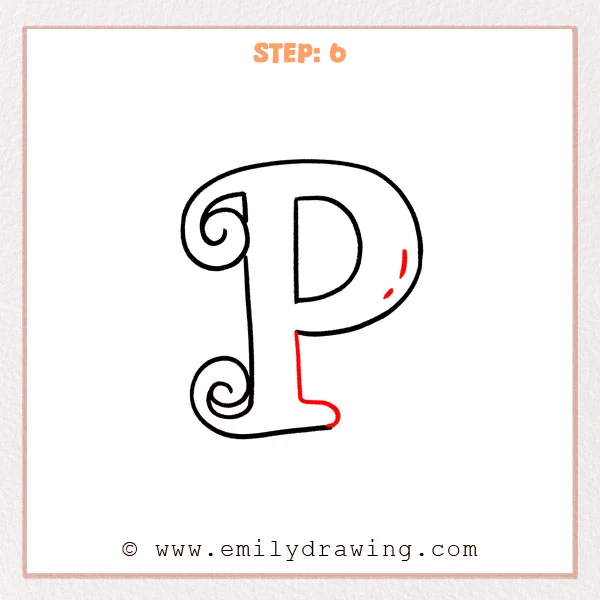
Add a short vertical stroke on the lower right, then curve it into a small foot so the “P” sits firmly.
Place two or three short curved marks inside the right outer loop as simple highlight accents, keeping them brief.
Pro Tip: Keep the bottom foot’s curve gentler than the outer loop so it doesn’t steal attention.
Step 7: Color in your drawing!
Fun Facts
- Fancy letters like this are inspired by calligraphy, where strokes change direction smoothly.
- Spirals are a classic flourish because they guide the eye and feel balanced.
- Many decorative alphabets use extra loops to make initials look special.
Pin it now, Draw later!
Trace your favorite lines with a darker pen, and erase any sketch marks you no longer need.
You can thicken the main strokes and keep the highlight marks thin for contrast.
Now you know how to draw a fancy letter P with a swirl—try drawing your initials next.
Get the FREE Printable Drawing Guide
FREE Download Printable Fancy Letter P Drawing Tutorial
Frequently Asked Questions
How do I make the fancy letter P look smoother?
Draw lightly first, then redraw the curve in one slow, confident motion.
What if my spiral looks uneven?
Start with a simple circle guide, then tighten the spiral gradually toward the center.
Can I add more decorations to this letter?
Yes, add small dots, short lines, or extra curls, but keep them smaller than the main loop.