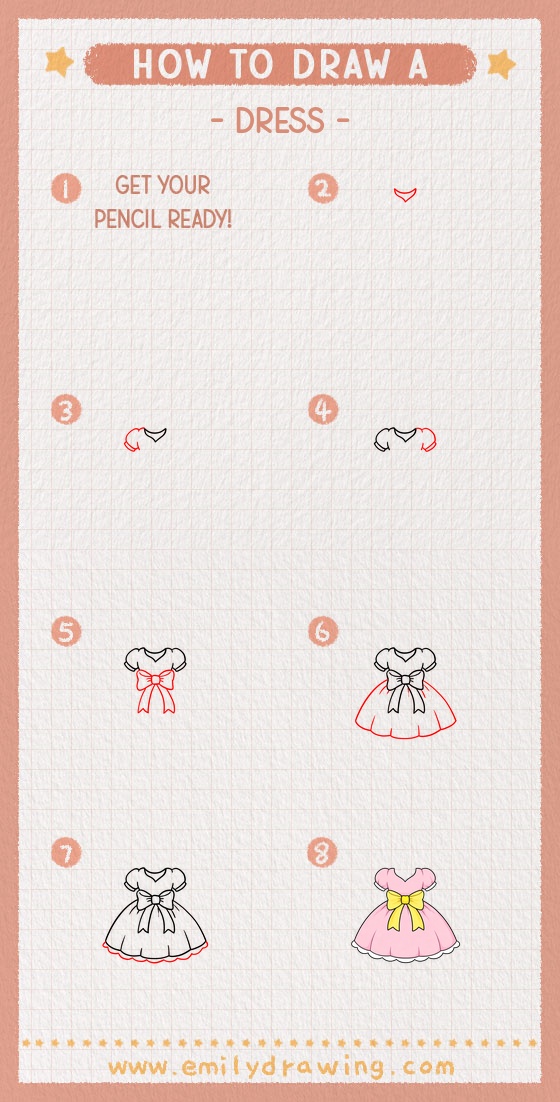
This easy drawing tutorial shows how to draw a dress with a bow.
We will build the shapes slowly, using simple curves and symmetry.
Take your time, and keep your lines light until the end.

What You Will Need
- Pencil
- Eraser
- Black marker or pen
- Paper
- Colored pencils or crayons (optional)
Here are my RECOMMENDED Art Supplies!
- Crayola Coloring Set (140 Pieces – Mega Value!)
- 24 Colored Crayon Set
- A4 Printer Paper
- Crayola Coloring Pencils
- HP Home Printer with Instant Ink!
Time needed:
13 minutes.
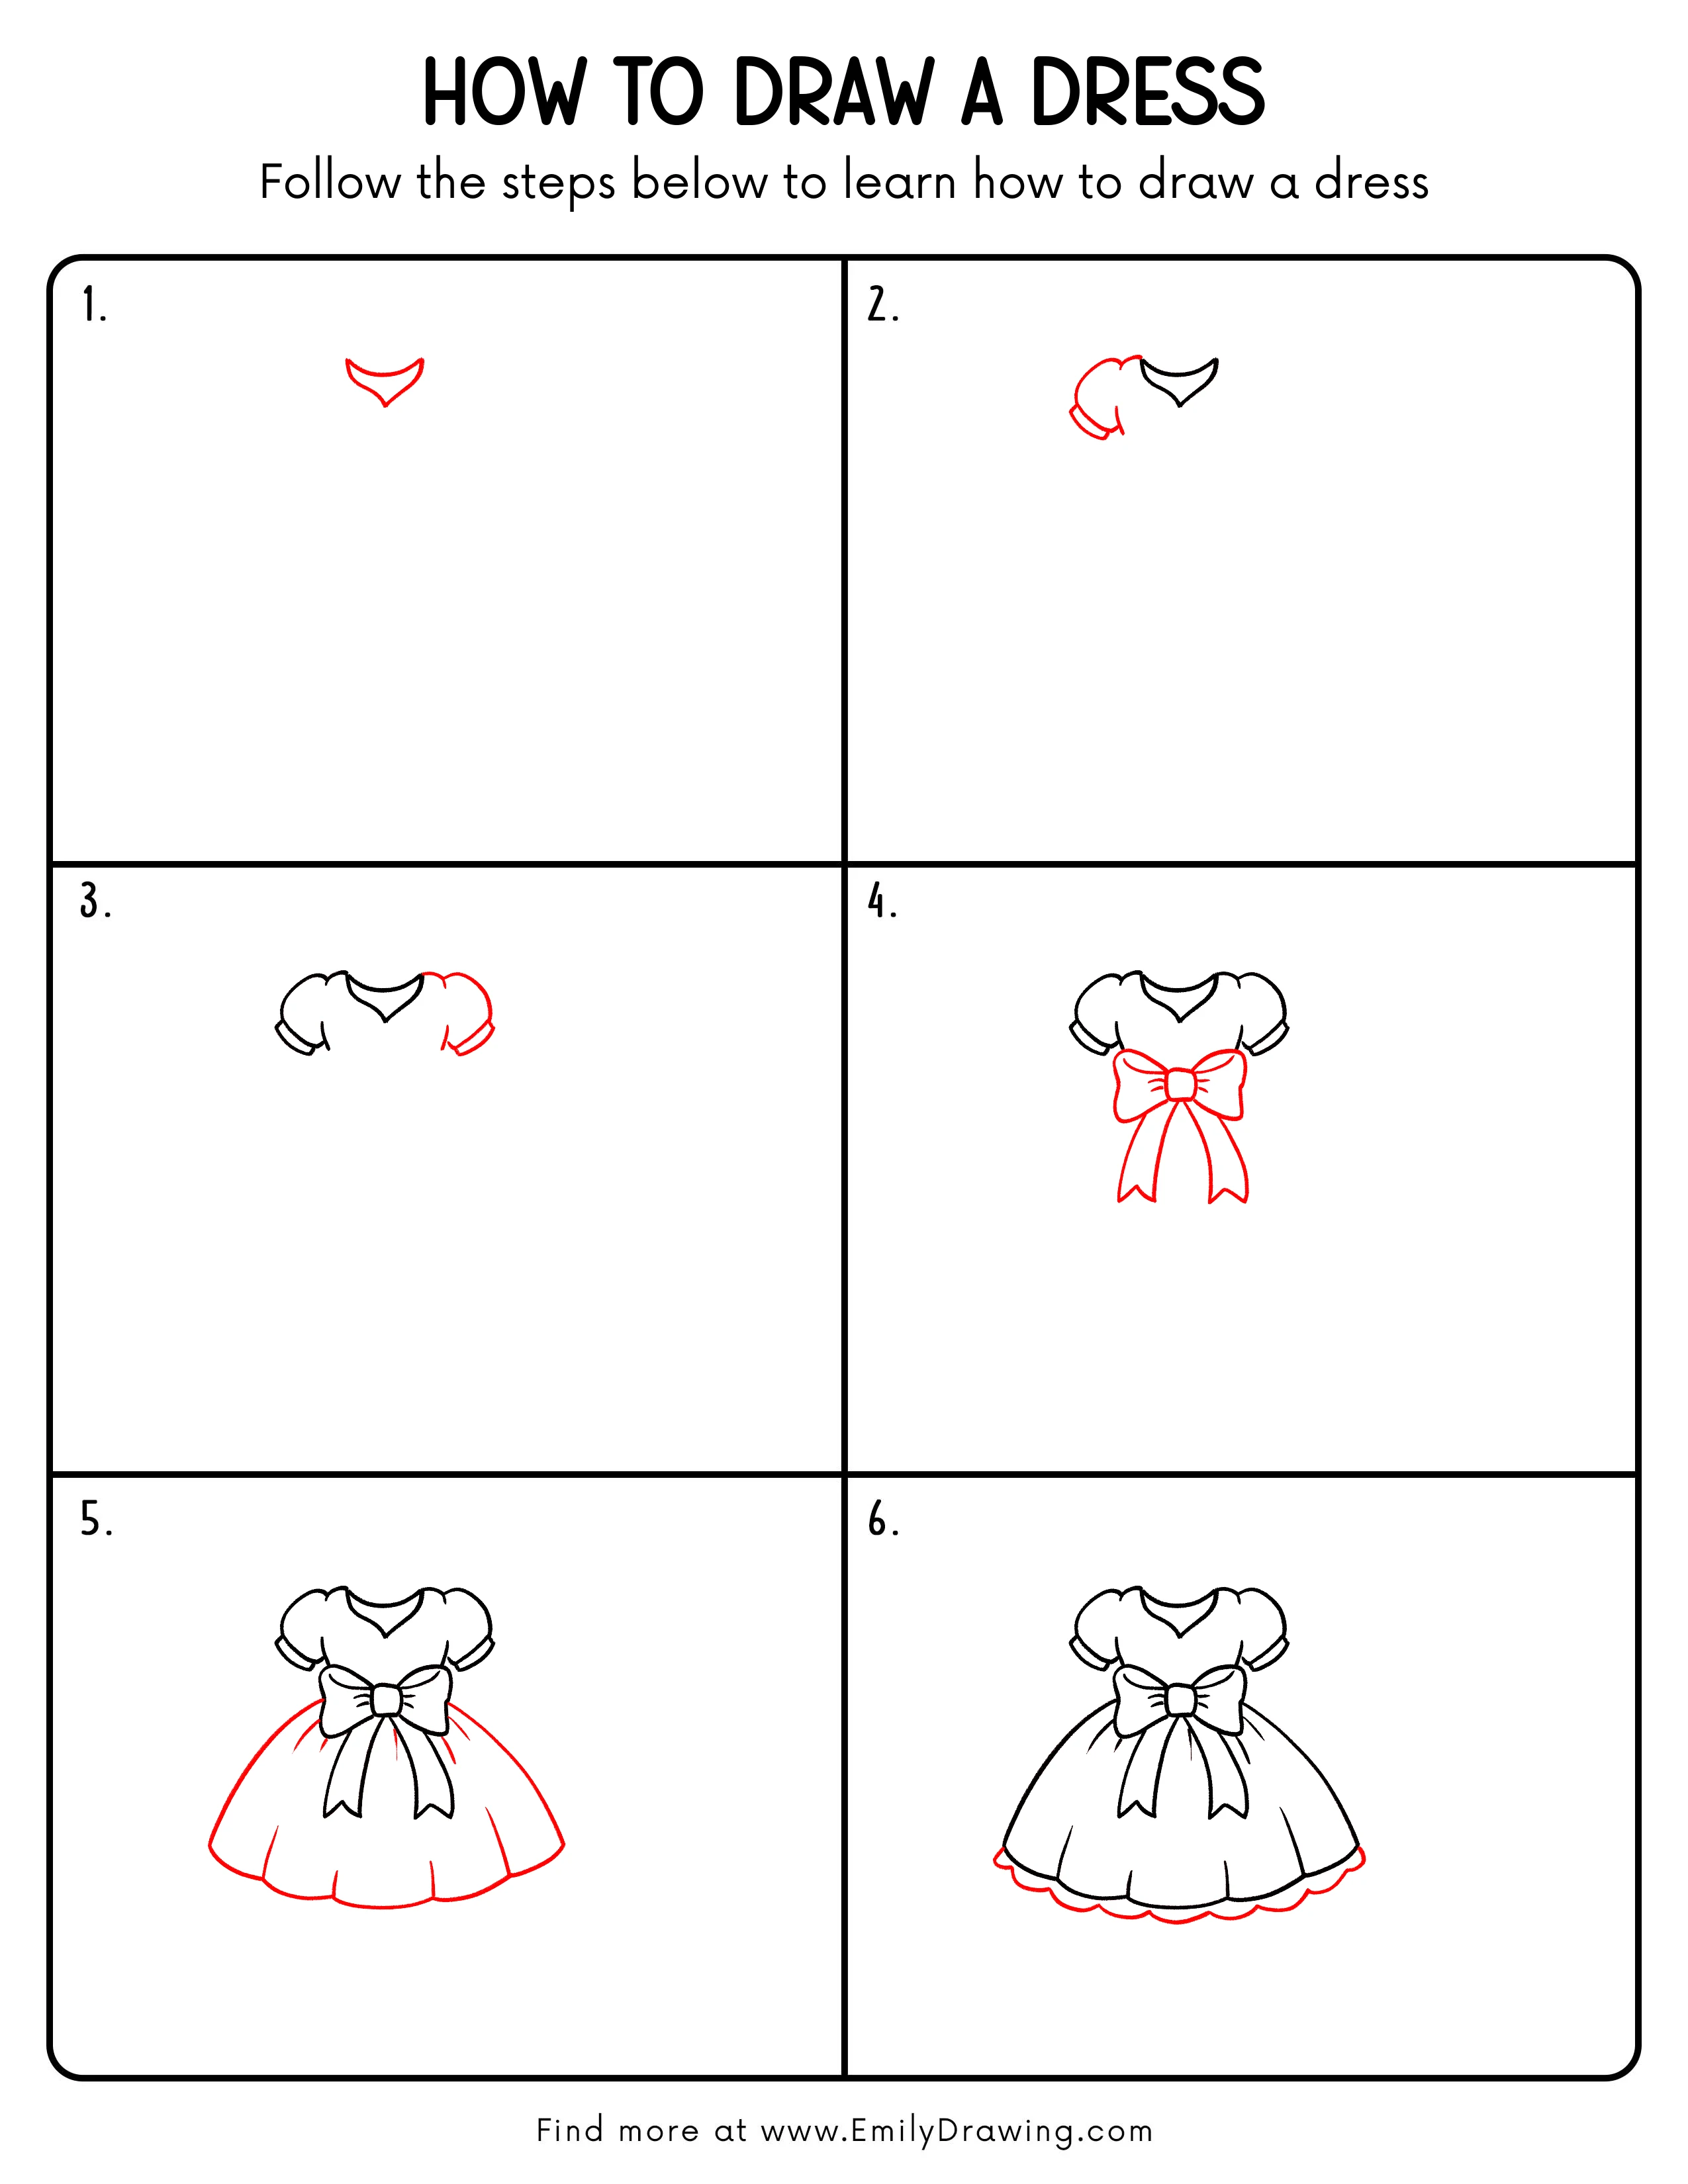
Step-by-Step Drawing Guide
Step 1: Draw the Neckline Shape
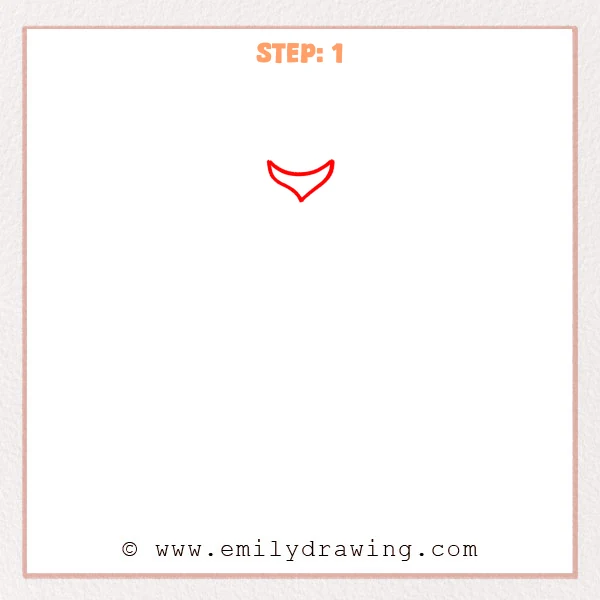
Near the top, draw a gentle curved line like a soft smile.
From both ends, taper down to a point to form a wide V-shaped neckline.
Pro Tip: Keep the neckline slightly wide at first so the dress can stay symmetrical later.
Step 2: Add the Left Shoulder and Sleeve
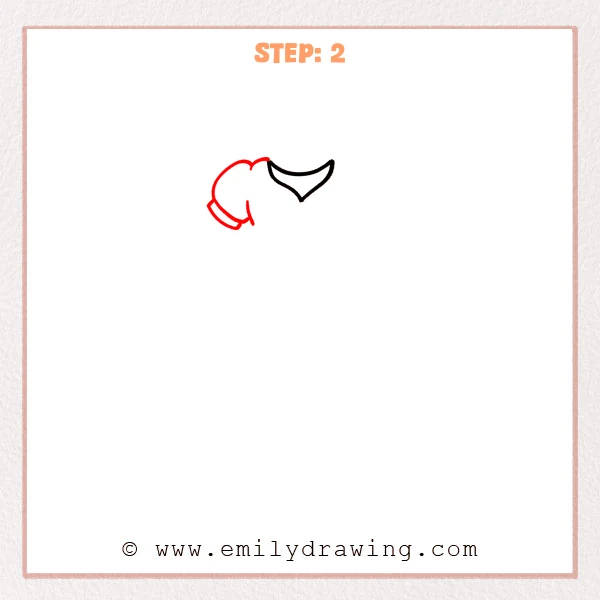
From the left side of the neckline, draw a rounded shoulder curve that bulges outward.
Add a short curved sleeve edge below it, then draw an inner curve back toward the neckline to shape the arm opening.
Pro Tip: Keep the outer sleeve curve fuller than the inner curve so it feels like real fabric.
Step 3: Add the Right Shoulder and Sleeve
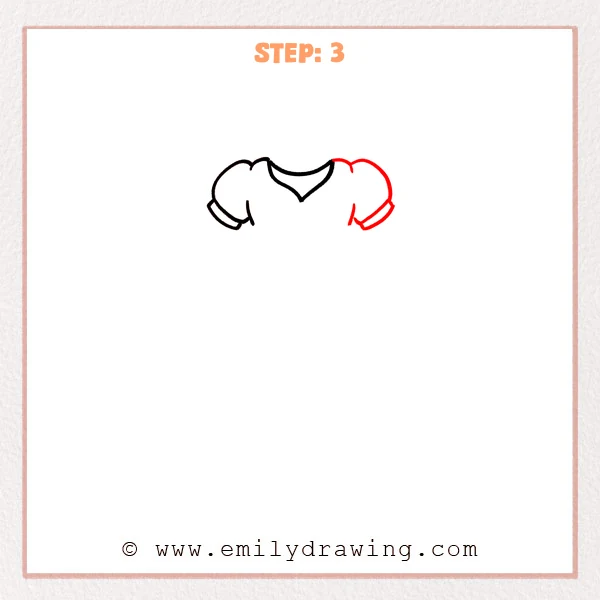
On the right side of the neckline, draw a matching rounded shoulder curve.
Add the short sleeve edge, then curve an inner line back toward the bodice to form the right arm opening.
Pro Tip: Compare sleeve length and angle on both sides, then adjust to match.
Step 4: Draw the Waist Bow and Ribbons
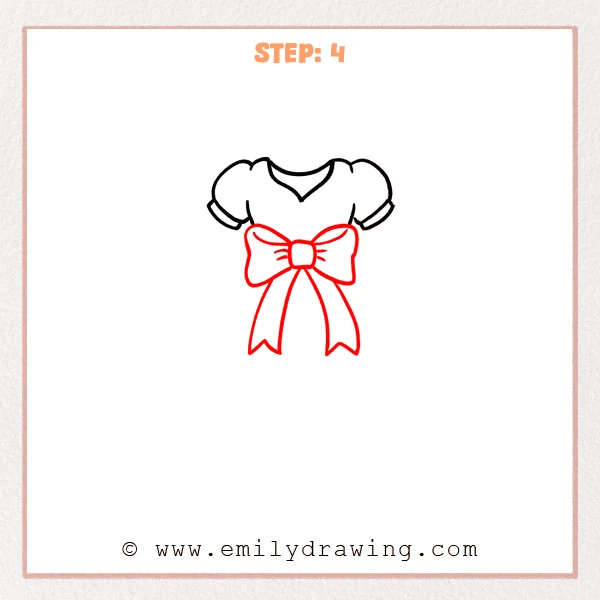
Below the bodice, draw a small rounded square for the bow knot.
Add a wide curved bow loop on each side, then draw two long ribbons hanging down, each ending with a small V-cut.
Pro Tip: Keep both bow loops about the same height so the knot stays centered.
Step 5: Draw the Flared Skirt and Pleats
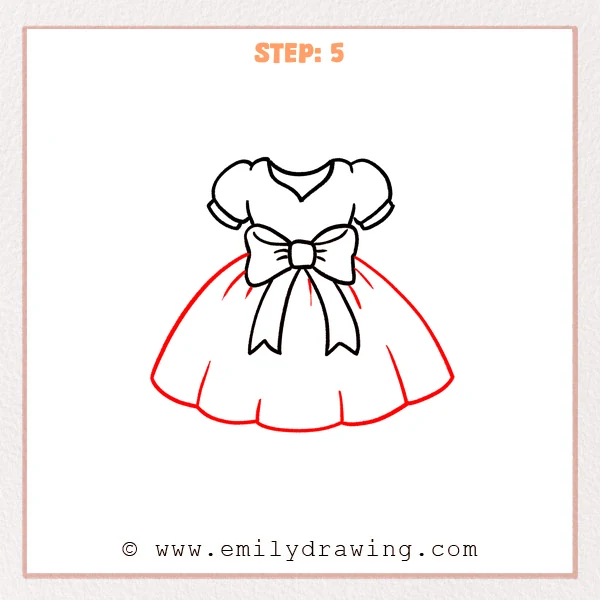
From both sides of the bow, pull two long curved lines downward to flare the skirt outward.
Connect the bottom with a gentle wavy curve, then add a few short vertical lines to suggest pleats.
Pro Tip: Keep the lowest point of the hem in the center so both sides feel balanced.
Step 6: Add a Scalloped Ruffle Hem
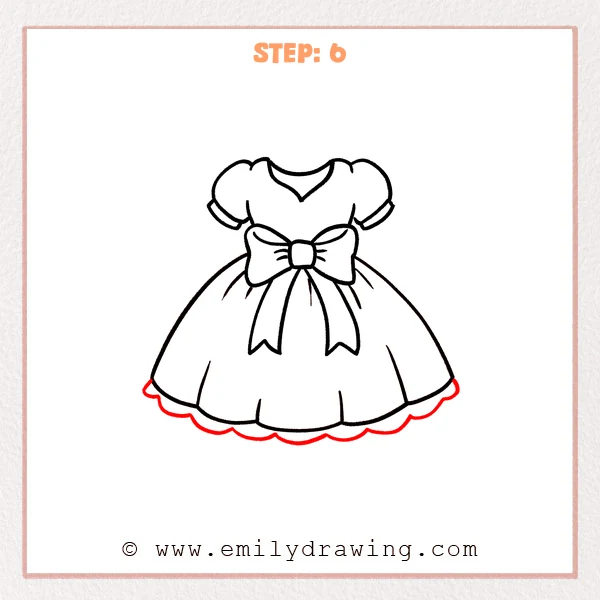
Outside the original hemline, draw a second edge made of repeating small half-circle scallops.
Keep the scallops similar in size, and let them follow the skirt curve smoothly.
Pro Tip: Lightly mark a few evenly spaced points first, then connect them with scallops.
Step 7: Color in your drawing!
Fun Facts
- Many dresses use bows because they quickly add a clear focal point.
- Ruffle hems are common in party dresses because they feel playful and light.
- Puffy sleeves are made by gathering fabric, which creates soft volume.
Pin it now, Draw later!
Trace your final outline with a clean, steady line, then erase extra sketch marks.
Add color blocks, patterns, or tiny dots to make your dress design unique.
Now you know how to draw a dress step by step—try drawing a second dress with a new bow shape.
Get the FREE Printable Drawing Guide
FREE Download Printable Dress Drawing Tutorial
Frequently Asked Questions
How do I make the dress look more symmetrical?
Fold your paper lightly to find the center, or compare left and right shapes as you draw.
How can I change the style of the dress?
Change the sleeve shape, move the bow higher or lower, or make the skirt longer.
What if my ruffle hem looks uneven?
Erase a few scallops and redraw them using evenly spaced guide points.