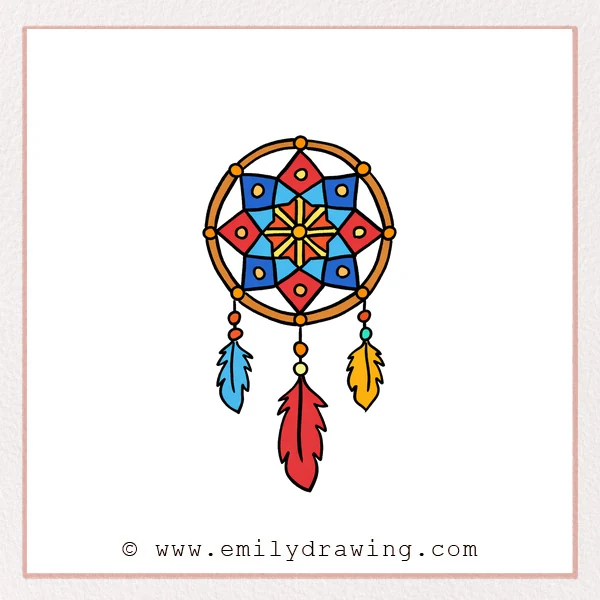
A dream catcher is a beautiful circle of woven lines with hanging feathers and beads.
In this easy drawing tutorial, you will build it using simple shapes and clean lines.
Take your time and keep your lines light until you are ready to darken them.
What You Will Need
- Pencil
- Eraser
- Black pen or marker (optional for final lines)
- Paper
- Colored pencils or markers (optional)
Here are my RECOMMENDED Art Supplies!
- Crayola Coloring Set (140 Pieces – Mega Value!)
- 24 Colored Crayon Set
- A4 Printer Paper
- Crayola Coloring Pencils
- HP Home Printer with Instant Ink!
Time needed:
18 minutes.
Step-by-Step Drawing Guide
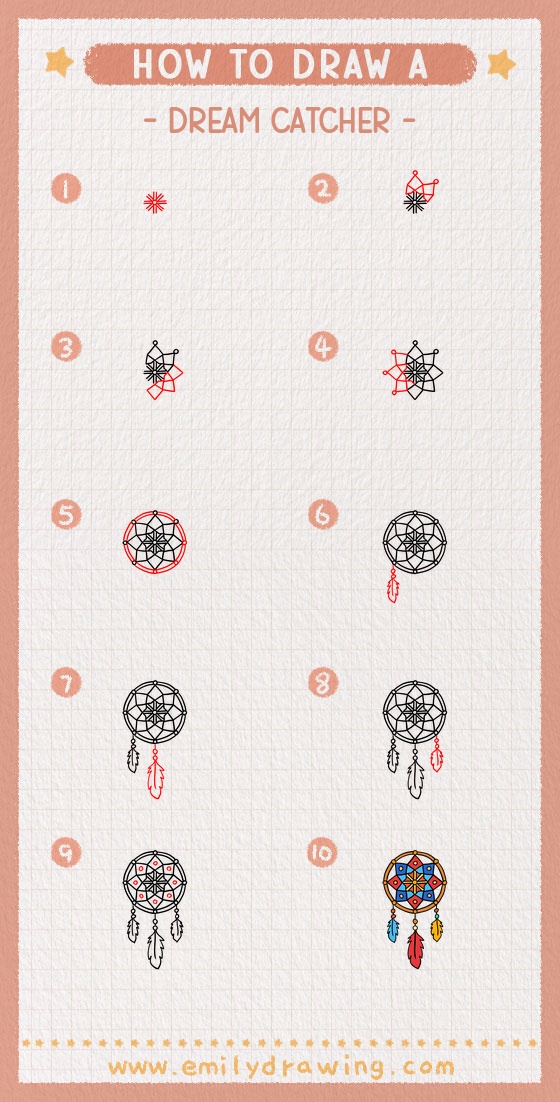
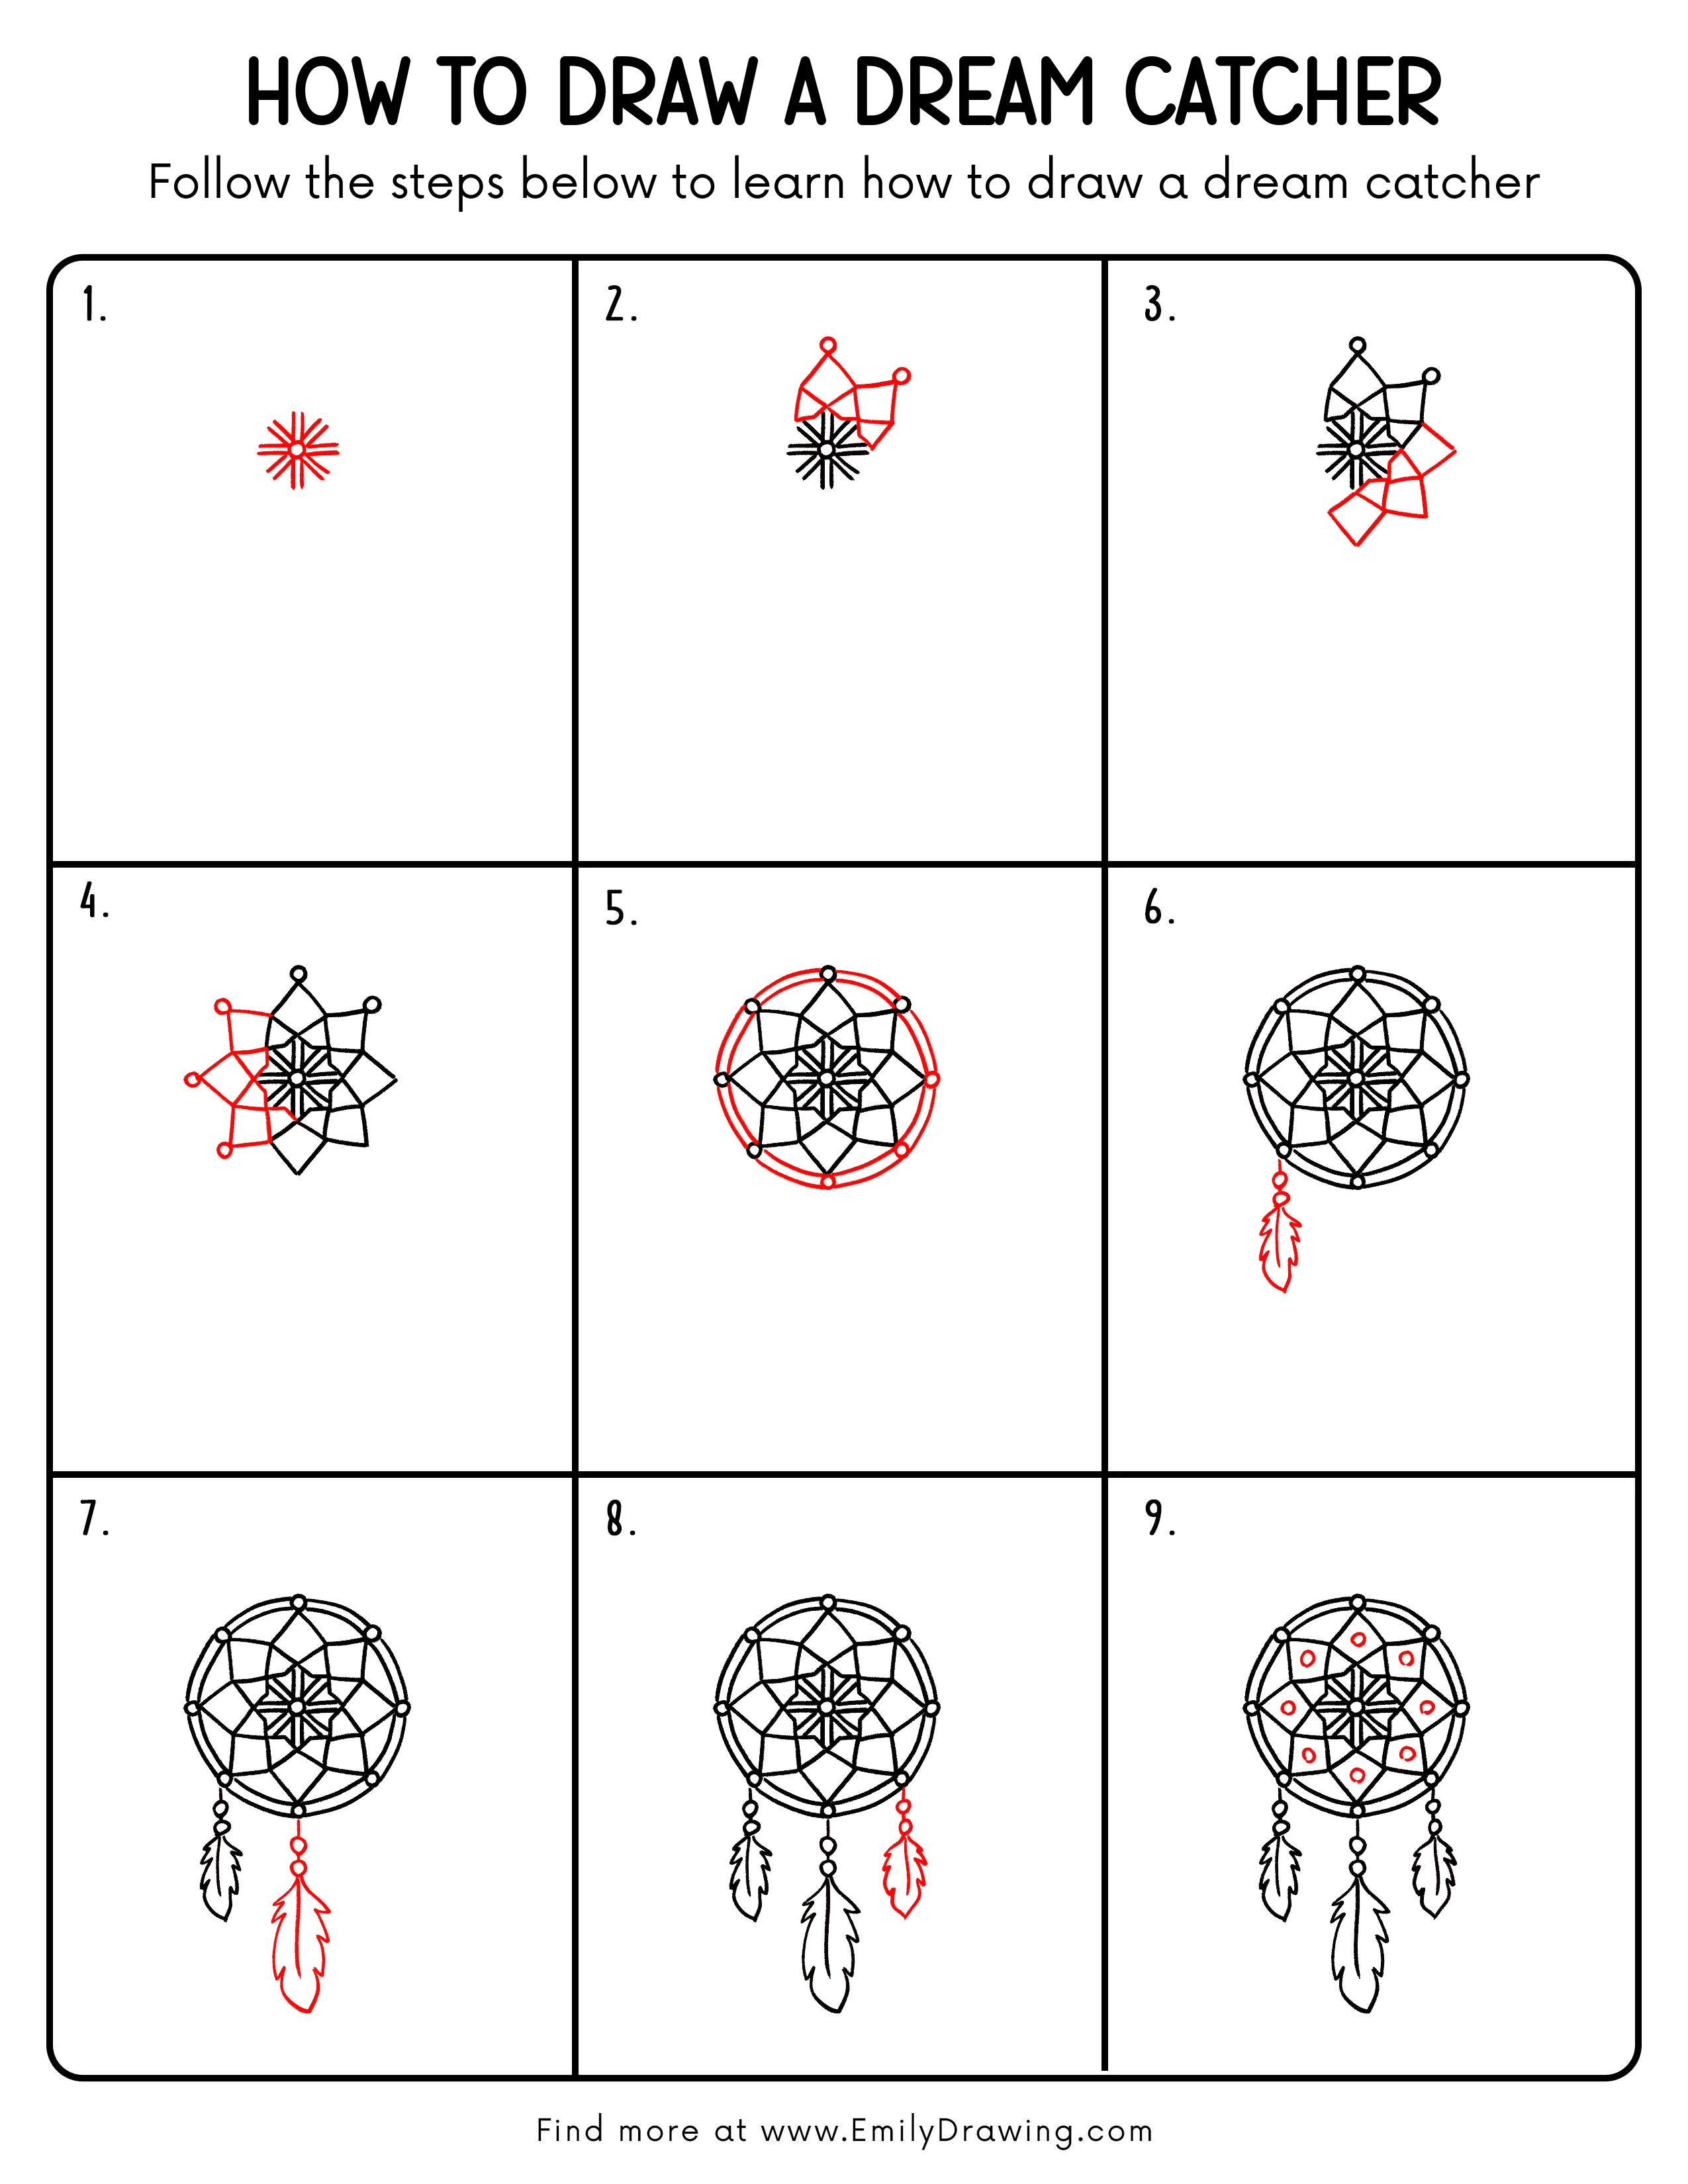
Step 1: Draw the Center and Spokes
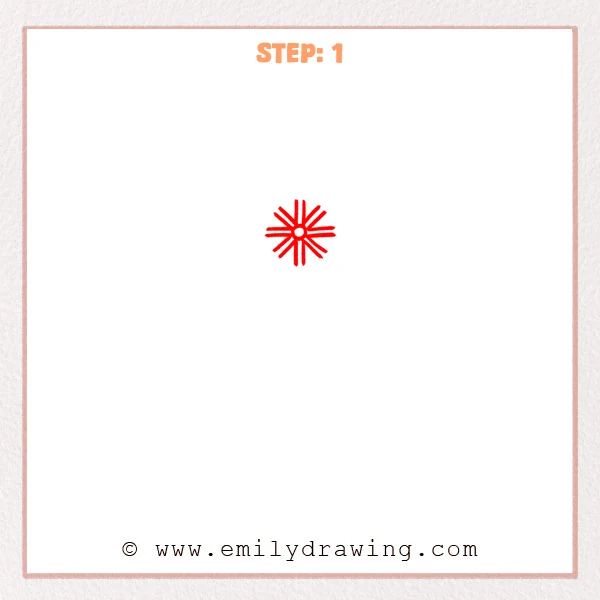
Draw a small circle near the upper center of the page as the web’s center.
Pull several straight lines outward from the circle, evenly spaced like sun rays, to build a guide for the dream catcher’s woven pattern.
Keep the spokes similar in length for a tidy start.
Pro Tip: Keep the spokes evenly spaced so the web looks balanced later.
Step 2: Add Top Knots and the First Web Blocks
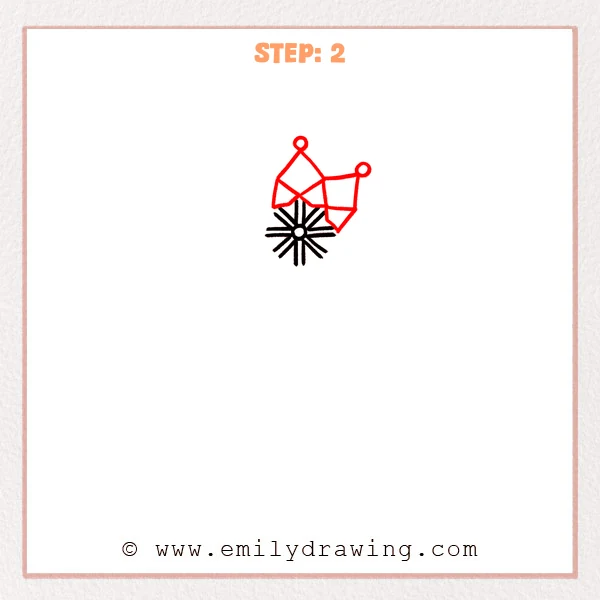
Draw two small circles above the spokes to act as knot points.
Use straight lines from those circles down to the outer ends of the spokes, forming two tilted kite-shaped web sections that sit against the spoke tips.
Let the shapes feel like the first “woven” pieces around the center.
Pro Tip: Don’t space the two knot circles too far apart, so the web stays compact.
Step 3: Extend the Next Layer of Web Sections
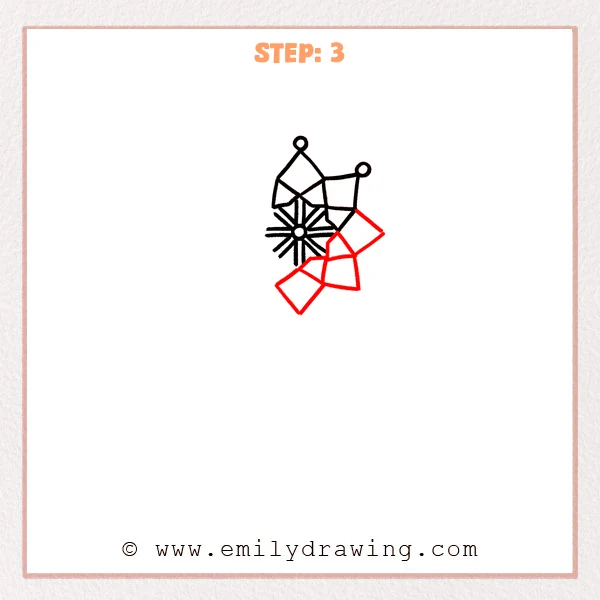
From the outer corner of the right web section, continue the lines downward to form a new kite-shaped section.
Add one more connected section beside it so this layer starts wrapping around the circle.
Keep the new corners pointing outward like petals.
Pro Tip: Place the new outer corners along the same curve so the hoop fits smoothly later.
Step 4: Build a Full Ring of Woven Shapes
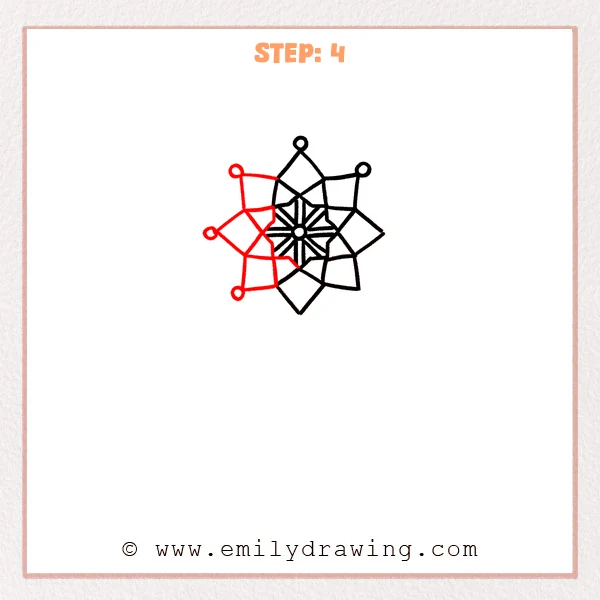
Add more diamond or kite shapes around the center, filling the left side to complete a petal-like ring.
Make each shape touch the next one so the dream catcher web feels connected and woven.
Aim for a steady rhythm as the shapes repeat around the circle.
Pro Tip: Keep the outer edges similar in length so the ring stays even.
Step 5: Draw the Outer Hoop and Anchor Rings
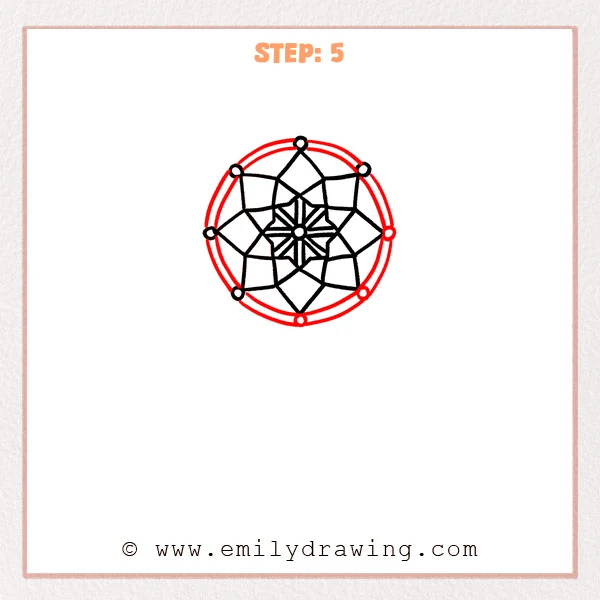
Draw two smooth, concentric circles around the woven shapes to form the dream catcher’s hoop.
Add several small circles along the hoop as anchor rings, spacing them around the rim.
Let the hoop sit just outside the web without touching it too tightly.
Pro Tip: Sketch the big circle lightly first, then darken it for a cleaner hoop.
Step 6: Add the First Feather Dangle
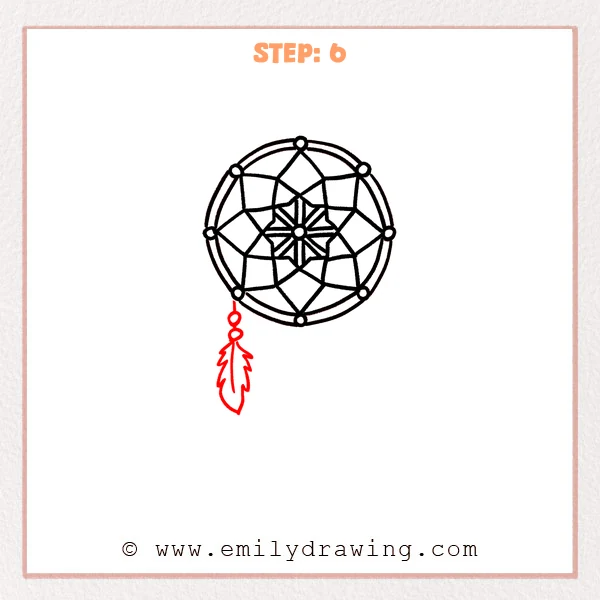
From the lower-left ring on the hoop, add two or three small circles like beads on a string.
Draw a feather below: start with a long center shaft, then add short zigzag edges on both sides.
Keep the feather shape slim so it looks light.
Pro Tip: Make the feather tip slightly sharper to feel light and airy.
Step 7: Add the Second Feather Dangle
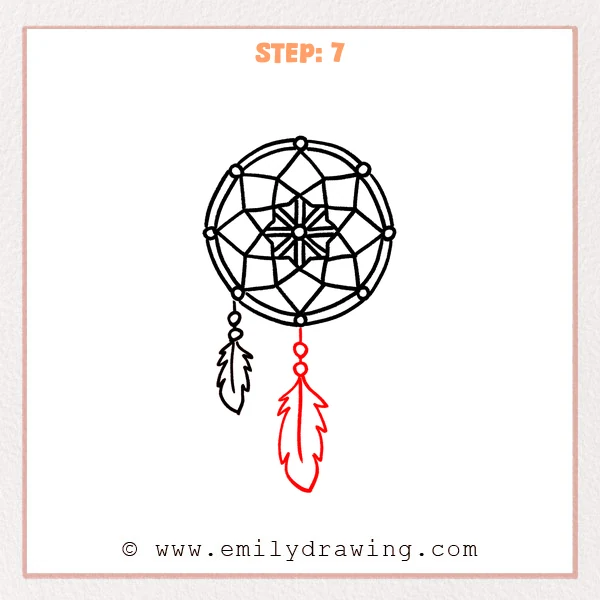
From the bottom ring on the hoop, draw a short connector line, then add two or three bead circles.
Draw a second feather below the beads, making it a bit longer than the left one and keeping the shaft straight down.
Let the edges echo the same zigzag style as the first feather.
Pro Tip: Stagger the dangle lengths slightly so the design feels natural.
Step 8: Add the Third Feather Dangle
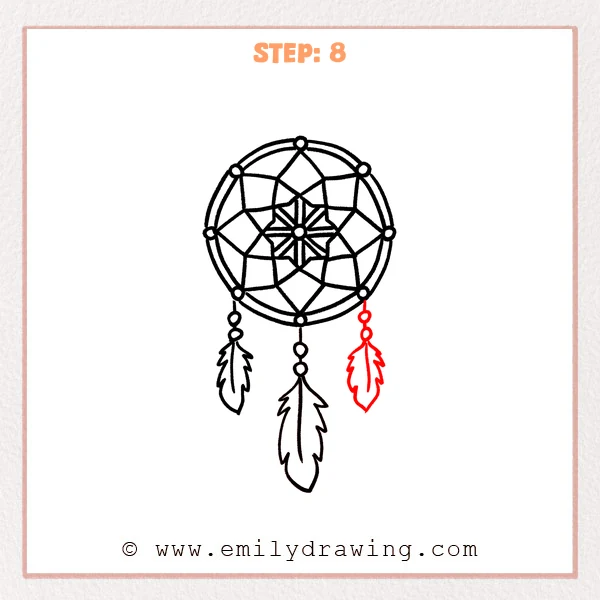
From the lower-right ring on the hoop, add two or three bead circles with the same spacing as the others.
Draw a third feather under the beads: add a straight shaft first, then build zigzag edges on both sides, keeping its length close to the middle feather.
Balance the spacing so the three dangles feel evenly placed.
Pro Tip: Keep the feather widths similar so the whole dream catcher looks consistent.
Step 9: Add Decorative Dots Inside the Web
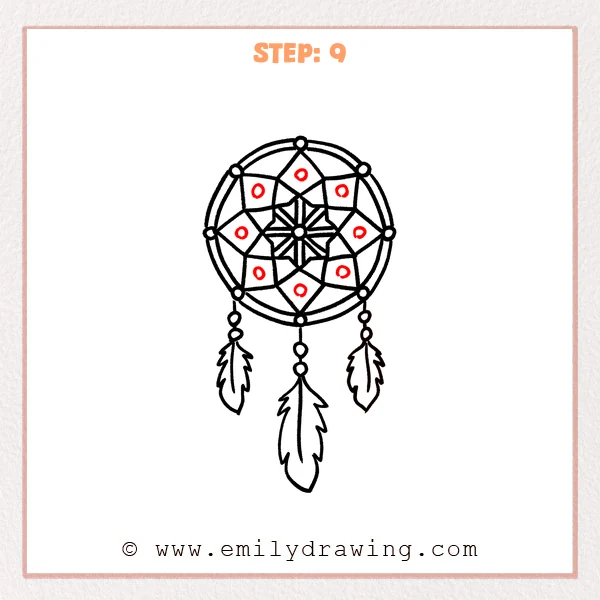
In each large web section around the ring, draw a small circle near the center as a decoration.
Keep the circles similar in size and placement so the pattern feels even.
These small details make the dream catcher look more finished.
Pro Tip: Lightly mark each section’s center first to place the dots neatly.
Step 10: Color in your drawing!
Fun Facts
- Dream catchers are often made with a hoop, a woven web, and hanging decorations like feathers.
- Many designs use repeating patterns because they are soothing to look at.
- Adding beads and small symbols is a popular way to personalize a dream catcher.
Pin it now, Draw later!
Trace your favorite lines with a pen, then erase any light sketch marks you do not need.
You can color the hoop, web, and feathers with gentle, natural tones or bright patterns.
If you enjoyed this step by step drawing, try making a second dream catcher with different feather shapes and bead counts.
Get the FREE Printable Drawing Guide
FREE Download Printable Dream Catcher Drawing Tutorial
Frequently Asked Questions
How do I make the hoop look perfectly round?
Start with a very light circle, then adjust it with small corrections before darkening.
What if my web shapes look uneven?
Keep going and match the next shape to the last one, then tidy edges at the end.
Can I simplify this dream catcher drawing?
Yes, use fewer web sections and draw just one feather dangle for a quick version.