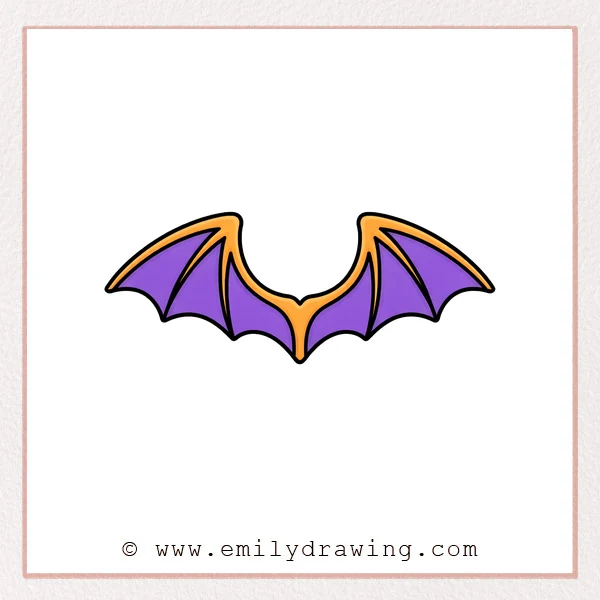
Dragon wings can look complex, but you can build them from simple curves and points.
In this easy drawing tutorial, you will sketch the silhouette first, then add bones and panels.
Take your time and keep your lines light until the shapes feel balanced.
What You Will Need
- Pencil (or a drawing tablet stylus)
- Eraser
- Black pen or marker (optional, for final lines)
- Plain paper or a sketchbook
Here are my RECOMMENDED Art Supplies!
- Crayola Coloring Set (140 Pieces – Mega Value!)
- 24 Colored Crayon Set
- A4 Printer Paper
- Crayola Coloring Pencils
- HP Home Printer with Instant Ink!
Time needed:
23 minutes.
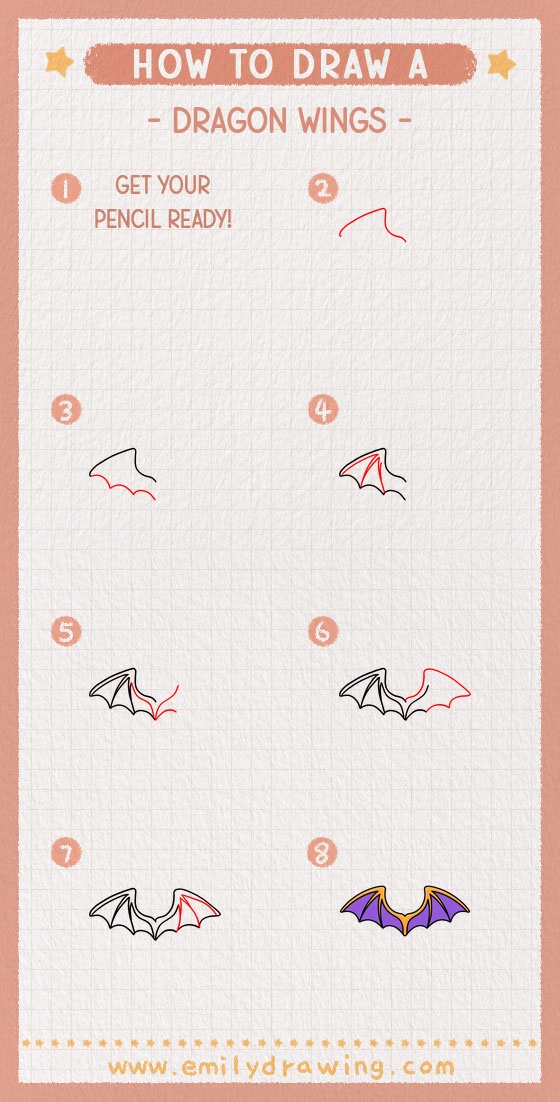
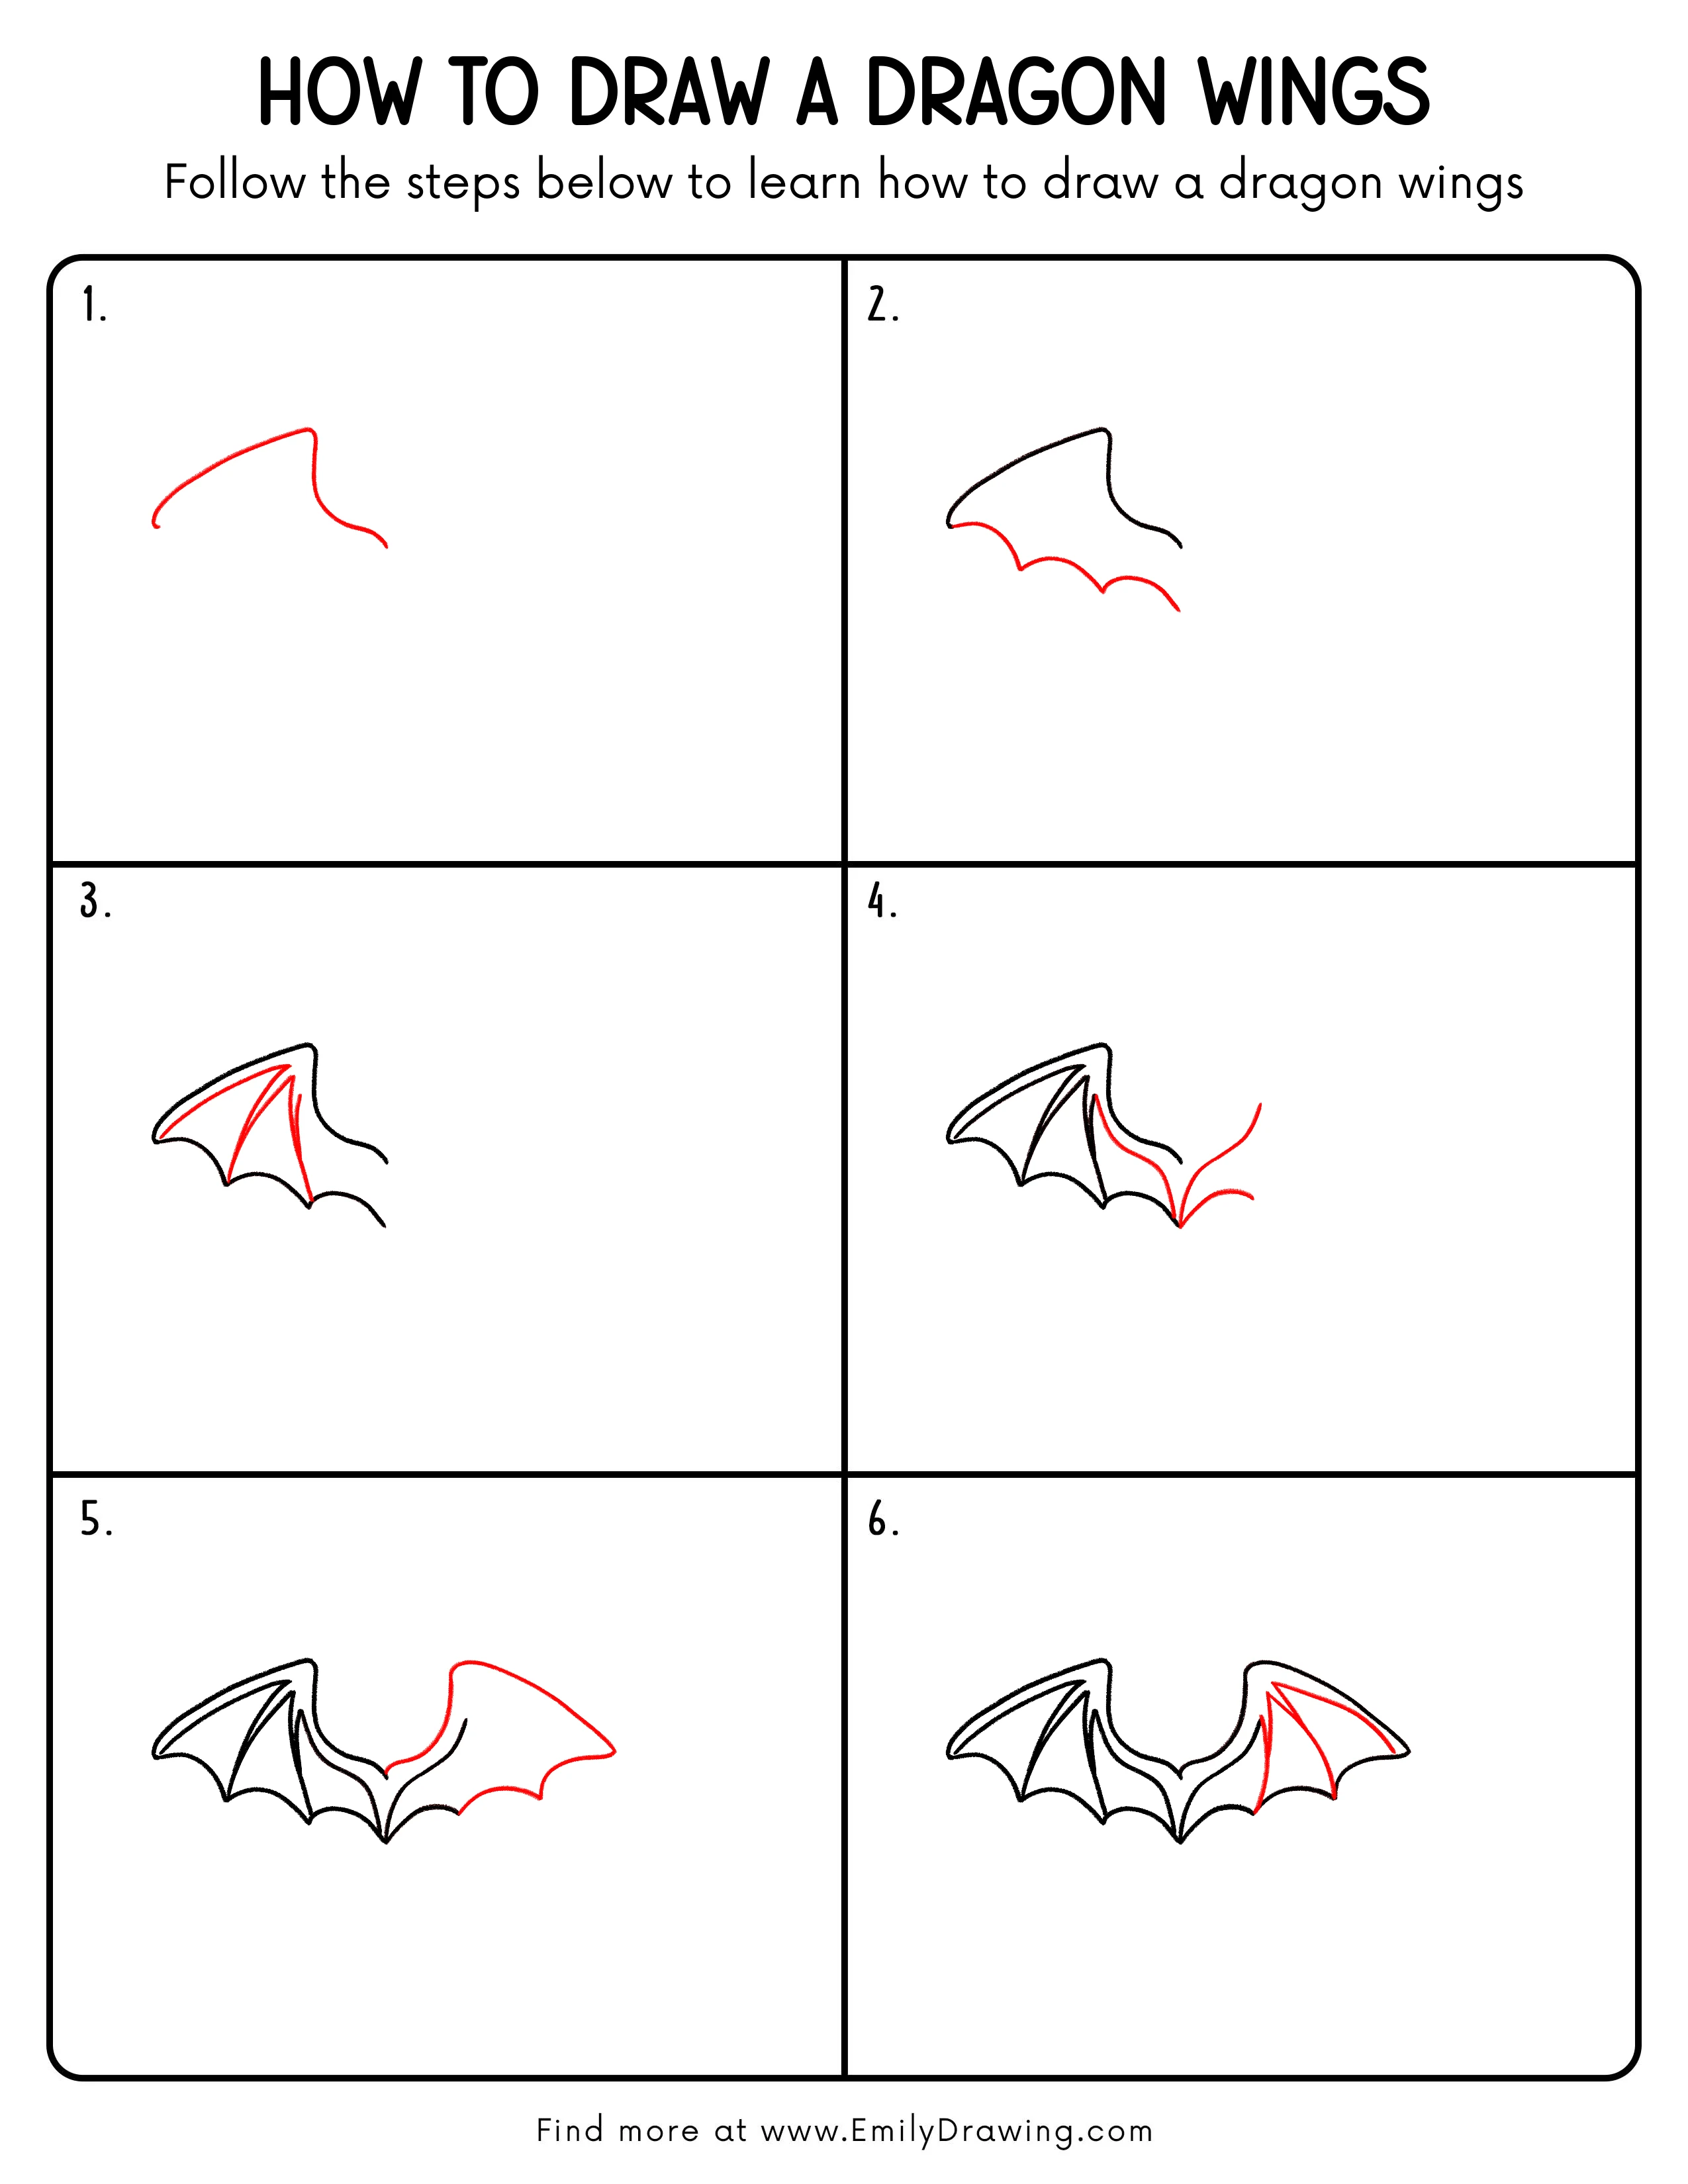
Step-by-Step Drawing Guide
Step 1: Sketch the Wing’s Top Outline
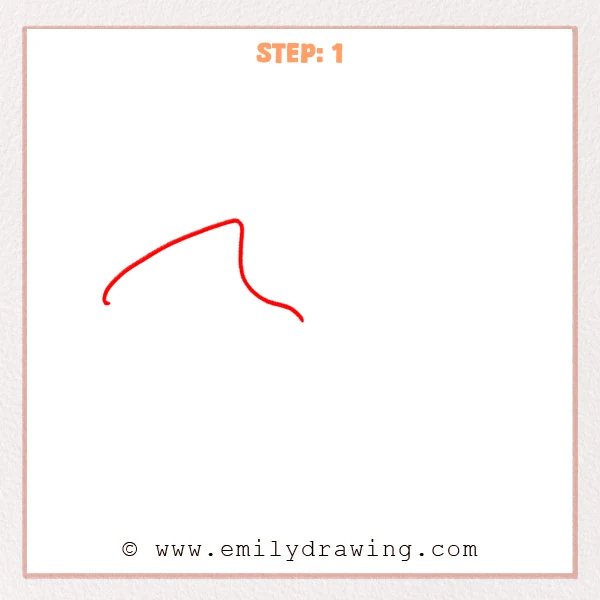
Start with a long, smooth arc for the outer top edge of the wing.
Add a small sharp bend near the middle to suggest a wing “joint.”
After the bend, curve the line downward to leave room for the lower edge and fingers.
Pro Tip: Place the point near the middle of the arc so the wing feels strong.
Step 2: Add the Wavy Lower Edge
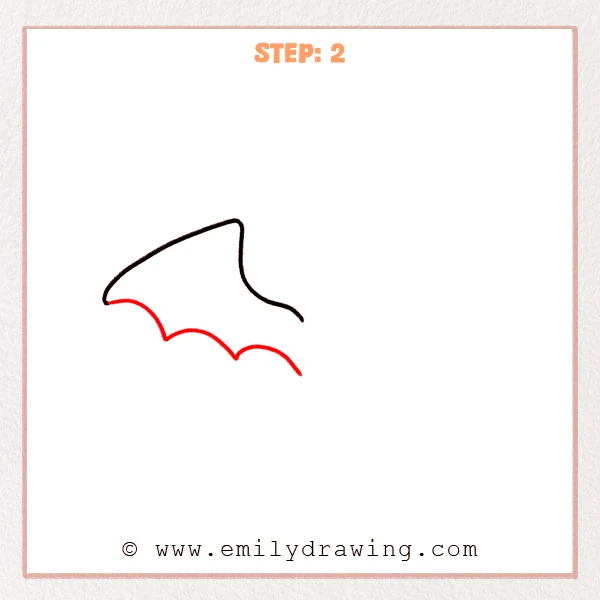
Drop a short line from the front tip to start the lower edge.
Draw a gentle wavy line for the membrane, making a few rounded scallops.
Let the line finish in a sharper point on the right to form the back tip.
Pro Tip: Keep the scallops similar in height so the membrane looks tidy.
Step 3: Add Wing Bones and Inner Dividers
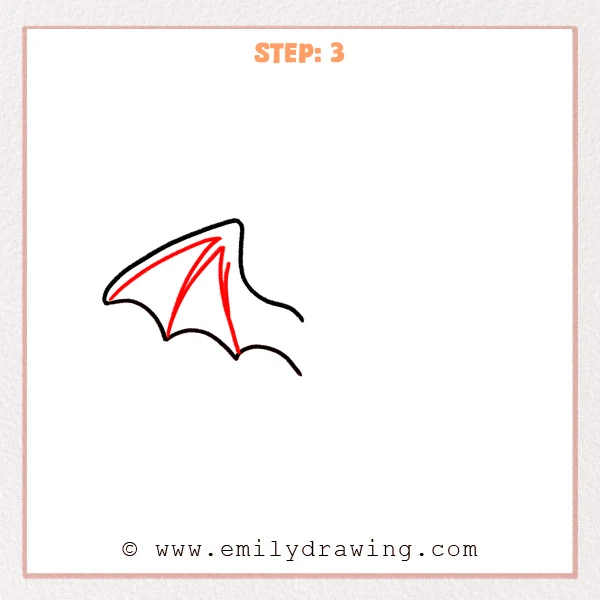
Draw a long straight line from the top peak down to the pointed scallop to form the main wing bone.
From that same peak, add a second diagonal line down toward the front lower bend for another “finger.”
Add a short inner curve along the top edge to hint at thickness and a membrane section.
Pro Tip: Aim each bone at a clear landing point so the wing structure feels real.
Step 4: Begin the Second Wing with Guiding Arcs
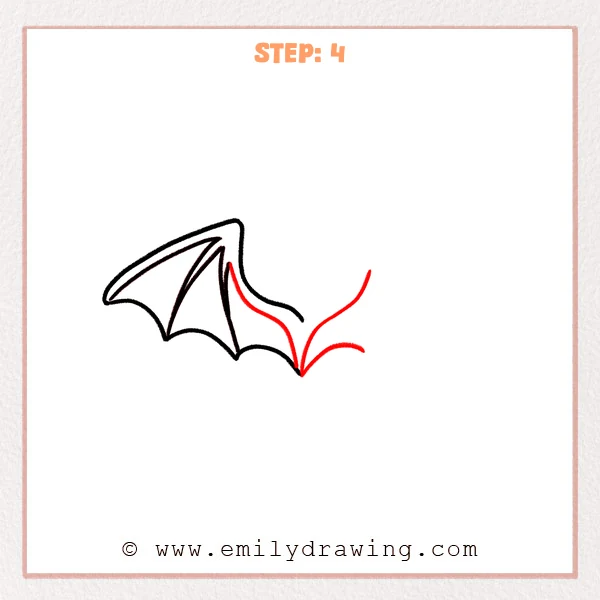
From the shared bottom notch, draw a big upward arc to guide the other wing’s top direction.
From the same point, add a short lower arc to start the next membrane scallop.
Use a smooth curve to bridge the first wing’s back edge into that notch so both wings connect.
Pro Tip: Keep the shared pointed notch crisp so the wing structure reads clearly.
Step 5: Complete the Other Wing’s Outer Shape
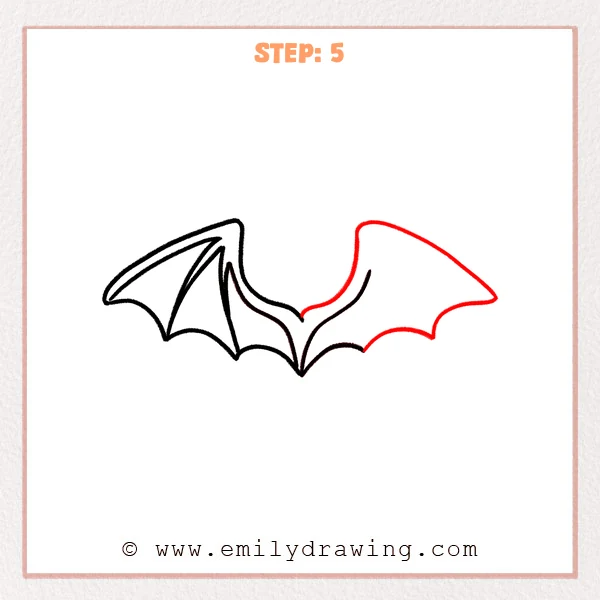
Follow the guide curve and draw the right wing’s top edge to a sharp outer tip.
Curve down from the tip, then add matching scallops along the lower edge.
Add a short inner curve near the wing base to suggest thickness and attachment.
Pro Tip: Keep the outer tip sharper than the scallops for a bold silhouette.
Step 6: Add Wing Bones to the Right Wing
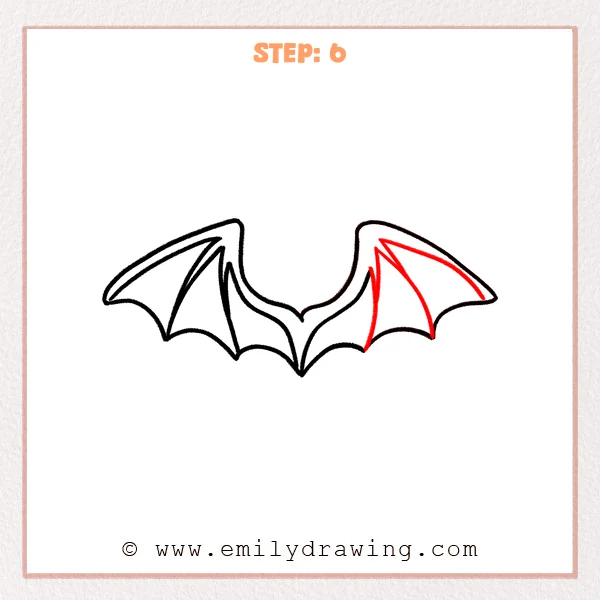
From the right wing’s top peak, draw a long straight bone down to a lower scallop point.
From the same peak, add a second diagonal divider reaching toward the outer tip.
Add a short inner curve along the top edge to match the thickness on both wings.
Pro Tip: Match the bone angles to the left wing so the pair feels balanced.
Step 7: Color in your drawing!
Fun Facts
- Many dragon wings are inspired by bat wings, with long “finger” bones holding the membrane.
- Artists often use scalloped edges to show flexible skin stretched between bones.
- A strong silhouette matters more than tiny details in fantasy wing designs.
Pin it now, Draw later!
Go over the main outline with a darker line to make the wings easy to read.
You can add small texture marks or tiny tears along the scallops for character.
Now you know how to draw dragon wings step by step—try changing the wing shape to create your own dragon.
Get the FREE Printable Drawing Guide
FREE Download Printable Dragon Wings Drawing Tutorial
Frequently Asked Questions
How do I make dragon wings look more realistic?
Keep the bones straight and purposeful, and let the membrane curve gently between them.
What if my wings look uneven?
Compare the top peaks and outer tips, then adjust one side with small, slow edits.
Can I use this as a drawing for beginners exercise?
Yes, repeat this step by step drawing with different sizes to build confidence and control.