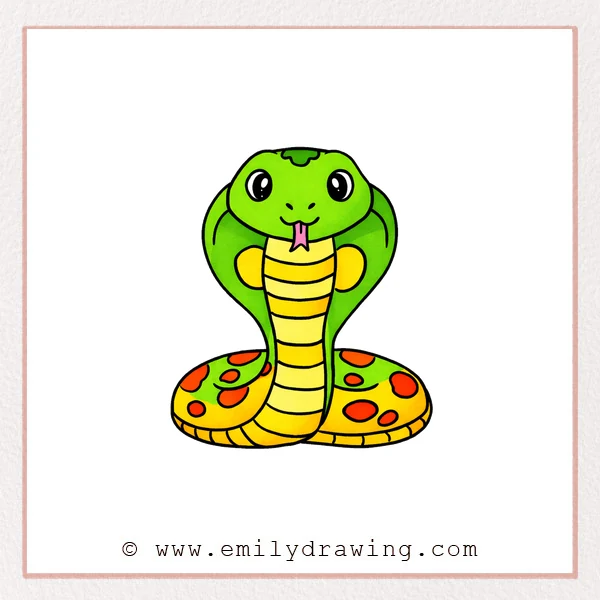
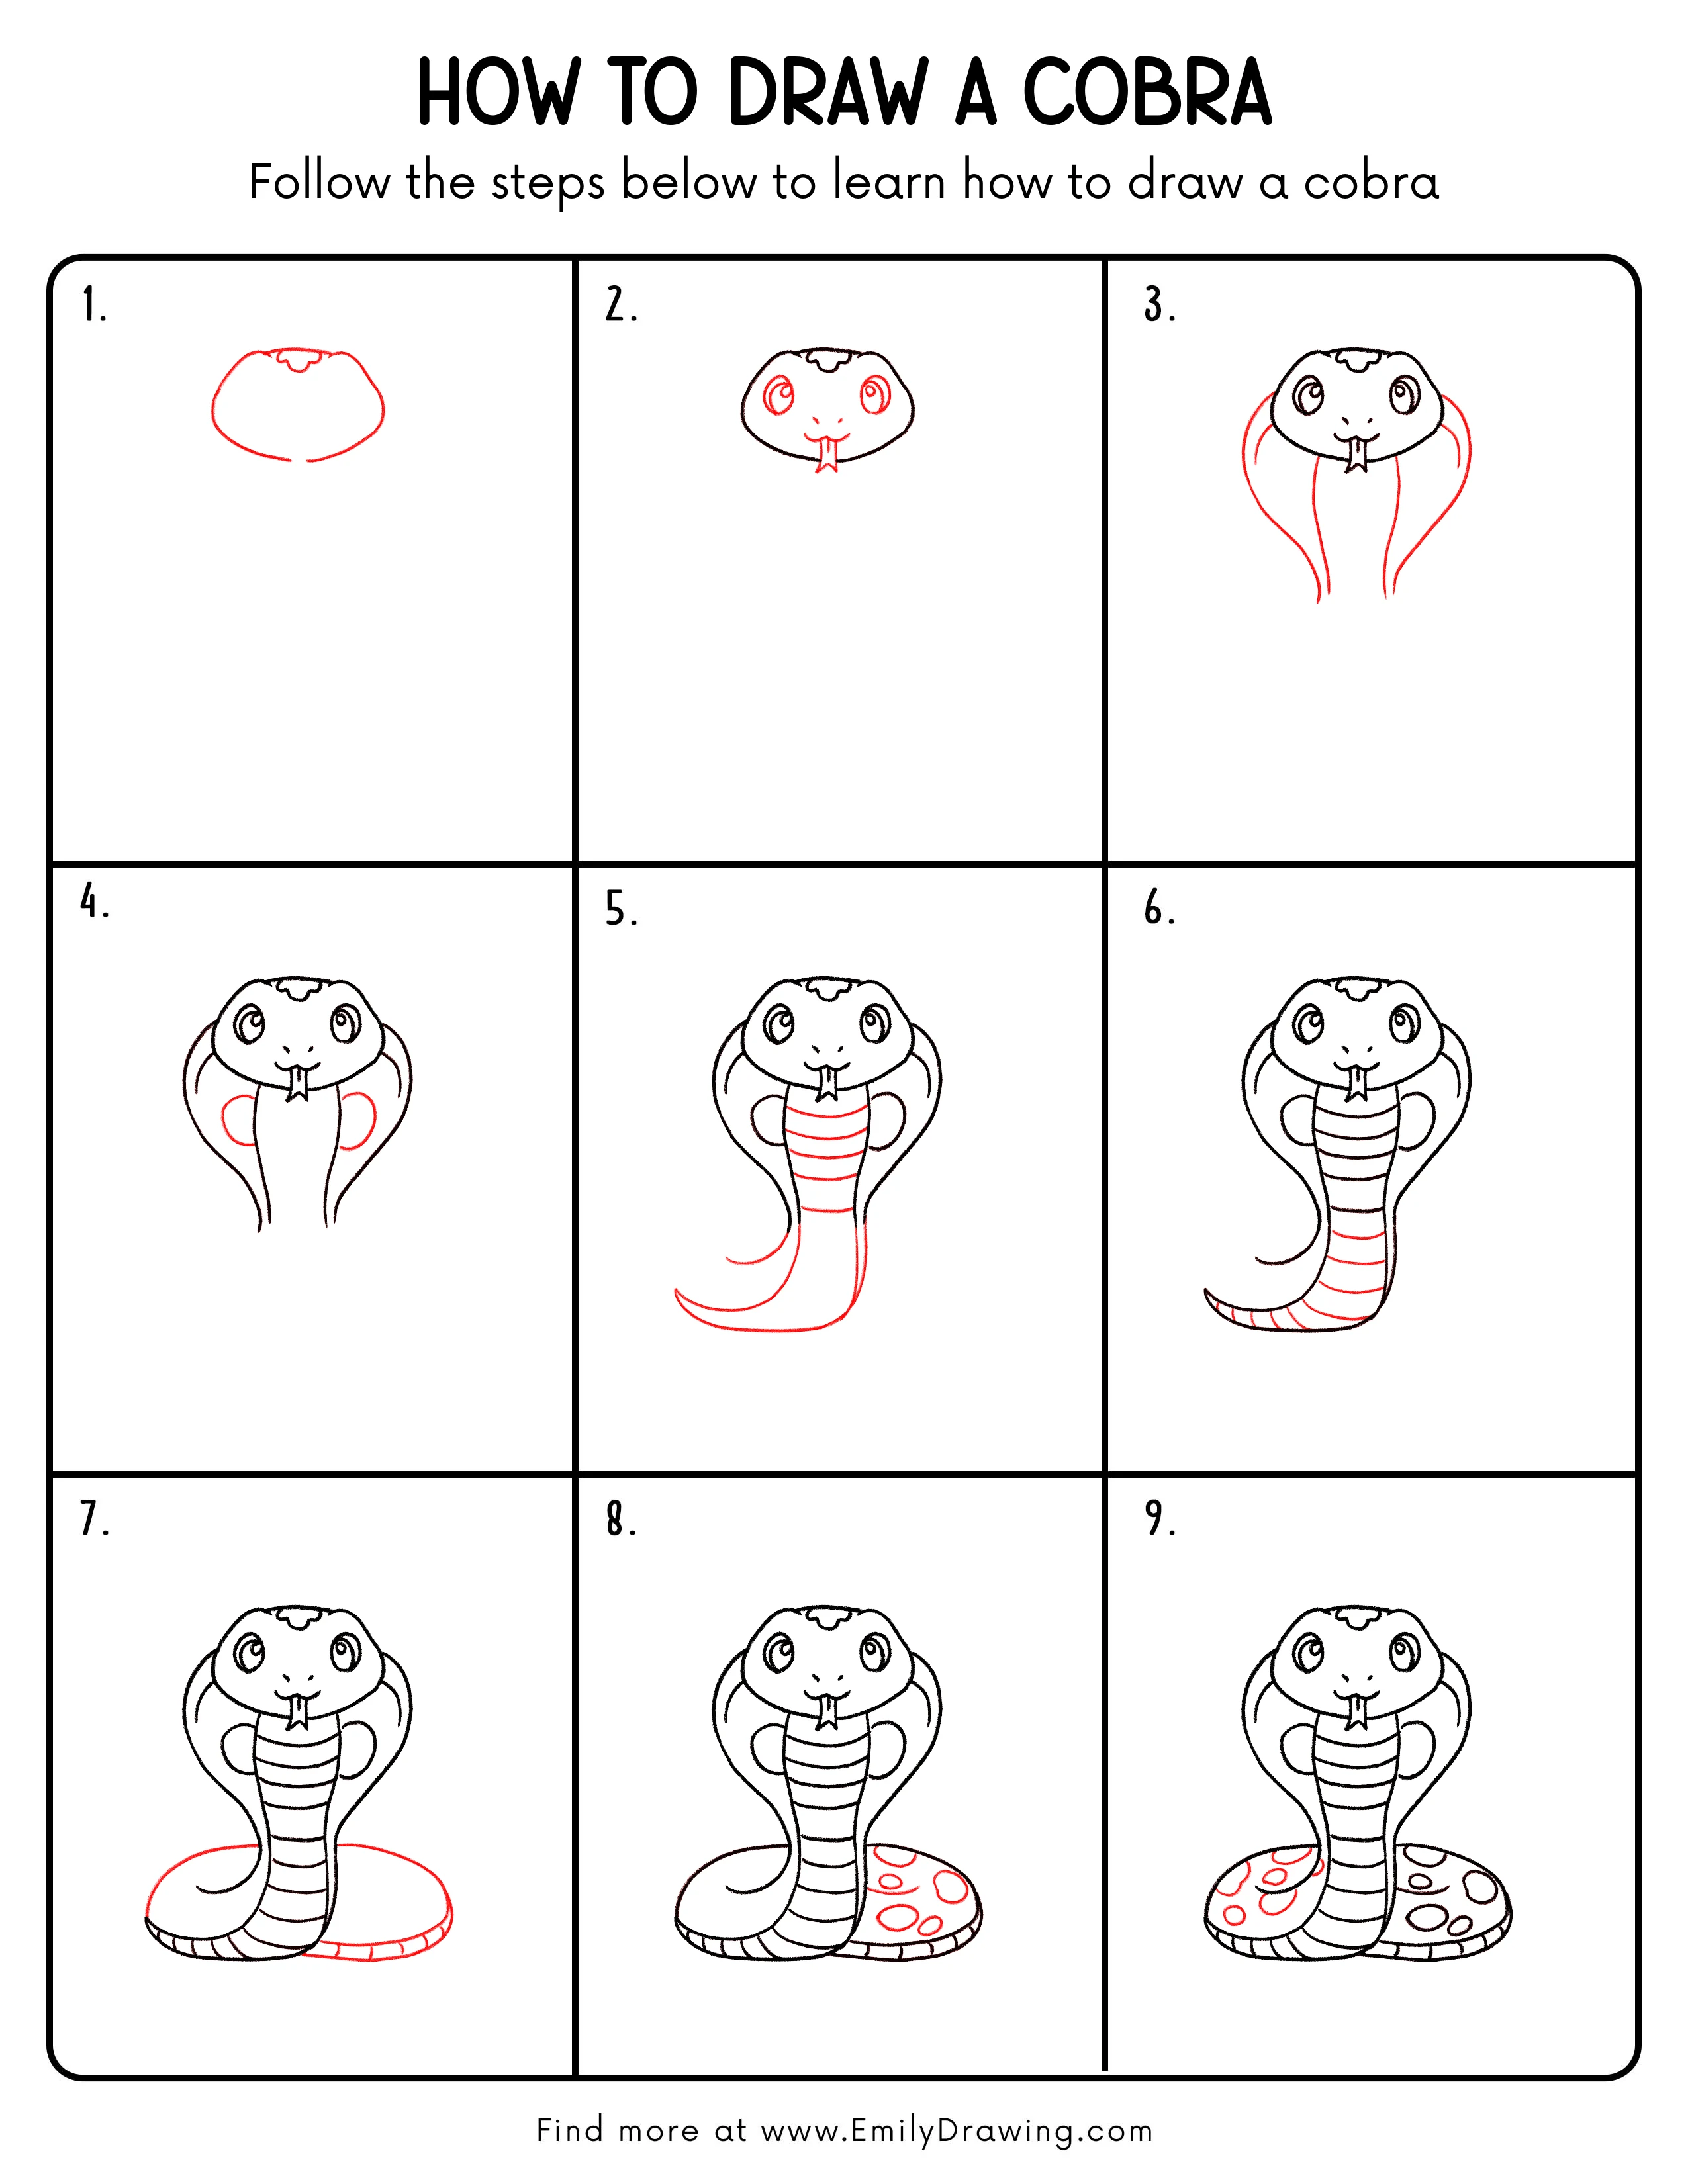
In this easy drawing tutorial, you will learn how to draw a cobra step by step. We will use simple shapes and smooth lines to build a cute cobra with a wide hood and a coiled body. Take your time, and enjoy watching your drawing grow.
What You Will Need
- Pencil
- Eraser
- Black marker or pen (optional, for outlining)
- Colored pencils or crayons (optional)
Here are my RECOMMENDED Art Supplies!
- Crayola Coloring Set (140 Pieces – Mega Value!)
- 24 Colored Crayon Set
- A4 Printer Paper
- Crayola Coloring Pencils
- HP Home Printer with Instant Ink!
Time needed:
16 minutes.
Step-by-Step Drawing Guide
Step 1: Sketch the Cobra Hood Shape
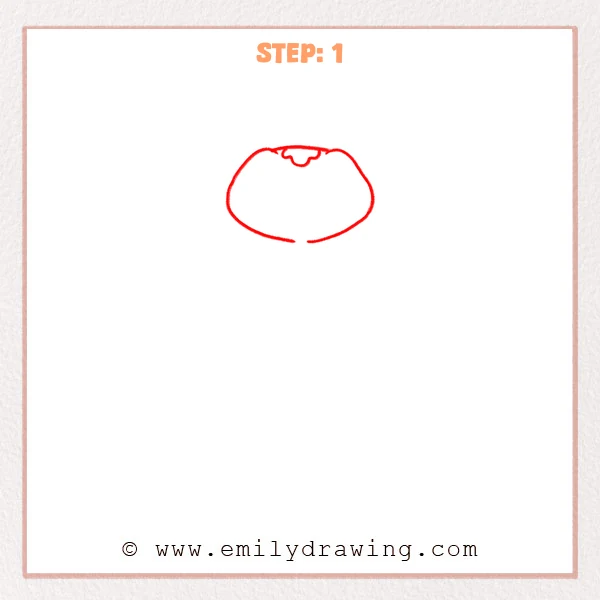
Start near the top of the page with a wide, rounded outline, like an upside-down spoon. Add a small bump at the top center to mark where the head will sit. Leave a small gap at the bottom so the shape stays open for now.
Pro Tip: Keep both curves balanced so the hood feels steady and even.
Alt Text: A simple outline of a cobra’s wide hood with a small head bump at the top center and a small gap at the bottom.
Step 2: Add the Face and Forked Tongue
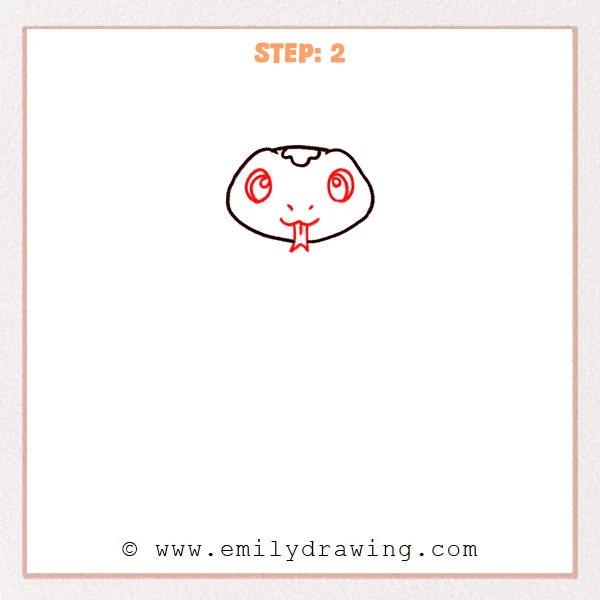
Inside the hood, add two large oval eyes, one on each side, with the pupils slightly turned inward and a tiny highlight. Place two small nostrils in the center, then draw a gentle smile line and a forked tongue sticking out.
Pro Tip: Keep the eyes the same size and level for a cute, calm look.
Alt Text: A cobra hood outline with big oval eyes, small nostrils, a smiling mouth, and a forked tongue added.
Step 3: Add the Body and Wider Hood Curves
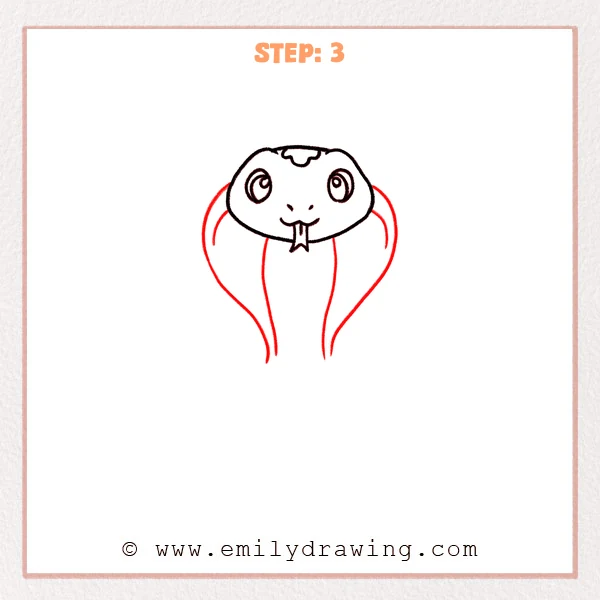
Add two long outer curves that start from each side of the head and flow downward, making the hood look wide and open. Then draw two inner curves under the chin to form the front of the body, narrowing slightly near the bottom.
Pro Tip: Keep the outer curves smooth and roomy so the hood feels spread out.
Alt Text: A cute cobra face with two wide outer hood curves and two inner body lines extending downward.
Step 4: Add Rounded Side Details on the Body

On both sides of the body’s middle area, add one rounded bump that sticks out like a small cloud shape. Keep each one close to the body outline, but leave a small gap before the outer hood line.
Pro Tip: Match the two rounded shapes in size and height for a neat look.
Alt Text: A cute cobra with a wide hood and body, now featuring two rounded side shapes added midway down the body.
Step 5: Add Belly Stripes and a Curled Tail
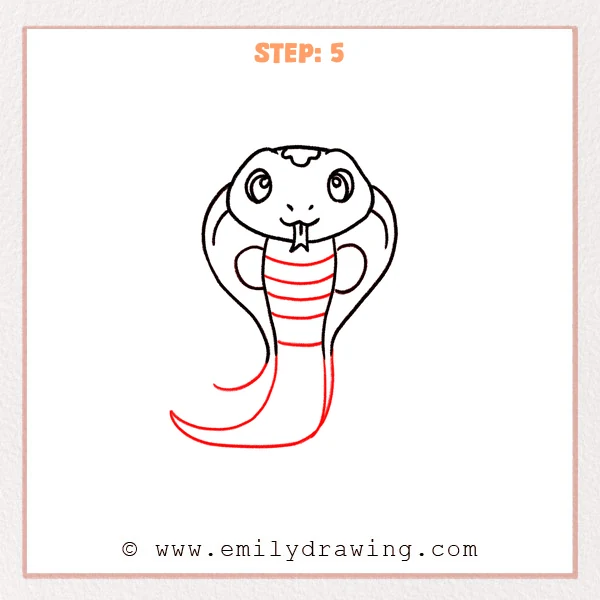
Draw several curved horizontal bands across the front of the body, like soft belts that follow the body’s curve. Then extend the lower body and sweep it left into a big curl for the tail, adding one inner curve to show thickness.
Pro Tip: Let the stripe ends stop short of the edges for more depth.
Alt Text: A cute cobra drawing with belly stripes added and the body extended into a large curled tail with an inner line for thickness.
Step 6: Finish the Stripe Details on the Tail
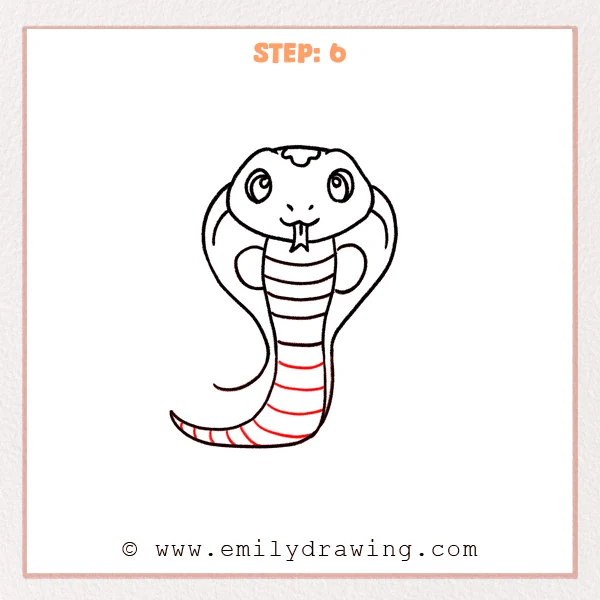
Continue the curved belly bands downward so the segments reach into the bend of the tail. Then add a few short vertical separators on the small tail tip at the far left to break it into tiny sections.
Pro Tip: Let the stripes get slightly narrower as they move down the body.
Alt Text: A cute cobra drawing with additional belly stripes extended down the body and small segmented lines added on the tail tip.
Step 7: Draw the Coiled Base Body
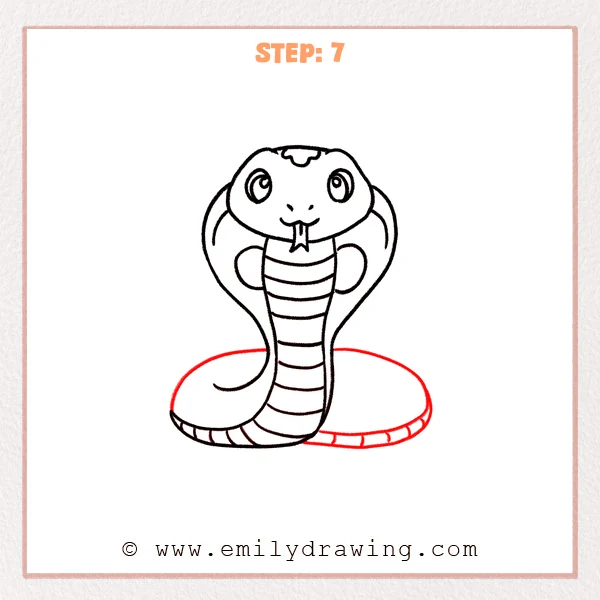
Add a large, flat oval shape under the body to show the cobra coiling on the ground, making the right side wider and rounder. Then place a few short vertical separators along the bottom edge to give the coil simple segments.
Pro Tip: Keep the outer coil line smooth so it feels gently wrapped.
Alt Text: A cute cobra with a new large oval coil added at the bottom, plus small segmented marks along the lower edge.
Step 8: Add Pattern Spots on the Coil
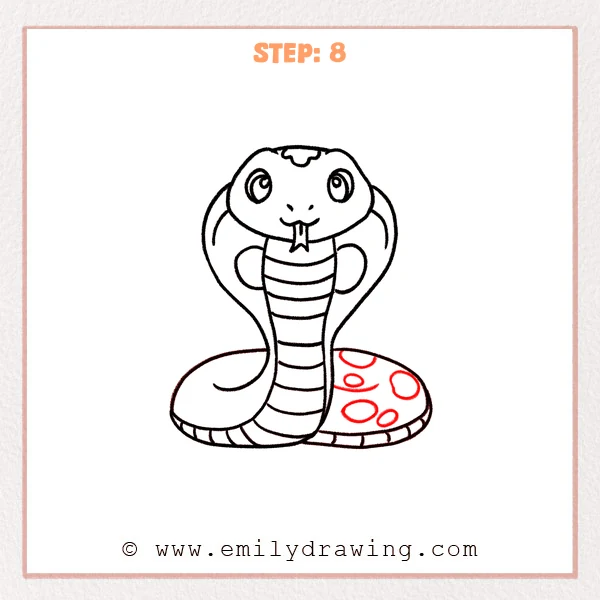
On the right side of the coiled body, add several oval spots in different sizes. Scatter them with some space between each one, following the curve instead of lining them up.
Pro Tip: Place the larger spots first, then fill in with smaller ones.
Alt Text: A cute cobra with its coiled base now decorated with several oval spots on the right side.
Step 9: Add Spots to the Left Coil
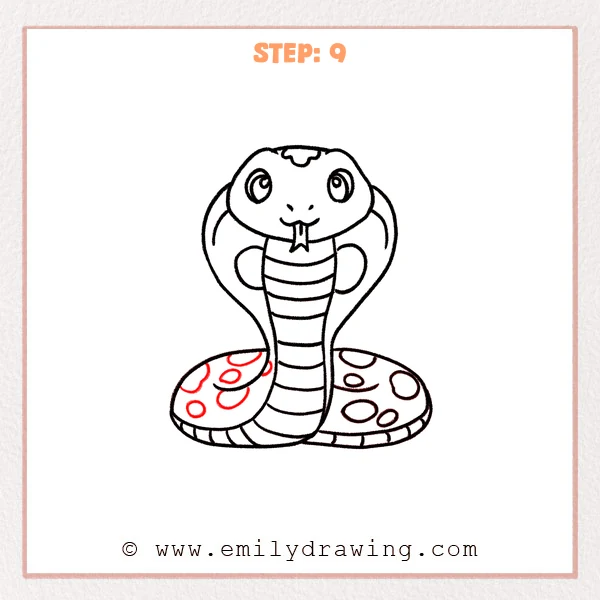
Add a few oval spots on the left side of the coiled body, mixing large and small shapes. Place them along the curve of the coil, and keep a little space from the outer edge line.
Pro Tip: Vary the spot sizes so the pattern feels more natural.
Alt Text: A cute cobra with spot patterns now added to both the left and right coiled sections.
Step 10: Color in your drawing!
Fun Facts
- Cobras can spread their neck ribs to make a wide hood when they feel threatened.
- Many cobras use their patterns and posture to look bigger than they are.
- A cobra’s forked tongue helps it “smell” by collecting tiny scent clues in the air.
Pin it now, Draw later!
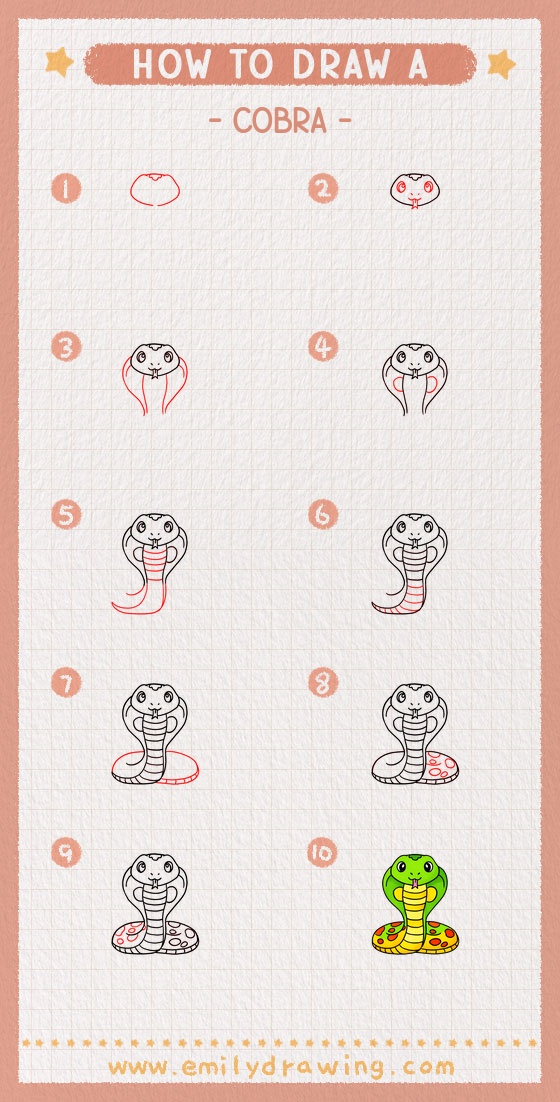
You now have a complete cobra drawing with a wide hood, clear belly bands, and a patterned coil. If you want to add color, try a warm brown or sandy tan for the body, then shade the underside a little darker. A soft gray shadow under the coil can help your cobra feel grounded.
One common beginner mistake is making the hood curves uneven, so the cobra looks like it is leaning. If that happens, gently adjust one side to match the other before you outline.
Keep practicing this step by step drawing, and try changing the spot shapes or stripe spacing next time. When you are ready, draw another snake pose or a new animal and build your skills one small step at a time.
Get the FREE Printable Drawing Guide
FREE Download Printable Cobra Drawing Tutorial
Frequently Asked Questions
How do I make the cobra hood look more even?
Lightly sketch the left curve first, then mirror it on the right side. You can erase and smooth the line until both sides match.
What if my stripes look wobbly?
Draw each stripe as a gentle curve that follows the body shape. Slower lines usually look smoother than fast ones.
Can I color the cobra in a fun way?
Yes. You can use bright greens, blues, or even patterns like hearts or stars, while keeping the belly a lighter shade for contrast.