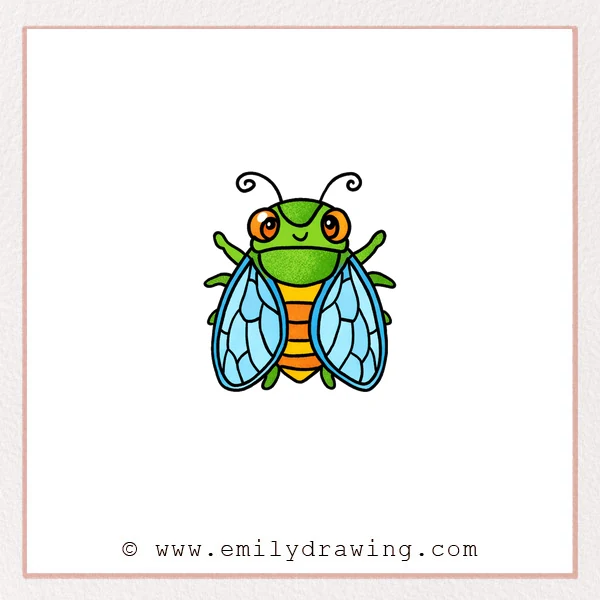
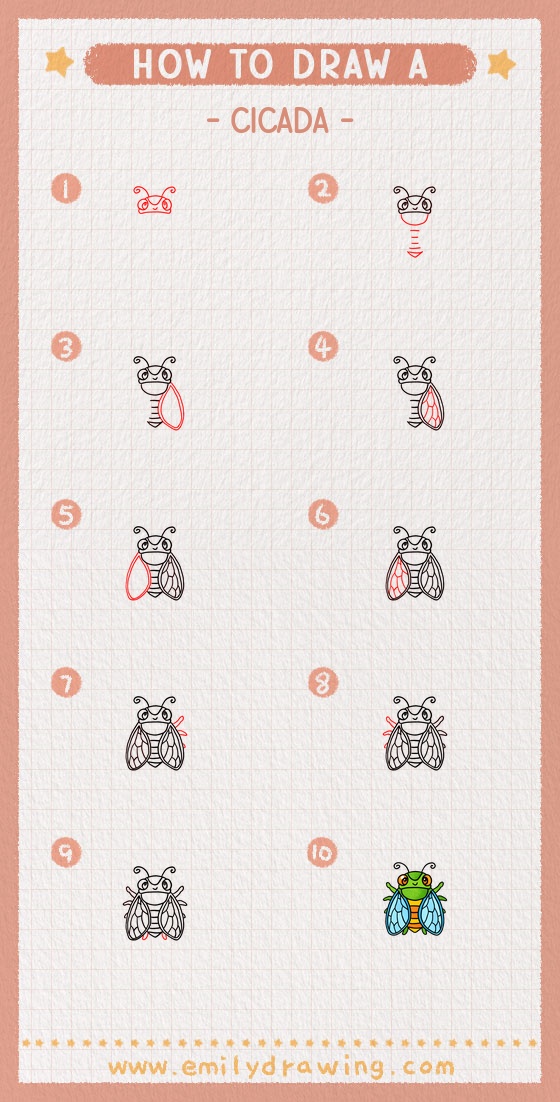
This easy drawing tutorial shows how to draw a cicada step by step.
We will build a friendly cartoon cicada using simple shapes and smooth lines.
Take your time, and enjoy a calm drawing for beginners.
What You Will Need
- Pencil (or a light gray digital brush)
- Eraser
- Black pen or marker for outlining
- Colored pencils or markers (optional)
Here are my RECOMMENDED Art Supplies!
- Crayola Coloring Set (140 Pieces – Mega Value!)
- 24 Colored Crayon Set
- A4 Printer Paper
- Crayola Coloring Pencils
- HP Home Printer with Instant Ink!
Time needed:
14 minutes.
Step-by-Step Drawing Guide
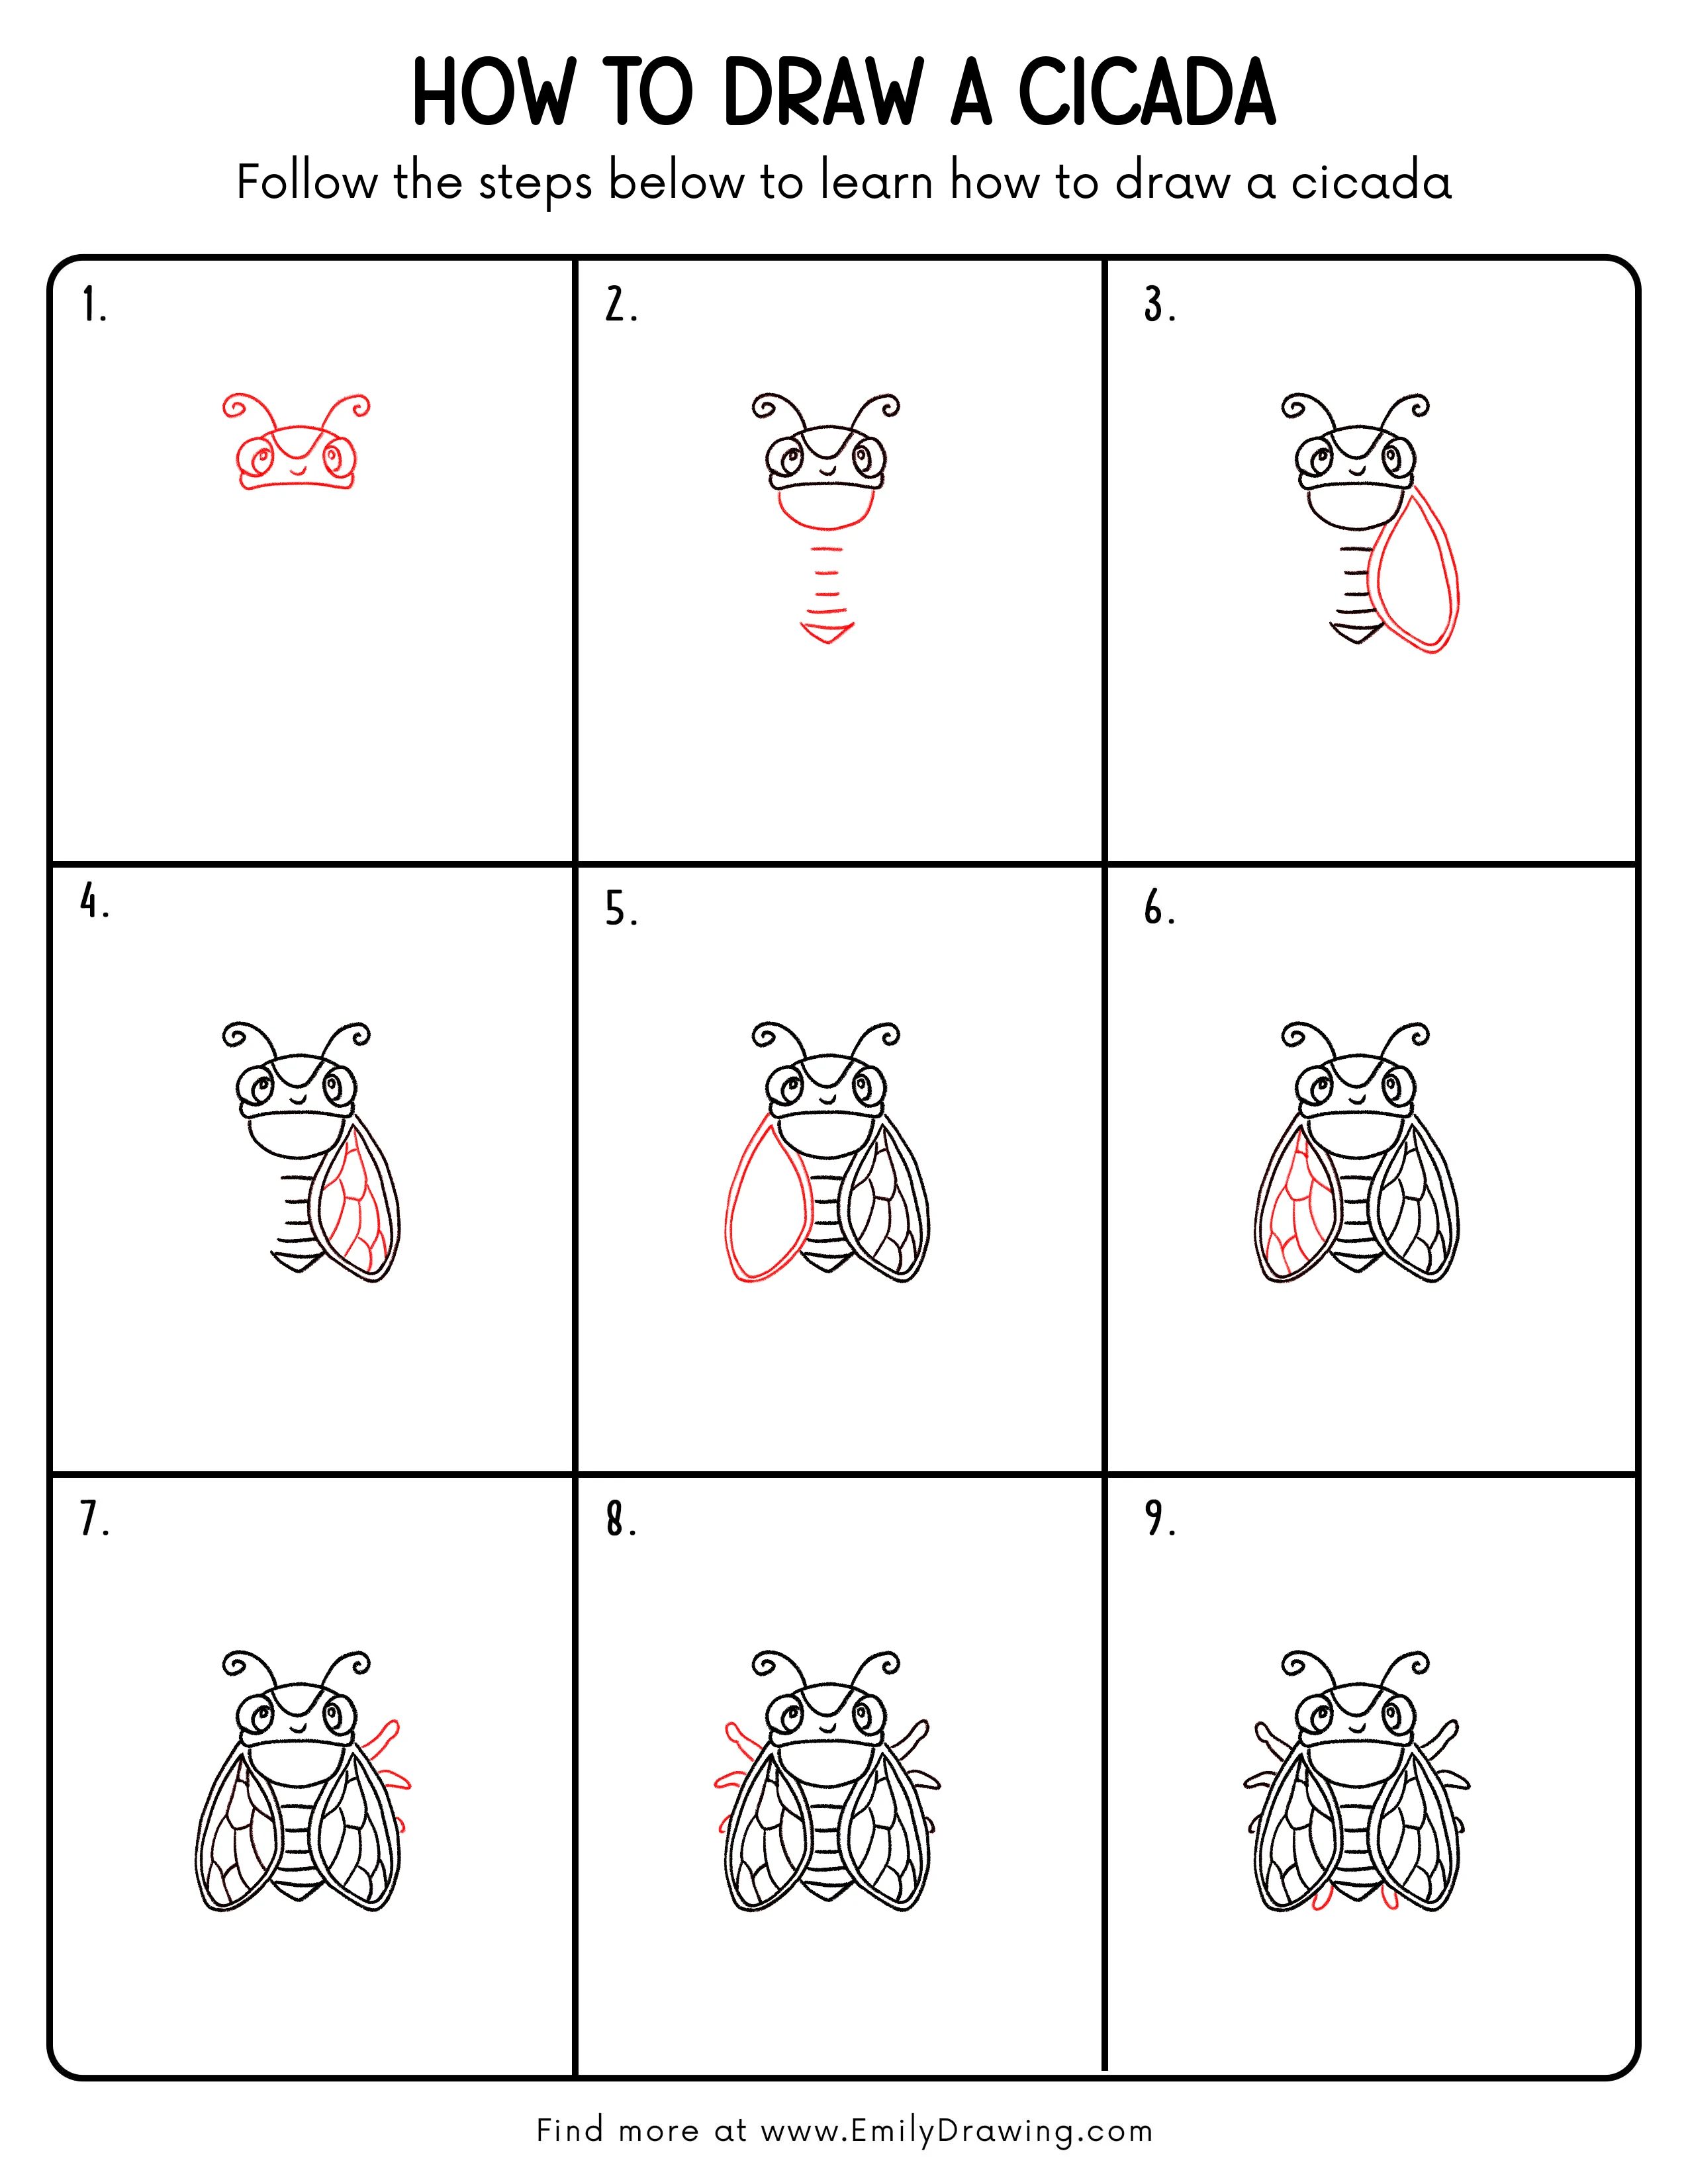
Step 1: Sketch the Cicada Face
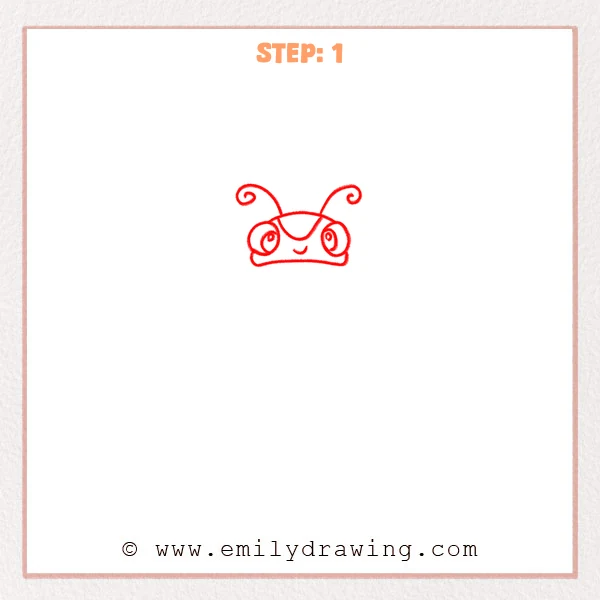
Start with a gentle curved line for the top of the head, then add two large round eyes on each side.
Draw simple spiral shapes inside the eyes, and place a small smile in the center.
Finish by adding two antennae that curl into little loops at the tips.
Pro Tip: Keep both eyes the same size and evenly spaced.
Step 2: Add the Body and Abdomen Segments
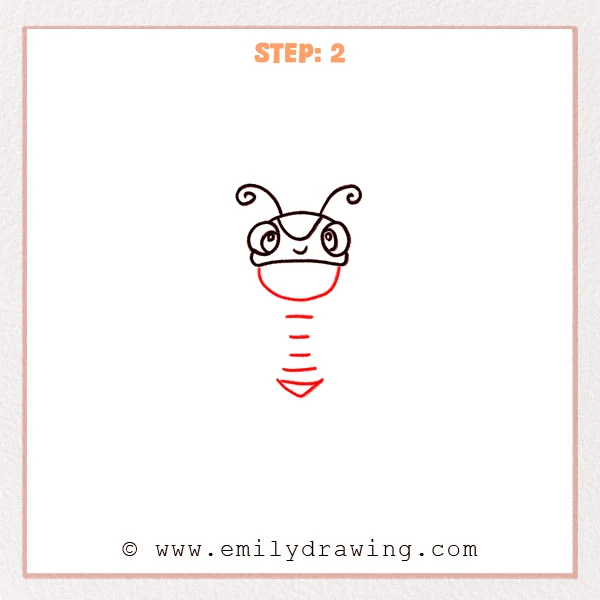
Add a rounded oval under the head to form the cicada’s upper body.
Below it, place a few short horizontal lines as simple abdomen segments, then finish with a small pointed tip.
Keep the belly area open and clean so later details stand out.
Pro Tip: Let the segment lines widen slightly as they go downward.
Step 3: Draw One Large Wing
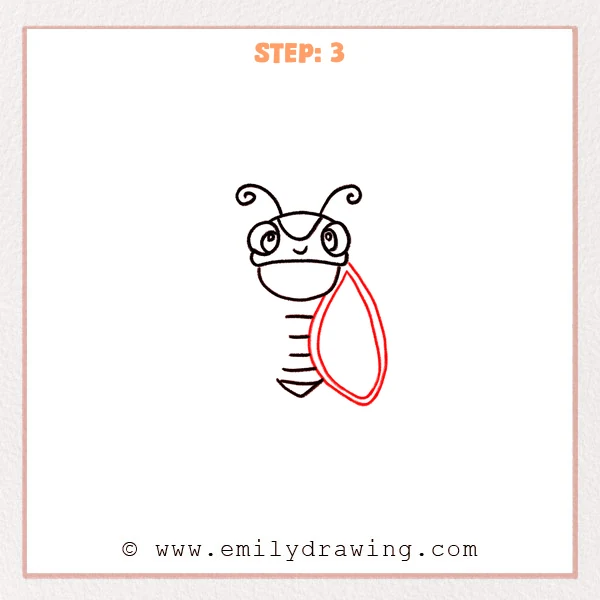
Add a long teardrop-shaped wing on the right side of the body, with the tip pointing downward and the top touching the chest area.
Trace a second line just inside the wing outline to create a double border and give it more shape.
Try to keep the curves smooth from top to bottom.
Pro Tip: Keep the wing outline smooth, using one steady curved stroke.
Step 4: Add Wing Texture Panels
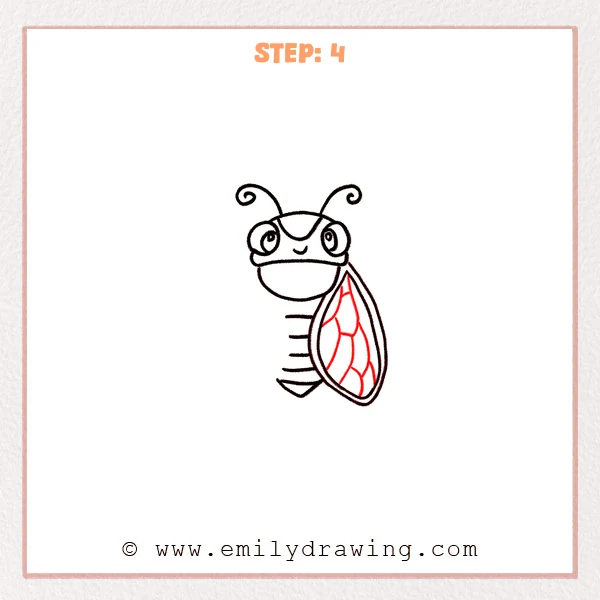
Inside the wing, draw a few curved lines to divide it into leaf-like panels.
Let the curves follow the wing’s direction, and make the outer panels slightly longer.
Leave small open spaces so the wing still feels light.
Pro Tip: Avoid straight lines; gentle curves make the wing look lighter.
Step 5: Add the Second Wing and Overlap
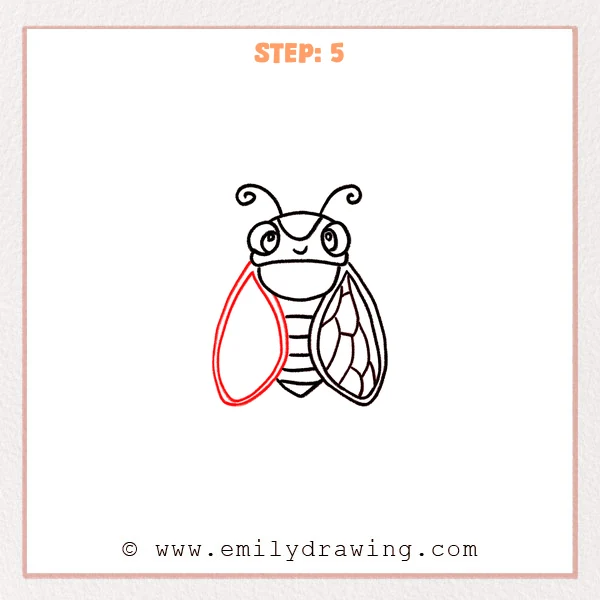
Draw a matching teardrop-shaped wing on the left side, starting under the head and hanging down beside the body.
Add an inner border line, then let the two wings overlap slightly in front of the abdomen for depth.
Keep the overlap soft, not sharp or jagged.
Pro Tip: Keep both wings similar in length so their tips line up neatly.
Step 6: Add Texture to the Second Wing
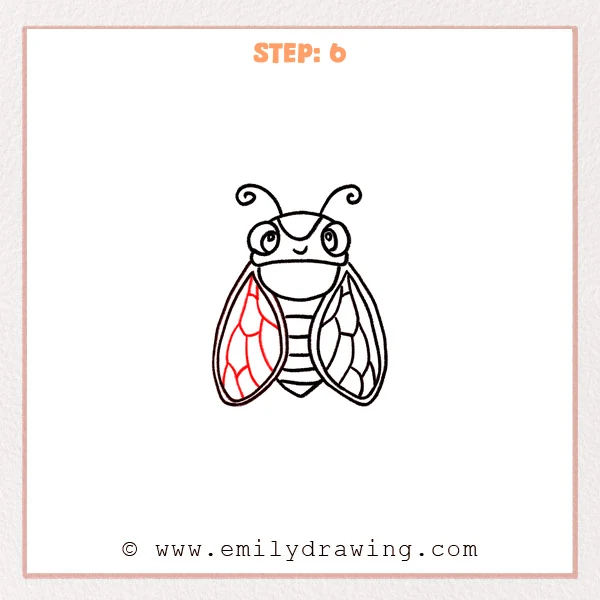
Inside the left wing, use curved lines to divide it into a few leaf-like panels.
Keep the panels flowing in the same direction as the wing, and make the lower panels a bit fuller near the tip.
It is fine if the two wings are not perfectly identical.
Pro Tip: The patterns can differ, but keep the curve style consistent.
Step 7: Add the Little Legs Behind the Wings
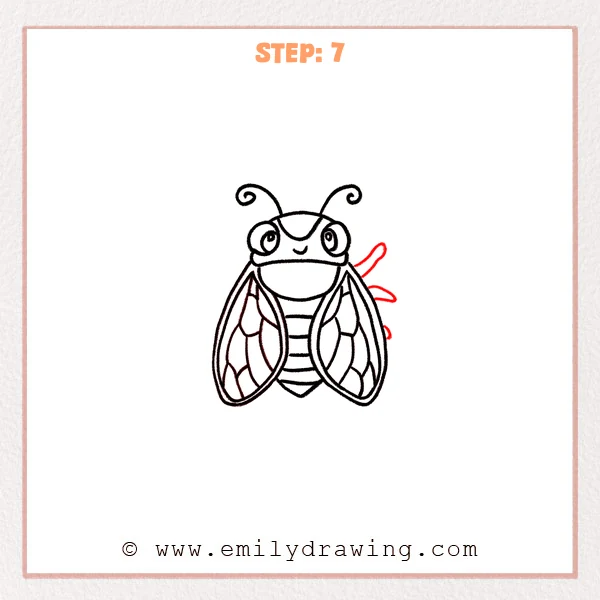
Behind the right wing edge, add a few short curved legs that peek out from the body.
Round the tips slightly, and leave small gaps between each leg so they do not blend together.
Let the legs sit behind the wing to keep the layering clear.
Pro Tip: Keep the legs short for a cute, simple cartoon proportion.
Step 8: Add the Legs on the Other Side for Balance
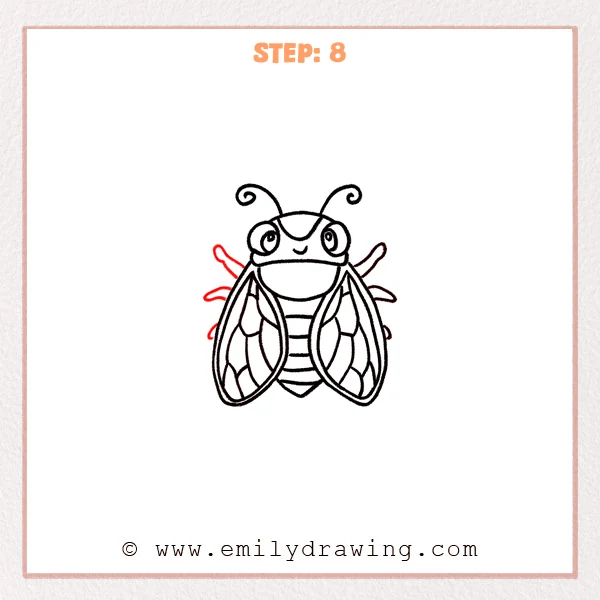
Behind the left wing edge, add a few short curved legs to match the right side.
Make the upper leg a little longer as if it is reaching out, then keep the other legs shorter and rounded.
Try to keep the legs evenly spaced on both sides.
Pro Tip: Keep the number and spacing of legs similar on both sides.
Step 9: Add Two Little Feet at the Bottom
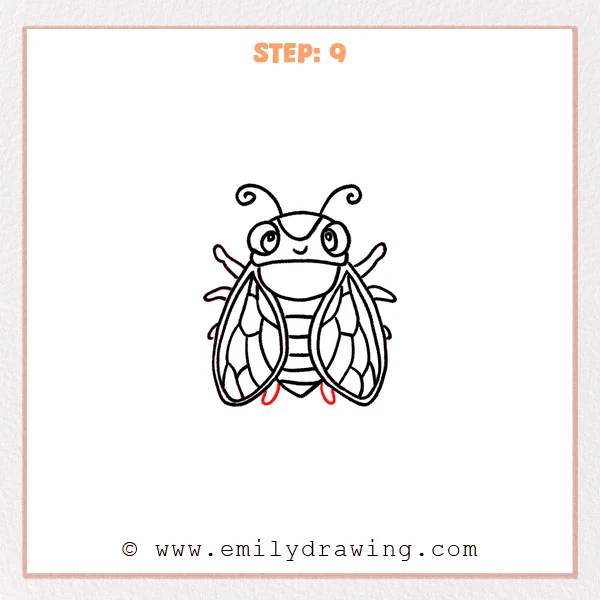
Under the abdomen, between the two wings, add two short legs that look like small teardrops peeking out.
Place them on each side of the center line with similar length so the cicada feels balanced.
These small feet help the cicada look like it can stand.
Pro Tip: Keep the feet close to the center so they feel attached underneath.
Step 10: Color in your drawing!
Fun Facts
- Cicadas are known for their loud buzzing songs, made by the males.
- Many cicadas spend most of their life underground before becoming adults.
- Their wings are transparent, so light lines look best for wing details.
Pin it now, Draw later!
You have now drawn a cute cicada with big eyes, curled antennae, layered wings, and simple legs.
For coloring, try a warm brown or green body and keep the wings pale and light.
Add gentle shading under the head and where the wings overlap to show depth.
A common beginner mistake is making the wings different lengths, so check the tips align.
Keep practicing this step by step drawing, and try drawing the cicada in different poses next time.
Get the FREE Printable Drawing Guide
FREE Download Printable Cicada Drawing Tutorial
Frequently Asked Questions
How can I make the cicada wings look more transparent?
Use lighter pressure and thinner lines for the inner panels.
You can also leave more white space inside the wing.
What if my wings do not match?
That is normal in drawing for beginners.
Adjust the longer wing by trimming the outline slightly with your eraser.
Can I simplify this easy drawing tutorial even more?
Yes, you can skip the wing panels and keep only the double outline.
The cicada will still look clear and cute.