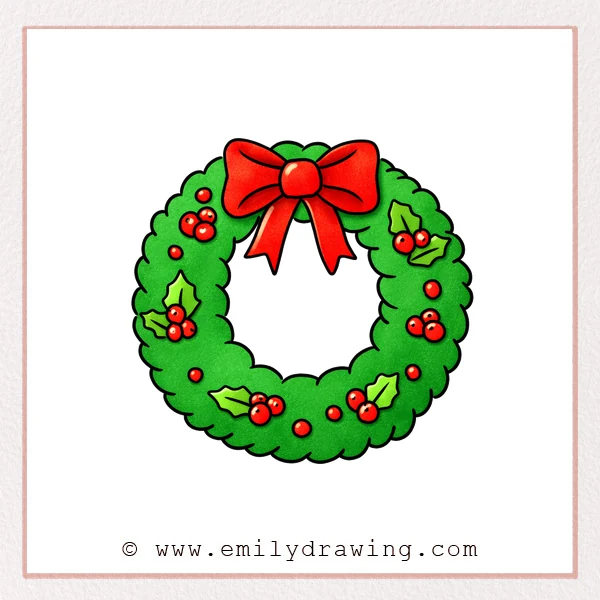
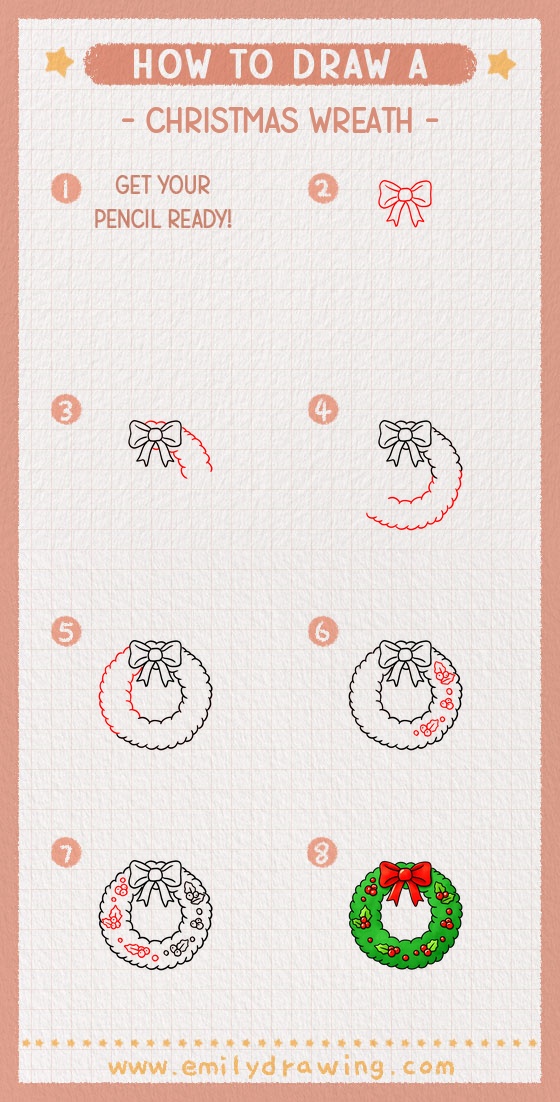
This easy drawing tutorial shows how to draw a Christmas wreath step by step.
We will build a fluffy wreath shape, then add a bow and holly details.
It is a calm, simple drawing for beginners and young artists.
What You Will Need
- Pencil
- Eraser
- Black marker or pen
- Red and green crayons, markers, or colored pencils (optional)
Here are my RECOMMENDED Art Supplies!
- Crayola Coloring Set (140 Pieces – Mega Value!)
- 24 Colored Crayon Set
- A4 Printer Paper
- Crayola Coloring Pencils
- HP Home Printer with Instant Ink!
Time needed:
12 minutes.
Step-by-Step Drawing Guide
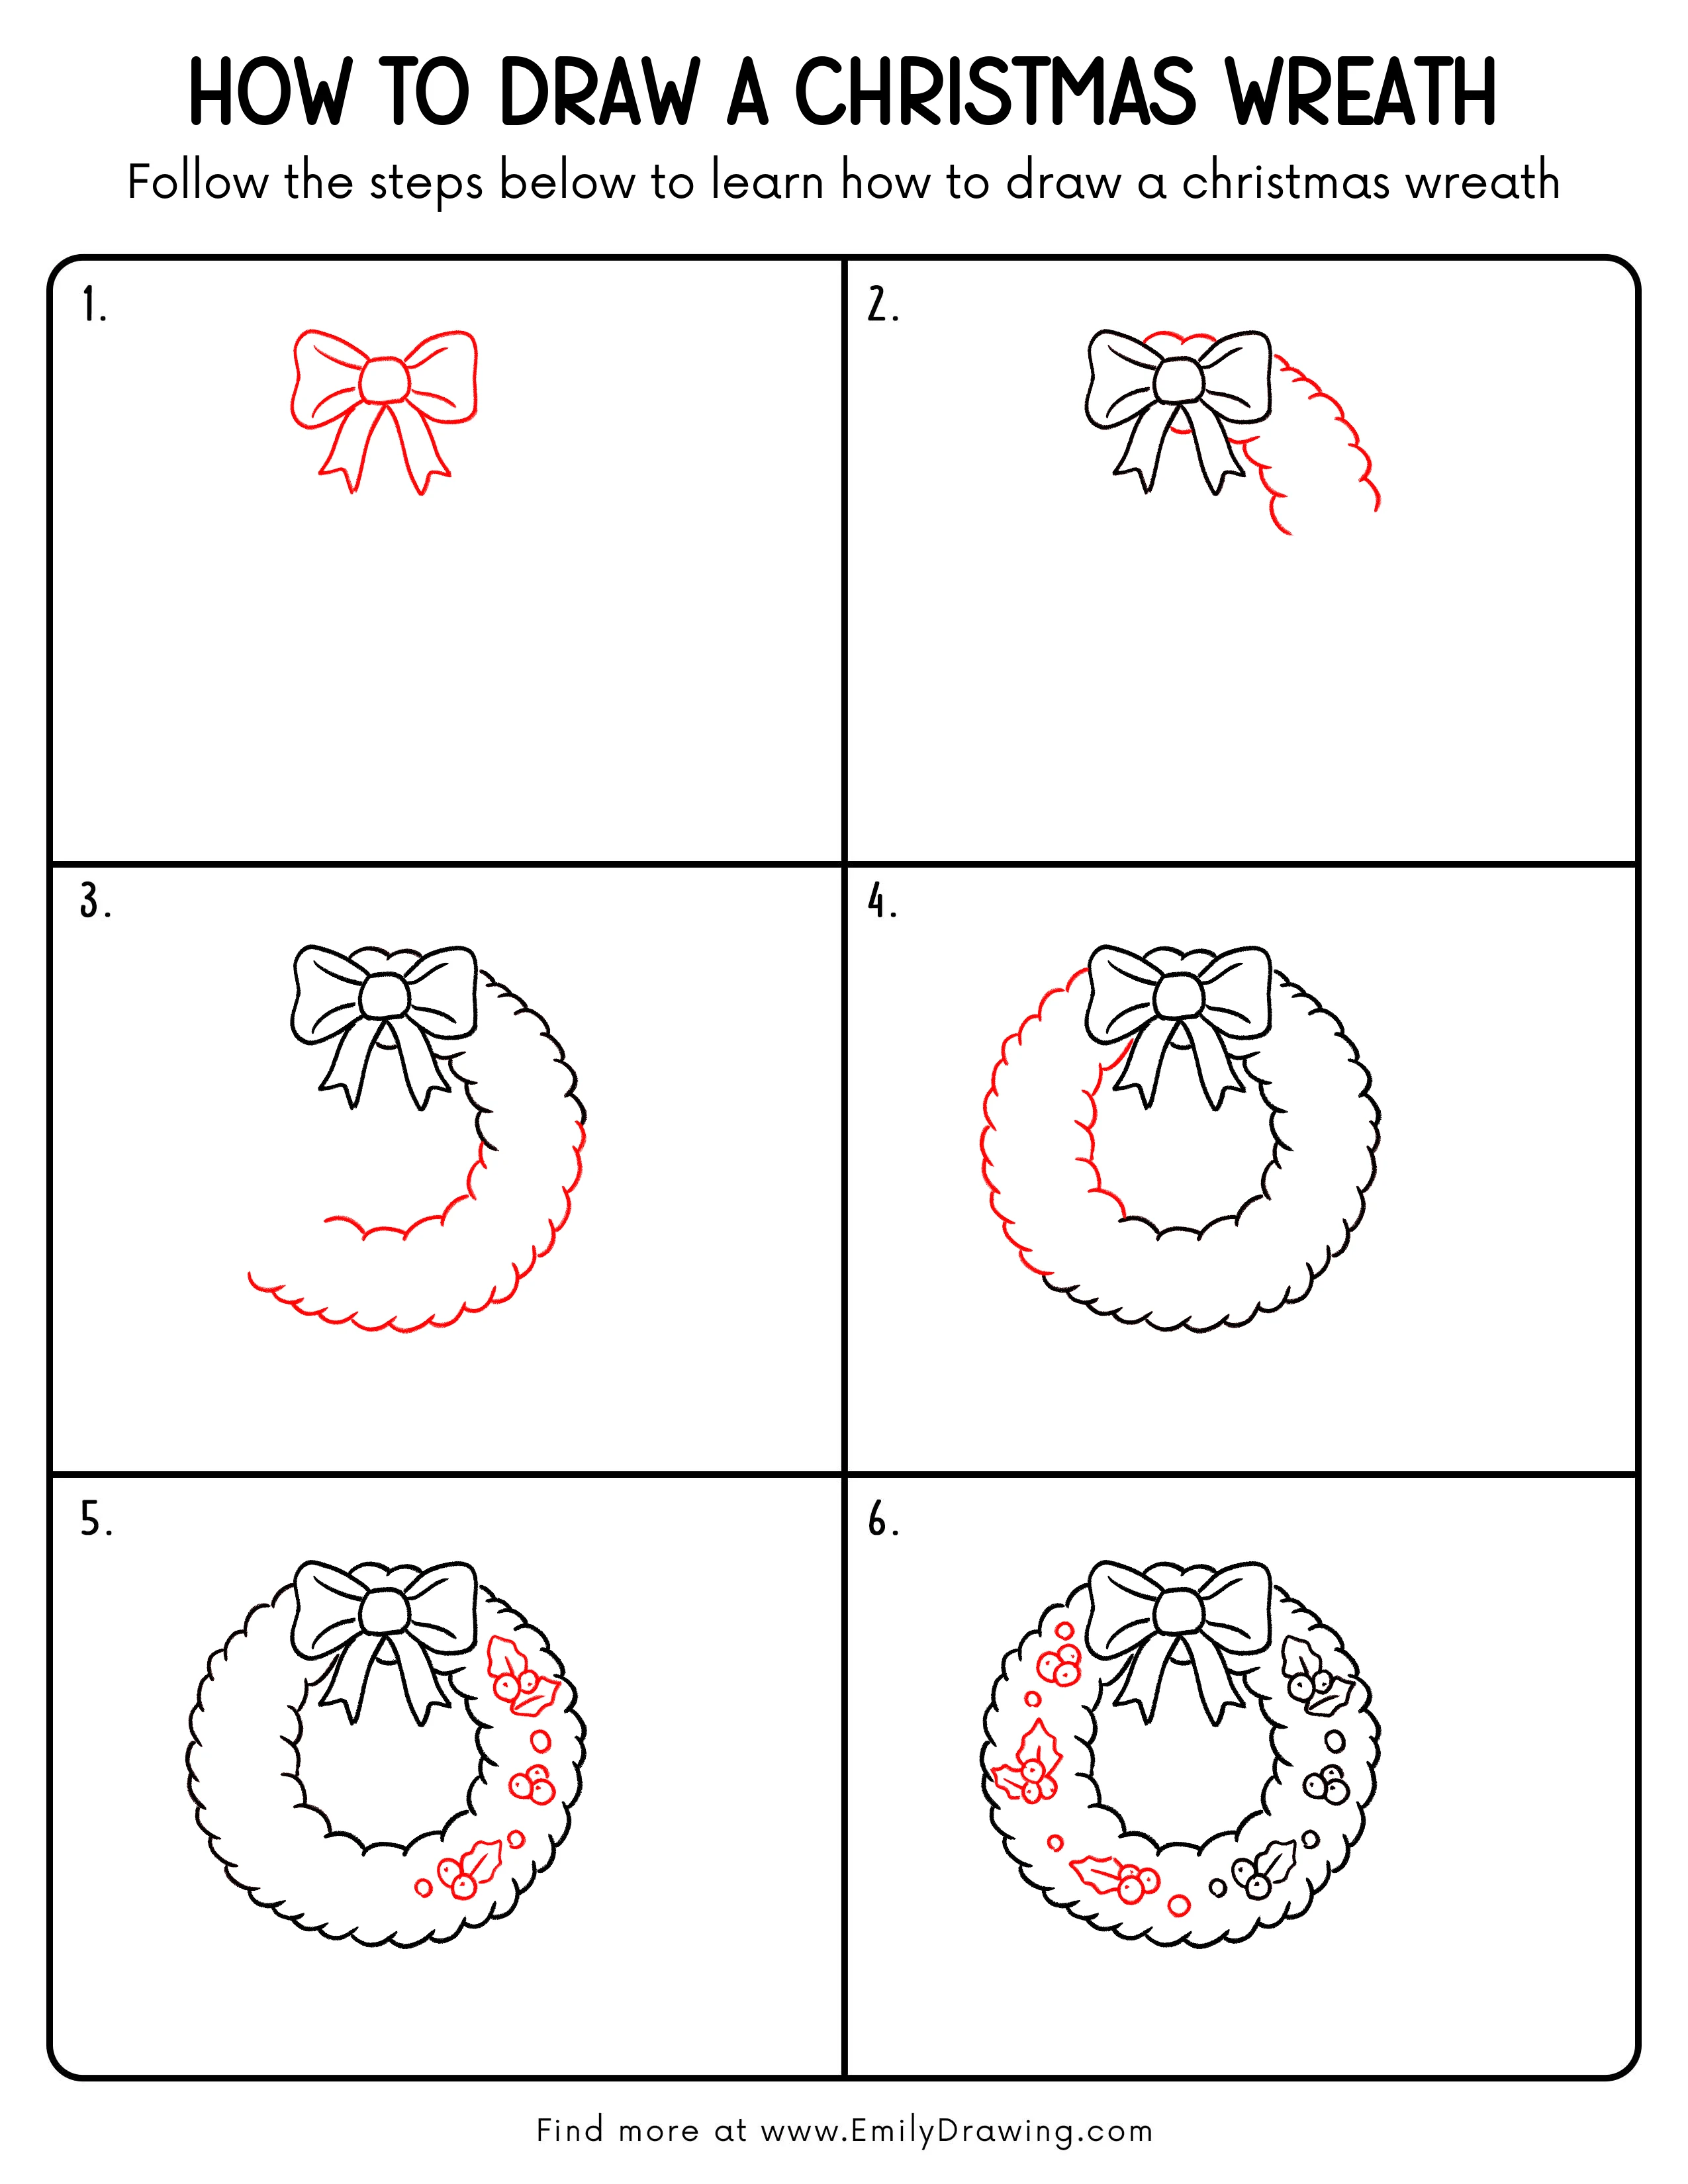
Step 1: Draw a Big Bow
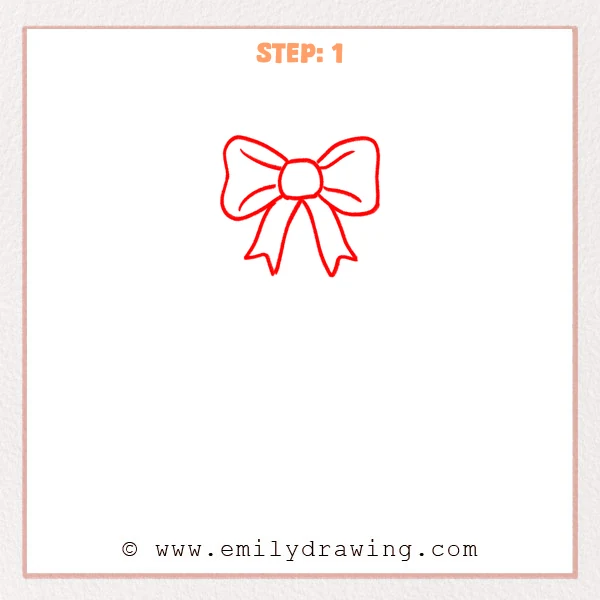
Start with a small rounded square near the top center for the knot.
Add two wide curved loops on both sides, keeping the outer edges puffy and smooth.
Pull two ribbon tails down from the knot, ending with pointed tips or small notches.
Pro Tip: Keep both sides similar in size so the bow looks neat.
Step 2: Add the Wreath’s Outer Outline
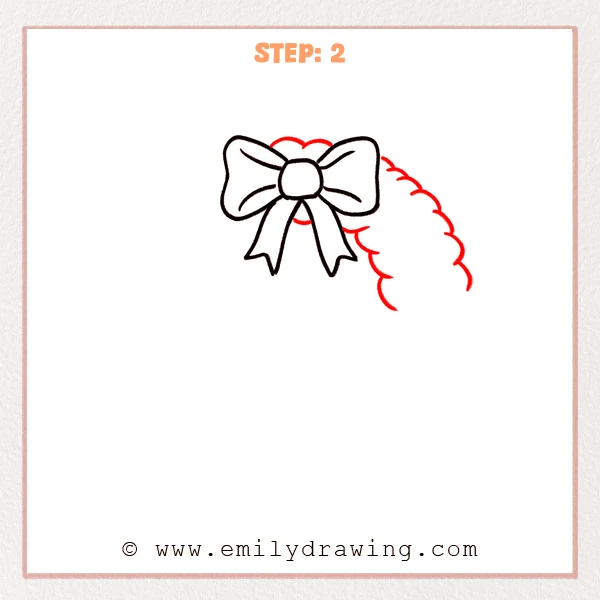
Starting behind the bow, sketch a chain of rounded scallops to form the wreath’s outer edge.
Let it curve down along the right side, then add a few scallops above the bow so the wreath feels wrapped around it.
Pro Tip: Keep the scallops similar in size for a fluffy, even wreath.
Step 3: Complete the Wreath’s Outer Ring
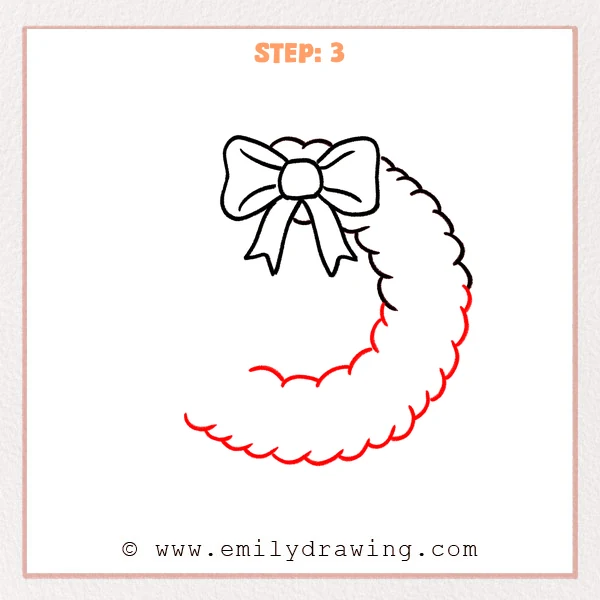
Continue the scalloped edge down the right side, letting it curve into the bottom of the wreath.
Then add more rounded bumps from the lower left, guiding the curve upward while keeping the center open.
Pro Tip: Make the bumps slightly closer on tight curves to keep it smooth.
Step 4: Add the Wreath’s Inner Ring
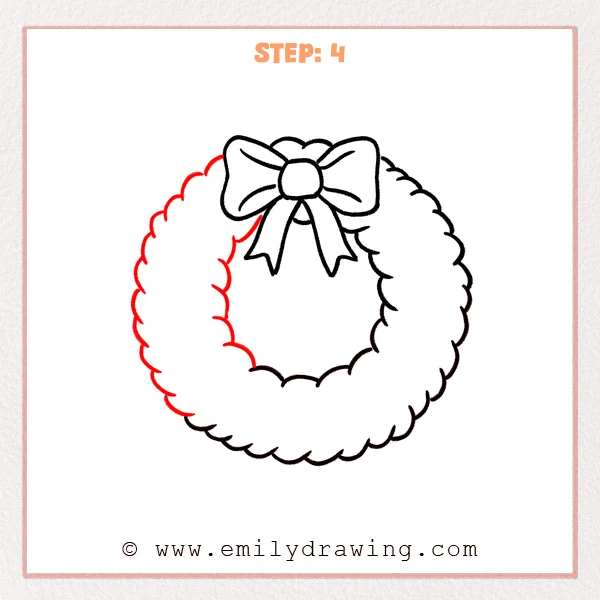
Inside the wreath, add a second line of smaller scallops, starting on the left and moving upward.
Keep a steady gap from the outer edge, and let the inner line tuck behind the bow slightly.
Pro Tip: Keep the inner gap consistent so the wreath looks thick and even.
Step 5: Add Holly Leaves and Berries
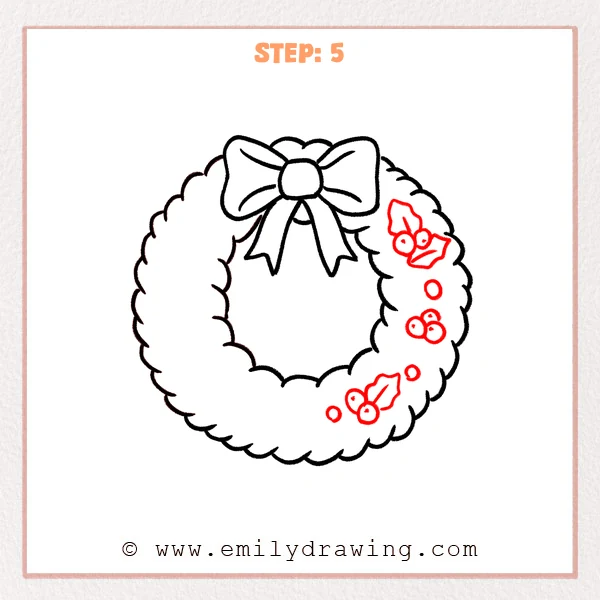
On the right side of the wreath, sketch a pair of pointed holly leaves, opening like a small “V.”
Next to them, add two or three round berries, then place tiny highlight dots to make them feel shiny.
Pro Tip: Point the leaf tips outward and cluster the berries close together.
Step 6: Spread Decorations Around the Wreath
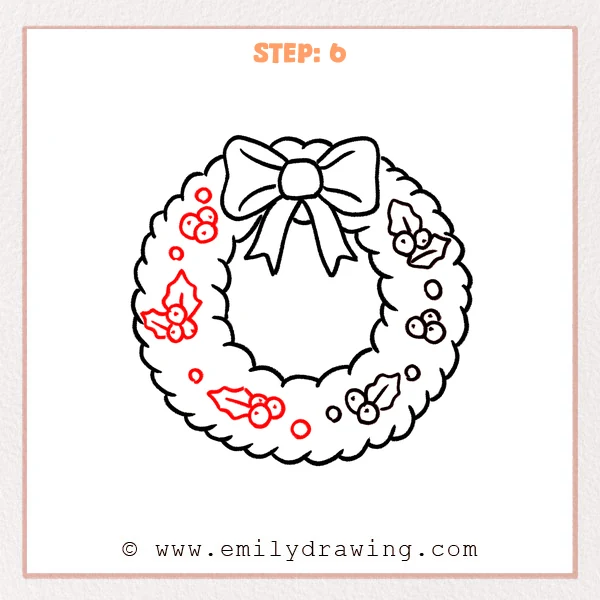
Add another holly cluster on the left side, with two pointed leaves and a few round berries.
Then place a small berry group near the upper left, and dot a couple of extra berries near the bottom to balance the design.
Pro Tip: Group decorations in clusters instead of spacing them evenly.
Step 7: Color in your drawing!
Fun Facts
- Christmas wreaths are often made with evergreen branches because they stay green in winter.
- Holly berries are a classic holiday symbol, often shown as bright red dots in decorations.
- Many wreaths are hung on doors as a warm welcome during the season.
Pin it now, Draw later!
Now you have a complete Christmas wreath drawing with a bow and holly details.
For coloring, try deep green for the wreath, bright red for the berries, and a bold red bow.
Add gentle shading under the bow and behind some scallops to make the wreath look round.
A common beginner mistake is making the inner ring uneven, so take your time with the spacing.
Keep practicing this step by step drawing, and try creating other holiday decorations next.
Get the FREE Printable Drawing Guide
FREE Download Printable Christmas Wreath Drawing Tutorial
Frequently Asked Questions
How do I make the wreath look more fluffy?
Use more scallops, and keep them close together on the curves.
You can also add a few extra small bumps between larger ones.
What if my wreath looks lopsided?
Lightly sketch a big circle guide first, then build scallops around it.
An eraser can help you adjust the widest parts before outlining.
Can I decorate the wreath in a different way?
Yes. You can add bells, candy canes, stars, or small ornaments.
Keep decorations in small clusters so the wreath still feels balanced.