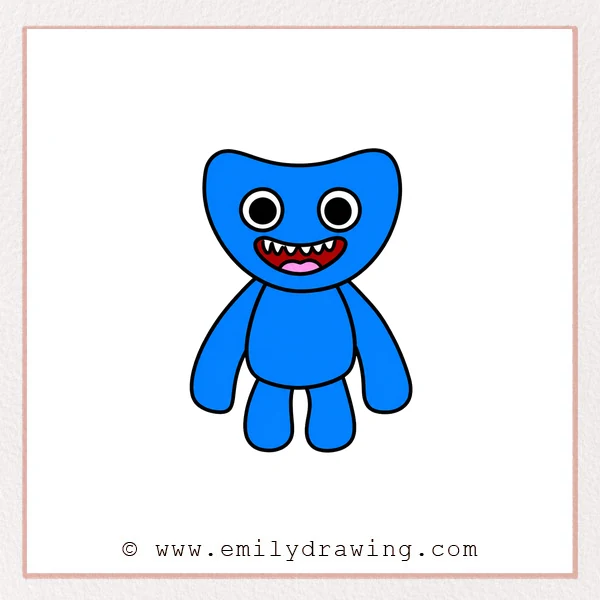
Want to learn how to draw Huggy Wuggy in a simple way? This step by step drawing guide breaks the character into easy shapes, so it is great for beginners and young artists. Take your time with each part, and enjoy building the drawing one step at a time.
What You Will Need
- Drawing paper
- Pencil or black marker
- Red pencil or red marker for guide shapes
- Eraser
- Colored pencils or crayons if you want to color the final drawing
Here are my RECOMMENDED Art Supplies!
- Crayola Coloring Set (140 Pieces – Mega Value!)
- 24 Colored Crayon Set
- A4 Printer Paper
- Crayola Coloring Pencils
- HP Home Printer with Instant Ink!
Time needed:
20 minutes.
Step-by-Step Drawing Guide
Step 1: Draw the Two Eyes
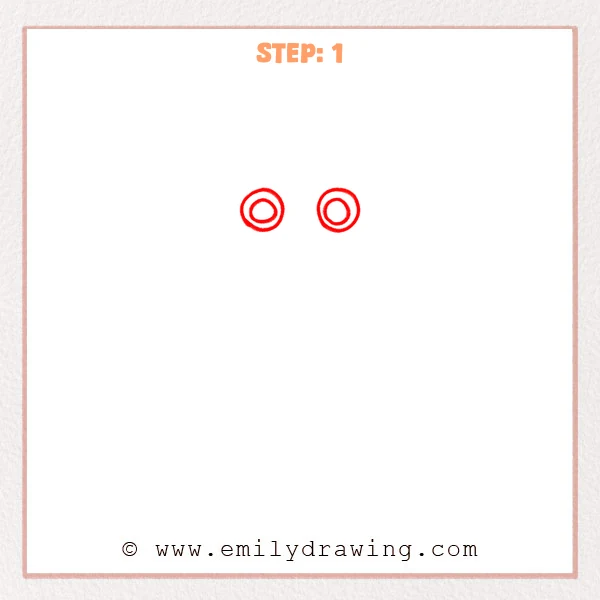
Start near the upper part of the page with two ring shapes, one on each side. Add a smaller circle inside each ring to make the eyes look round and clear. Keep the eyes simple and evenly spaced.
Pro Tip: Leave enough space between the two eyes so the face will look balanced later.
[Alt Text: Step 1 sketch of Huggy Wuggy with two simple circular eyes drawn near the top of the page.]
Step 2: Add the Big Mouth and Teeth
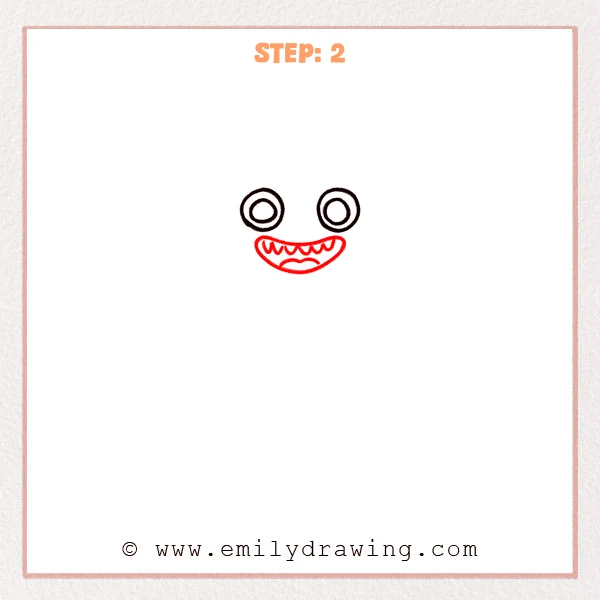
Draw a wide smiling mouth under the eyes, shaped like a curved crescent. Add a row of small pointed teeth along the upper edge, then draw a curved tongue shape near the bottom. This gives Huggy Wuggy a playful but recognizable expression.
Pro Tip: Make the mouth a little wider than both eyes together to give Huggy Wuggy a more expressive look.
[Alt Text: Step 2 sketch of Huggy Wuggy with round eyes, a wide smiling mouth, pointed teeth, and a curved tongue added.]
Step 3: Draw the Head Outline
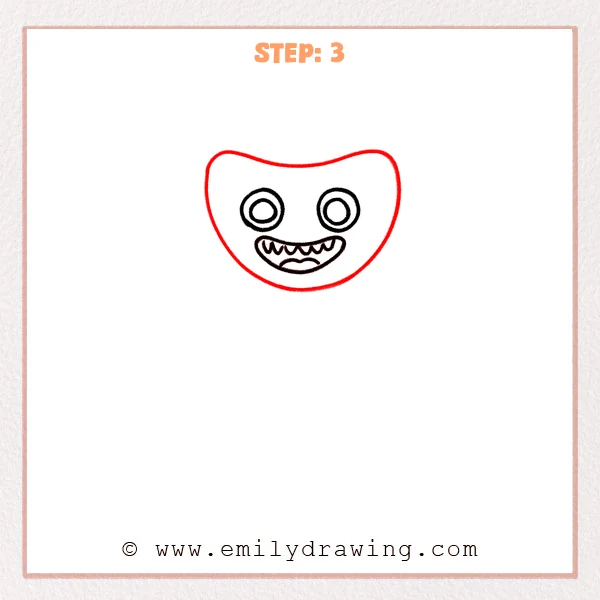
Draw a large head shape around the eyes and mouth, with gentle bumps on both upper sides. Make the chin rounded, and keep the face details centered inside the wide outline. This big head shape is one of the main features of Huggy Wuggy.
Pro Tip: Make the head much larger than the facial features so the furry body will fit naturally later.
[Alt Text: Step 3 sketch of Huggy Wuggy with eyes, mouth, teeth, tongue, and a large rounded head outline added.]
Step 4: Add the Body and Long Arms
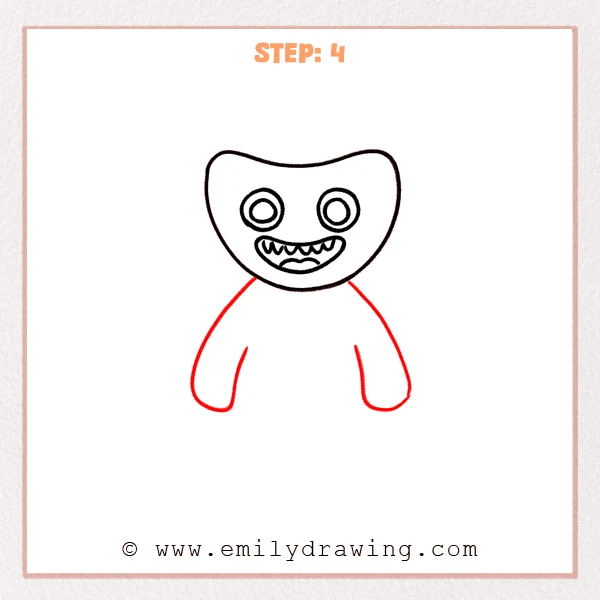
From both lower sides of the head, draw two long outer lines downward to form a loose body shape. Add one shorter curved line inside each side so the arms look like they are hanging down. Keep the arms long and soft-looking.
Pro Tip: Keep the bottoms of the arms rounded so the character feels softer and cuter.
[Alt Text: Step 4 sketch of Huggy Wuggy with the head finished and a loose body shape with long hanging arms added.]
Step 5: Draw the Belly Outline
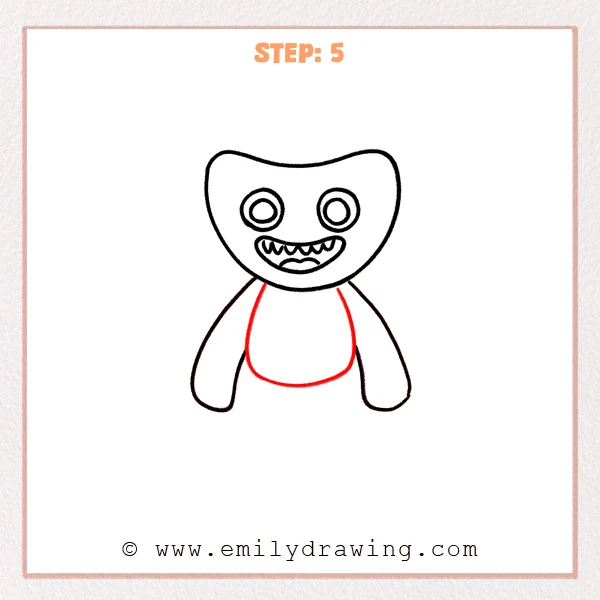
Draw a rounded belly shape in the middle of the body, curving from below the shoulders toward the lower body. This new line separates the center of the body and makes Huggy Wuggy look more complete. Try to keep the belly shape smooth and even.
Pro Tip: Keep both sides of the belly curve as even as possible so the body feels steady.
[Alt Text: Step 5 sketch of Huggy Wuggy with a rounded belly outline added inside the body.]
Step 6: Add the Two Legs
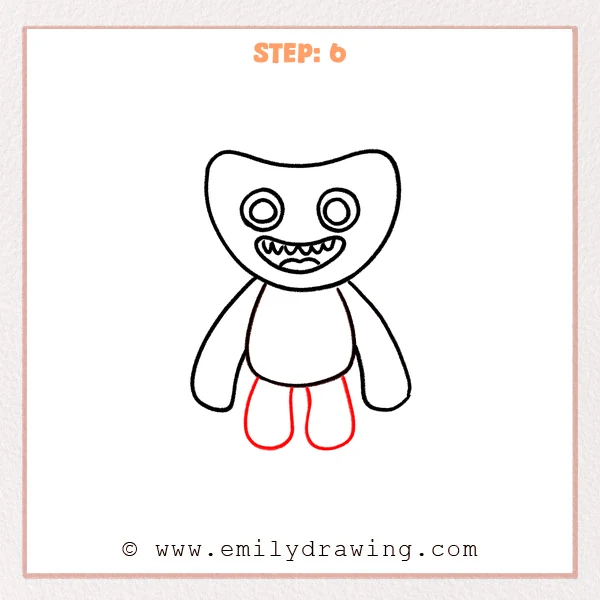
Draw two short legs below the belly, one on each side. Keep the bottoms rounded, and leave a narrow space between the legs. Now the full body shape of Huggy Wuggy is easy to recognize.
Pro Tip: Keep the two legs close in length so Huggy Wuggy looks balanced while standing.
[Alt Text: Step 6 sketch of Huggy Wuggy with two short rounded legs added below the belly.]
Step 7: Color in your drawing!
Fun Facts
- Huggy Wuggy is known for a tall body, long arms, and a very wide smile.
- Simple shapes can make character drawing much easier for beginners.
- Many cartoon-style characters start with basic circles, curves, and rounded outlines.
Pin it now, Draw later!
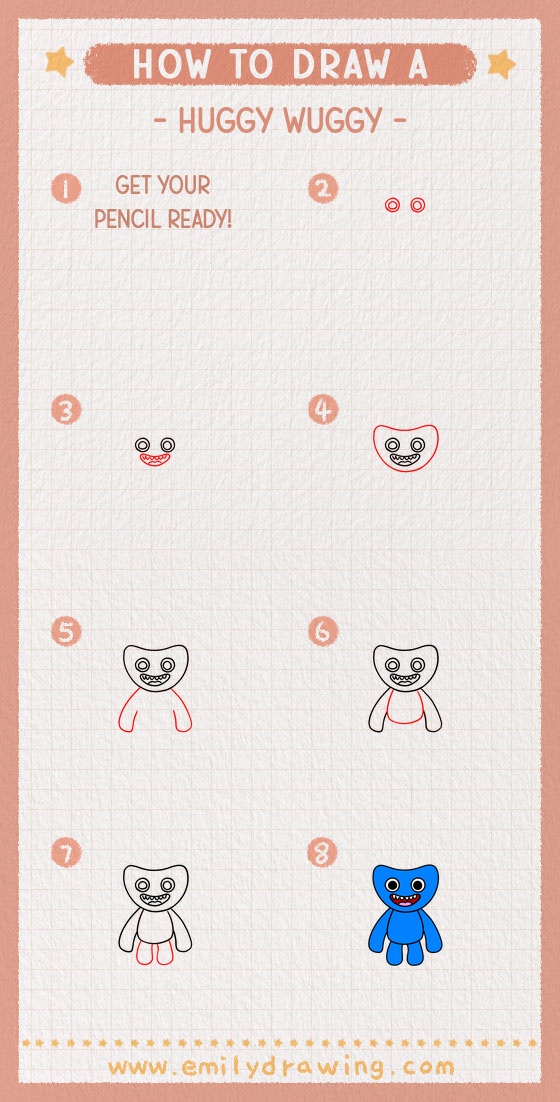
You now know how to draw Huggy Wuggy with an easy drawing for beginners approach. You started with the face, added the head, then built the body step by step. If you want, you can go over the final lines neatly and color the character to finish your artwork. Keep practicing this step by step drawing method, and try drawing it again to make your lines even smoother. If you enjoyed this easy drawing tutorial, save it and come back for more drawing practice.
Get the FREE Printable Drawing Guide
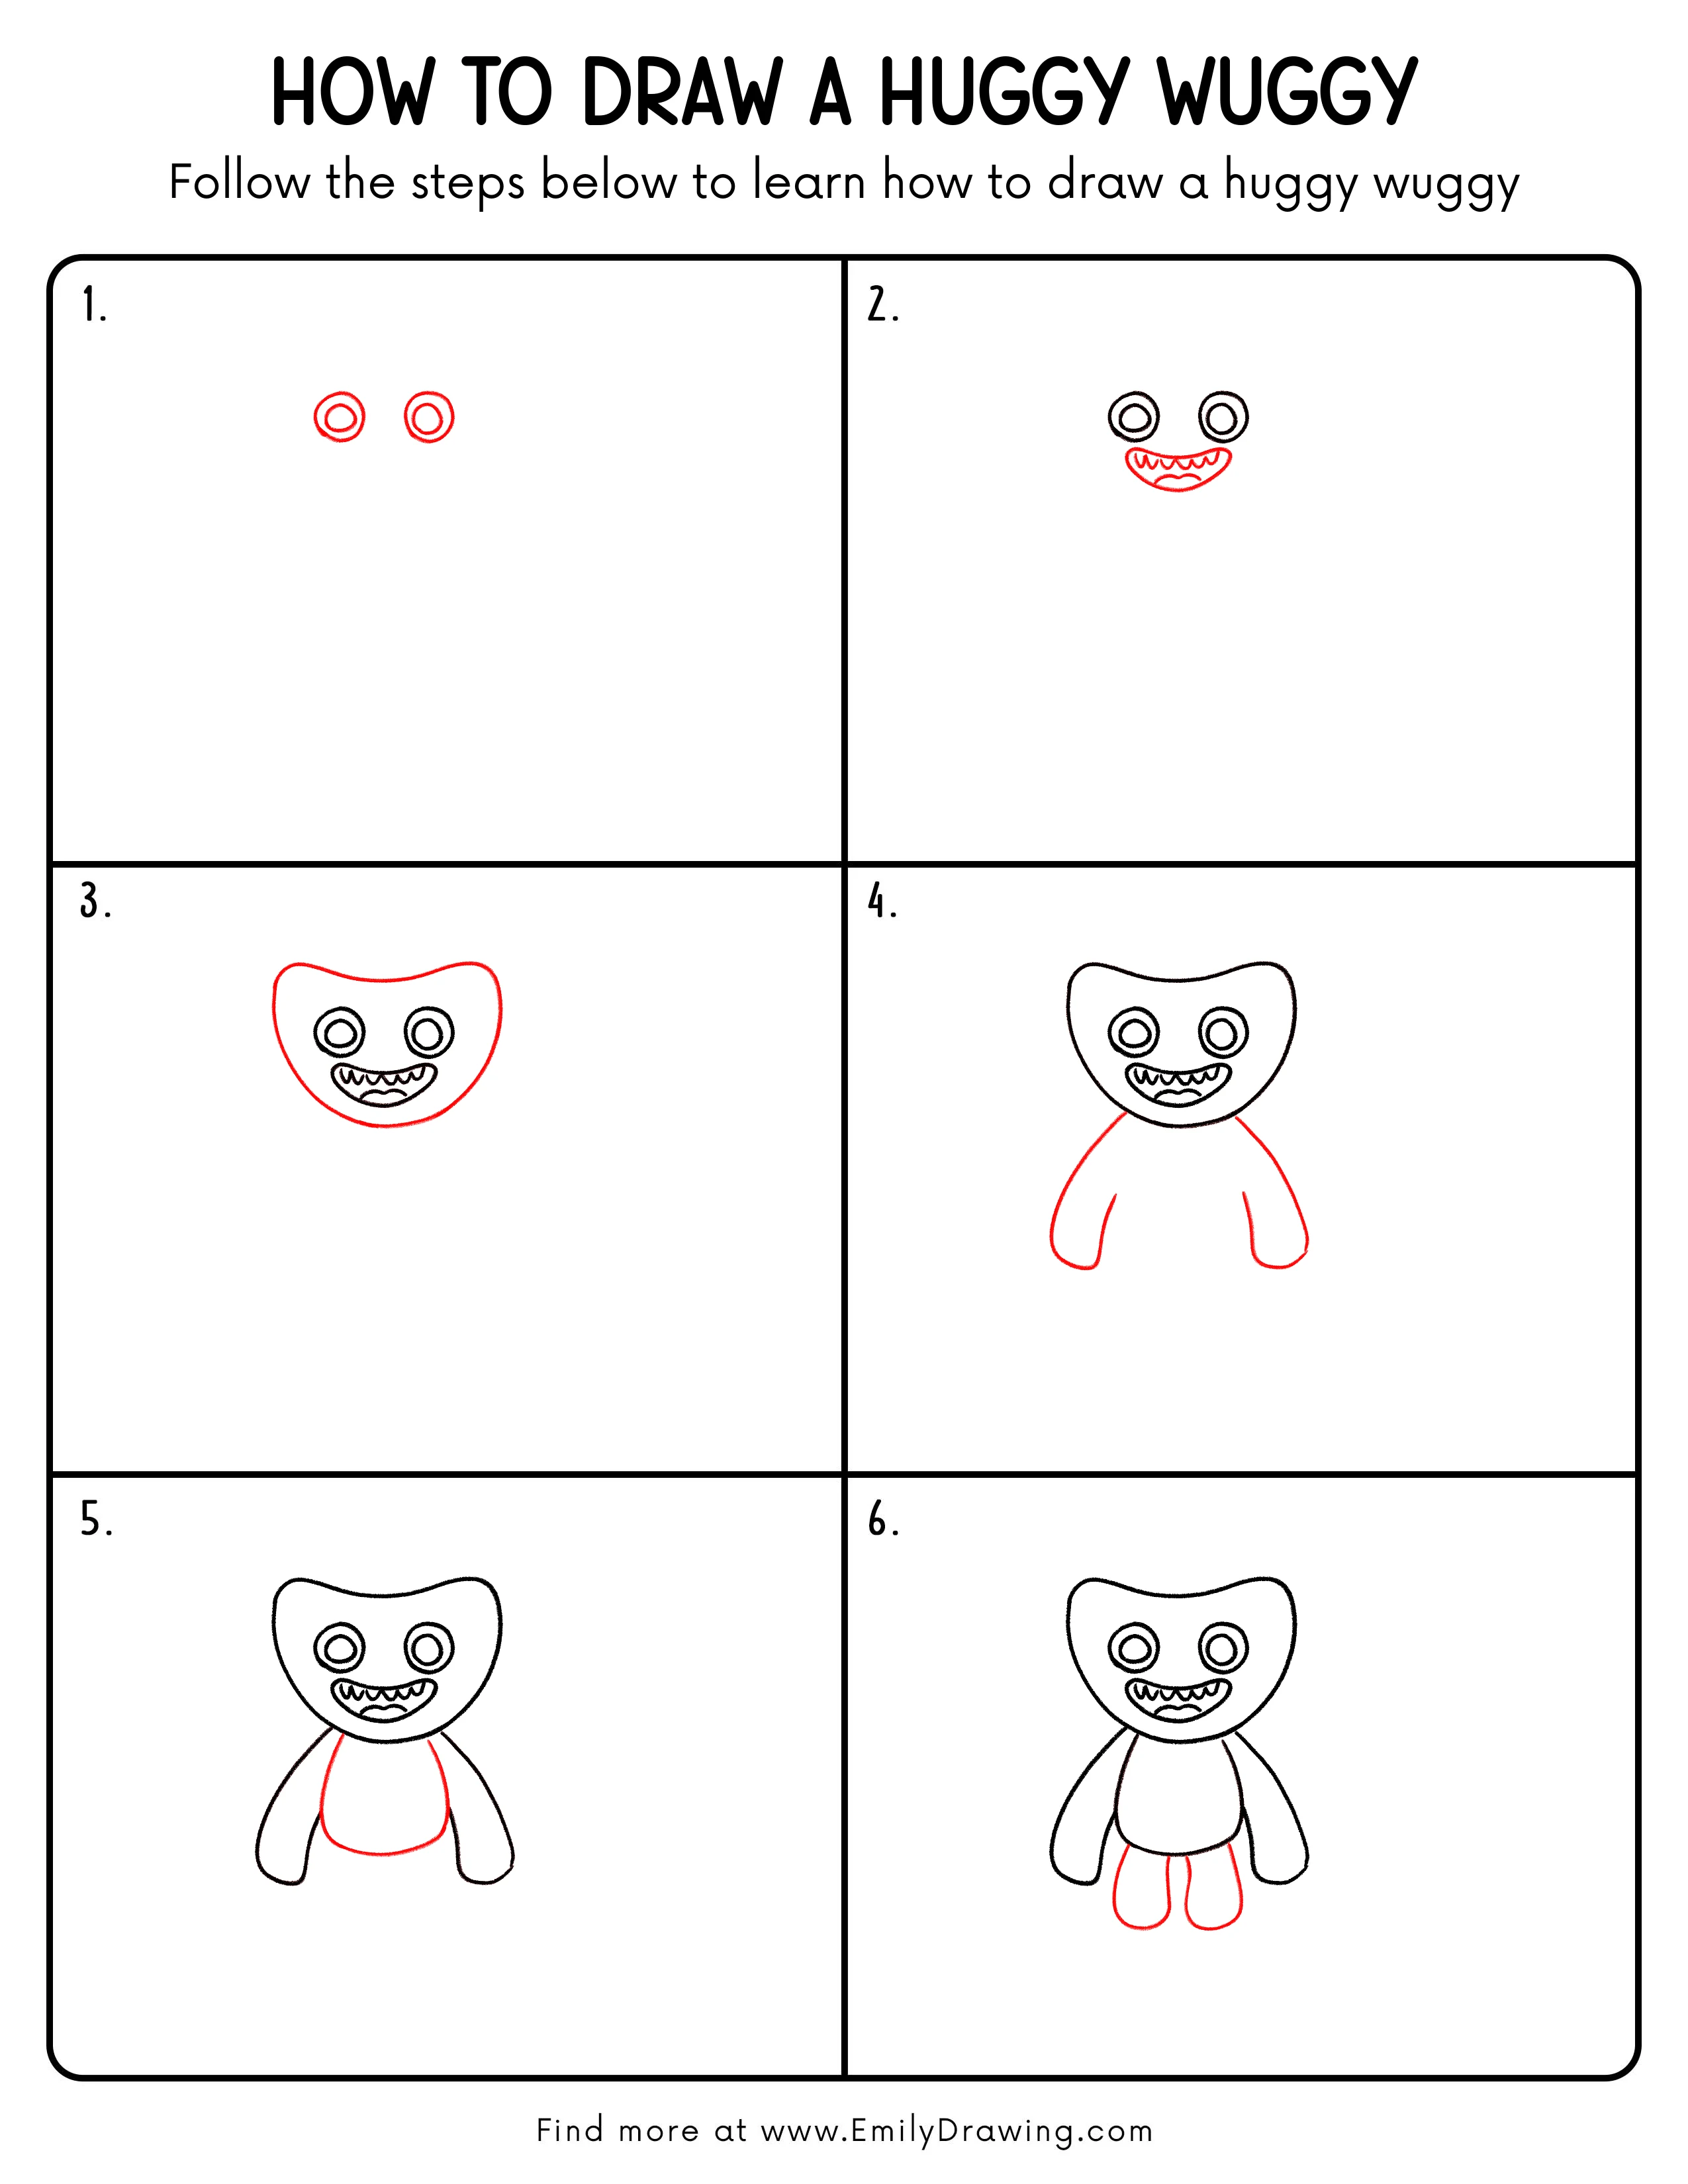
FREE Download Printable Huggy Wuggy Drawing Tutorial
Frequently Asked Questions
Can beginners learn how to draw Huggy Wuggy?
Yes. This easy drawing tutorial uses simple shapes and clear steps, which makes it a good choice for beginners.
Should I draw with pencil first?
Yes. A pencil helps you adjust shapes and fix small mistakes before tracing the final lines.
Can I color the drawing after finishing?
Absolutely. After the outline is complete, you can add color to make your Huggy Wuggy drawing look more lively and fun.