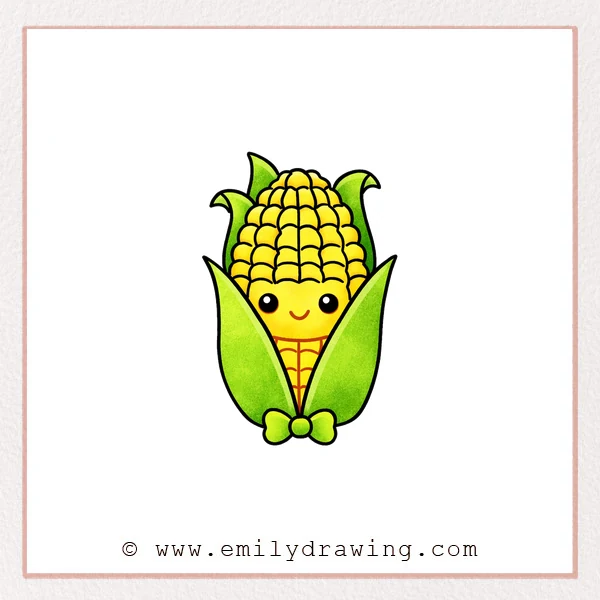
This easy drawing tutorial shows how to draw corn step by step in a cute style. We will build simple husk shapes first, then add kernels and a friendly face. Take your time and enjoy this drawing for beginners.
What You Will Need
- Pencil
- Eraser
- Black marker or fineliner
- Coloring tools (colored pencils, crayons, or markers)
- Paper
Here are my RECOMMENDED Art Supplies!
- Crayola Coloring Set (140 Pieces – Mega Value!)
- 24 Colored Crayon Set
- A4 Printer Paper
- Crayola Coloring Pencils
- HP Home Printer with Instant Ink!
Time needed:
30 minutes.
Step-by-Step Drawing Guide
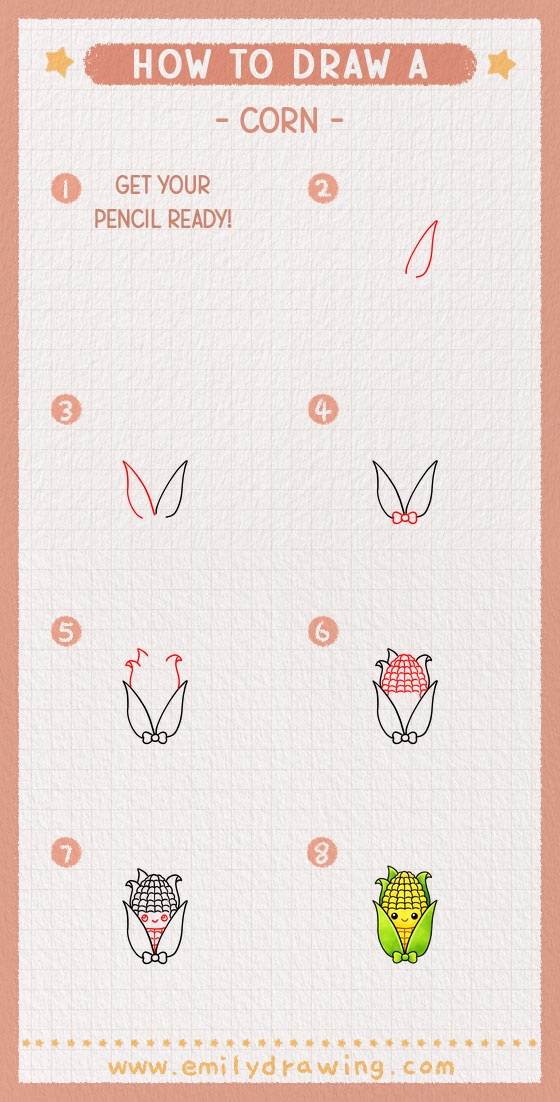
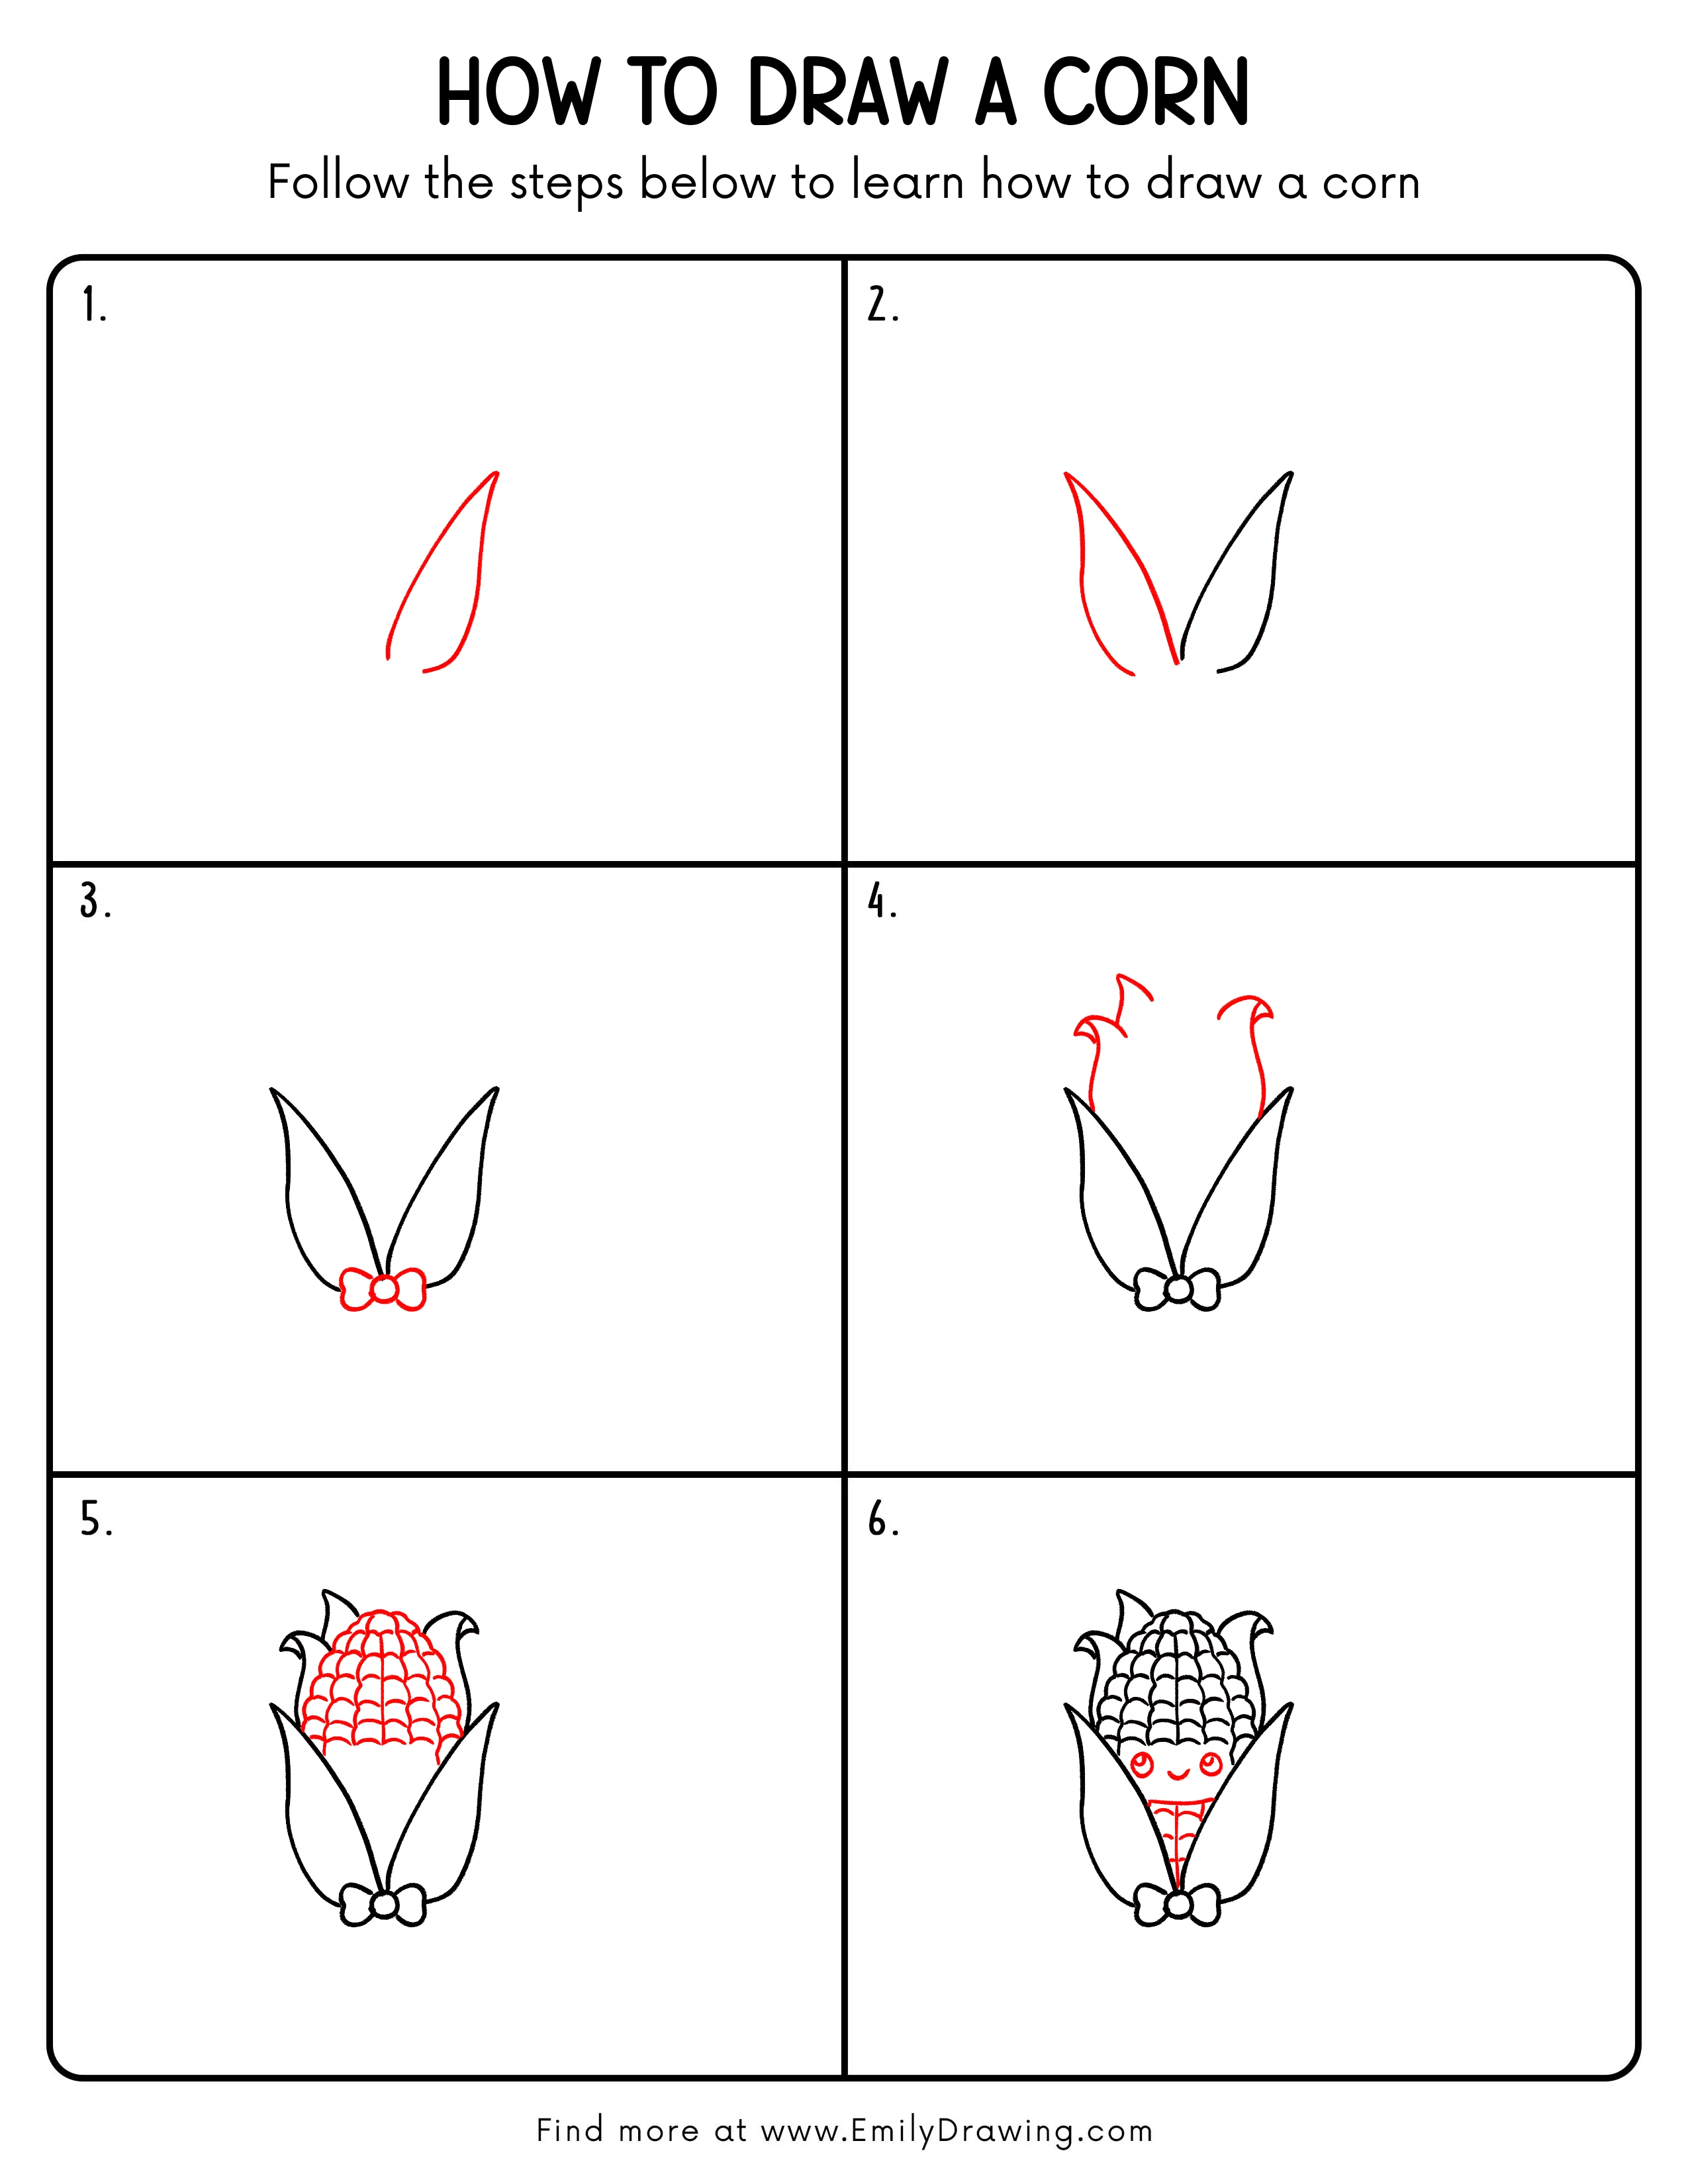
Step 1: Draw the First Corn Husk Leaf
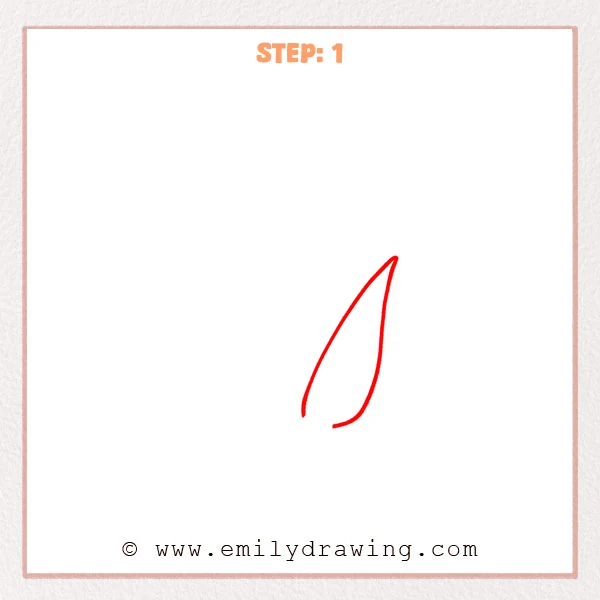
Start with a long curved line on the right side, like a leaf pointing upward. Add a second curved line that returns toward the bottom, meeting the first line at a sharp tip. Leave the bottom slightly open for now.
Pro Tip: Keep the top tip narrow so the husk feels like it is wrapping inward.
Step 2: Add the Second Corn Husk Leaf
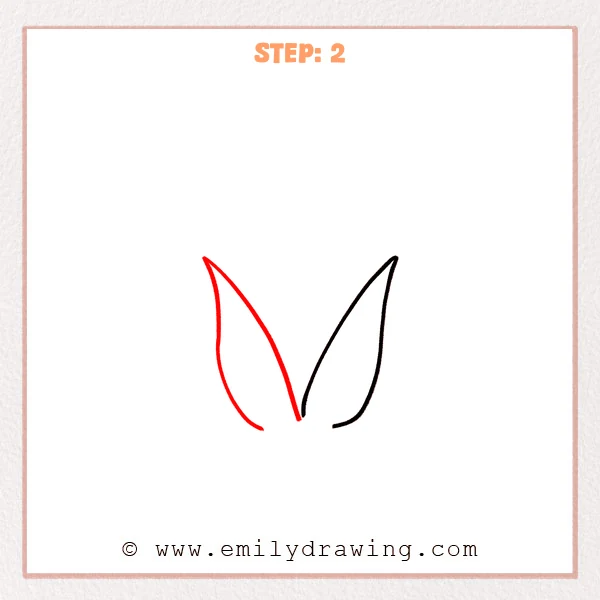
On the left side, sketch a wider husk leaf with a pointed tip, and a slightly rounder curve at the bottom. Let its lower end come close to the center, near the first leaf’s base, so the two husks feel like they are opening side by side.
Pro Tip: Make the left husk slightly larger to give the corn more depth.
Step 3: Add a Bow at the Base
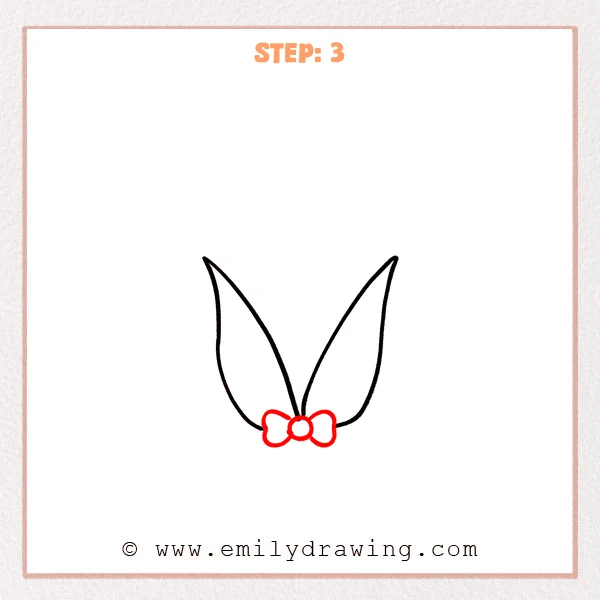
At the center bottom where the husks meet, start with a small circle for the knot. Then draw one rounded, cloud-like loop on each side to form a symmetrical bow. Let the bow sit snugly against the husk bases.
Pro Tip: Keep both bow loops the same size so the drawing looks balanced.
Step 4: Add the Corn Silk and the Top of the Ear
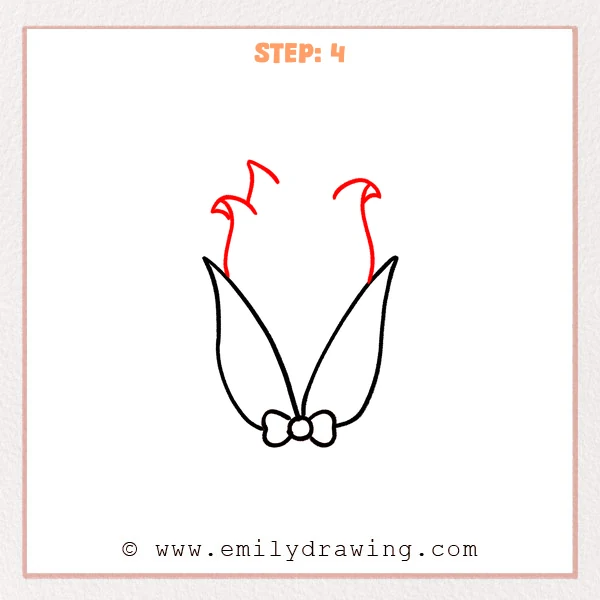
Between the two husks, add two long curved lines rising upward, like slender stems. At the top of each line, add a small hook and a short curve so the tips look like gently curled corn silk.
Pro Tip: Use light, smooth curves so the corn silk feels soft and airy.
Step 5: Add the Rows of Corn Kernels
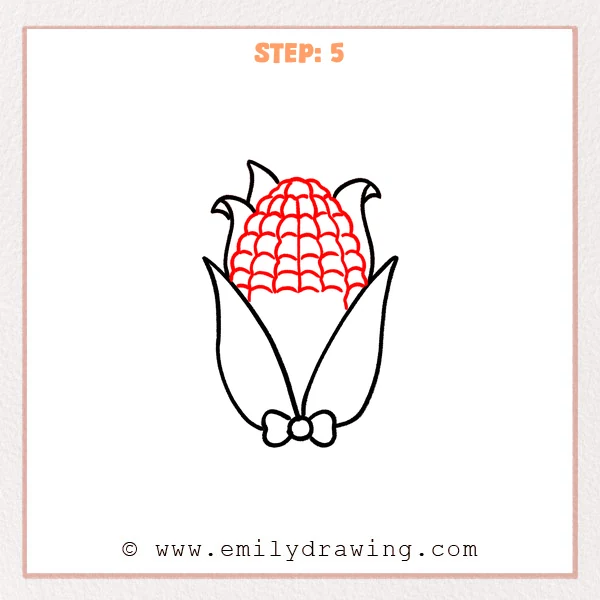
Between the husks, outline the top of the corn ear, then fill the upper area with rows of small curved “half-oval” shapes. Add a light vertical guideline in the center so the kernels look neatly stacked on both sides.
Pro Tip: Make the kernels slightly smaller near the top for a rounded look.
Step 6: Add a Cute Face and Lower Kernels
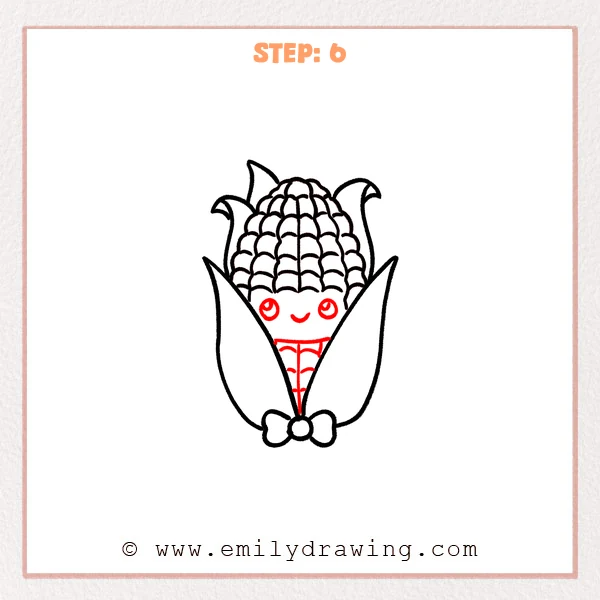
In the blank space on the cob, draw two round eyes and add small highlights inside them. Add a tiny curved line for a smiling mouth. Then extend a center vertical line downward and add short curved kernel lines to suggest the lower rows.
Pro Tip: Place both eyes at the same height to keep the smile sweet and balanced.
Step 7: Color in your drawing!
Fun Facts
- Corn is also called maize, and it grows on tall stalks in fields.
- Each ear of corn can have hundreds of kernels arranged in tidy rows.
- Corn silk helps the kernels grow, and it often turns brown as it dries.
Pin it now, Draw later!
You now have a cute corn drawing with open husks, kernels, and a smiling face. For coloring, try yellow for the kernels and light green for the husks, then add a soft shadow along one side of the cob to make it feel round. A common beginner mistake is making kernel rows uneven, so keep your curves gentle and spaced in neat lines. Practice this step by step drawing a few times, and then try drawing corn in different poses or with different expressions.
Get the FREE Printable Drawing Guide
FREE Download Printable Corn Drawing Tutorial
Frequently Asked Questions
How do I make the kernels look more even?
Use a light center guideline, then draw matching curved rows on both sides. Keep each row’s curves similar in size and spacing.
What if my husks look too skinny or too wide?
Adjust one husk to be slightly larger than the other, and keep the tips narrow. Husk leaves often overlap, so small size changes look natural.
Can I draw corn without a face?
Yes, simply leave the face area blank and continue the kernel pattern downward. You can also add more kernel rows to fill the whole cob.