An hourglass is a simple shape with a fun, classic look.
In this easy drawing tutorial, you will build it from clean curves and a few details.
Take your time, and keep your lines smooth as you go.
What You Will Need
- Pencil
- Eraser
- Black pen or marker
- Paper
- Optional: colored pencils or markers
Here are my RECOMMENDED Art Supplies!
- Crayola Coloring Set (140 Pieces – Mega Value!)
- 24 Colored Crayon Set
- A4 Printer Paper
- Crayola Coloring Pencils
- HP Home Printer with Instant Ink!
Time needed:
28 minutes.
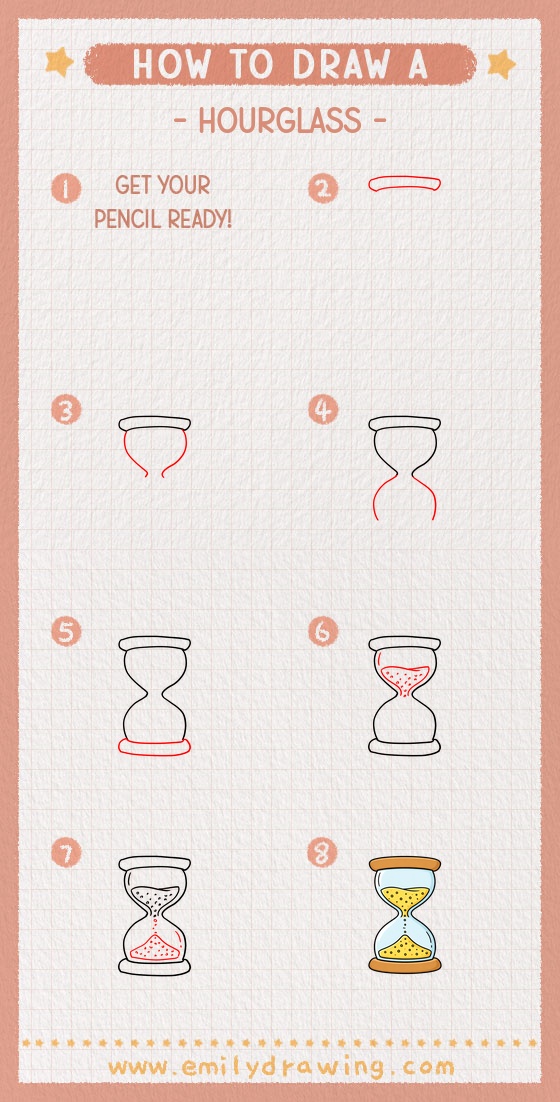
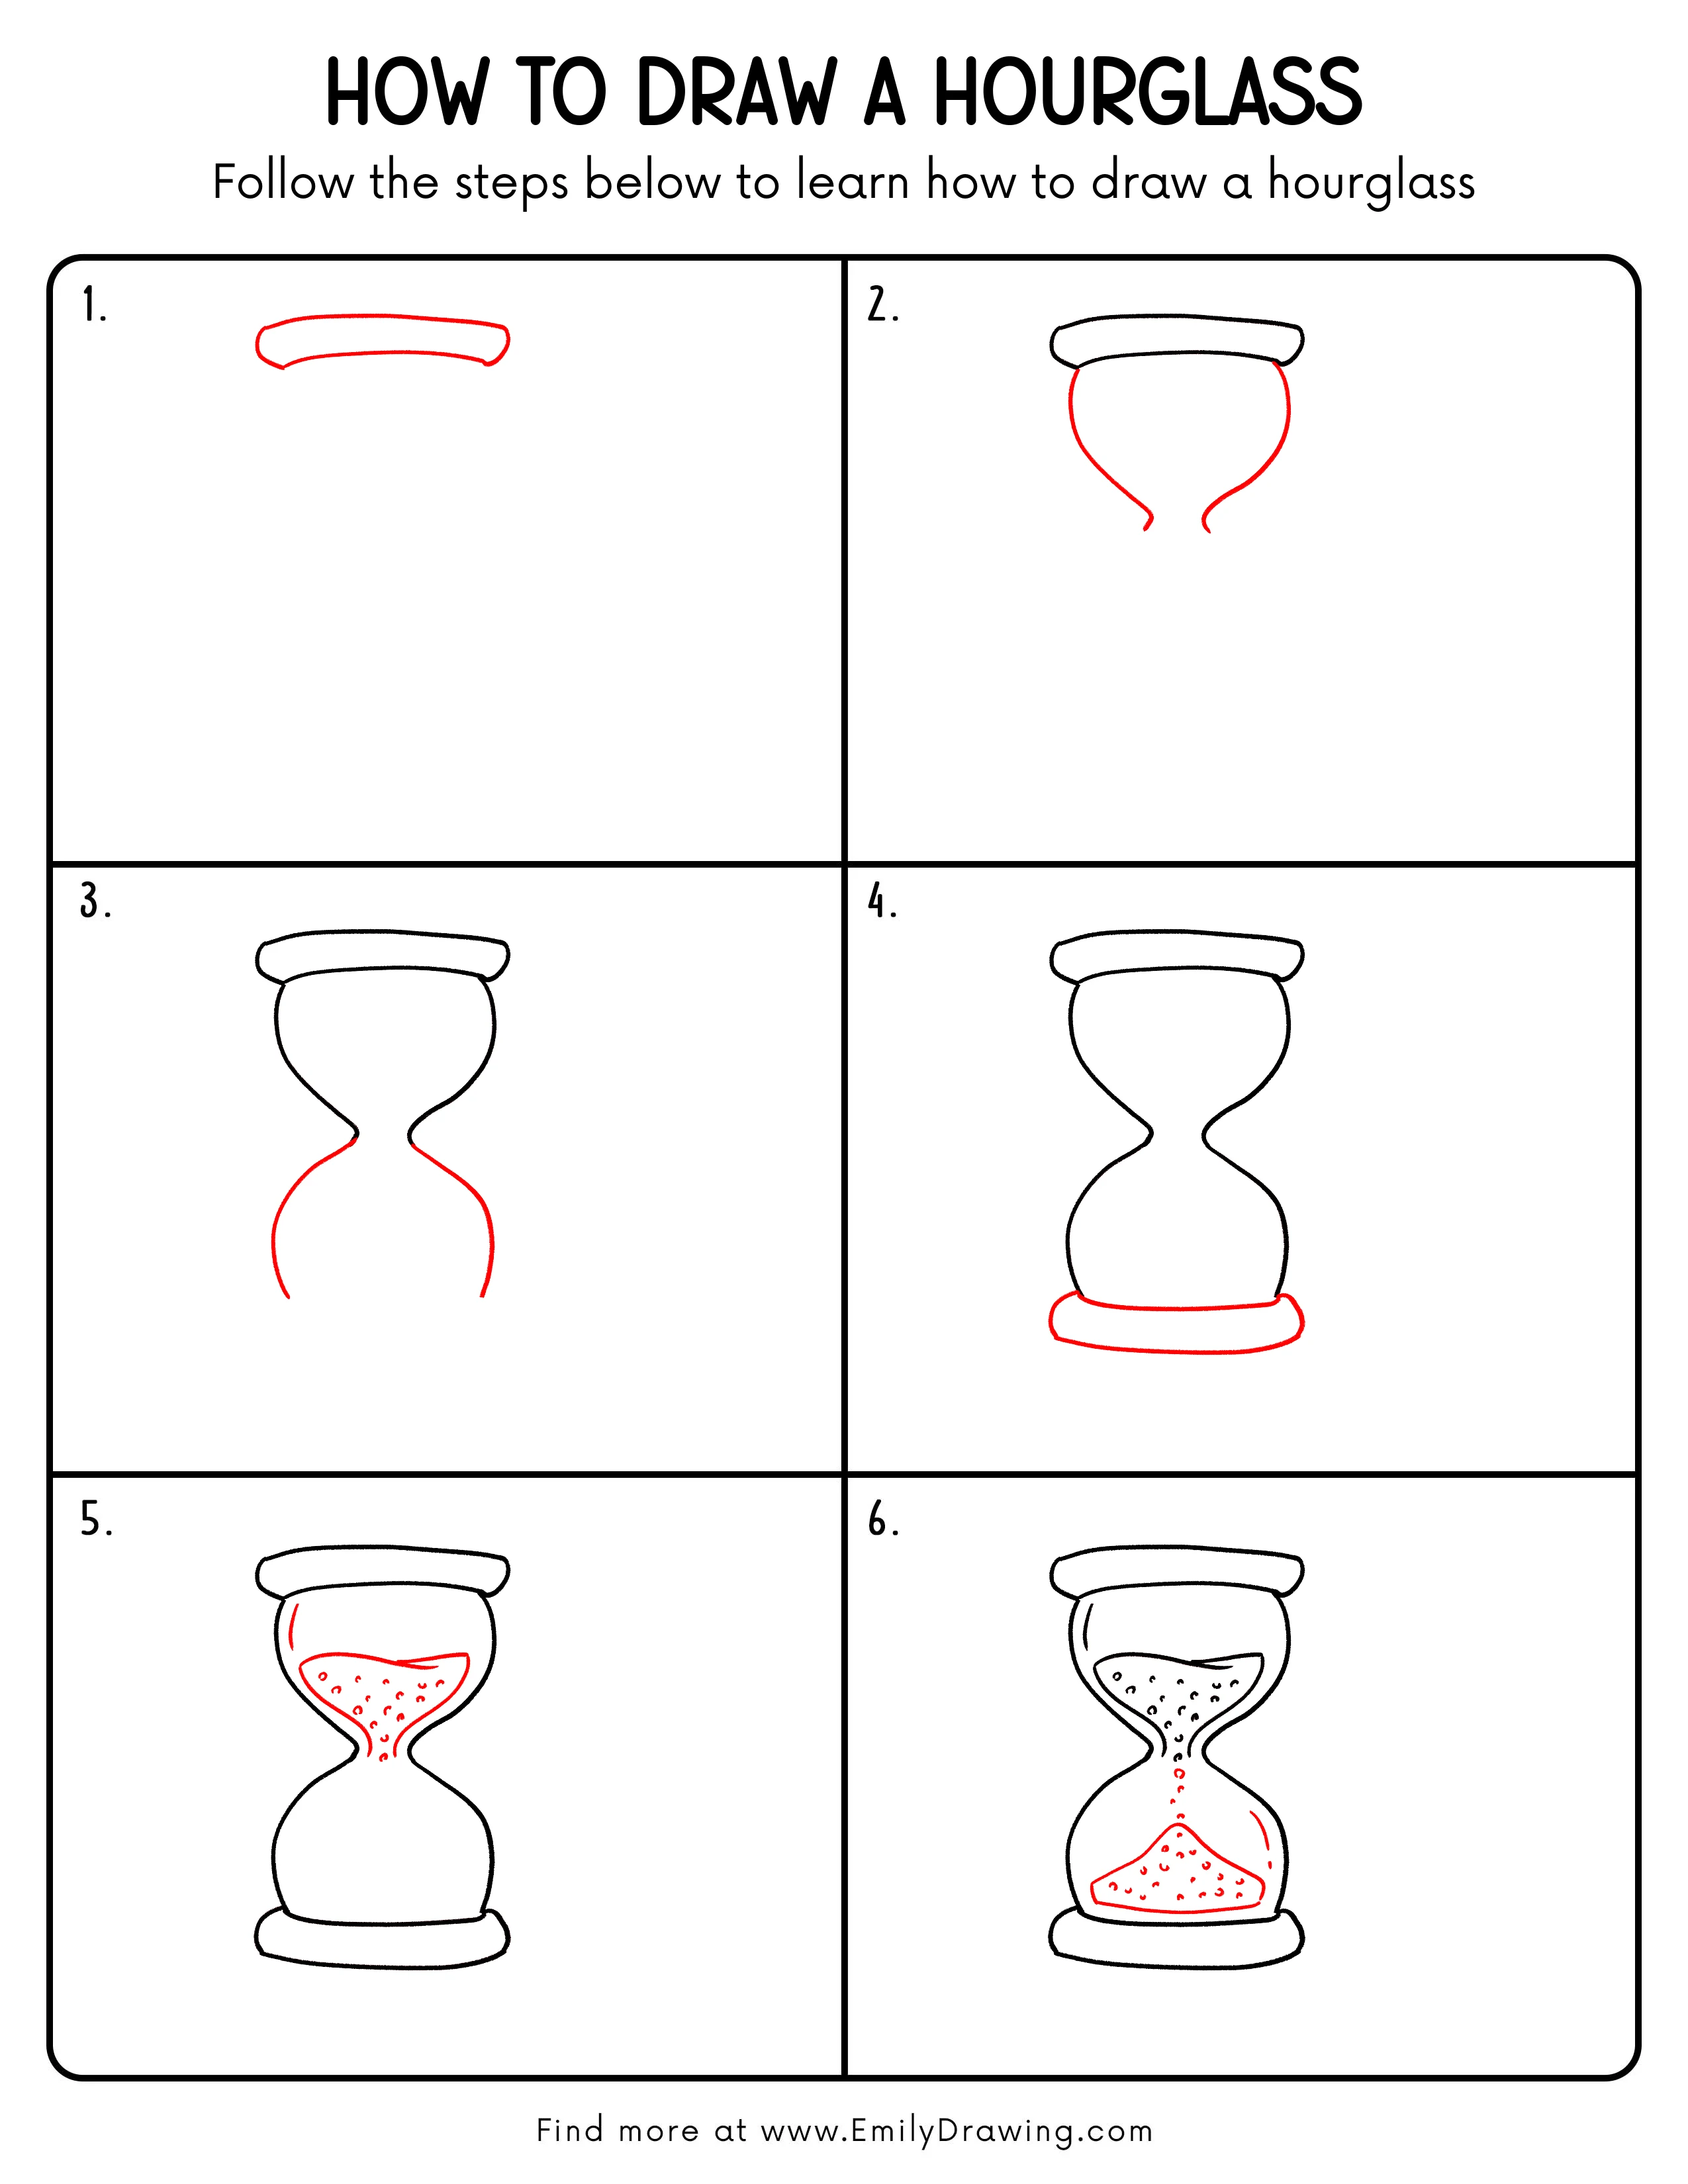
Step-by-Step Drawing Guide
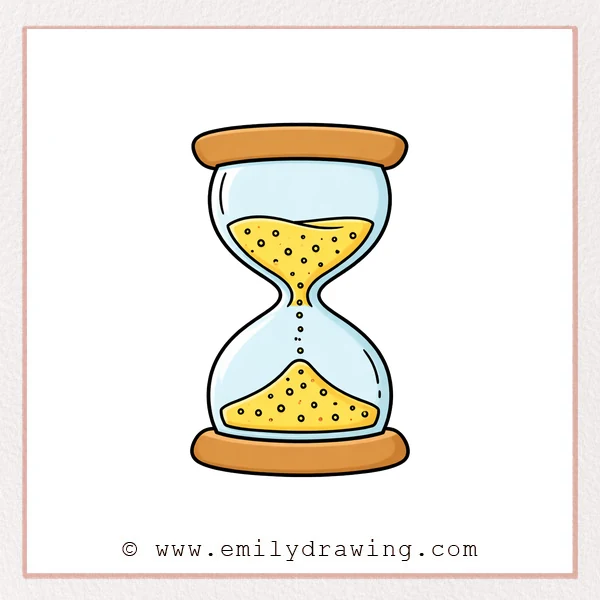
Step 1: Draw the Top Curved Rim
Near the top of the page, draw a long, gentle curve like a bent bar.
Add a lighter curve beneath it and connect the ends to show thickness.
Pro Tip: Keep the gap between the two curves even for a sturdy rim.
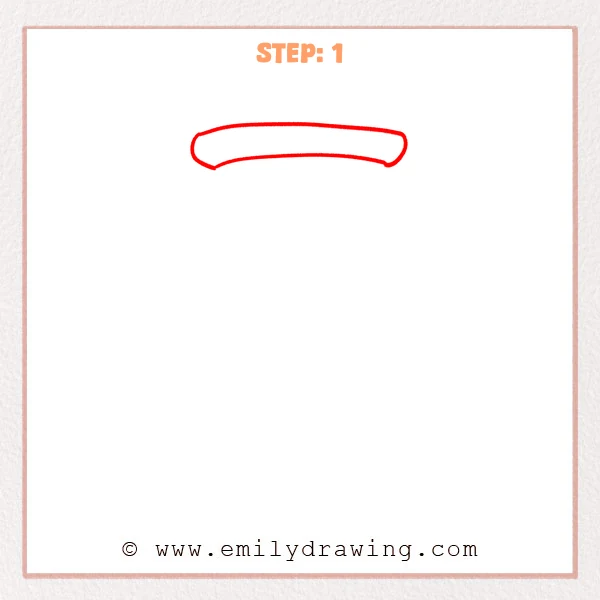
Step 2: Add the Upper Hourglass Body
From both sides of the top rim, draw two long curves downward that bulge outward to form the rounded upper chamber.
Keep pulling the curves inward as they go down, narrowing toward the center and leaving the neck area open.
Pro Tip: Keep both sides symmetrical, and taper inward at the same height.
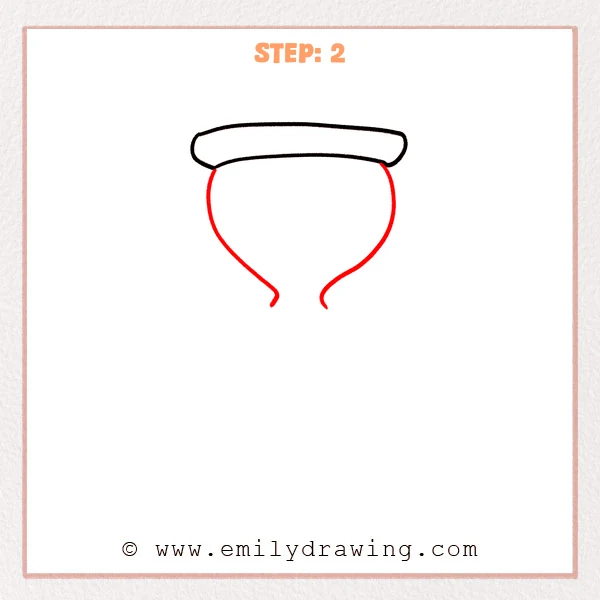
Step 3: Complete the Lower Chamber Outline
From the narrow center, extend two curves downward and let them bulge outward to form the lower chamber.
Stop the curves before closing the bottom so you can add the base next.
Pro Tip: Make the lower bulge similar in size to the upper chamber for balance.
Step 4: Add the Bottom Base
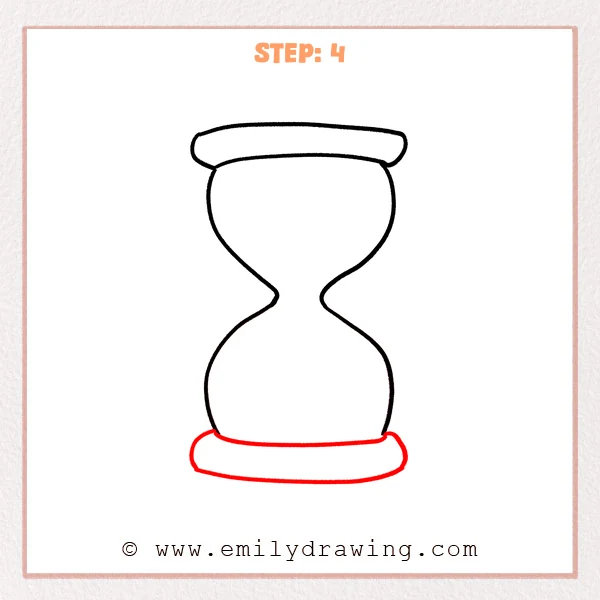
Draw a long, slightly curved line under the lower chamber to mark the top edge of the base.
Add a larger curve below it and connect the ends to create a thick oval base.
Pro Tip: Make the base a bit wider than the glass for a stable look.
Step 5: Draw the Sand in the Top Chamber
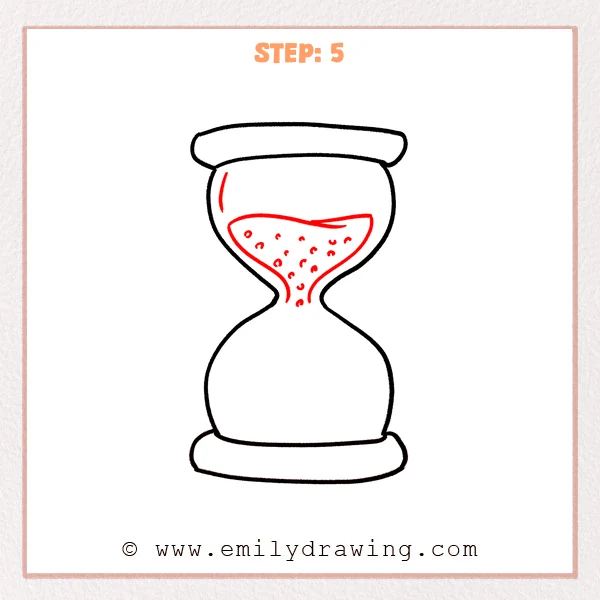
Inside the upper chamber, draw a wavy “sand surface” line so it looks piled up.
Add a thin falling stream toward the narrow neck, then sprinkle small dots for grains.
Pro Tip: Keep the sand line slightly away from the glass outline for depth.
Step 6: Add the Bottom Sand Pile and Glass Highlights
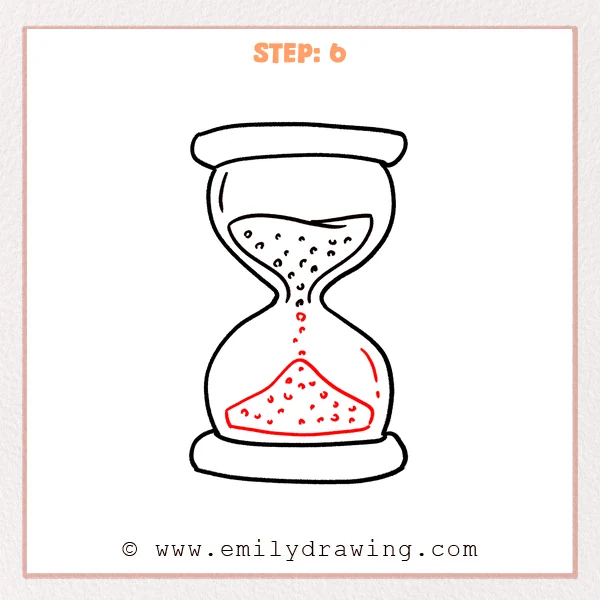
In the lower chamber, draw a small mound with slanted sides and a pointed peak.
Sprinkle a few grain dots inside the mound, then add one or two short curved highlight lines on the glass.
Pro Tip: Keep highlight lines close to the outline without touching it for a glassy look.
Step 7: Color in your drawing!
Fun Facts
- Early hourglasses were popular on ships because they worked without magnets or gears.
- Many hourglasses were designed to measure about 30 minutes at a time.
- The glass “pinch” in the middle helps control the steady flow of sand.
Pin it now, Draw later!
Go over your final lines with a clean pen, then erase any pencil marks.
If you want, color the sand a warm yellow and keep the glass lightly shaded.
You now have a neat hourglass drawing for beginners—try drawing a second one with different sand levels.
Get the FREE Printable Drawing Guide
FREE Download Printable Hourglass Drawing Tutorial
Frequently Asked Questions
How do I make the hourglass look even on both sides?
Lightly sketch one side first, then copy its curve on the other side.
You can also mark a center line to help keep things balanced.
How can I show more sand has fallen?
Make the top sand pile lower and the bottom mound taller.
Keep the falling stream thin so it still looks like sand is flowing.
What if my curves look wobbly?
Use slow, confident strokes and redraw the line once if needed.
Small corrections with an eraser can smooth the shape quickly.