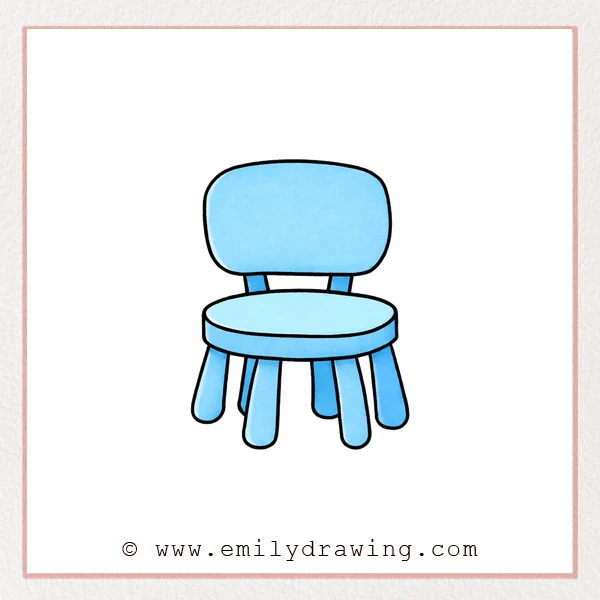
If you want to learn how to draw a chair, this step by step drawing guide keeps it calm and simple. We will build the chair from soft shapes, then refine it into a sturdy seat with legs. This easy drawing tutorial is made for drawing for beginners.
What You Will Need
- Pencil
- Eraser
- Black marker or pen (optional, for clean outlines)
- Coloring tools (colored pencils, crayons, or markers)
Here are my RECOMMENDED Art Supplies!
- Crayola Coloring Set (140 Pieces – Mega Value!)
- 24 Colored Crayon Set
- A4 Printer Paper
- Crayola Coloring Pencils
- HP Home Printer with Instant Ink!
Time needed:
26 minutes.
Step-by-Step Drawing Guide
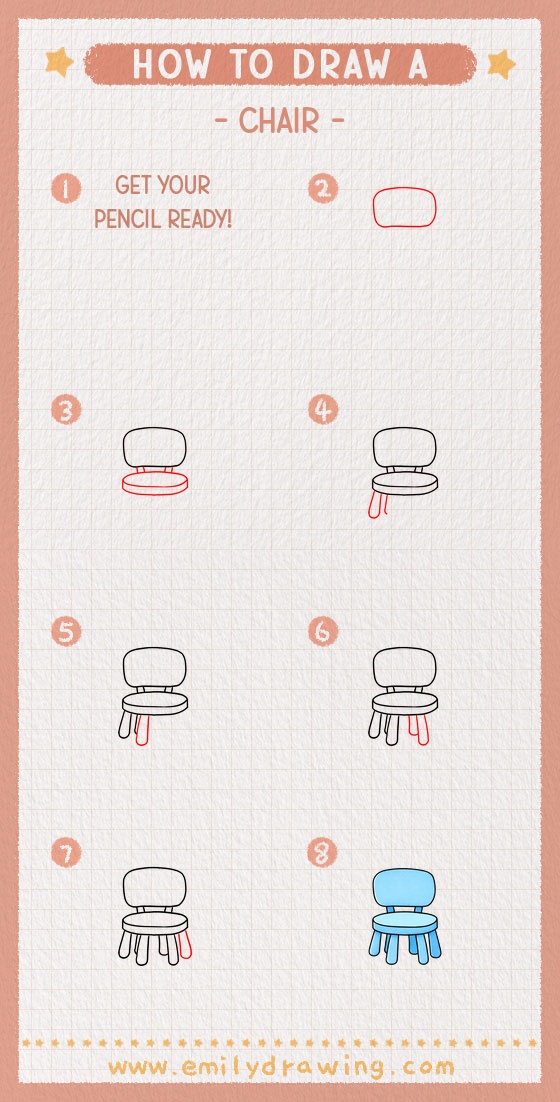
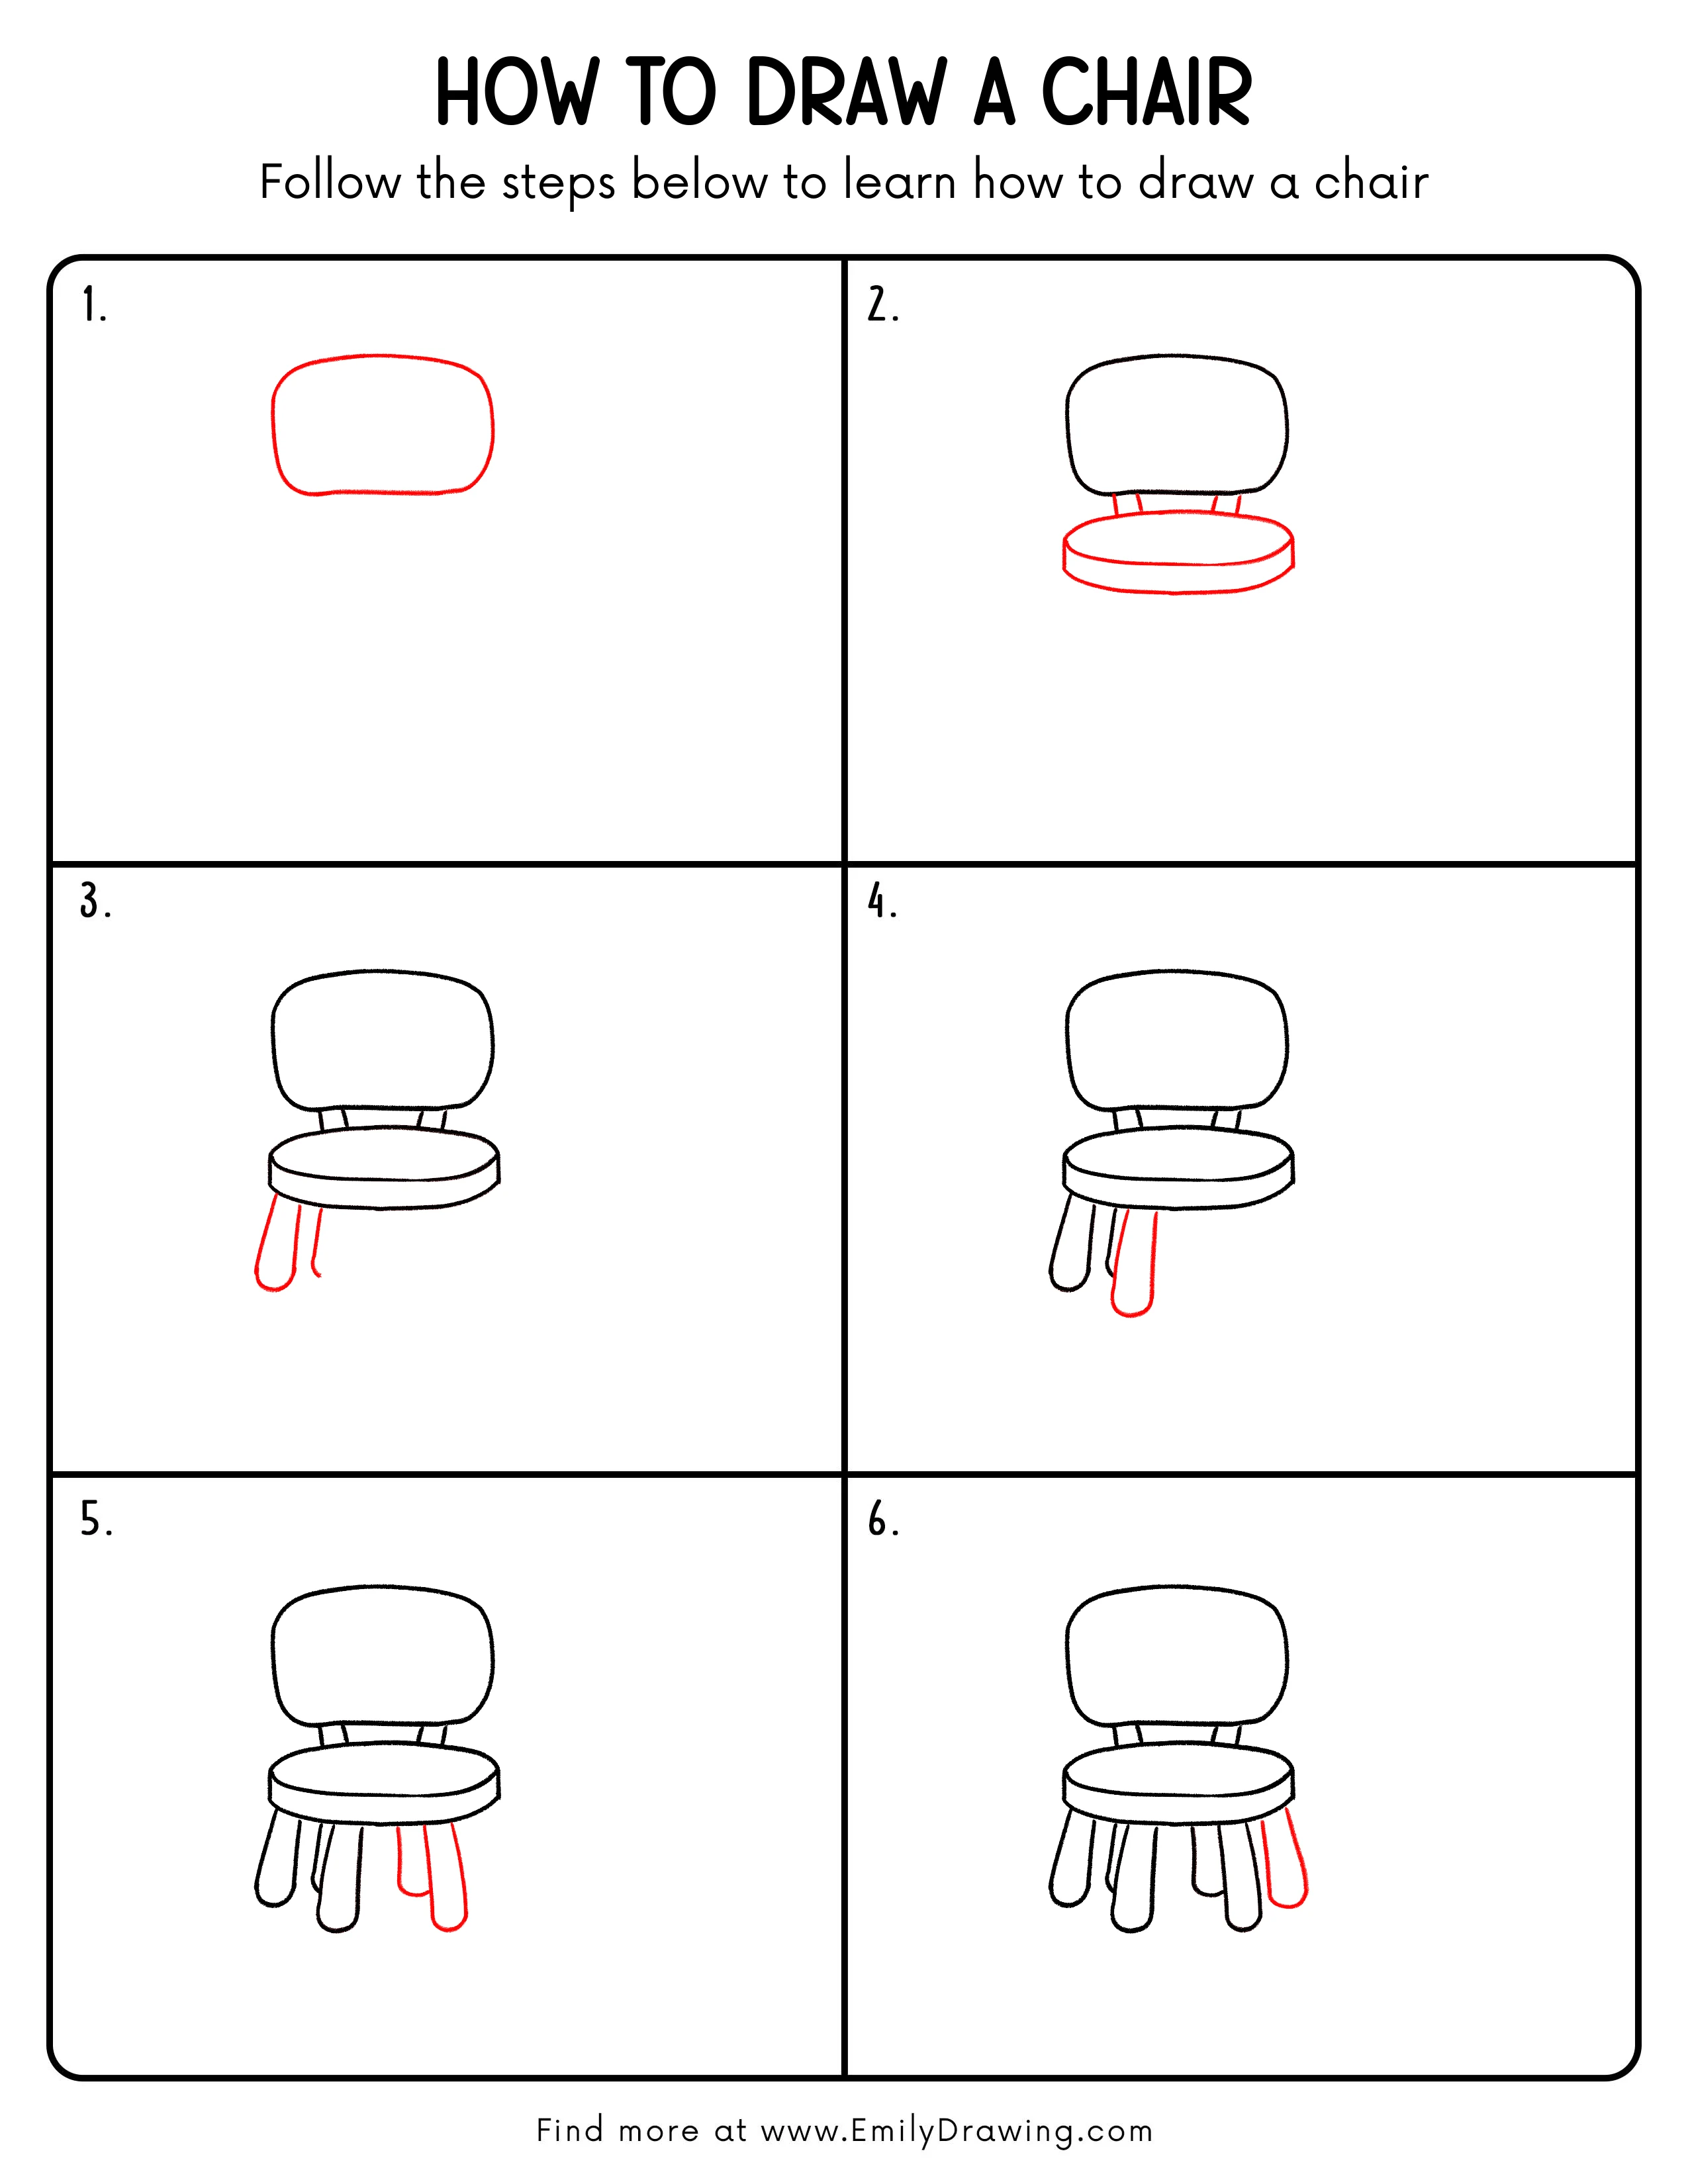
Step 1: Sketch the Chair Seat Shape
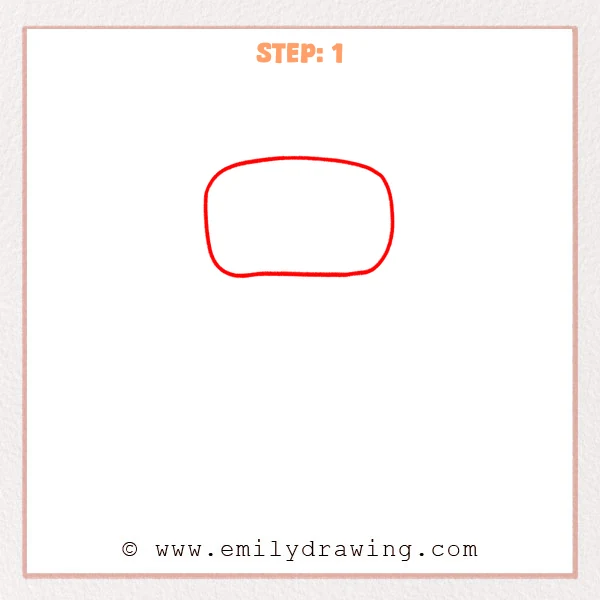
Start near the upper middle of the page with a wide rounded rectangle. Let the top edge curve slightly and keep the bottom edge flatter, like a soft seat cushion.
Step 2: Add the Backrest and a 3D Seat Cushion
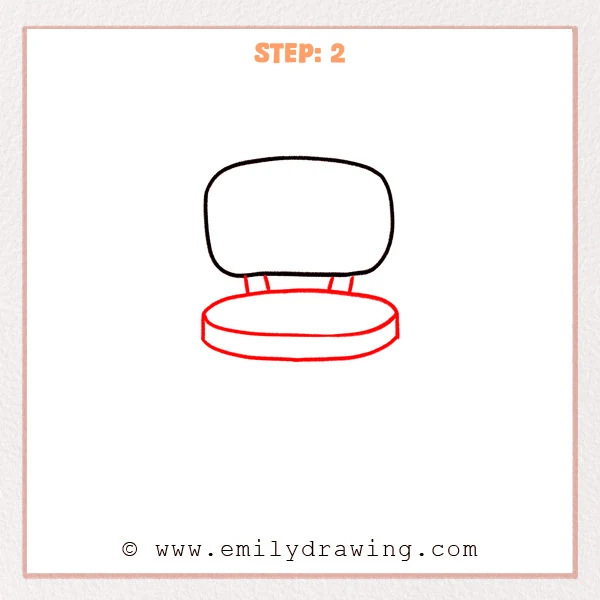
Add a larger rounded rectangle above the seat to form the chair backrest. Turn the seat into a thick oval cushion by drawing an ellipse on top and a curved line below for the thickness. Then add a few short connectors between the backrest and the seat so they feel attached and sturdy.
Step 3: Add the Front Pair of Chair Legs
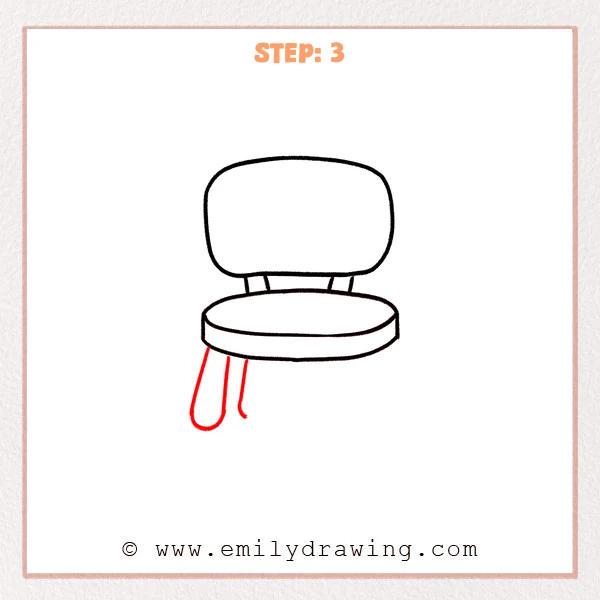
From the lower left edge of the seat, add a thick leg shape that drops down and ends with a rounded bottom. Next to it, sketch a slimmer leg behind it, slightly tucked inward to show depth and overlap.
Step 4: Add the Right Pair of Chair Legs
Under the right side of the seat, sketch a thick leg with a rounded bottom, matching the height of the left side. Behind it, add a slimmer leg that is slightly hidden, so the chair shows clear front-and-back depth.
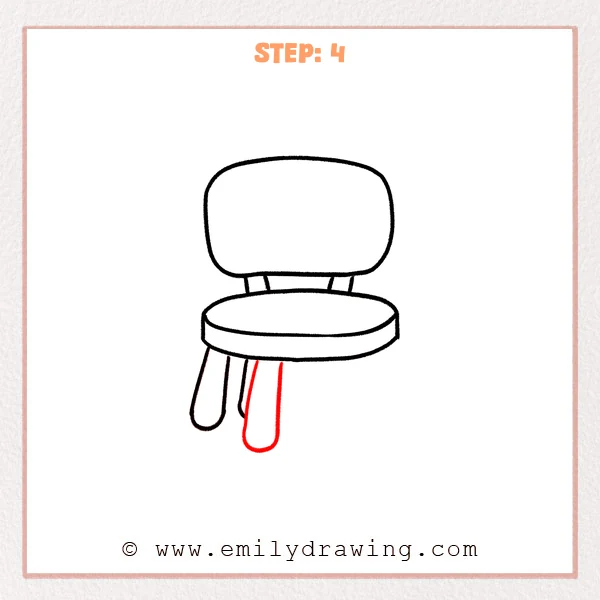
Step 5: Add the Remaining Legs for a Balanced Look
Under the middle of the seat, add another thicker leg with a rounded bottom. Then complete the last leg on the right side, letting it overlap slightly with the nearby leg so the chair feels evenly supported.
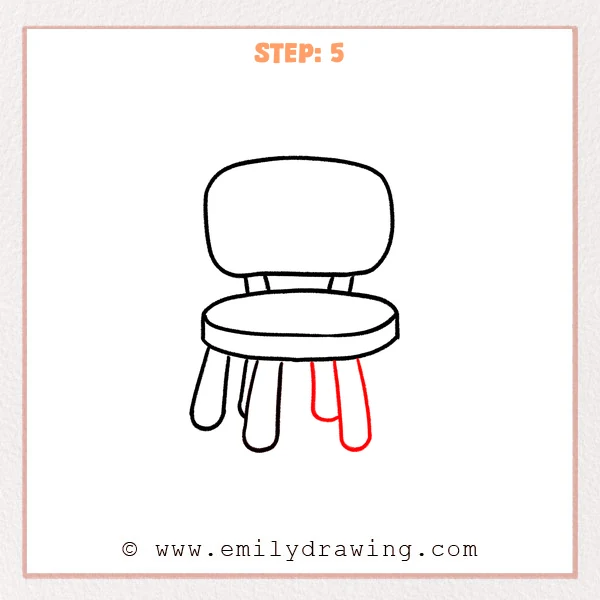
Step 6: Refine the Outer Right Leg
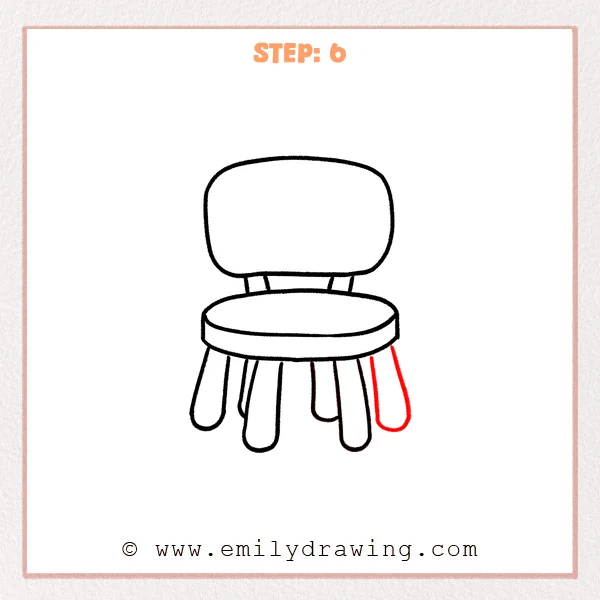
Finish the outline of the outer right leg so it drops smoothly from the seat edge and ends with a rounded bottom. Leave a small gap from the seat rim so the chair’s width reads clearly.
Step 7: Color in your drawing!
Fun Facts
- Many chairs use four legs, but some use one central pedestal instead.
- Curved edges on a chair can make it feel softer and more comfortable.
- Designers often test chairs for balance, so they do not tip easily.
Pin it now, Draw later!
You have now completed a simple chair using rounded shapes and layered legs. If you want more depth, shade under the seat and along one side of each leg. Try coloring the seat a brighter color and keep the legs a darker tone for contrast. A common beginner mistake is making the legs different lengths, so check that the bottoms line up. Keep practicing this easy drawing tutorial, and try drawing the same chair from a new angle next time.
Get the FREE Printable Drawing Guide
FREE Download Printable Chair Drawing Tutorial
Frequently Asked Questions
How do I make the chair look more 3D?
Add a light shadow under the seat and a darker shadow where legs overlap. Keep one side of the chair slightly darker than the other.
What if my chair legs look uneven?
Use a quick guide line across the bottoms of the legs, then adjust the ends to meet it. Small changes can fix the balance fast.
How can I change this into a different chair style?
You can make the backrest taller, add armrests, or draw thinner legs. Small shape changes can create a new chair design.