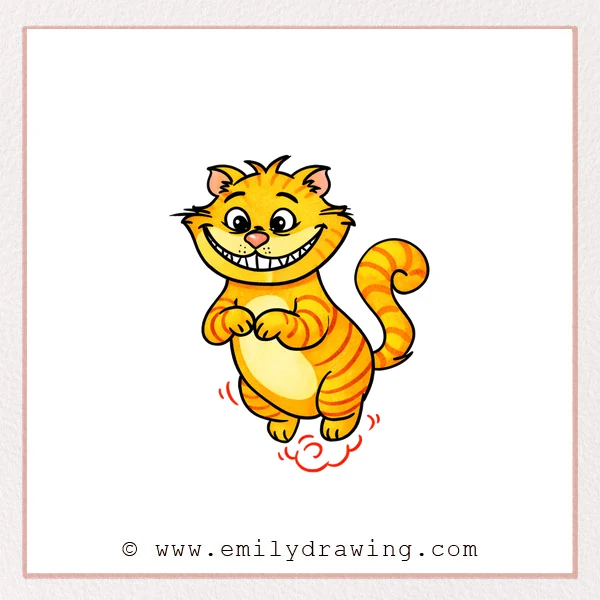
If you are learning how to draw a Cheshire Cat, this step by step drawing guide keeps everything simple and friendly. We will build a big smile, fluffy head, and a curly striped tail in a calm, easy way. This is a great drawing for beginners and a fun warm-up for any sketchbook.
What You Will Need
- Pencil
- Eraser
- Black pen or marker (optional for clean outlines)
- Colored pencils or markers (optional)
Here are my RECOMMENDED Art Supplies!
- Crayola Coloring Set (140 Pieces – Mega Value!)
- 24 Colored Crayon Set
- A4 Printer Paper
- Crayola Coloring Pencils
- HP Home Printer with Instant Ink!
Time needed:
18 minutes.
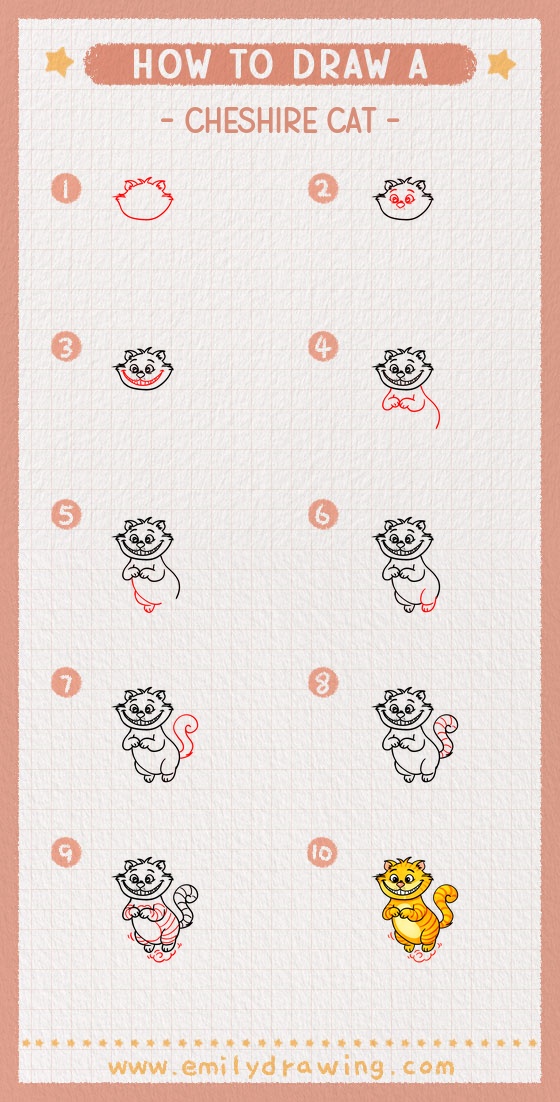
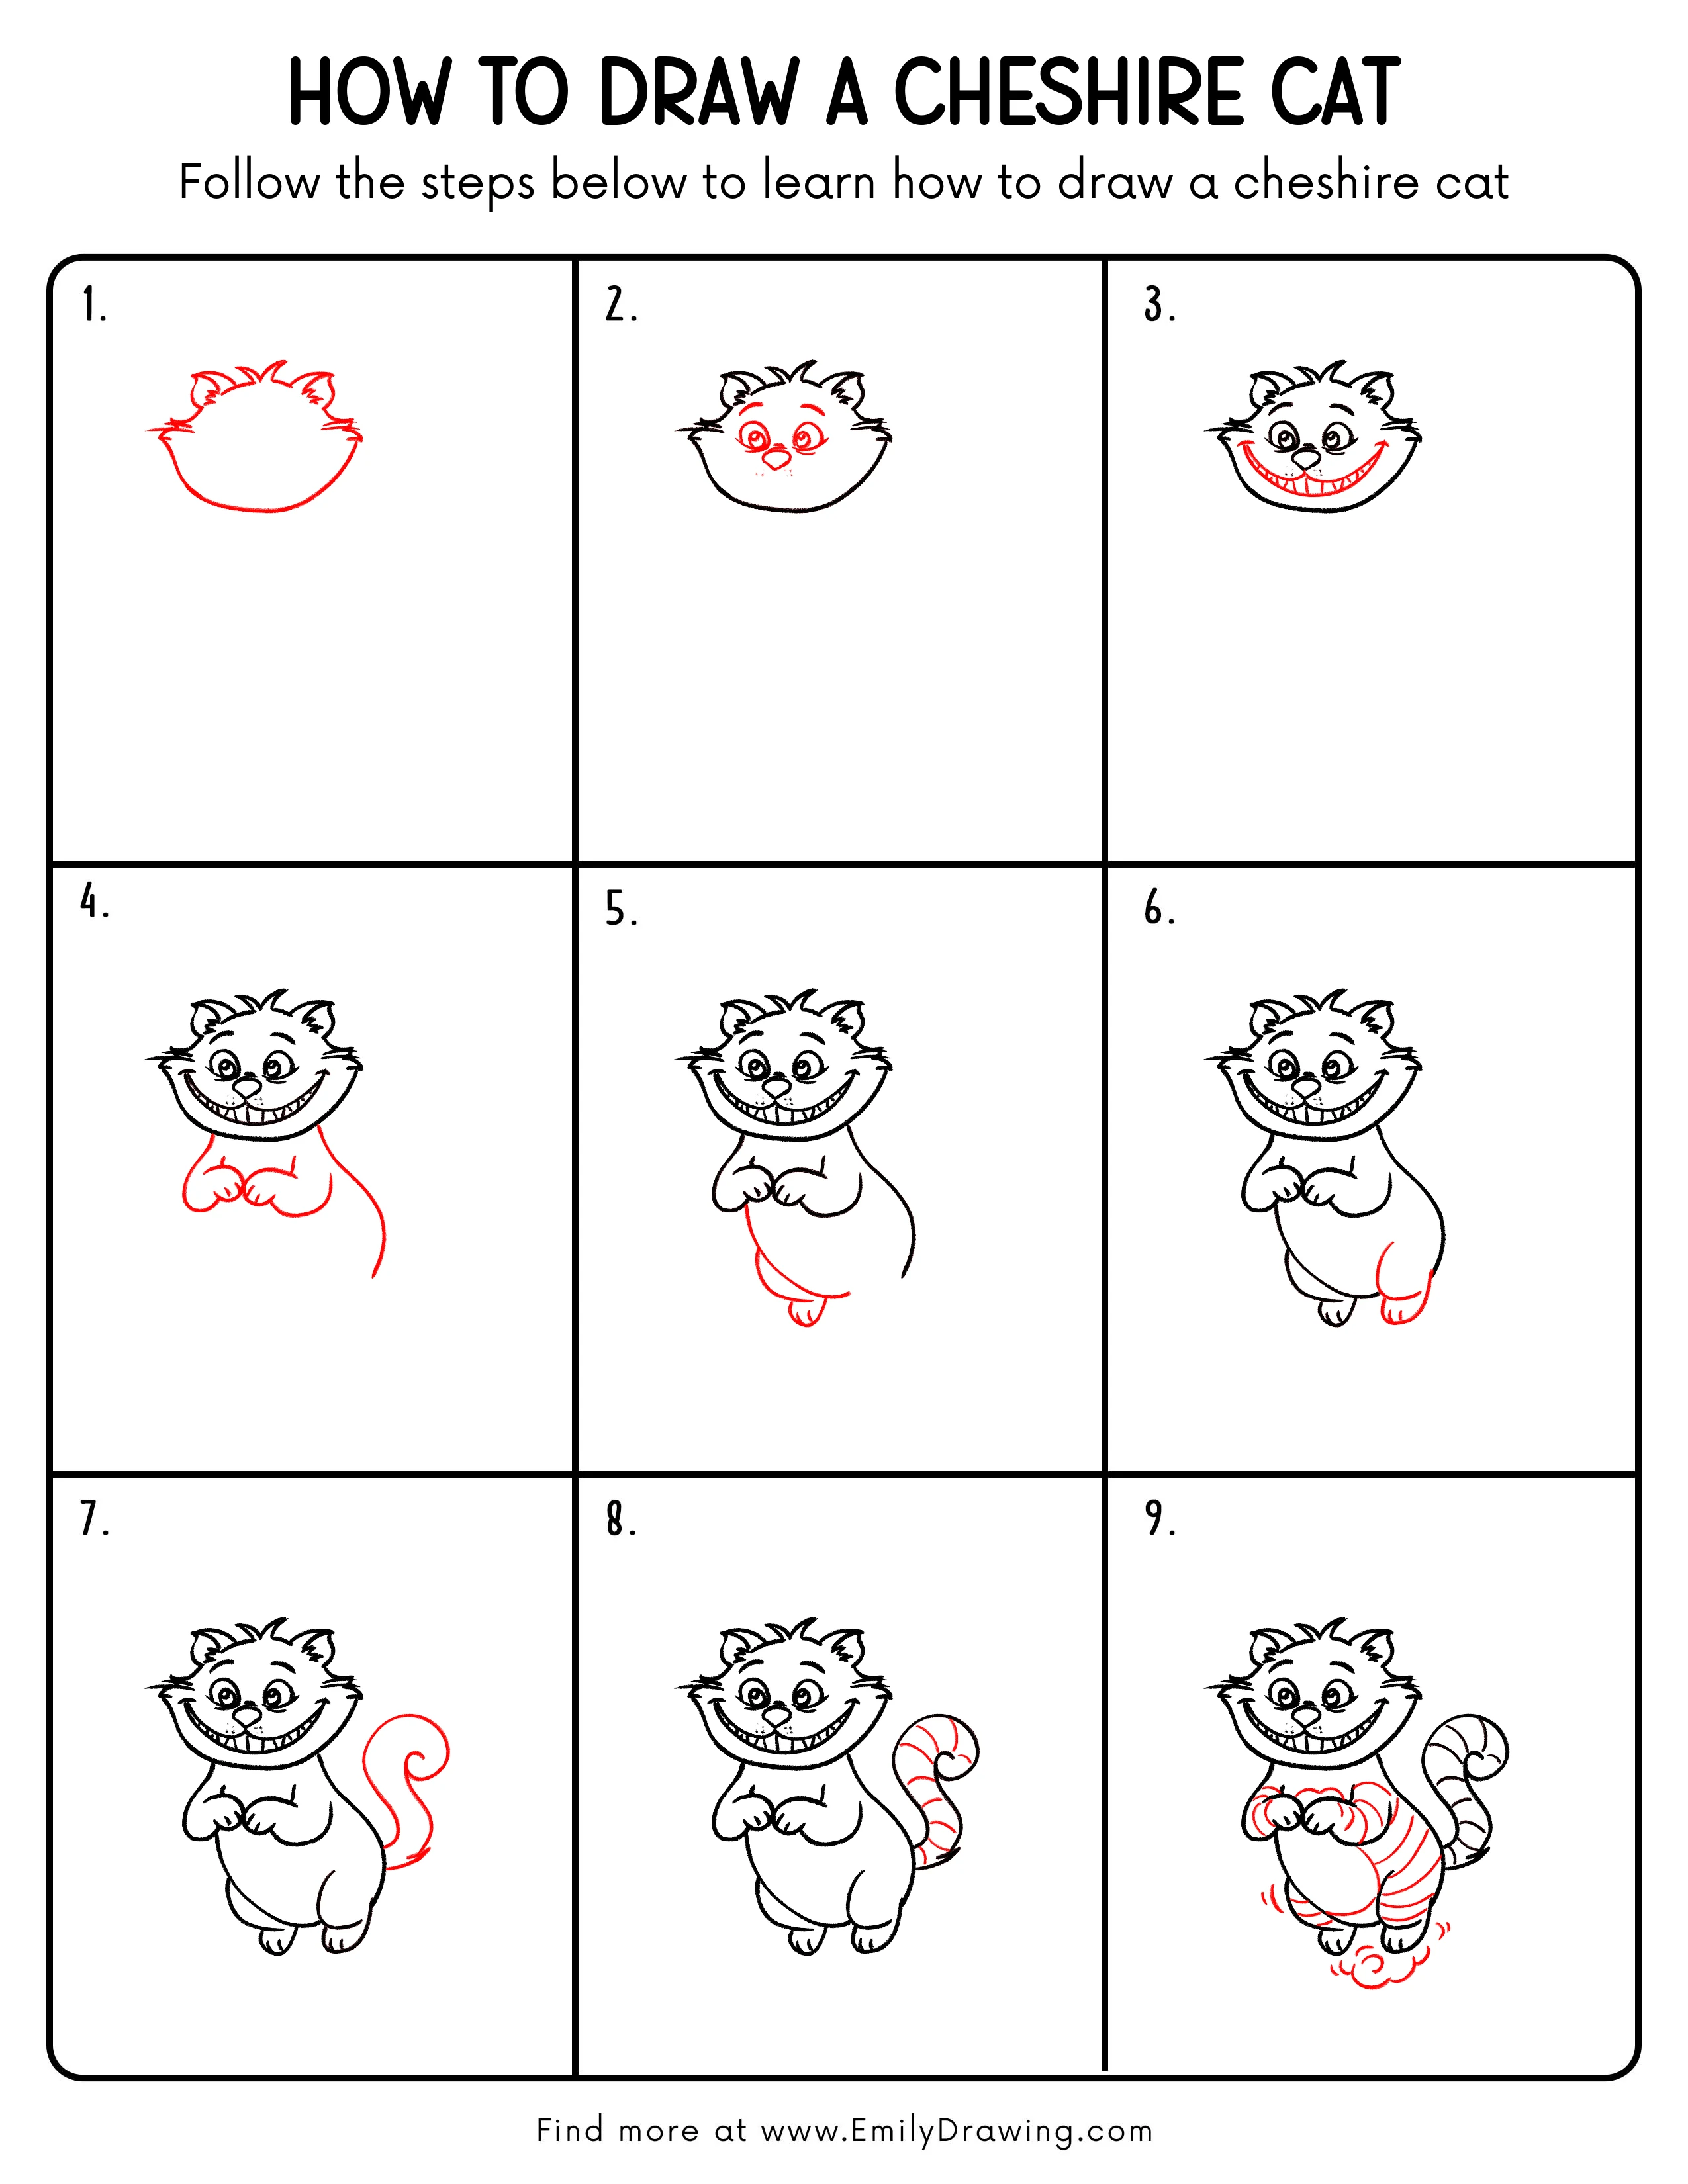
Step-by-Step Drawing Guide
Step 1: Sketch the Fluffy Head Outline
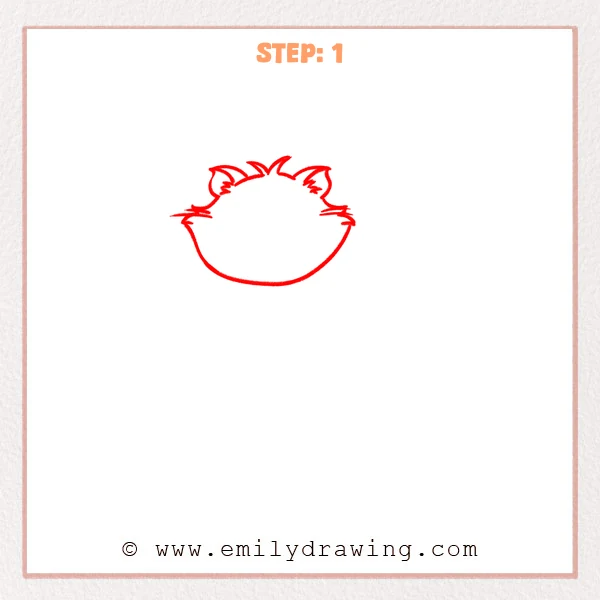
Start with a rounded face shape, then close the bottom with one smooth wide curve. Add two pointed ears on top, and place a few jagged fur tufts on the crown and cheeks to make it look fluffy.
Pro Tip: Keep the ears mostly symmetrical, but let the fur tufts stay uneven.
Step 2: Add the Eyes and Small Nose
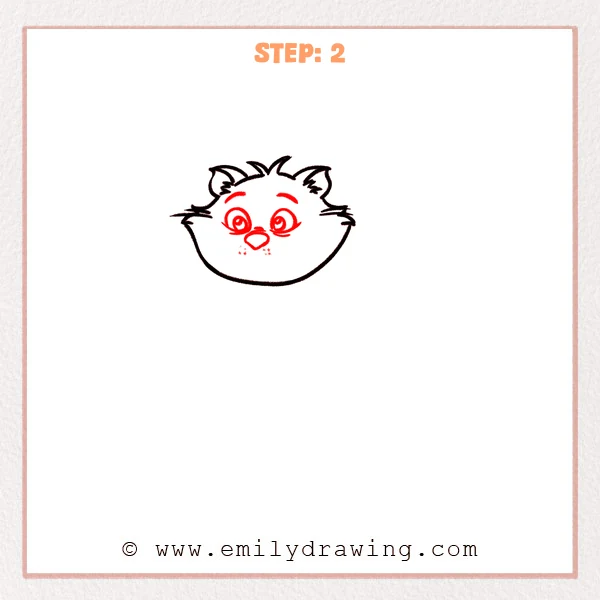
Place two large oval eyes in the upper half of the face, leaving a small gap between them. Add curved eyebrows above, then draw a rounded triangle nose slightly below center and sprinkle a few whisker dots underneath.
Pro Tip: Keep both eyes level, and center the nose between them.
Step 3: Add the Cheshire Cat Grin and Teeth
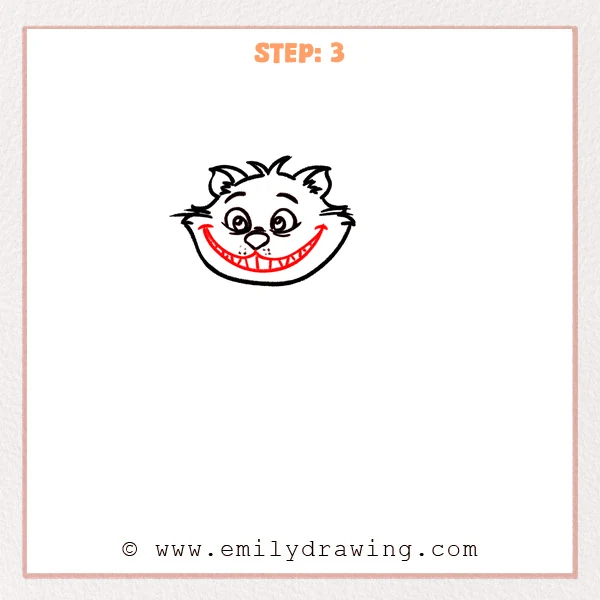
Start under the nose and draw a long curved smile that stretches wide, rising up at both corners. Add a second inner curve to form the mouth opening, then divide the space with slim triangle shapes for sharp teeth.
Pro Tip: Let the teeth vary slightly, but keep them following the smile curve.
Step 4: Add the Body Shape and Folded Paws
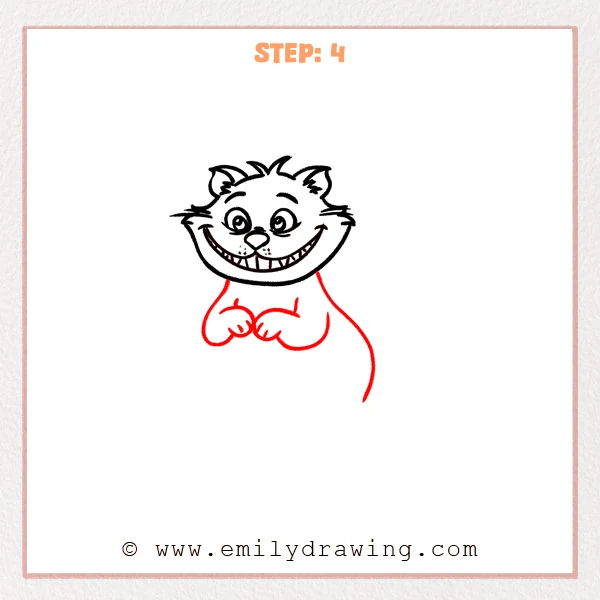
Pull two curved lines down from under the head to form a soft chest and body, letting the right side stretch longer like it is floating. Draw two short front arms bending inward, with the paws meeting in the middle, then add small curved marks to show the toes.
Pro Tip: Keep both paws similar in size, with only a small gap between them.
Step 5: Add the Lower Body Curve and a Tiny Foot
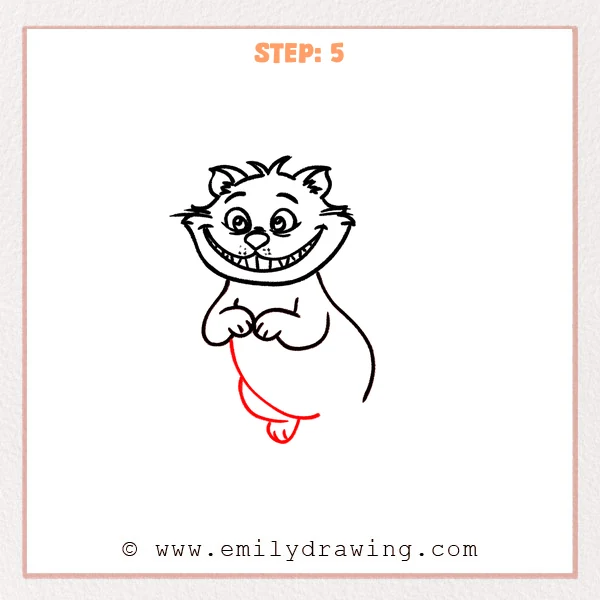
From the lower left side, sweep a long curved line downward to shape the floating lower body. Add a small dangling foot at the bottom, then mark the toes with a few short curved lines.
Pro Tip: Keep the lower curve smooth, and make the foot quite small.
Step 6: Add the Other Back Leg and Second Foot
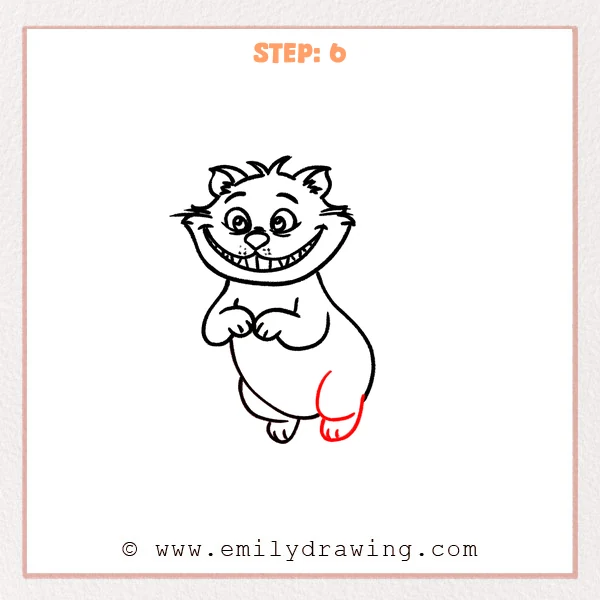
On the lower right side, draw an outward rounded curve to form the back leg. Add a larger foot at the bottom, pointing forward, and use a few short curved lines to suggest the toes.
Pro Tip: Make this foot slightly bigger than the first to show depth.
Step 7: Draw the Curly Tail
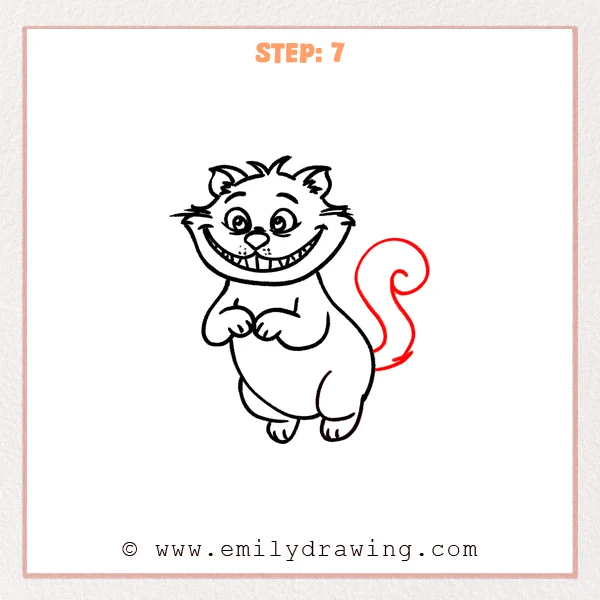
From the back-right side of the body, sweep a long curve upward and curl it into a rounded spiral. Add a second parallel curve to give the tail thickness, then taper it gently near the tip.
Pro Tip: Keep the tail lines evenly spaced, and leave a small open spiral center.
Step 8: Add Stripes to the Tail
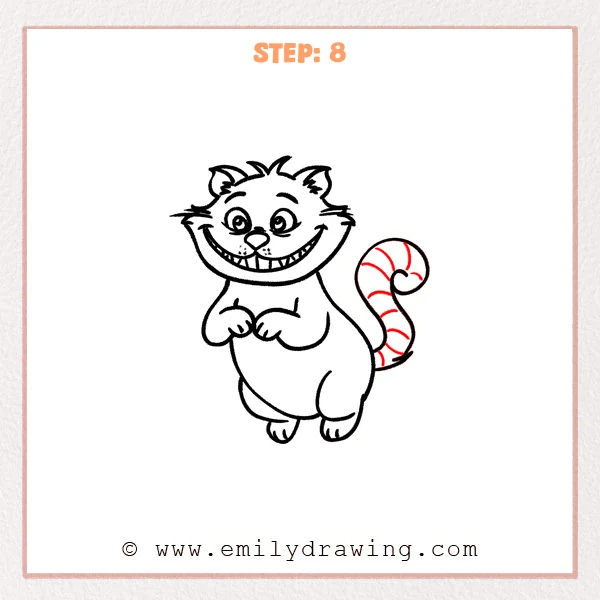
Draw several curved stripe bands that follow the tail’s curve, like rings wrapping around it. Make the stripes shorter on the inner curve and longer on the outer curve to suggest roundness.
Pro Tip: Keep the stripe spacing even, and let them bend with the spiral.
Step 9: Add Body Stripes and a Floating Puff
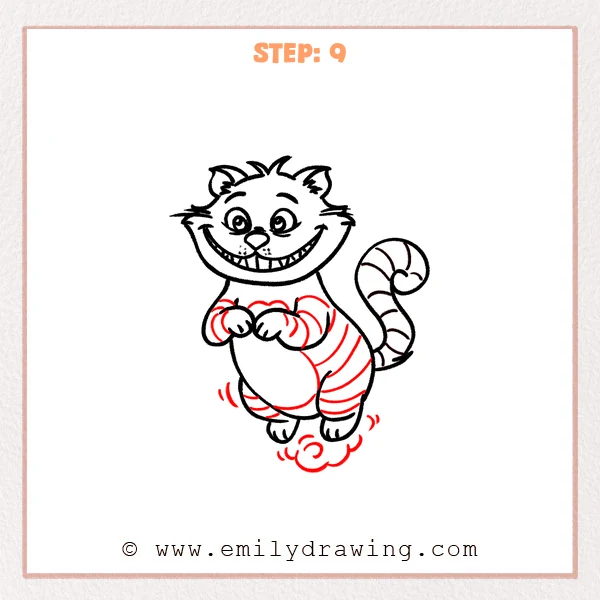
Draw curved stripe bands across the arms, belly, and legs, letting them wrap with the body’s round shape. Add a few small motion curves and a swirly puff under the feet to make the Cheshire Cat feel like it is floating.
Pro Tip: Curve the stripes with the form, not as straight horizontal lines.
Step 10: Color in your drawing!
Fun Facts
- The Cheshire Cat is famous for its huge grin and mysterious look.
- Curly tails are a fun way to show movement in a cartoon drawing.
- Stripes look best when they follow the curve of the body.
Pin it now, Draw later!
You now have a complete Cheshire Cat with a wide smile, fluffy head, and striped tail. If you want more depth, shade under the chin, beneath the paws, and along the belly curve where the body turns away. For coloring, try two stripe colors that contrast clearly, and keep the teeth lighter so the grin stays bright.
A common beginner mistake is drawing stripes as straight lines that ignore the cat’s curves. Take your time and let every stripe bend with the shape.
Keep practicing this easy drawing tutorial, and try drawing the Cheshire Cat again with a different tail curl or bigger grin. When you are ready, explore more step by step drawing subjects to build your confidence.
Get the FREE Printable Drawing Guide
FREE Download Printable Cheshire Cat Drawing Tutorial
Frequently Asked Questions
How do I make the Cheshire Cat smile look even wider?
Raise the mouth corners higher and stretch the curve farther toward the cheeks.
What if my eyes look uneven?
Lightly draw a gentle guide line first, then place both eyes on that line.
How do I keep stripes from looking messy?
Space them evenly and curve them around the form, especially near bends and spirals.