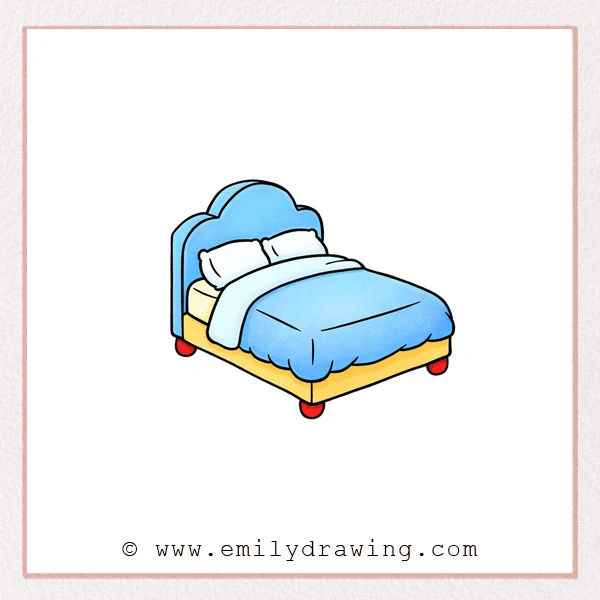
This easy drawing tutorial shows how to draw a cartoon bed step by step.
We will build a soft, cozy bed using simple shapes and gentle curves.
Take your time with each line, and let the drawing grow one step at a time.
What You Will Need
- Pencil
- Eraser
- Black marker or pen (optional for outlining)
- Coloring tools (crayons, markers, or colored pencils)
Here are my RECOMMENDED Art Supplies!
- Crayola Coloring Set (140 Pieces – Mega Value!)
- 24 Colored Crayon Set
- A4 Printer Paper
- Crayola Coloring Pencils
- HP Home Printer with Instant Ink!
Time needed:
26 minutes.
Step-by-Step Drawing Guide
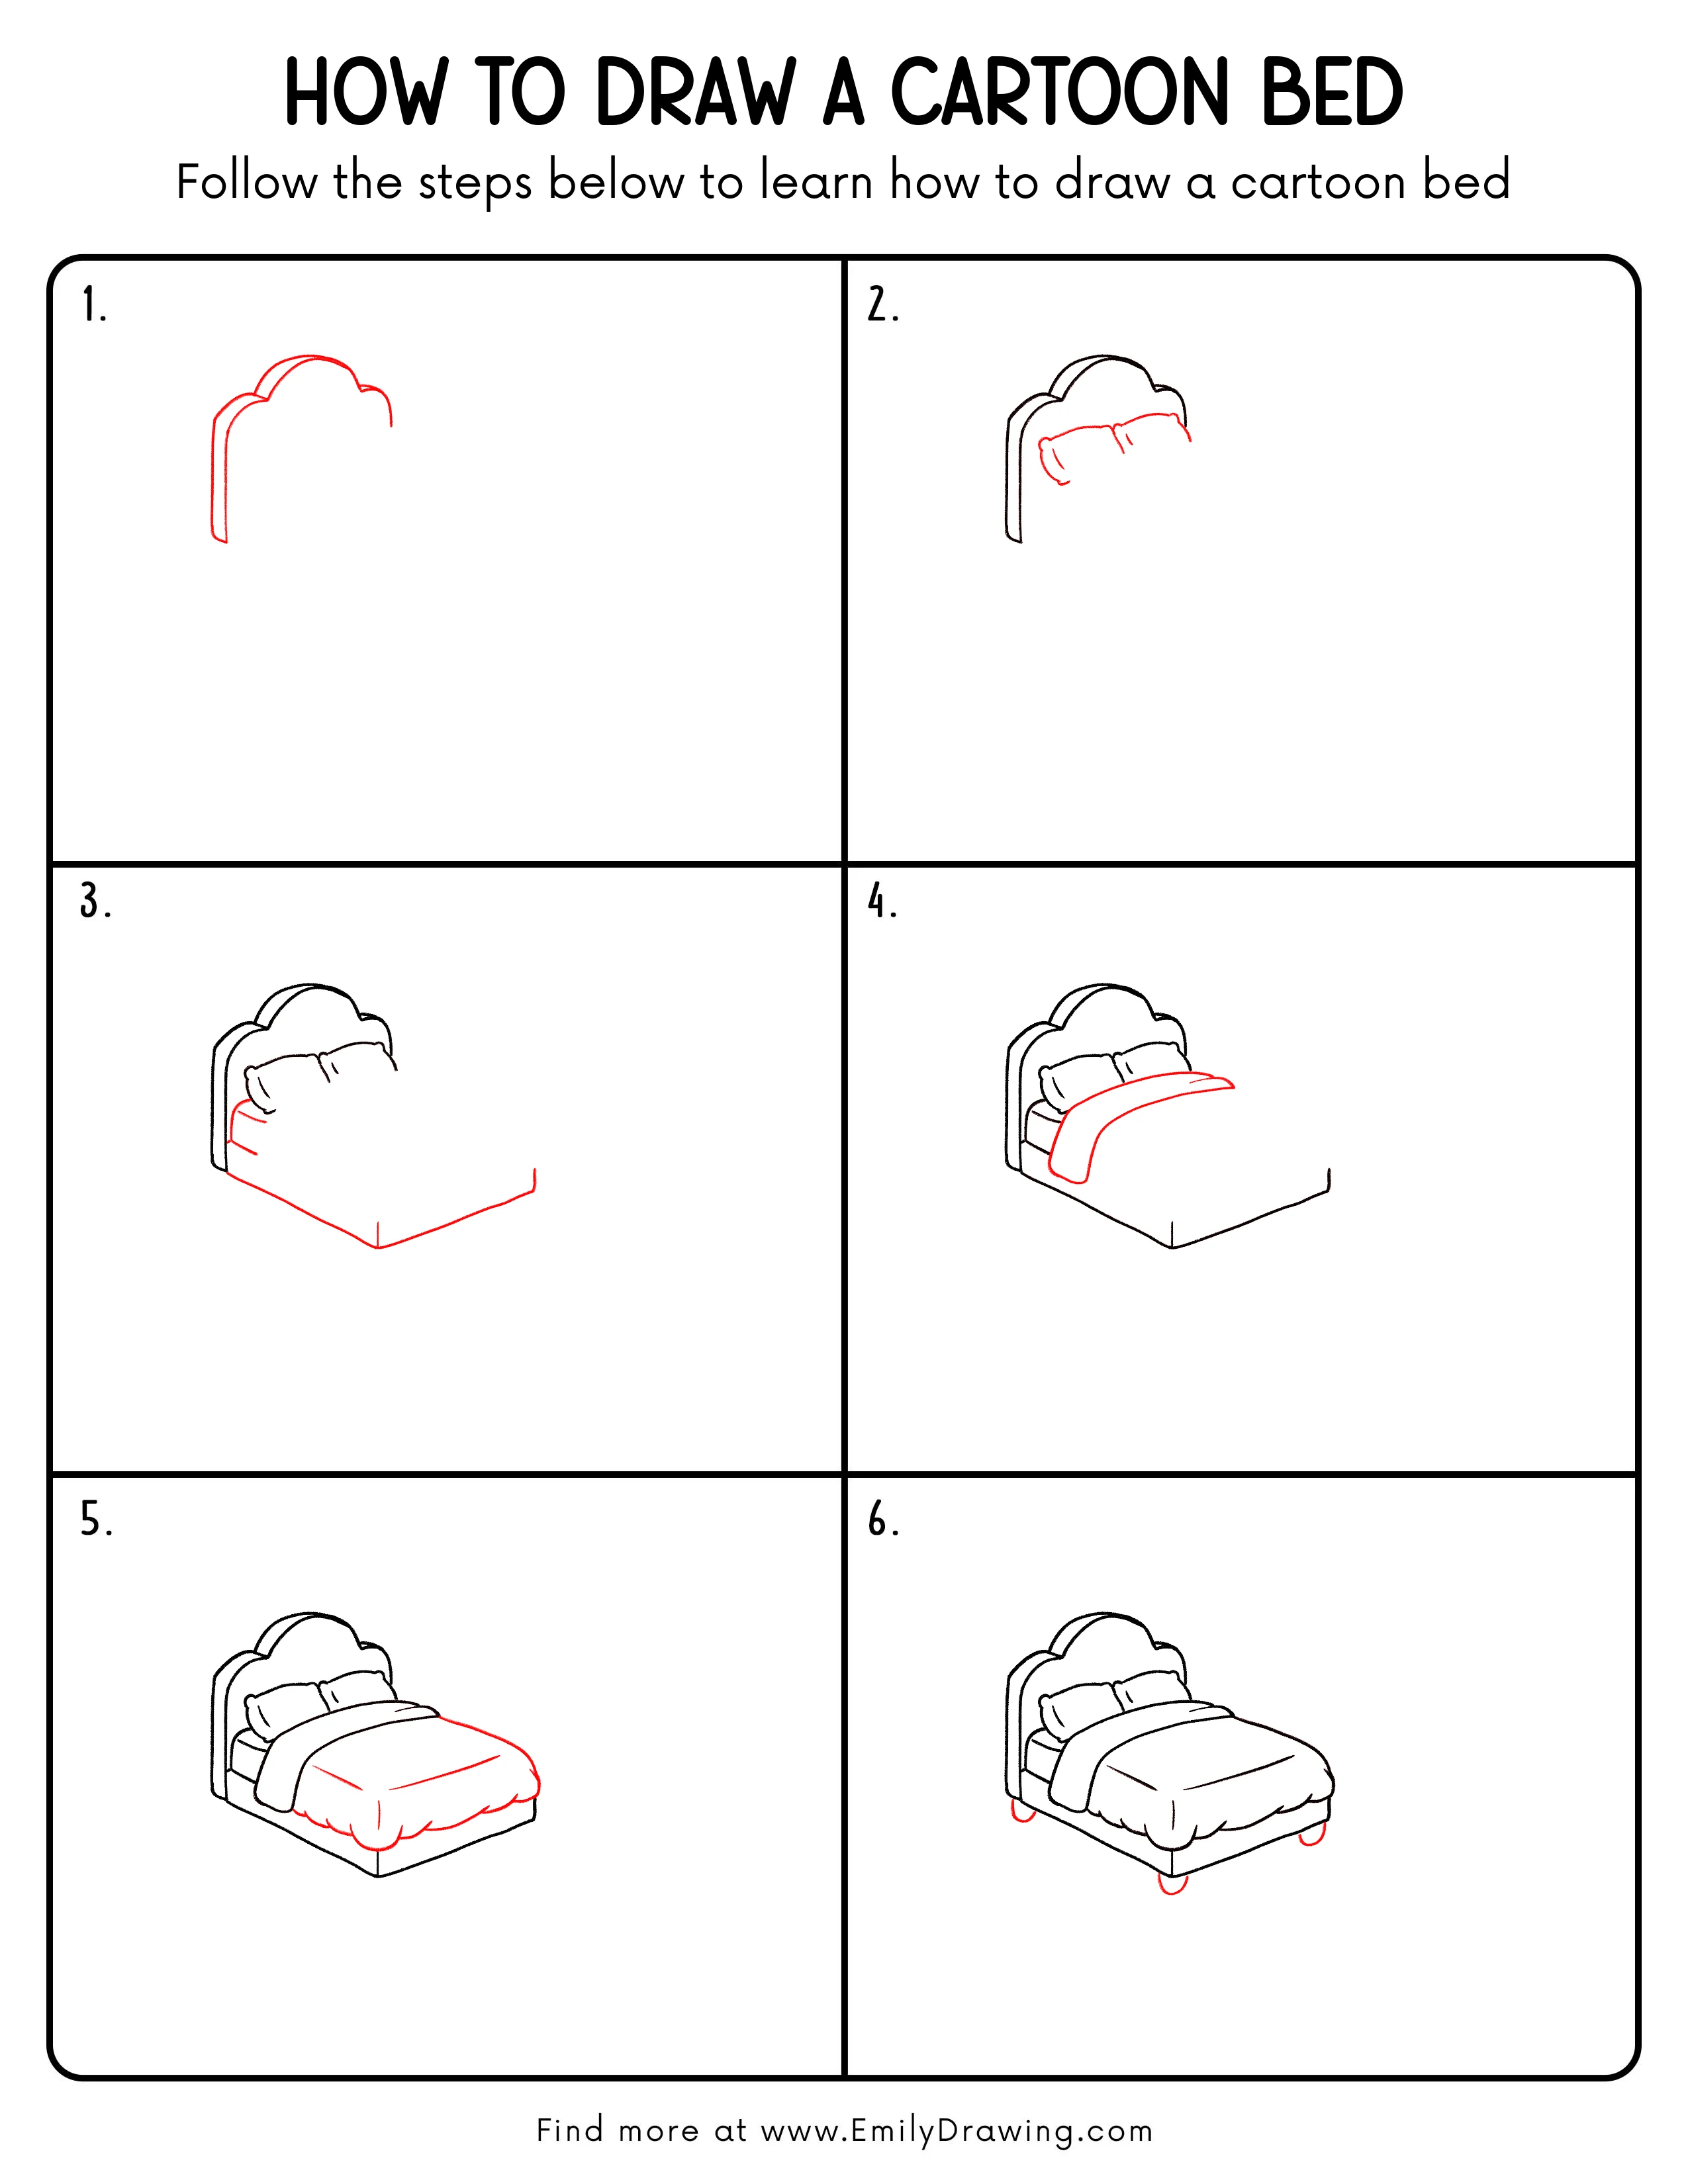
Step 1: Outline the Headboard Shape
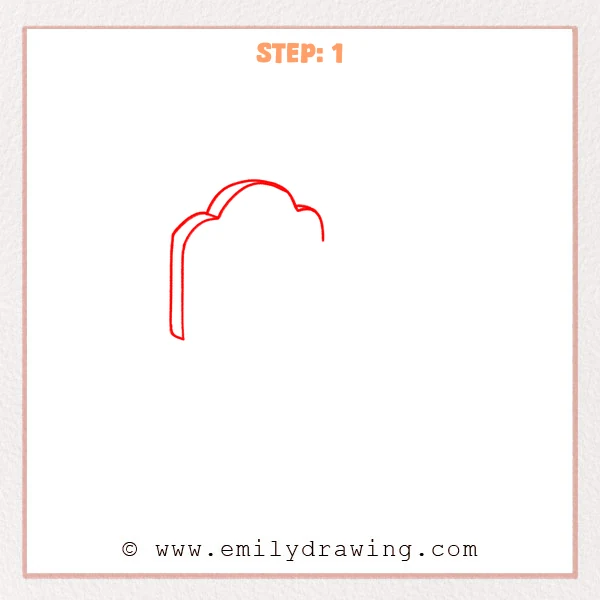
Start near the upper-left of your page with a tall vertical line with rounded ends.
From the top, add three connected curved bumps to the right to form a puffy cartoon headboard top, leaving the right side open for now.
Pro Tip: Keep the top bumps similar in size to make it look tidy.
Step 2: Add the Pillow Tops
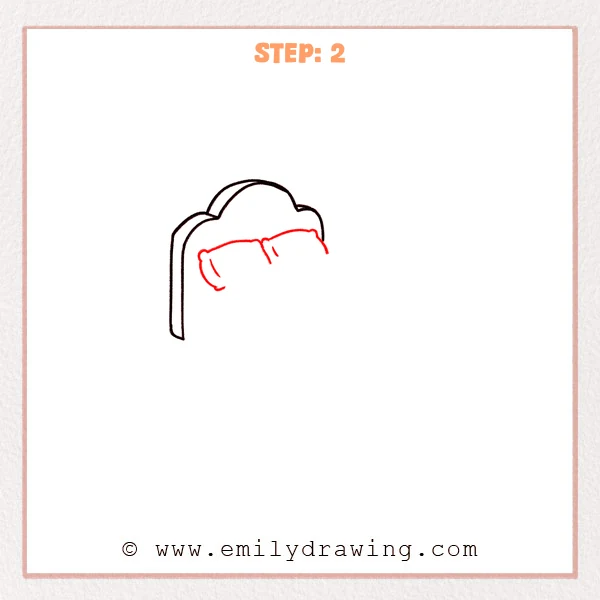
Inside the headboard, draw a gently bumpy horizontal line to show the top edge of two pillows.
Add a short divider line in the center, then place small curved crease lines on each pillow for softness.
Pro Tip: Keep the pillow lines rounded, with no sharp corners.
Step 3: Draw the Mattress and Bed Base in Perspective
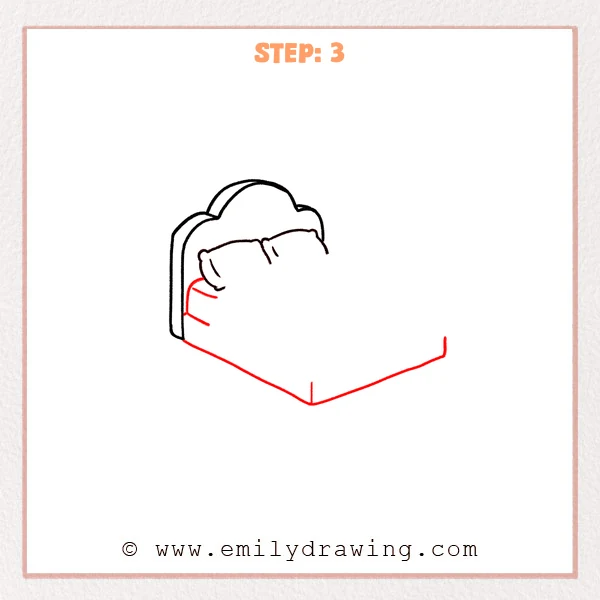
From beneath the pillows, extend a long top edge to the right to form the mattress surface.
Then drop a short side panel down near the headboard and add a pointed front corner, so the bed feels three-dimensional.
Pro Tip: Line up the front corner with the top and bottom edges for steadier perspective.
Step 4: Add a Blanket Draped Over the Bed

In front of the pillows, draw a long curved line sweeping to the right for the blanket’s top edge.
Drop a rounded side edge down on the left so the blanket hangs over the mattress, then add a short crease line near the top for a fold.
Pro Tip: Use wide curves for the blanket edges to keep it soft and cute.
Step 5: Finish the Puffy Blanket Edge
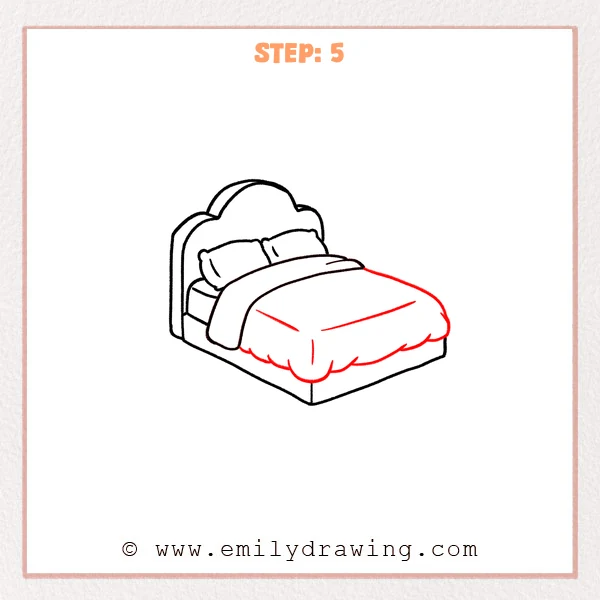
Along the front of the bed, add a bouncy wavy outline so the blanket looks puffy and drapes over the edge.
Place a few short crease lines in the middle and toward the right to show soft folds and weight.
Pro Tip: Don’t make the waves too crowded; bigger puffs feel more like a quilt.
Step 6: Add Small Rounded Bed Legs
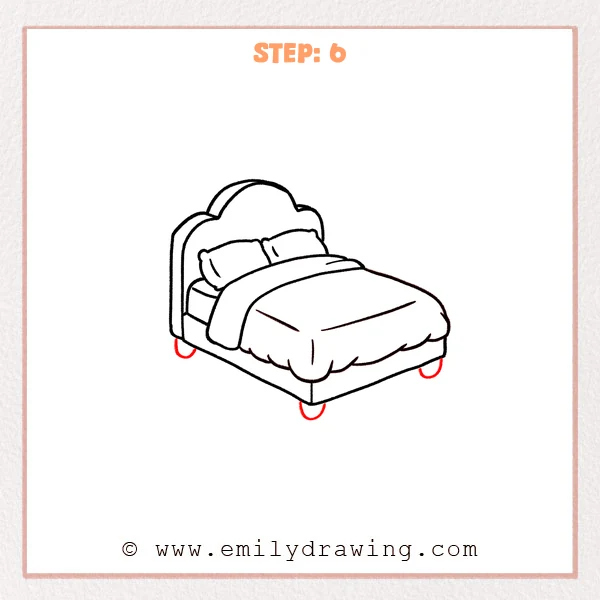
Under the bed base, add three small U-shaped curves—one near the back-left, one under the front-middle corner, and one near the front-right.
Keep each U opening upward so it connects softly to the base and looks like rounded feet holding the bed up.
Pro Tip: Keep the legs similar in size and not too close to the edges.
Step 7: Color in your drawing!
Fun Facts
- Beds can look different around the world, depending on climate and tradition.
- Pillows were once stuffed with natural materials like straw or feathers.
- A thick blanket often shows folds because fabric drapes under its own weight.
Pin it now, Draw later!

You have now drawn a cartoon bed with a cozy headboard, pillows, and a puffy blanket.
For coloring, try a light shade on the top of the blanket and a darker shade under the folds.
A soft shadow under the bed can help the legs feel more real.
One common beginner mistake is making the front corner slant differently from the bed edges, which can flatten the perspective.
Practice this step by step drawing again with different blanket patterns, and try another easy drawing tutorial to keep improving.
Get the FREE Printable Drawing Guide
FREE Download Printable Cartoon Bed Drawing Tutorial
Frequently Asked Questions
How can I make my cartoon bed look more three-dimensional?
Add a light shadow under the blanket edge and along the side of the bed base.
What if my blanket looks too flat?
Use bigger, smoother waves and add a few short crease lines to show folds.
How do I keep the perspective from looking crooked?
Let the top and bottom edges aim in the same direction, and keep the front corner lined up.