
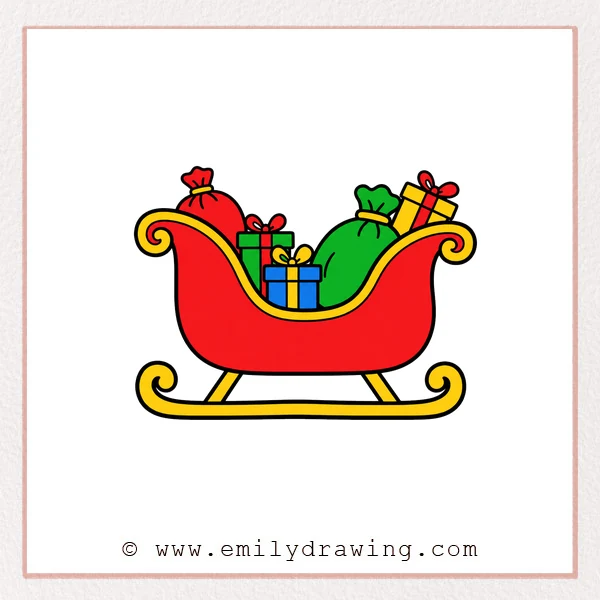
Learn how to draw Santa sleigh with this calm, easy drawing tutorial.
This step by step drawing guide is made for beginners who enjoy festive holiday art.
Take your time with each shape, and build the sleigh one part at a time.
What You Will Need
- Drawing paper
- Pencil
- Eraser
- Black marker or pen
- Red, brown, gold, and green coloring tools
Here are my RECOMMENDED Art Supplies!
- Crayola Coloring Set (140 Pieces – Mega Value!)
- 24 Colored Crayon Set
- A4 Printer Paper
- Crayola Coloring Pencils
- HP Home Printer with Instant Ink!
Time needed:
12 minutes.
Step-by-Step Drawing Guide
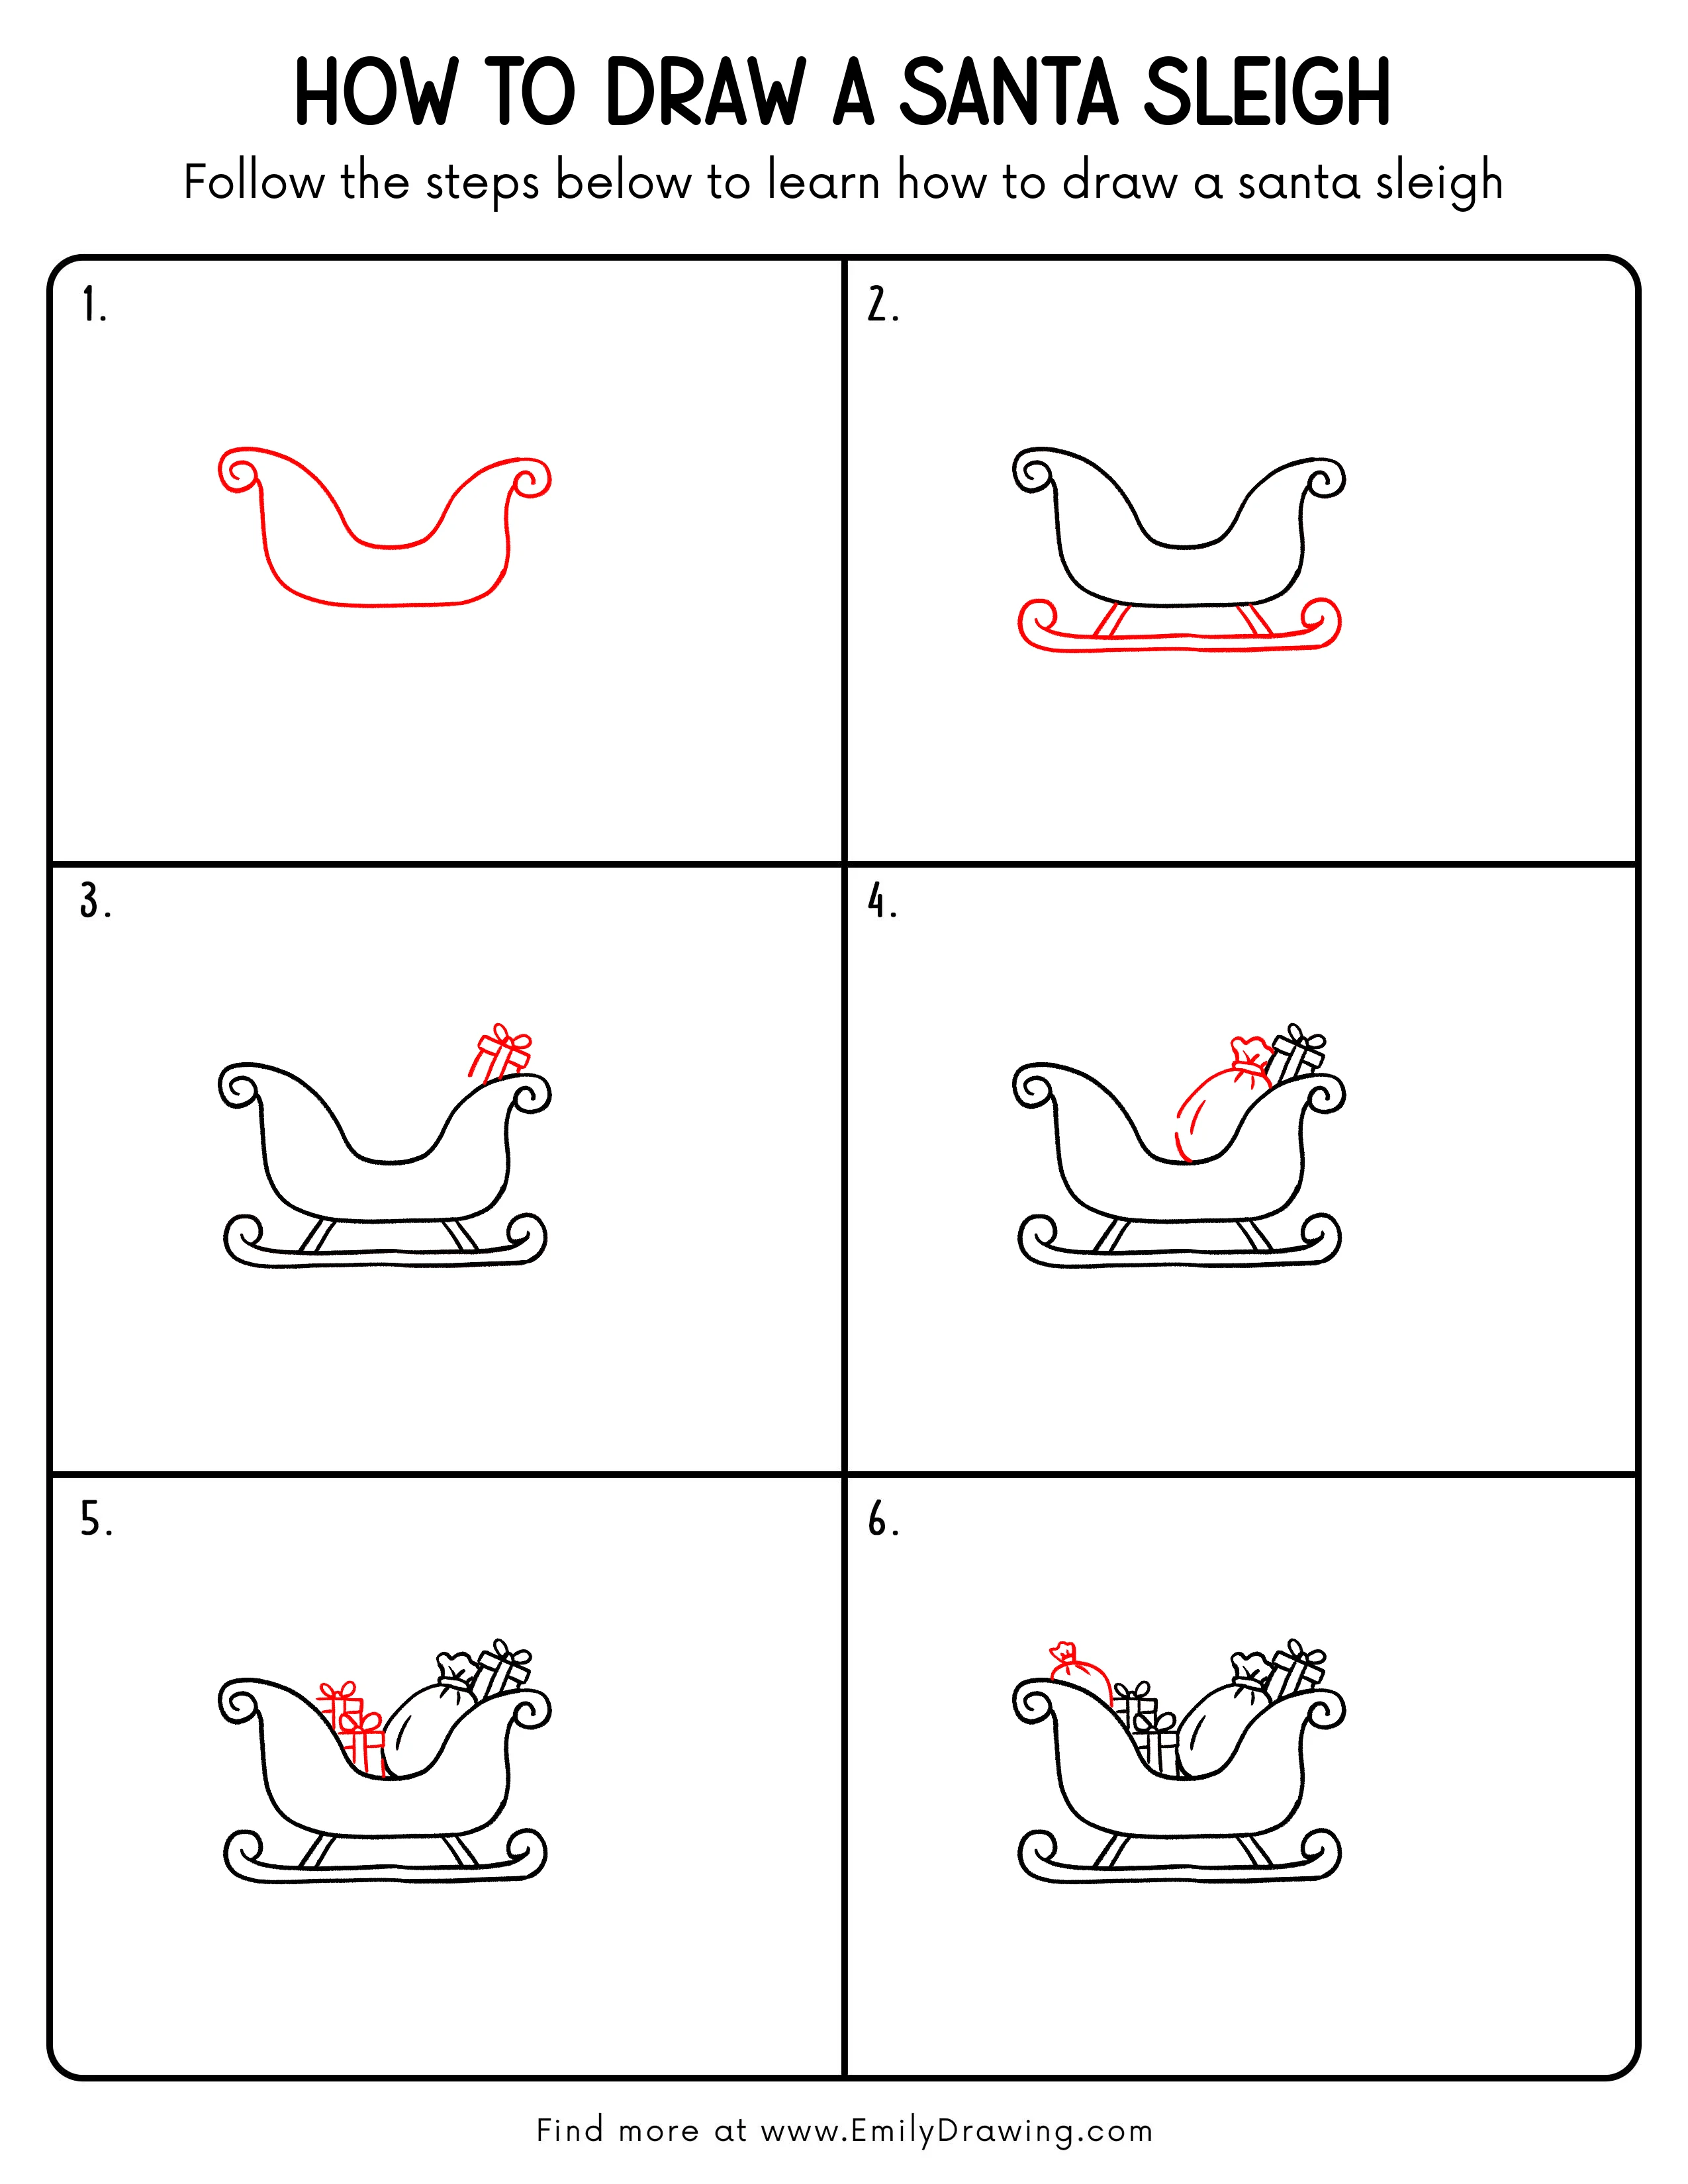
Step 1: Draw the Main Sleigh Outline
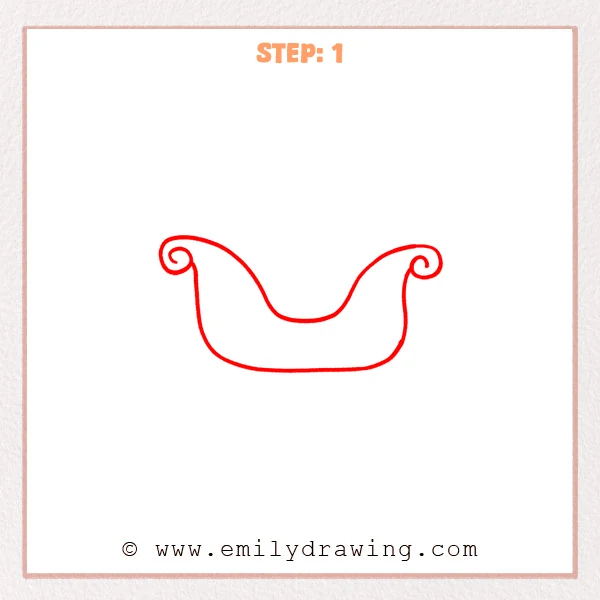
Start with a wide curved base, shaped like a shallow boat.
Add curled handles on both ends, letting each line spiral gently inward.
Pro Tip: Keep both curls close in height so the Santa sleigh looks balanced.
Step 2: Add the Sleigh Runners
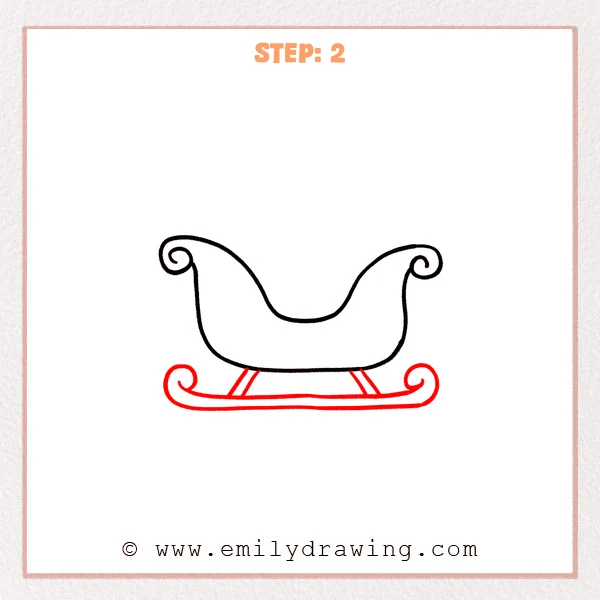
Draw a long runner below the body, curling upward at both ends.
Add a few short slanted supports to connect the sleigh body to the runner.
Pro Tip: Make the runner a little longer than the body so the Santa sleigh feels sturdy.
Step 3: Add a Gift Box
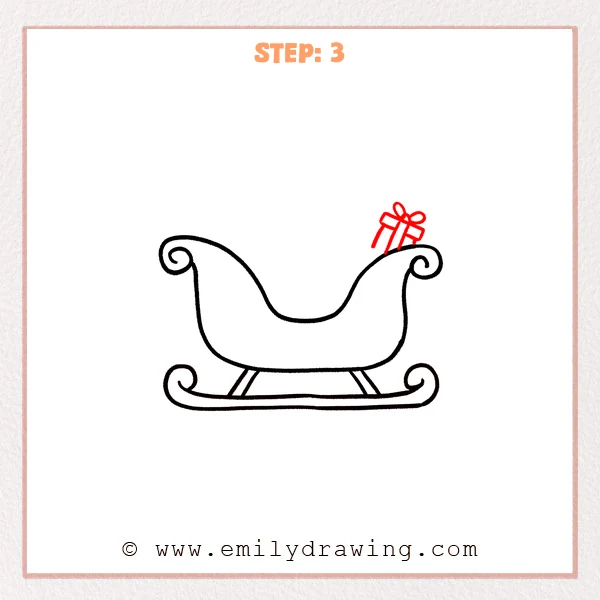
Draw a small gift box on the upper right side of the sleigh, tilted slightly.
Add a vertical ribbon and a bow to make the Santa sleigh feel more festive.
Pro Tip: Let part of the gift box hide behind the sleigh edge to create more depth.
Step 4: Add the Gift Sack
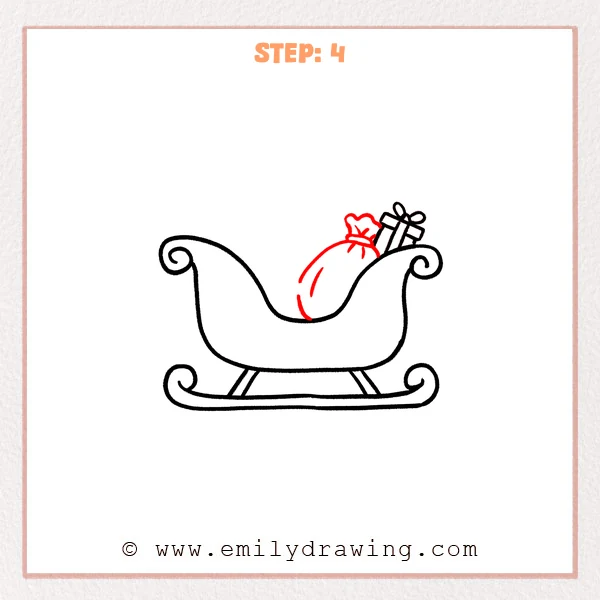
Draw a rounded gift sack near the middle-right of the sleigh.
Add gathered folds and tie lines at the top, letting it rest in front of the gift box.
Pro Tip: Keep the sack’s bottom close to the inner sleigh edge so it looks firmly placed inside.
Step 5: Add the Front Gift Boxes
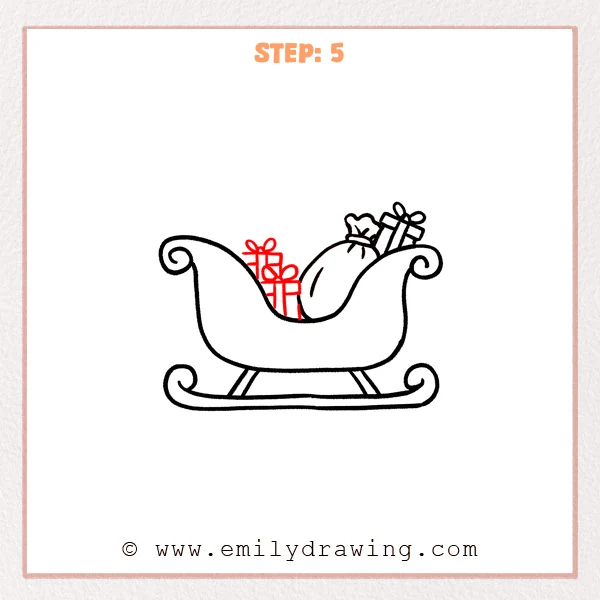
Draw two small gift boxes behind the left inner edge of the sleigh.
Add ribbons and bows to each box so the gift pile looks fuller.
Pro Tip: Vary the gift box heights so the items inside the Santa sleigh look more natural.
Step 6: Add the Back Gift Sack
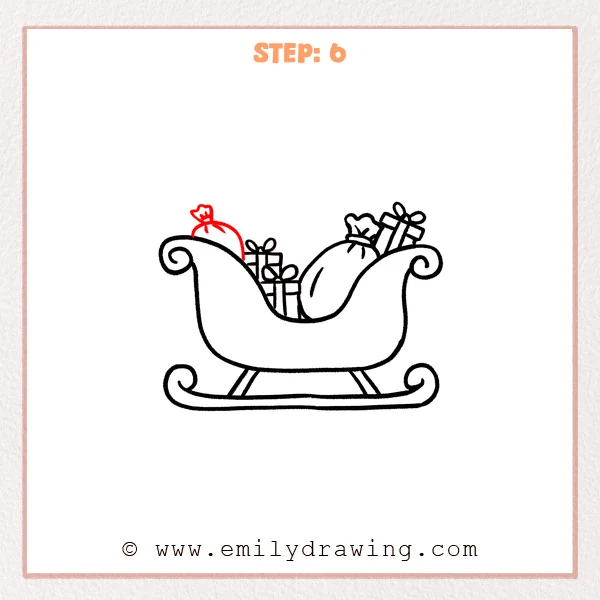
Draw a taller rounded gift sack at the back-left of the sleigh.
Add a small tied top and a few fold lines, letting it peek out behind the gift boxes.
Pro Tip: Show only part of the back sack so the layers of gifts stay clear.
Step 7: Color in your drawing!
Fun Facts
Santa’s sleigh is often shown with curled runners to make it look magical and graceful.
Gift sacks and boxes help tell the story of a busy Christmas Eve ride.
Curved lines can make a holiday drawing feel softer and more cheerful.
Pin it now, Draw later!
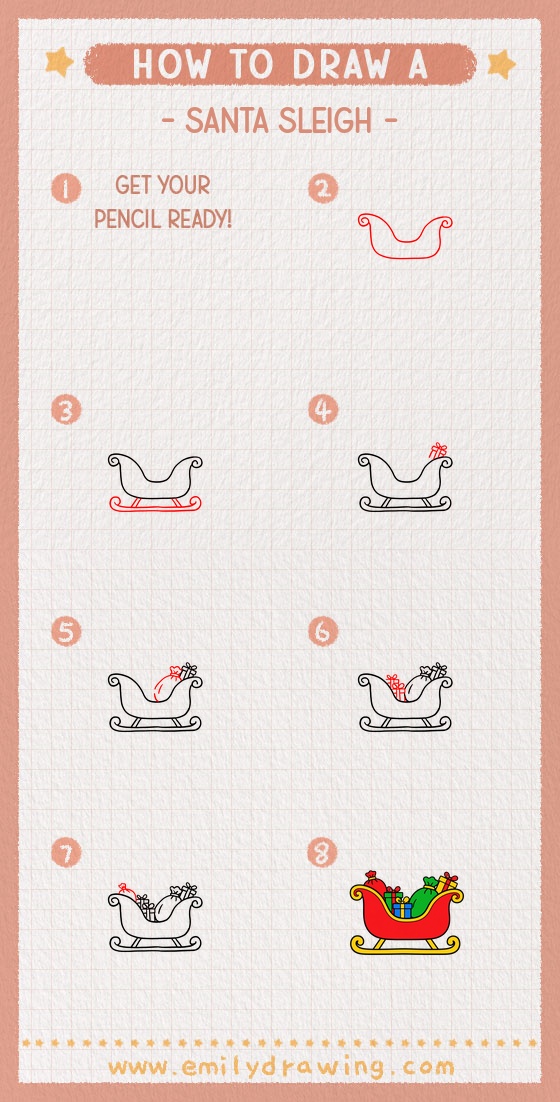
Trace your best pencil lines with a black marker when you are ready.
Color the sleigh red, add golden ribbons, and shade the gift sacks gently.
This drawing for beginners turns simple curves, boxes, and bags into a festive Santa sleigh.
Try adding snowflakes or stars around it to finish your holiday scene.
Get the FREE Printable Drawing Guide
FREE Download Printable Santa Sleigh Drawing Tutorial
Frequently Asked Questions
Is this Santa sleigh drawing good for beginners?
Yes, this easy drawing tutorial uses simple curves, boxes, and short lines.
Each step adds only one clear part, so beginners can follow along comfortably.
How can I make the sleigh look more festive?
Use bright red for the sleigh and warm colors for the gifts.
You can also add snow, stars, or tiny bells near the curled runners.
What should I do if my curls are uneven?
Lightly sketch the curls first, then adjust them before tracing.
Small differences are fine and can make your Santa sleigh look handmade.



