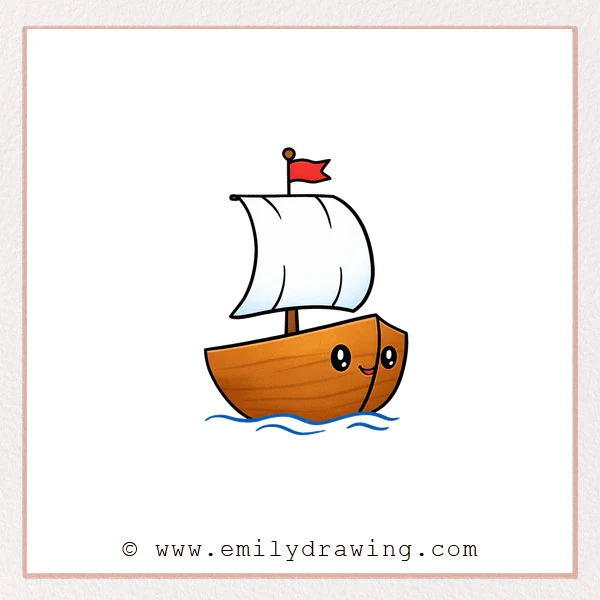
This easy drawing tutorial shows you how to draw a cartoon boat step by step.
We will build the picture in small, calm stages, so it feels friendly for beginners.
Take your time, and let each line stay simple and clear.
What You Will Need
- Pencil and eraser
- Black marker or pen (optional for outlining)
- Colored pencils or crayons (optional)
- Plain drawing paper
Here are my RECOMMENDED Art Supplies!
- Crayola Coloring Set (140 Pieces – Mega Value!)
- 24 Colored Crayon Set
- A4 Printer Paper
- Crayola Coloring Pencils
- HP Home Printer with Instant Ink!
Time needed:
27 minutes.
Step-by-Step Drawing Guide
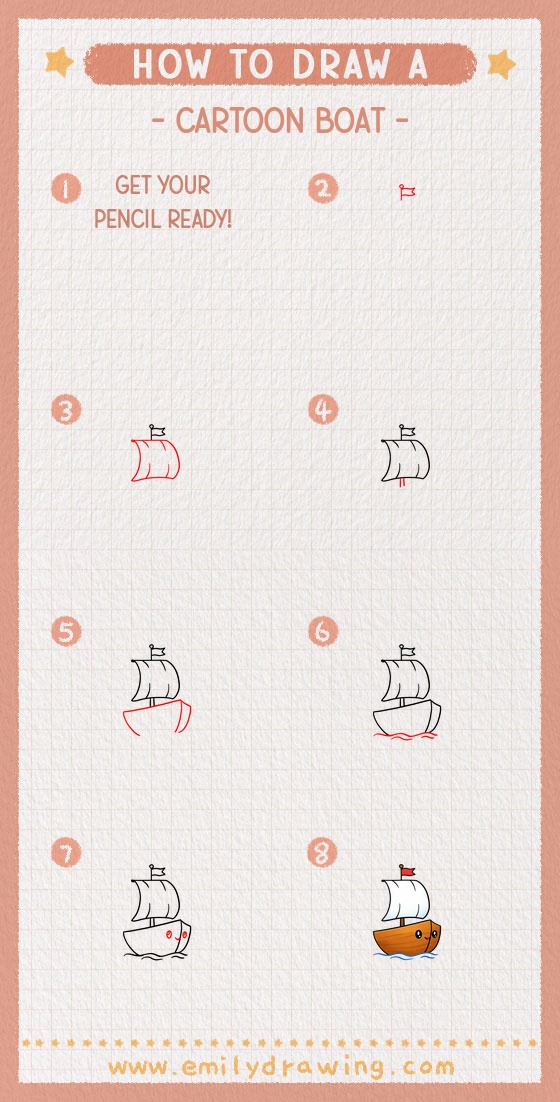
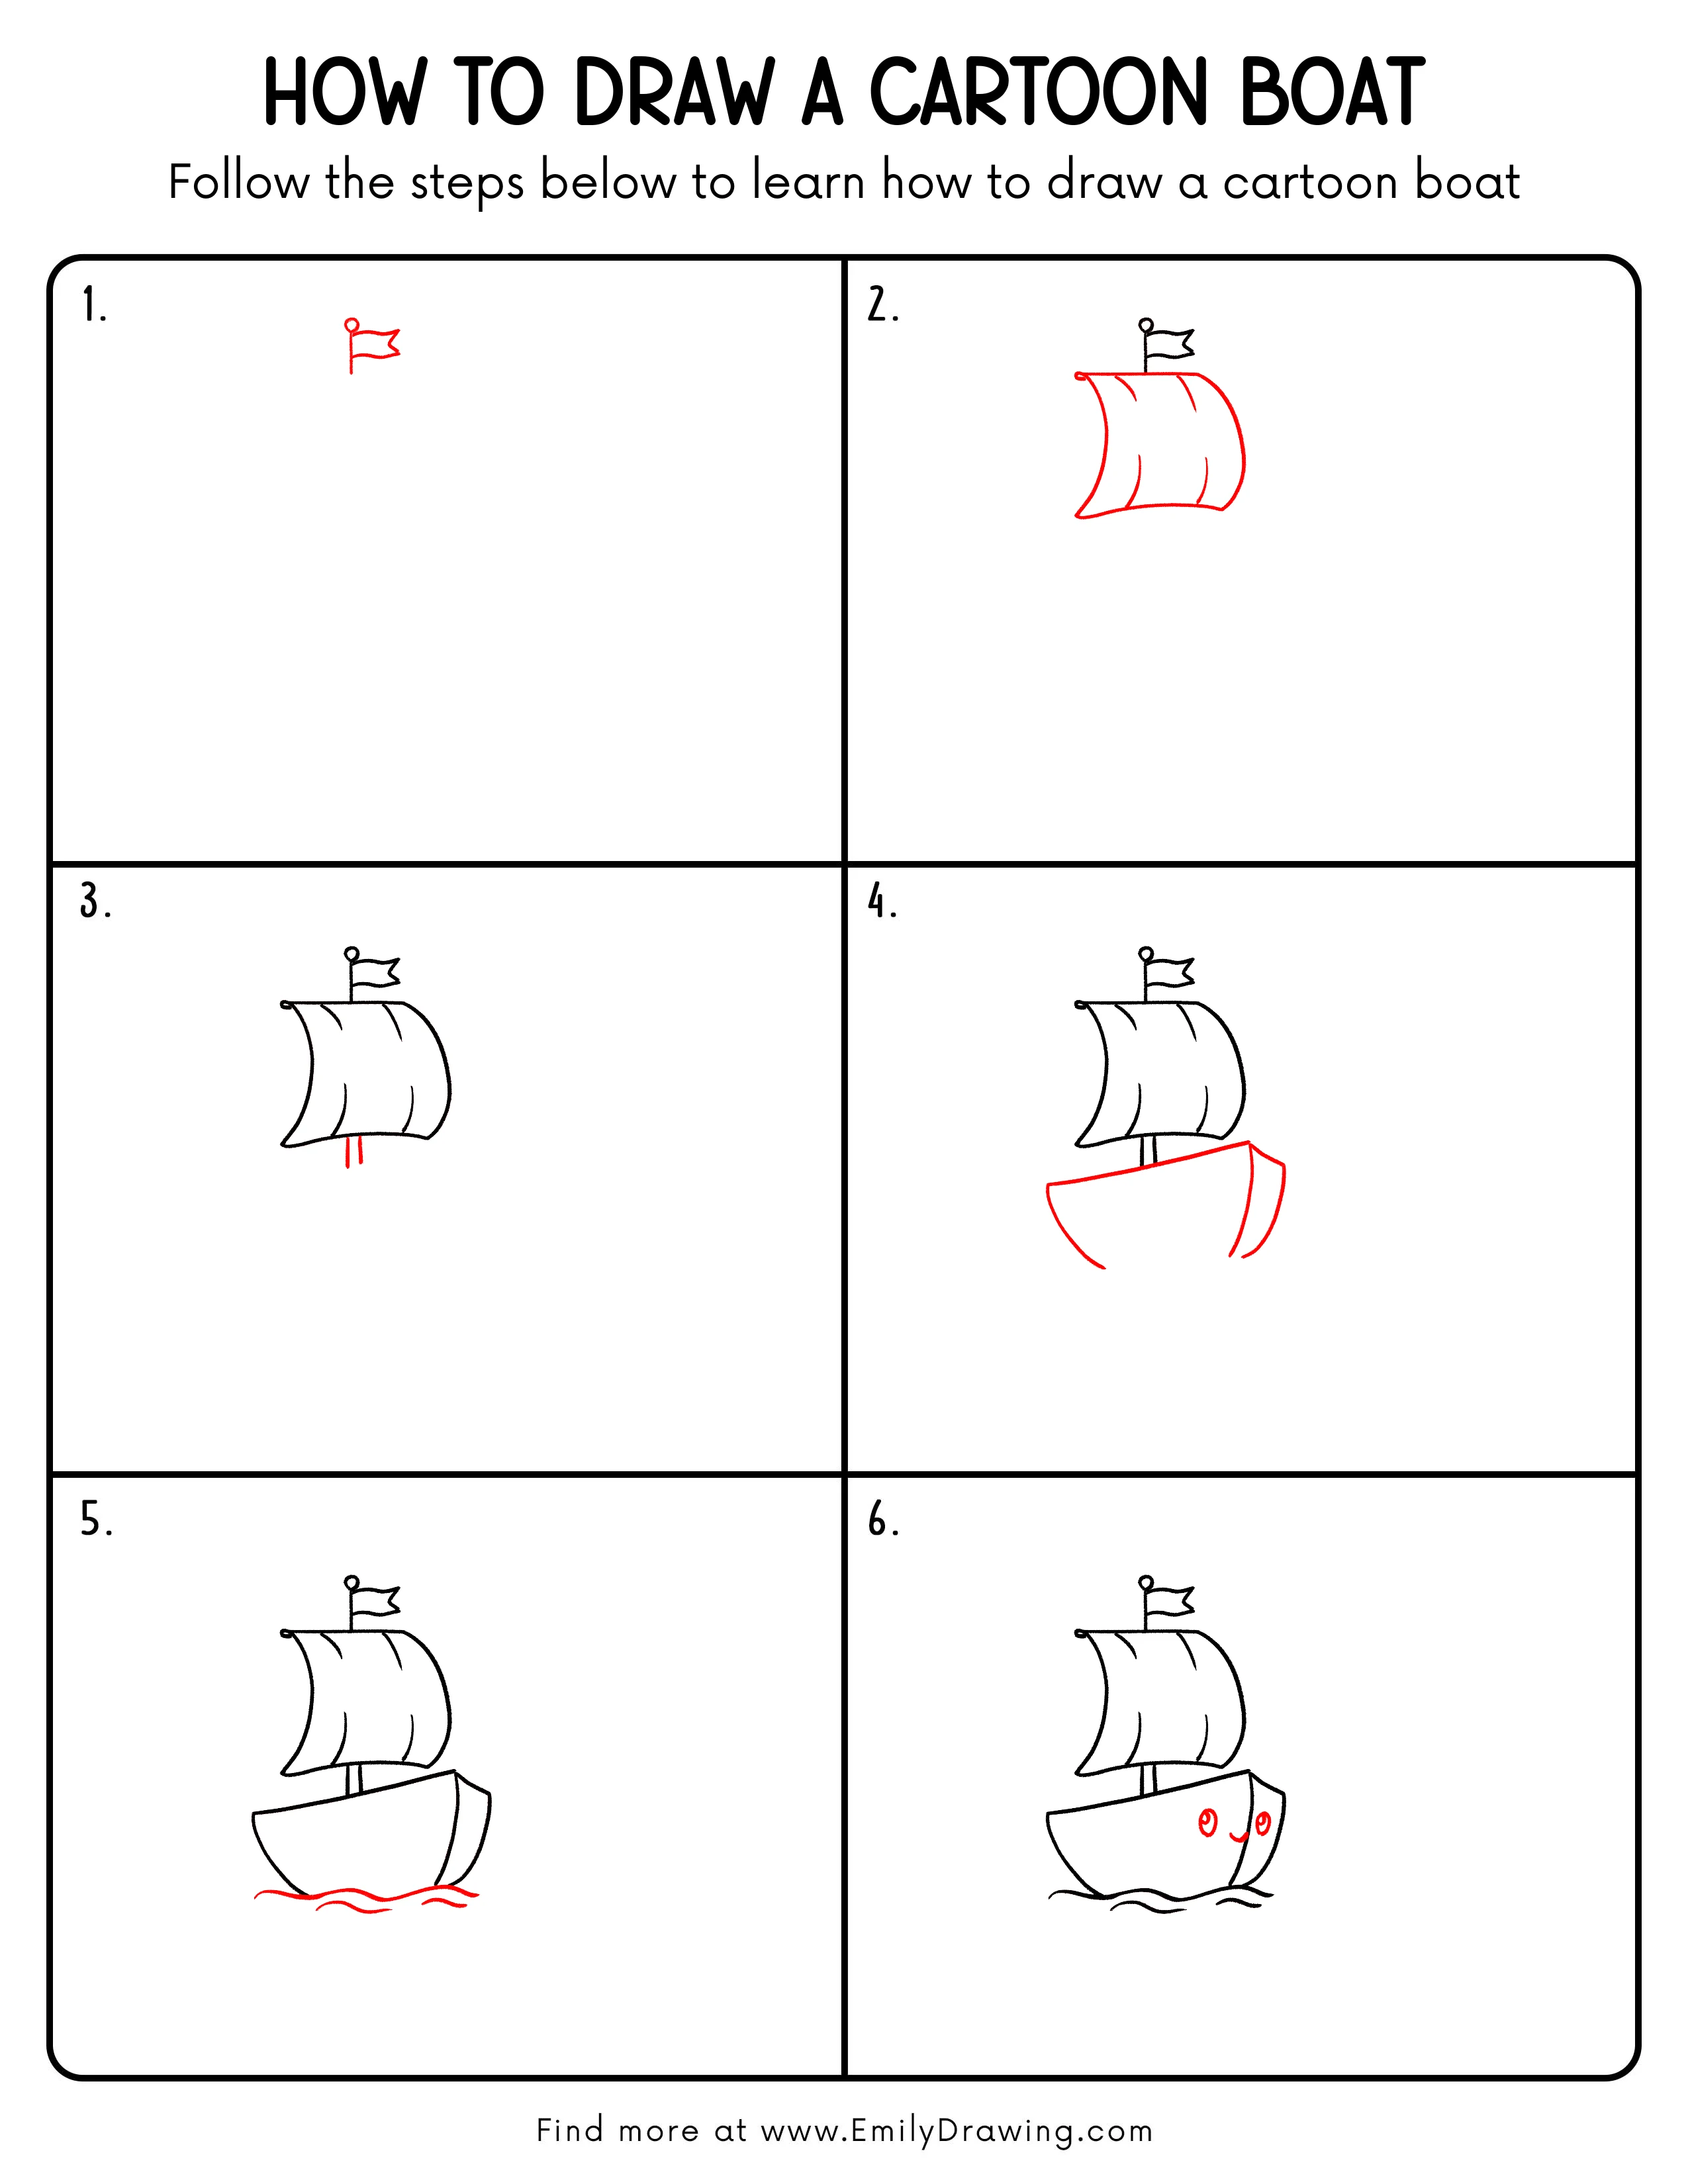
Step 1: Sketch a Small Flag
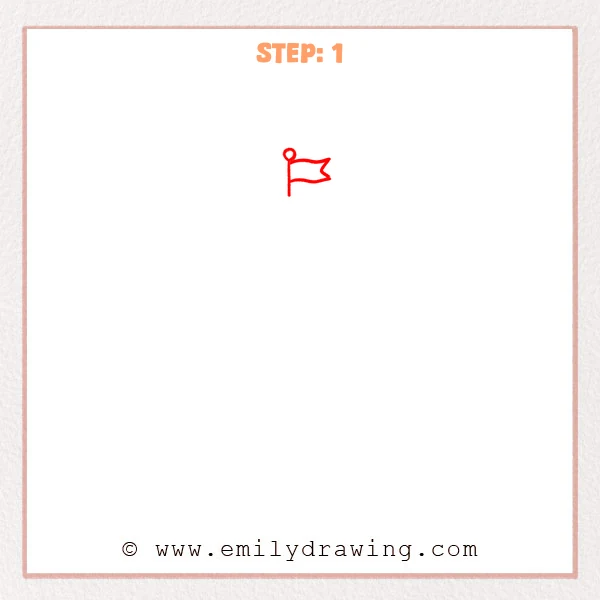
Start near the upper-left area and draw a thin vertical line for a flagpole.
Add a small circle on top, then draw a waving flag to the right with a soft curve and a pointed tip for a cartoon look.
Pro Tip: Curve the bottom edge a little more to make it feel windblown.
Step 2: Add the Big Sail
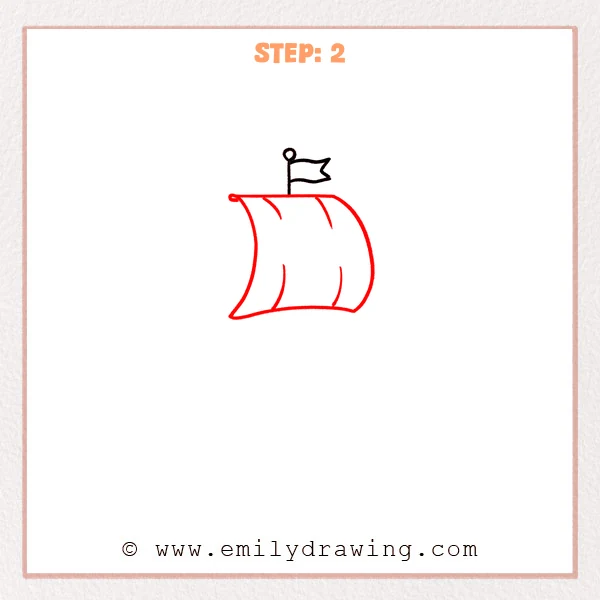
Below the small flag, sketch a large curved sail with a slight dip on the left and a rounded, puffed side on the right.
Keep the top edge close to the pole area, then add a few gentle curved vertical lines to show fabric folds.
Pro Tip: Keep fold lines light and follow the sail’s curve for a natural look.
Step 3: Add the Short Lines Below the Sail
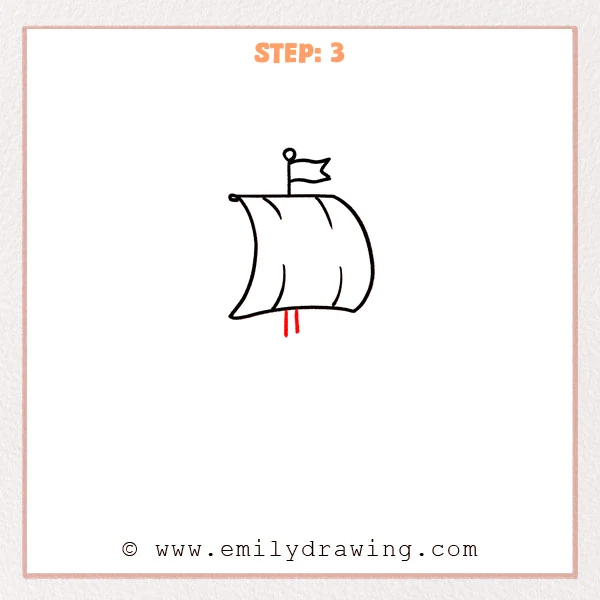
Under the center of the sail’s bottom edge, add two short vertical lines going downward.
Leave a small gap between them so the connection looks neat and clearly shaped.
Pro Tip: Keep these lines short so the boat feels light and simple.
Step 4: Draw the Boat Hull Shape

Below the two short lines, add a long slanted line for the top edge of the hull, rising slightly toward the right like an upturned bow.
Then draw a larger curved line underneath to form a rounded hull, and add one curved vertical line on the right to suggest the front side.
Pro Tip: Keep the bottom curve smooth so the boat feels sturdy and balanced.
Step 5: Add Simple Ocean Waves
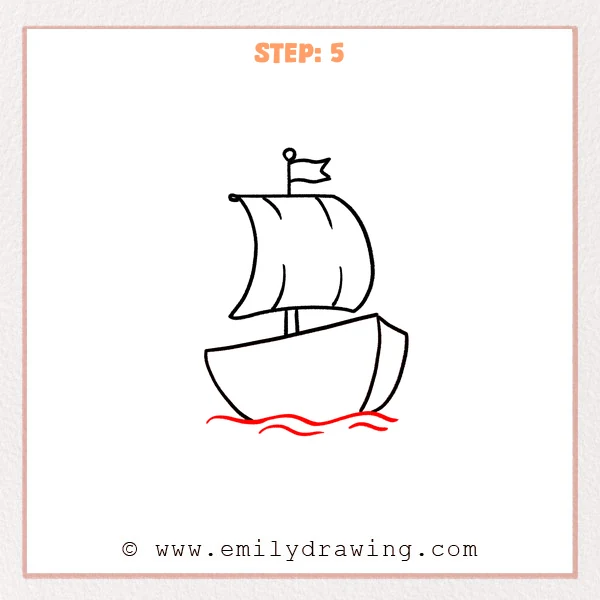
Under the bottom of the hull, draw a few wavy lines of different lengths to suggest moving water.
Place some waves slightly in front and some a bit behind to create depth.
Pro Tip: Keep the waves slightly uneven so the water looks natural.
Step 6: Add a Cute Face to the Boat
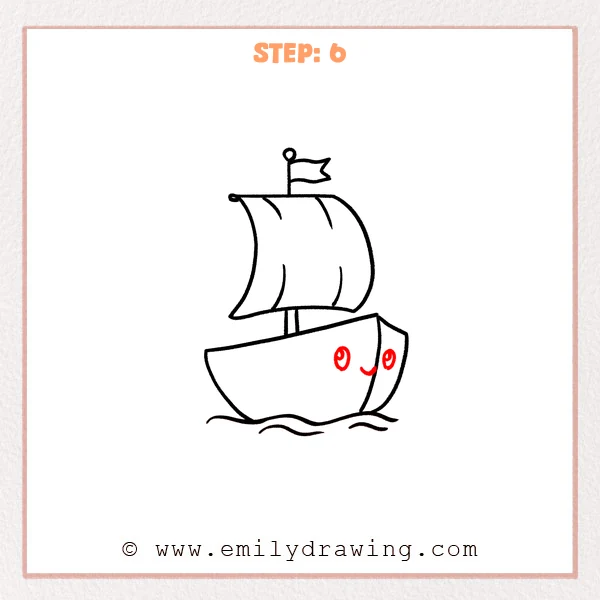
On the front-right area of the hull, sketch two round eyes and add a small curved highlight inside each one.
Between the eyes and a little lower, add a tiny curved smile to give the boat a friendly look.
Pro Tip: Keep both eyes similar in size so the face looks balanced.
Step 7: Color in your drawing!
Fun Facts
- Sailboats move using wind pushing against the sail.
- A boat’s “bow” is the front, and the “stern” is the back.
- Curved sails can look fuller, like they are catching a steady breeze.
Pin it now, Draw later!
You now have a cheerful cartoon boat with a sail, waves, and a friendly face.
Try outlining the final lines with a dark pen to make the shapes pop.
For coloring, keep the sail a light color and shade one side softly for depth.
A common beginner mistake is making the hull curve bumpy, so slow down on that line.
Practice this step by step drawing a few times, and try drawing other easy boats too.
Get the FREE Printable Drawing Guide
FREE Download Printable Cartoon Boat Drawing Tutorial
Frequently Asked Questions
How do I make the sail look more like it is blowing in the wind?
Add a stronger curve on one side of the sail and keep the fold lines gently curved.
Light, smooth lines usually look more windy than sharp angles.
What if my boat looks tilted or unbalanced?
Check the hull’s top edge and bottom curve, and adjust them to feel even.
You can also redraw the waves so the waterline looks steady.
Can I turn this into a different kind of boat?
Yes. You can add a second sail, a small window, or a simple cabin on the hull.
Small changes are a great way to learn how to draw a cartoon boat in new styles.