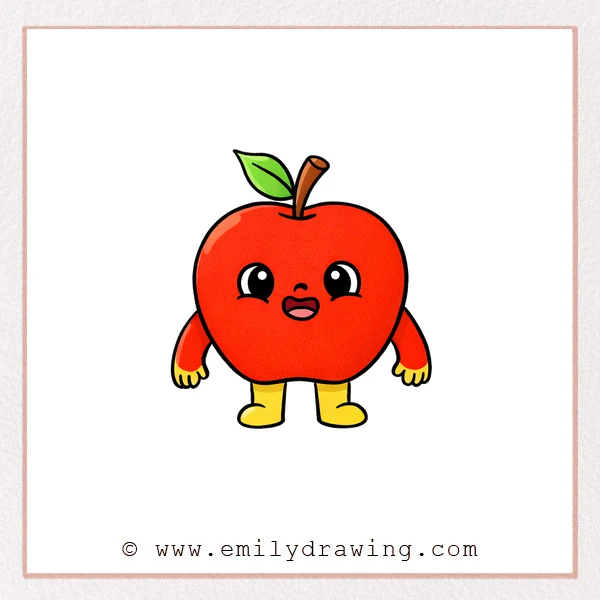
This easy drawing tutorial shows how to draw a cartoon apple step by step. We will build a simple apple character with a sweet face, arms, and shoes. Take your time with each line, and enjoy watching the drawing come alive.
What You Will Need
- Pencil
- Eraser
- Black marker or pen (optional for outlining)
- Coloring supplies (crayons, colored pencils, or markers)
- Paper
Here are my RECOMMENDED Art Supplies!
- Crayola Coloring Set (140 Pieces – Mega Value!)
- 24 Colored Crayon Set
- A4 Printer Paper
- Crayola Coloring Pencils
- HP Home Printer with Instant Ink!
Time needed:
19 minutes.
Step-by-Step Drawing Guide
Step 1: Draw the Apple Leaf and Stem
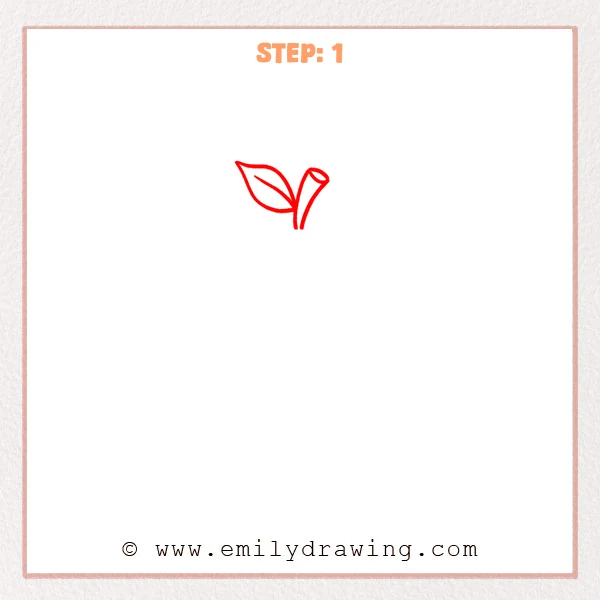
Start near the top of your page and sketch one curved leaf using two pointed arcs. Next, add a short tube-shaped stem beside it, and cap the top with a small oval so it looks cut and hollow.
Pro Tip: Keep the leaf tip slightly sharp, and place the base close to the stem.
Step 2: Add the Apple’s Outer Shape
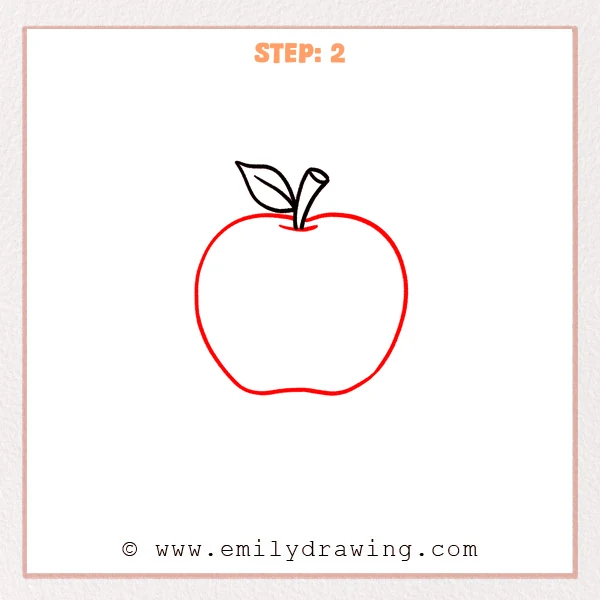
Start from both sides of the stem and sweep a big curved line downward to form the apple body, keeping the sides balanced. Near the bottom, add a gentle wavy bump for a cute cartoon look, then bring the line back up to meet the other side.
Pro Tip: Keep the bottom wave soft and rounded, not sharp.
Step 3: Add a Cute Face
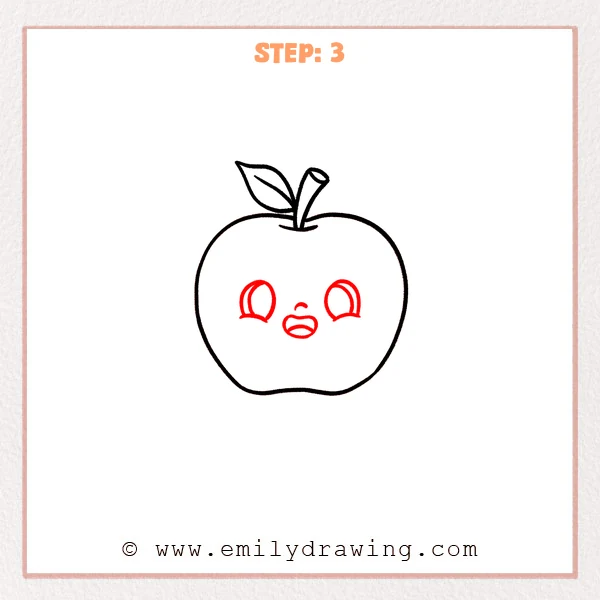
Place two big eyes slightly above the center, using rounded arcs and a smaller inner arc for a highlight edge. Between them, add a tiny curved nose, then draw an open smiling mouth below with an inner curve to show the tongue or mouth depth.
Pro Tip: Keep both eyes the same height and size for a balanced, cute look.
Step 4: Add the Left Little Arm
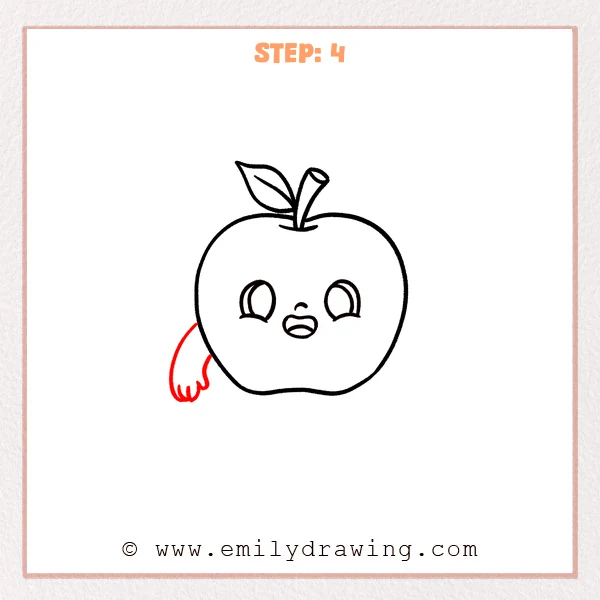
On the left side of the apple, sketch a curved line coming out and dropping down like a short arm. At the end, add a mitten-shaped hand with three rounded bumps for fingers, keeping everything soft and friendly.
Pro Tip: Keep the arm and hand a bit short for a cuter cartoon proportion.
Step 5: Add the Right Little Arm
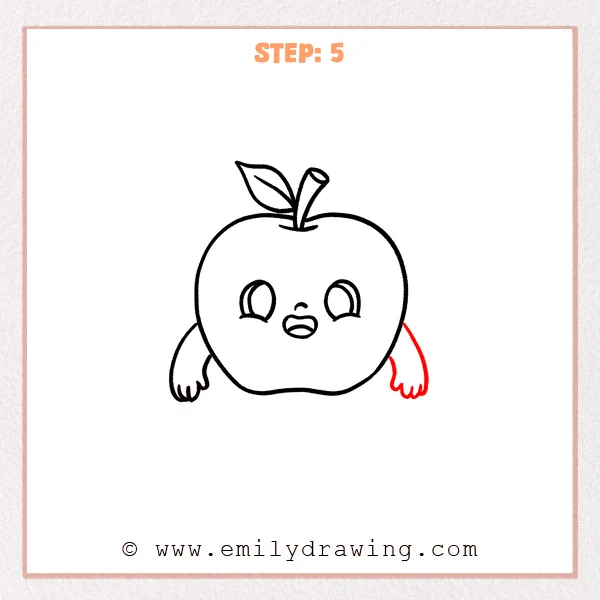
On the right side, sketch a second curved arm coming out from the apple’s edge and hanging down. Finish it with a mitten-like hand and three rounded finger bumps, matching the left side in size.
Pro Tip: Place the right arm slightly behind the body for a hugging feel.
Step 6: Add Two Short Legs and Shoes
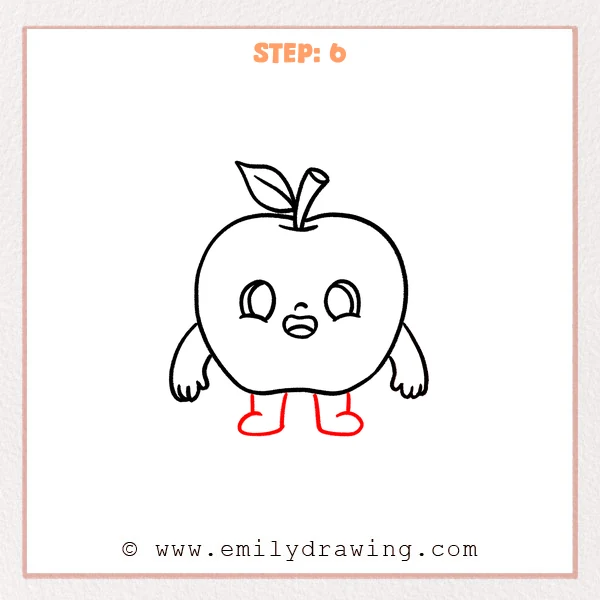
Under the bottom of the apple, add two short straight legs with a small gap between them for balance. Attach a rounded shoe to each leg, using a soft half-oval toe and a slightly tucked-in heel.
Pro Tip: Keep both shoes the same size, with toes pointing the same way.
Step 7: Color in your drawing!
Fun Facts
- Apples grow on trees, and apple blossoms turn into fruit after pollination.
- Apple skins can be red, green, yellow, or a mix of colors.
- Apples float in water because they have tiny air spaces inside.
Pin it now, Draw later!
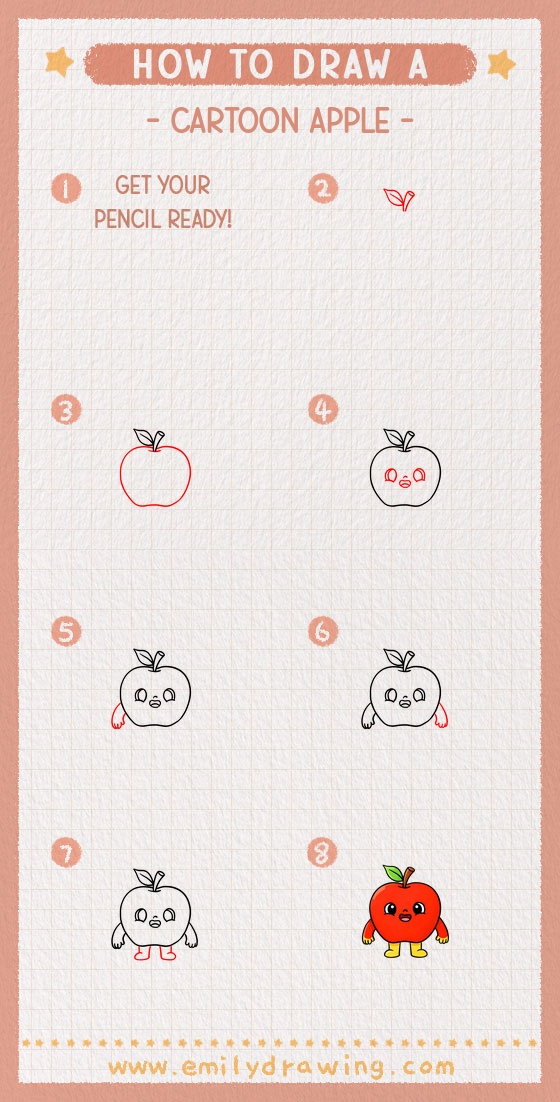
You now have a cheerful cartoon apple with a leaf, a stem, a friendly face, and simple limbs. For coloring, try a bright red body with a lighter red or pink highlight on one side, and add a gentle shadow under the shoes. A common beginner mistake is making one eye higher than the other, so pause and compare both sides before you outline. Keep practicing this step by step drawing, and try drawing more fruit characters next.
Get the FREE Printable Drawing Guide

FREE Download Printable Cartoon Apple Drawing Tutorial
Frequently Asked Questions
How do I make my cartoon apple look more round?
Use smoother curves on the sides and avoid sharp corners near the bottom wave.
What if my eyes do not match?
Lightly sketch both eye shapes first, then adjust with an eraser before outlining.
How can I add more personality to the face?
Try thicker eyelashes, rosy cheeks, or a bigger smile while keeping the features centered.