
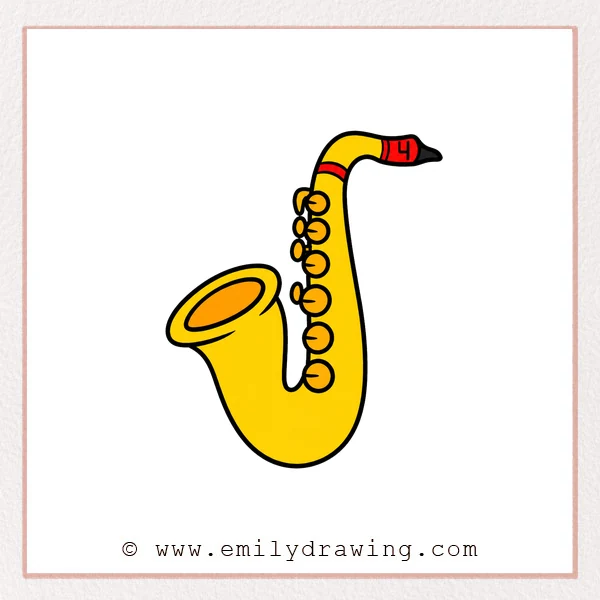
In this easy drawing tutorial, you will learn how to draw saxophone using simple curves, ovals, and small details. This step by step drawing is friendly for beginners and helps you build the instrument one part at a time. Take your time with each shape, and keep your lines smooth and relaxed.
What You Will Need
- Pencil
- Eraser
- Drawing paper
- Black marker or pen
- Colored pencils, crayons, or markers
Here are my RECOMMENDED Art Supplies!
- Crayola Coloring Set (140 Pieces – Mega Value!)
- 24 Colored Crayon Set
- A4 Printer Paper
- Crayola Coloring Pencils
- HP Home Printer with Instant Ink!
Time needed:
29 minutes.
Step-by-Step Drawing Guide
Step 1: Draw the Saxophone Bell
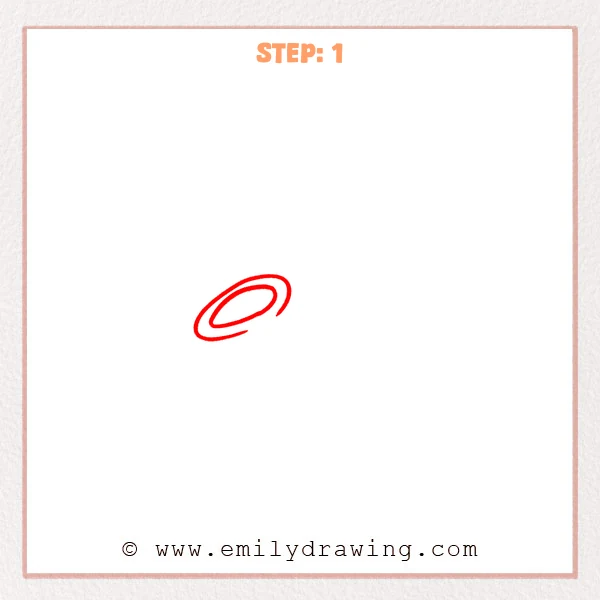
Start with a long oval tilted upward to the right. Add a larger curved line around it to suggest the open bell of the saxophone. Keep the lines smooth and relaxed, leaving a small opening on the right for now.
Pro Tip: Keep the inner and outer curves tilted at a similar angle so the bell looks natural.
Step 2: Draw the Saxophone Body Curve
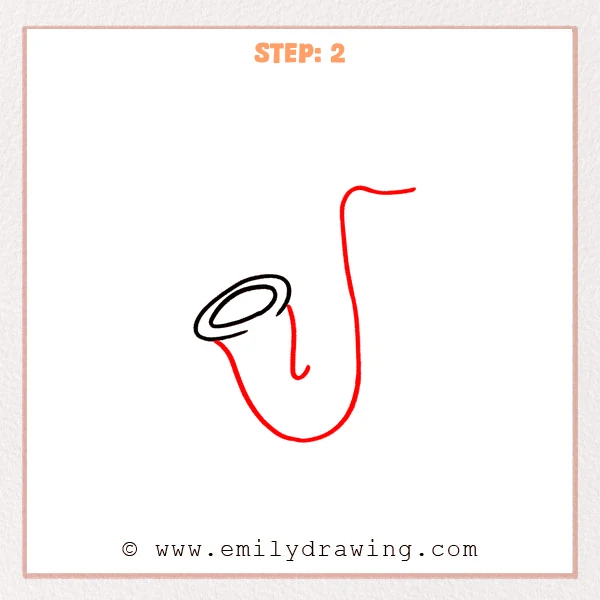
Extend a large curve from under the bell, rounding smoothly at the bottom. Bring the line upward to form the tall curved body of the saxophone. Add a short curved line beside the bell to connect the inner body shape.
Pro Tip: Make the bottom curve wide and rounded so the saxophone feels balanced.
Step 3: Thicken the Upper Neck Curve
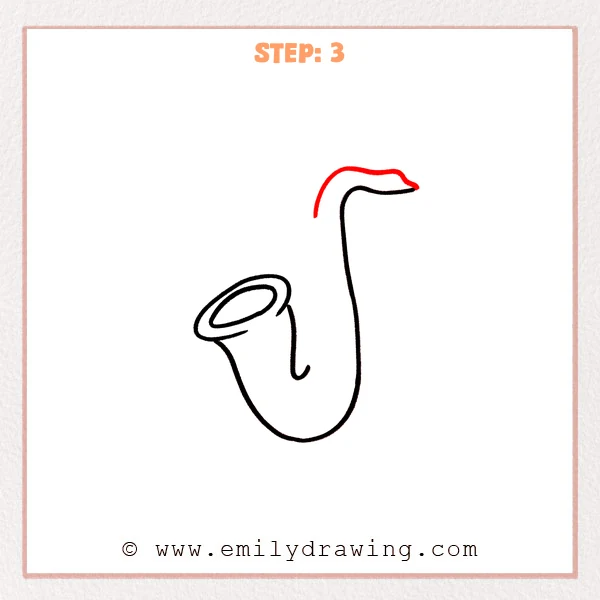
Add another outer curve above the tall body tube. Let it follow the original top bend to create a thicker neck section. Round the right end softly so it looks like the connection toward the saxophone mouthpiece.
Pro Tip: Keep the space between the two upper curves even so the tube looks neat.
Step 4: Add the Saxophone Keys
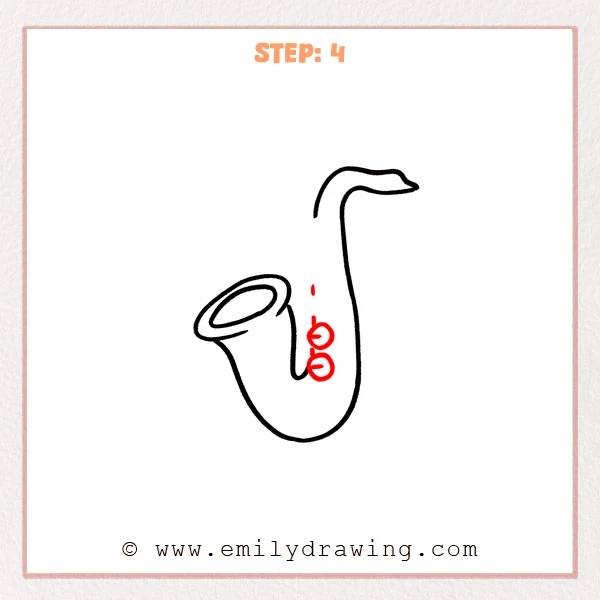
Draw two or three small circles in the middle of the body for the saxophone keys. Connect them gently with short lines so they follow the body shape. Add a small short mark above them to show a slight change in key placement.
Pro Tip: Keep the keys much smaller than the body and place them along the middle line.
Step 5: Add More Upper Keys
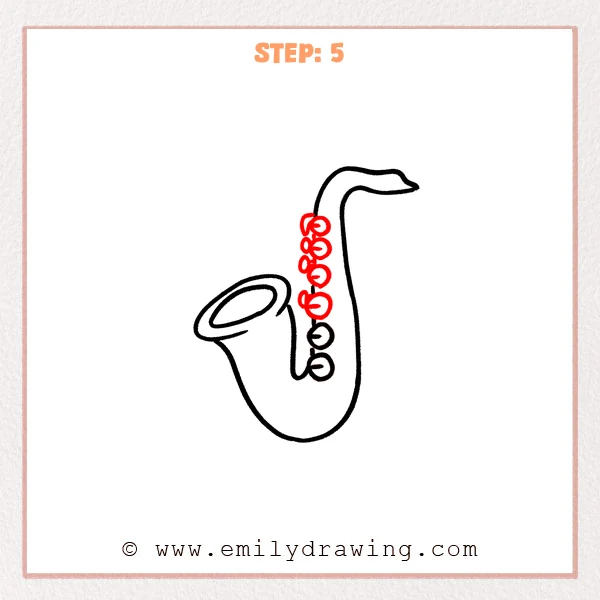
Continue drawing several small round keys upward along the middle of the body. Keep the new keys lined up with the lower keys and similar in size. Connect some keys with short lines to make the saxophone details feel more complete.
Pro Tip: The keys may shift slightly, but they should still follow the vertical flow of the body.
Step 6: Add the Mouthpiece and Neck Details
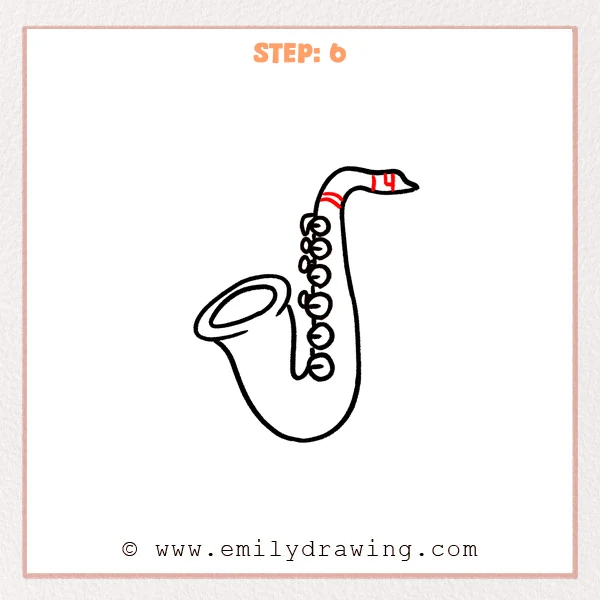
Draw a few short straight lines near the right end of the upper curve for the mouthpiece connection. Add two small curved marks at the neck bend to give the tube more structure. Keep these details close to the tube direction, and avoid making them too large.
Pro Tip: Keep the mouthpiece details short and tidy so they do not overpower the main outline.
Step 7: Color in your drawing!
Fun Facts
The saxophone is a woodwind instrument, even though it is usually made of brass. It is often used in jazz, concert bands, and marching bands. Its curved body and shiny bell make it a fun subject for drawing for beginners.
Pin it now, Draw later!
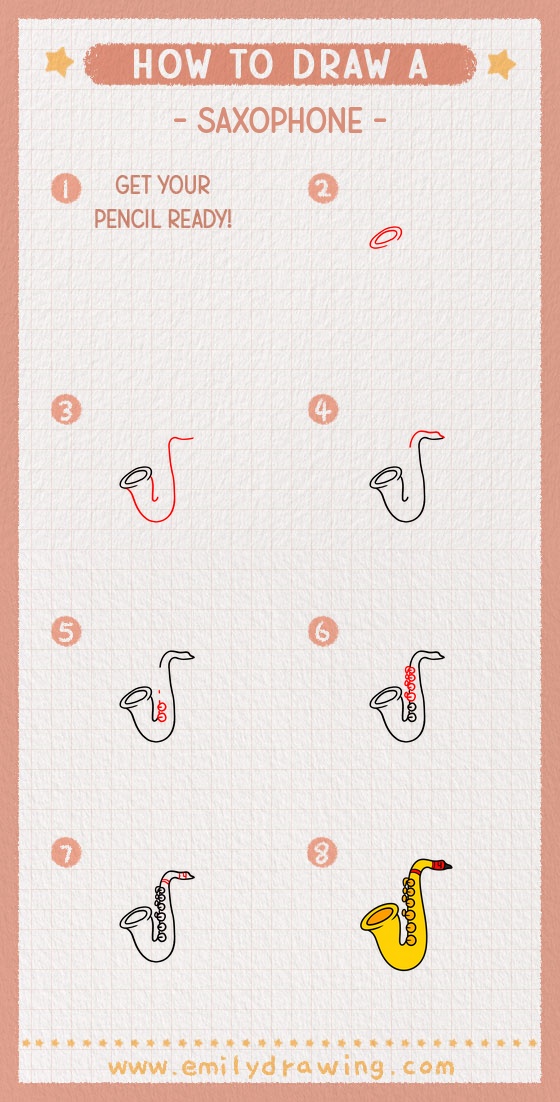
Now you know how to draw saxophone with clear, simple steps. Trace your best lines with a black marker, then erase any extra pencil marks. Add golden yellow, warm orange, or soft brown colors to finish your saxophone drawing, and try the tutorial again to make your next version even smoother.
Get the FREE Printable Drawing Guide
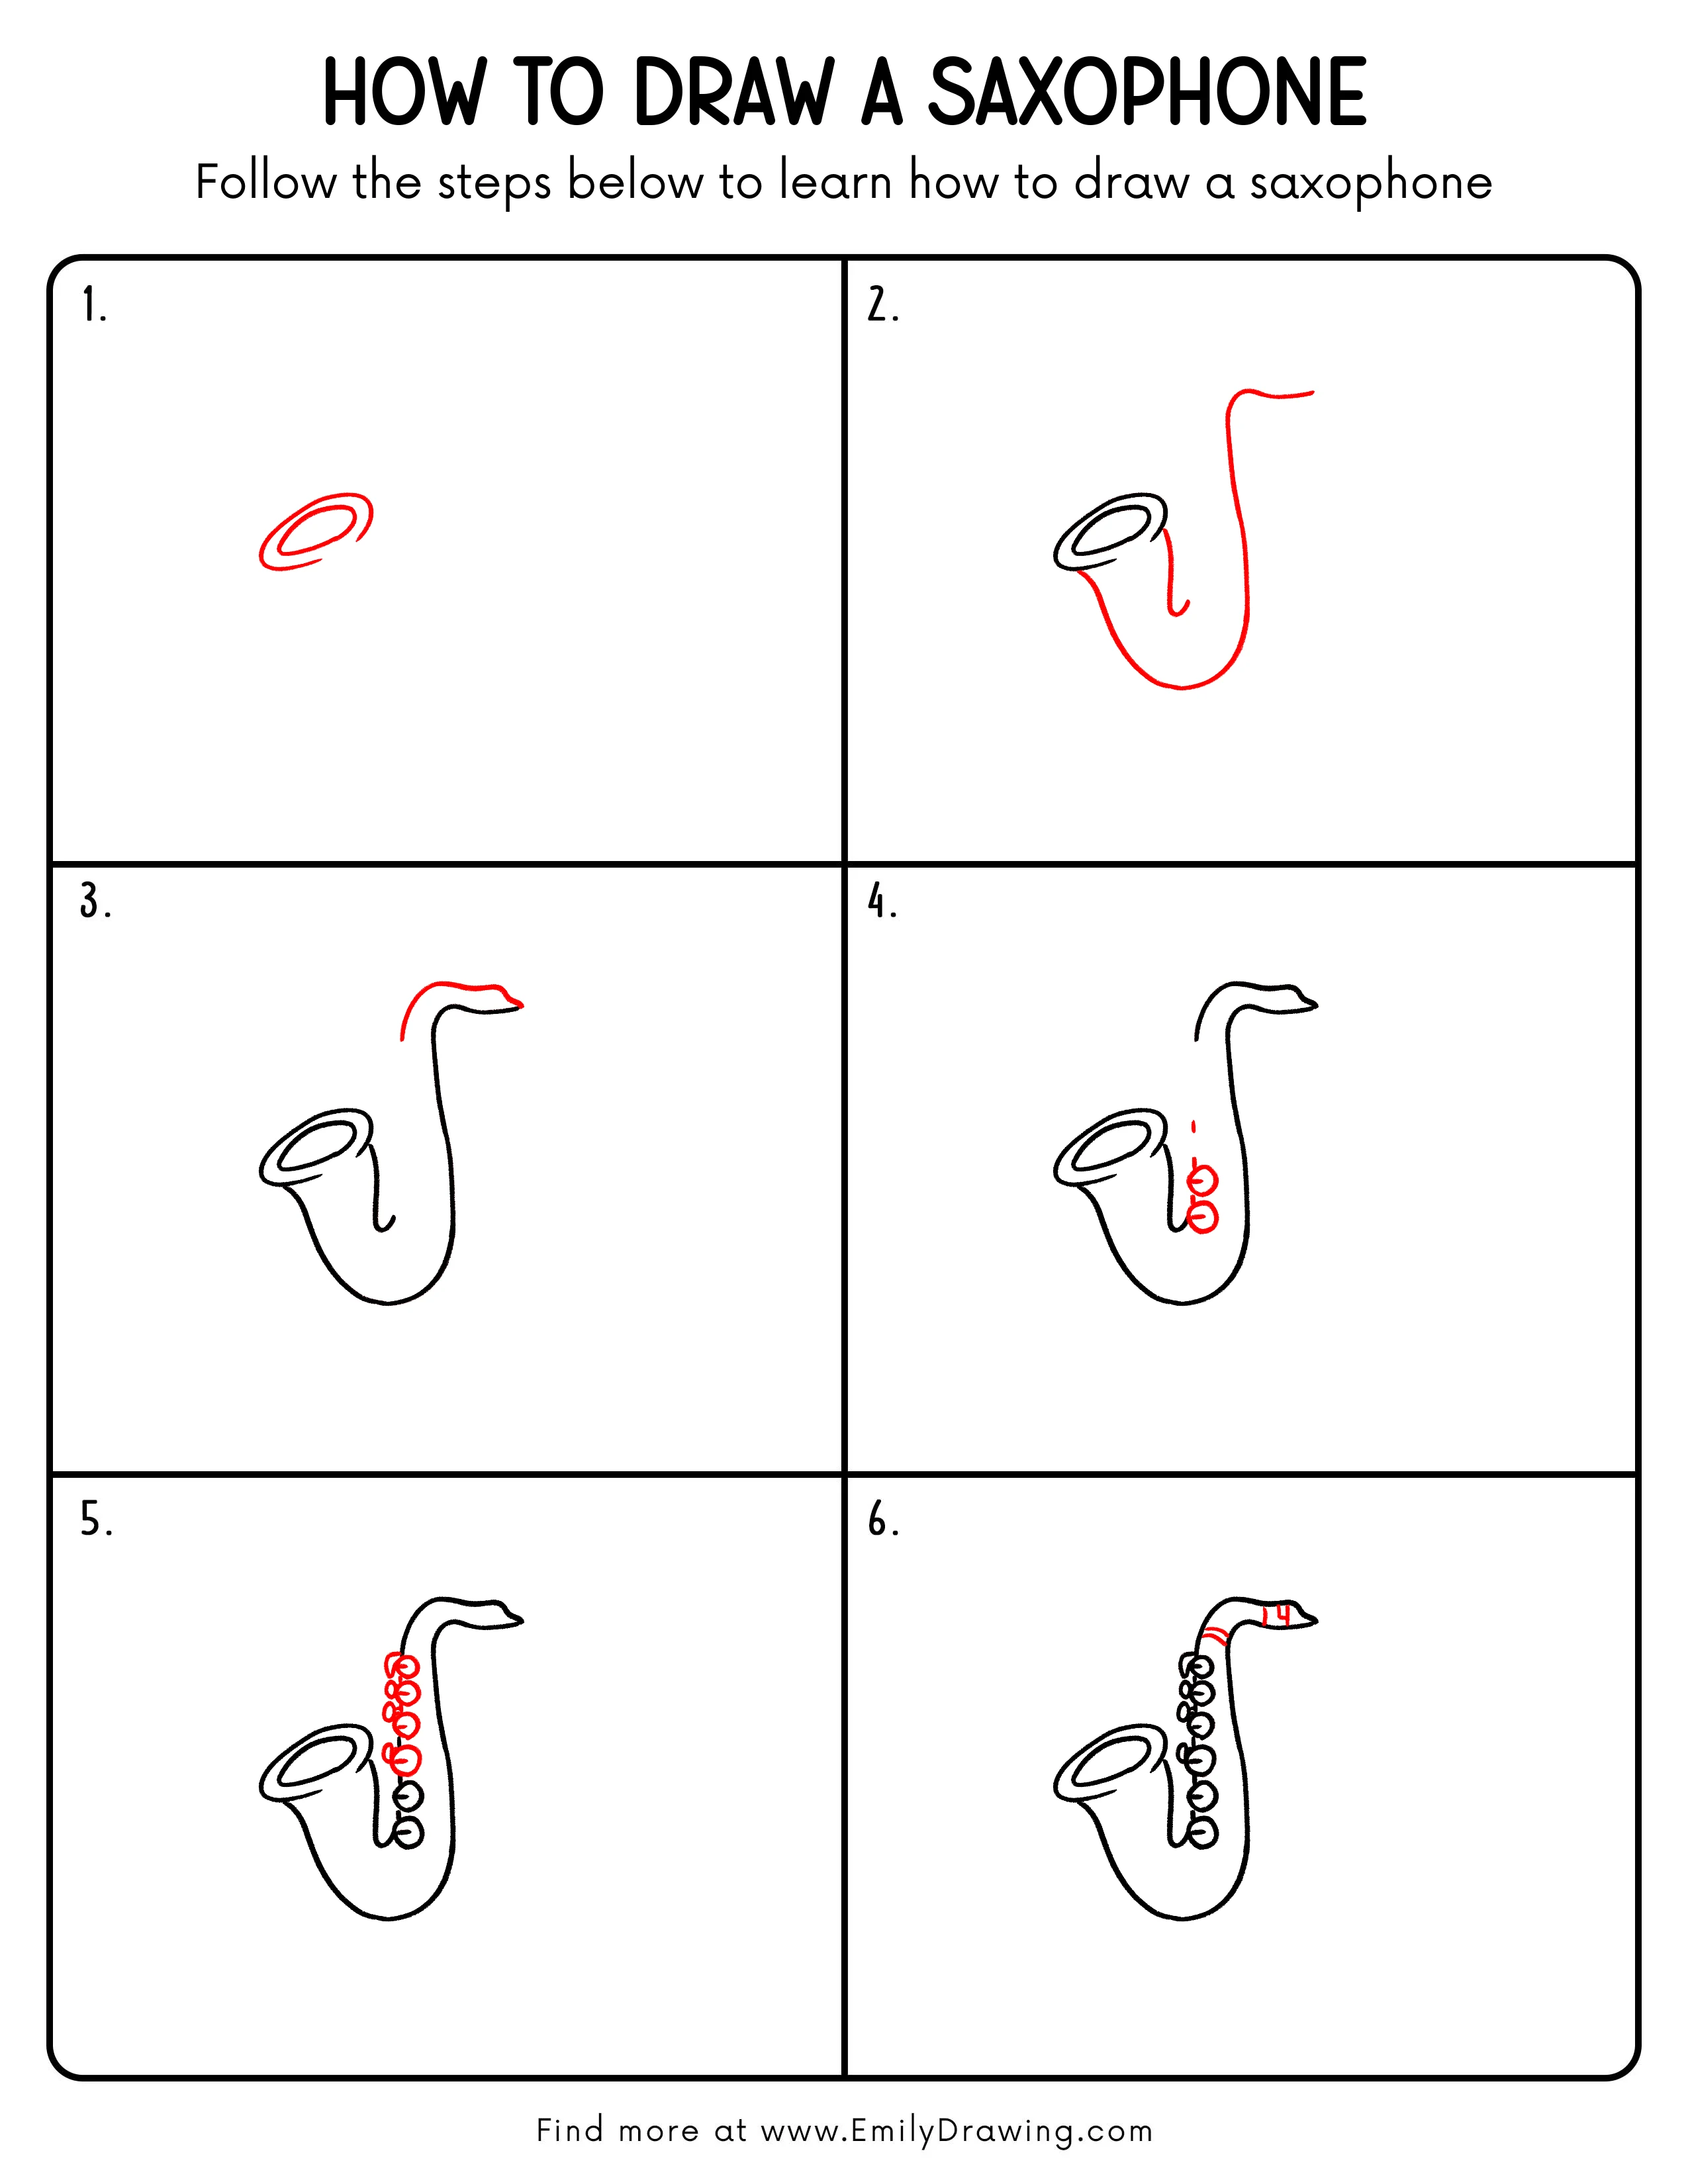
FREE Download Printable Saxophone Drawing Tutorial
Frequently Asked Questions
Is this saxophone drawing good for beginners?
Yes, this easy drawing tutorial uses simple curves, ovals, and small circles. Beginners can follow each step slowly and build the saxophone shape with confidence.
What is the hardest part of drawing a saxophone?
The curved body can be the trickiest part because it needs to look wide and balanced. Start lightly, then adjust the curve before tracing it darker.
How can I make my saxophone drawing look more detailed?
Add extra key circles, small connecting rods, and gentle shine lines on the bell. Keep the details small so the main saxophone shape stays clear.



