If you want to learn how to draw a cartoon bull, this step by step drawing guide is a calm place to start. You will use simple curves and rounded shapes to build a friendly bull that feels clear and easy for drawing for beginners.
What You Will Need
- Pencil
- Eraser
- Black marker or pen
- Coloring tools (colored pencils, crayons, or markers)
- Paper
Here are my RECOMMENDED Art Supplies!
- Crayola Coloring Set (140 Pieces – Mega Value!)
- 24 Colored Crayon Set
- A4 Printer Paper
- Crayola Coloring Pencils
- HP Home Printer with Instant Ink!
Time needed:
15 minutes.
Step-by-Step Drawing Guide
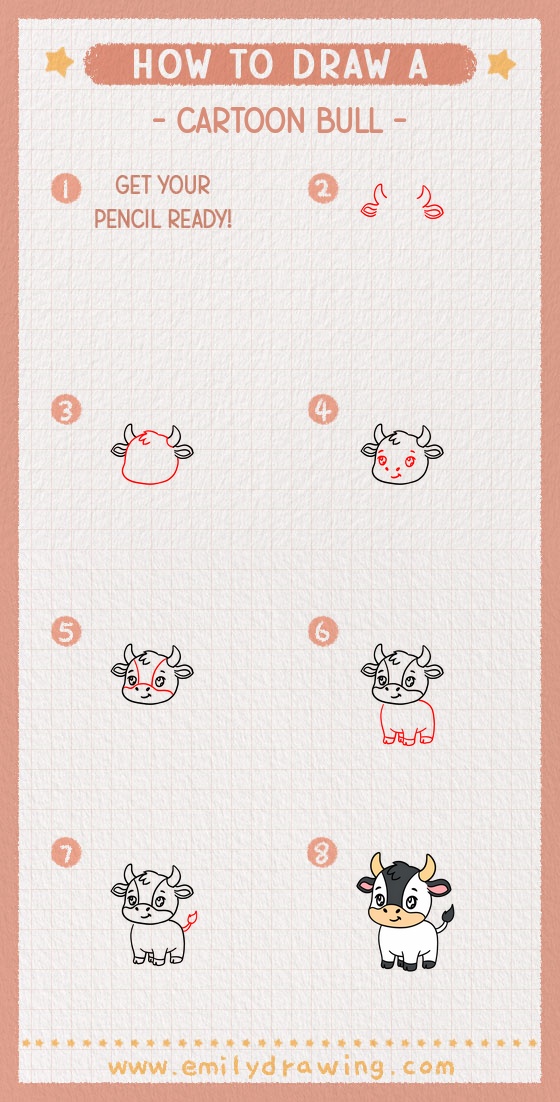
Step 1: Sketch the Horns and Nostrils
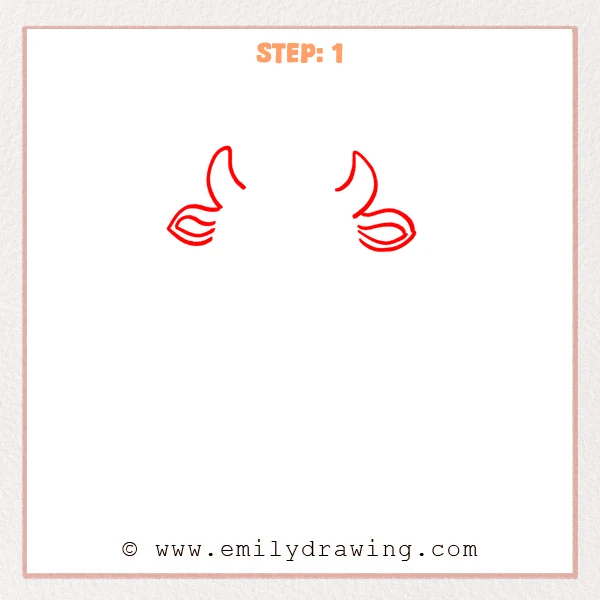
Start with two curved horns near the top, one on each side, shaped like soft pointed “C” curves. Under each horn, add a flat oval nostril, then draw a smaller inner curve to give it a thick rim.
Pro Tip: Keep both horns similar in height and curve for a balanced look.
Step 2: Add the Head Outline and a Small Forelock
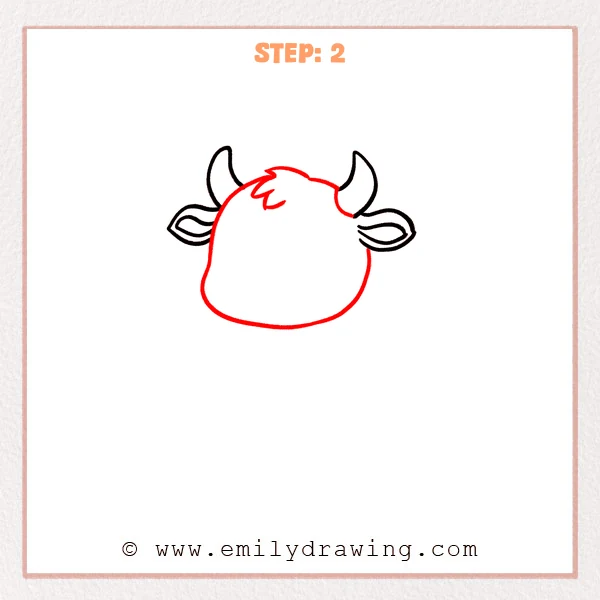
Draw a curved line between the horns to form the top of the head, then add a small wavy tuft in the middle. Continue with one big rounded outline down both sides to create chubby cheeks and a soft chin, like a rounded-square shape.
Pro Tip: Keep the bottom edge extra rounded to make the cartoon bull look cuter.
Step 3: Add the Eyes, Brows, and a Friendly Smile
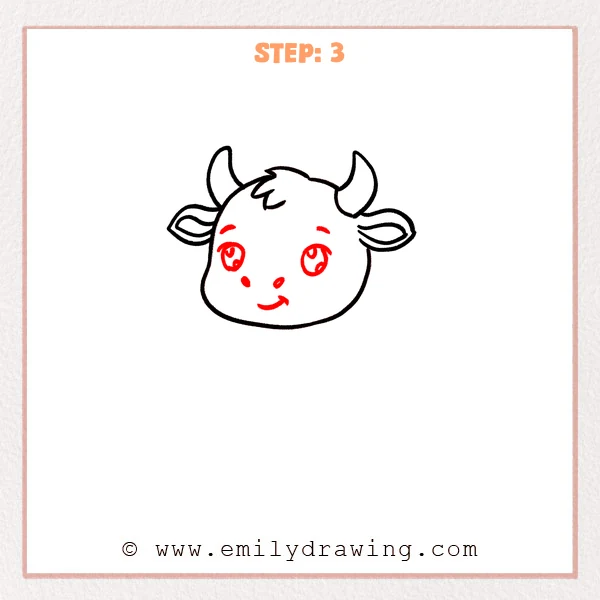
Add two big eyes in the upper middle of the face, using round outlines and tiny highlight spots to make them shine. Place short eyebrows above the eyes, dot in two small nostrils, then draw a curved smiling mouth and small cheek dots.
Pro Tip: Leave a small gap between the eyes for a relaxed expression.
Step 4: Add Face Markings and the Muzzle Divider
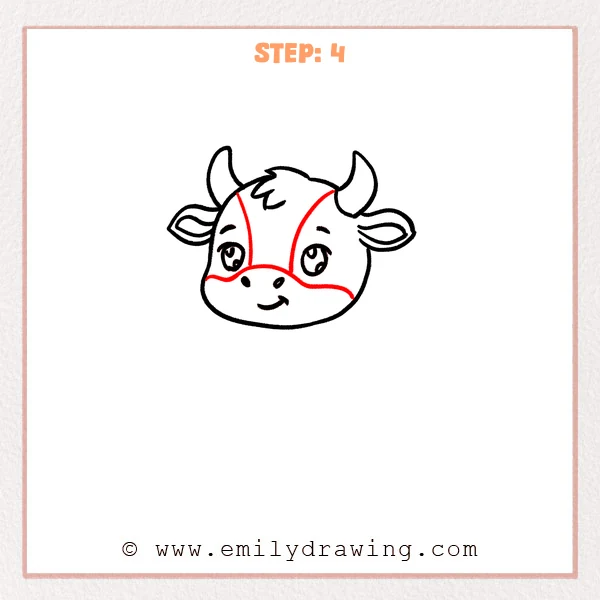
Draw two long curved lines from the forehead downward to form a wide stripe that follows the face shape. Then add a soft wavy line across the lower face to separate the muzzle area from the cheeks, letting the ends gently meet the sides.
Pro Tip: Keep both sides of the stripe similarly curved for a neat look.
Step 5: Add a Small Body and Four Short Legs
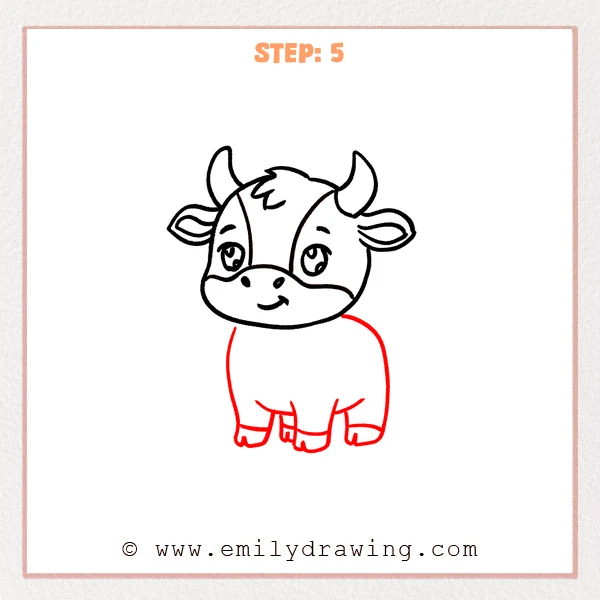
Attach a rounded body under the head, letting the back curve down on the right and leaving a flat space to stand. Add four short legs along the bottom, ending with small “U” shaped feet, then draw a short line on each leg to suggest hooves.
Pro Tip: Keep the legs a similar length so the bull stands steadily.
Step 6: Add a Small Tail with a Tuft
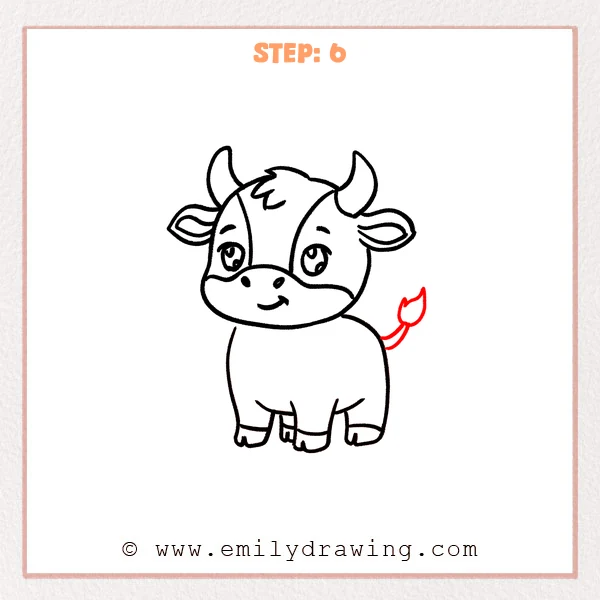
Attach a short curved tail on the back right side of the body, letting it lift slightly outward. Finish it with a tiny flame-shaped tuft, using soft points rather than sharp spikes.
Pro Tip: Make the tail base thinner and the tuft slightly bigger for clear shape contrast.
Step 7: Color in your drawing!
Fun Facts
- Bulls and cows have wide-angle vision, helping them notice movement around them.
- A bull’s horns keep growing because they have a bony core inside.
- Cartoon bulls often look friendlier when their shapes stay rounded and soft.
Pin it now, Draw later!
You have built your cartoon bull step by step, starting with horns and a face, then adding markings, a small body, and a tail. For coloring, try a warm brown body with a lighter muzzle, and add gentle shading under the chin and belly for depth. A common beginner mistake is making the legs different lengths, so take your time checking the bottoms line up. Keep practicing this easy drawing tutorial, and try drawing the bull in a different pose next time.
Get the FREE Printable Drawing Guide
FREE Download Printable Cartoon Bull Drawing Tutorial
Frequently Asked Questions
How do I make the cartoon bull look even cuter?
Make the head slightly larger than the body and keep the chin very rounded.
What if my horns look uneven?
Lightly sketch both horns first, then adjust their height and curve before outlining.
How can I add more detail without making it messy?
Add small details like a tiny highlight in the eyes or a light shadow line, and stop there.