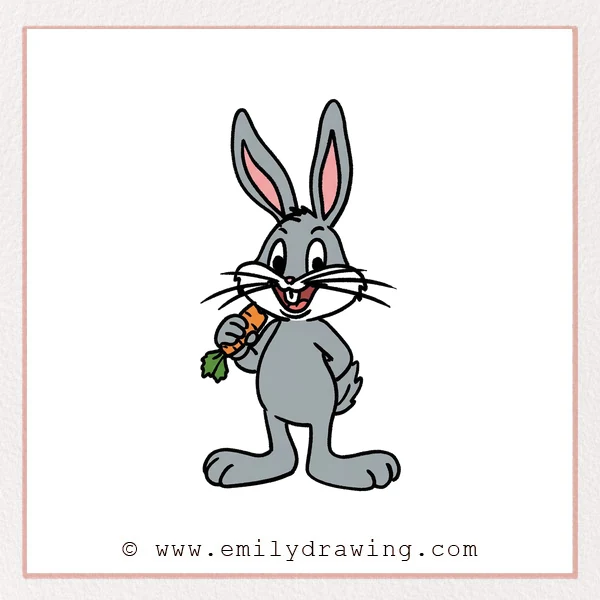
This easy drawing tutorial shows how to draw Bugs Bunny step by step.
We will build him slowly, using simple shapes that feel friendly for beginners.
Take your time with each line, and enjoy watching Bugs Bunny appear.
What You Will Need
- Pencil and eraser
- Black marker or fineliner
- Paper
- Colored pencils or crayons (optional)
Here are my RECOMMENDED Art Supplies!
- Crayola Coloring Set (140 Pieces – Mega Value!)
- 24 Colored Crayon Set
- A4 Printer Paper
- Crayola Coloring Pencils
- HP Home Printer with Instant Ink!
Time needed:
10 minutes.
Step-by-Step Drawing Guide
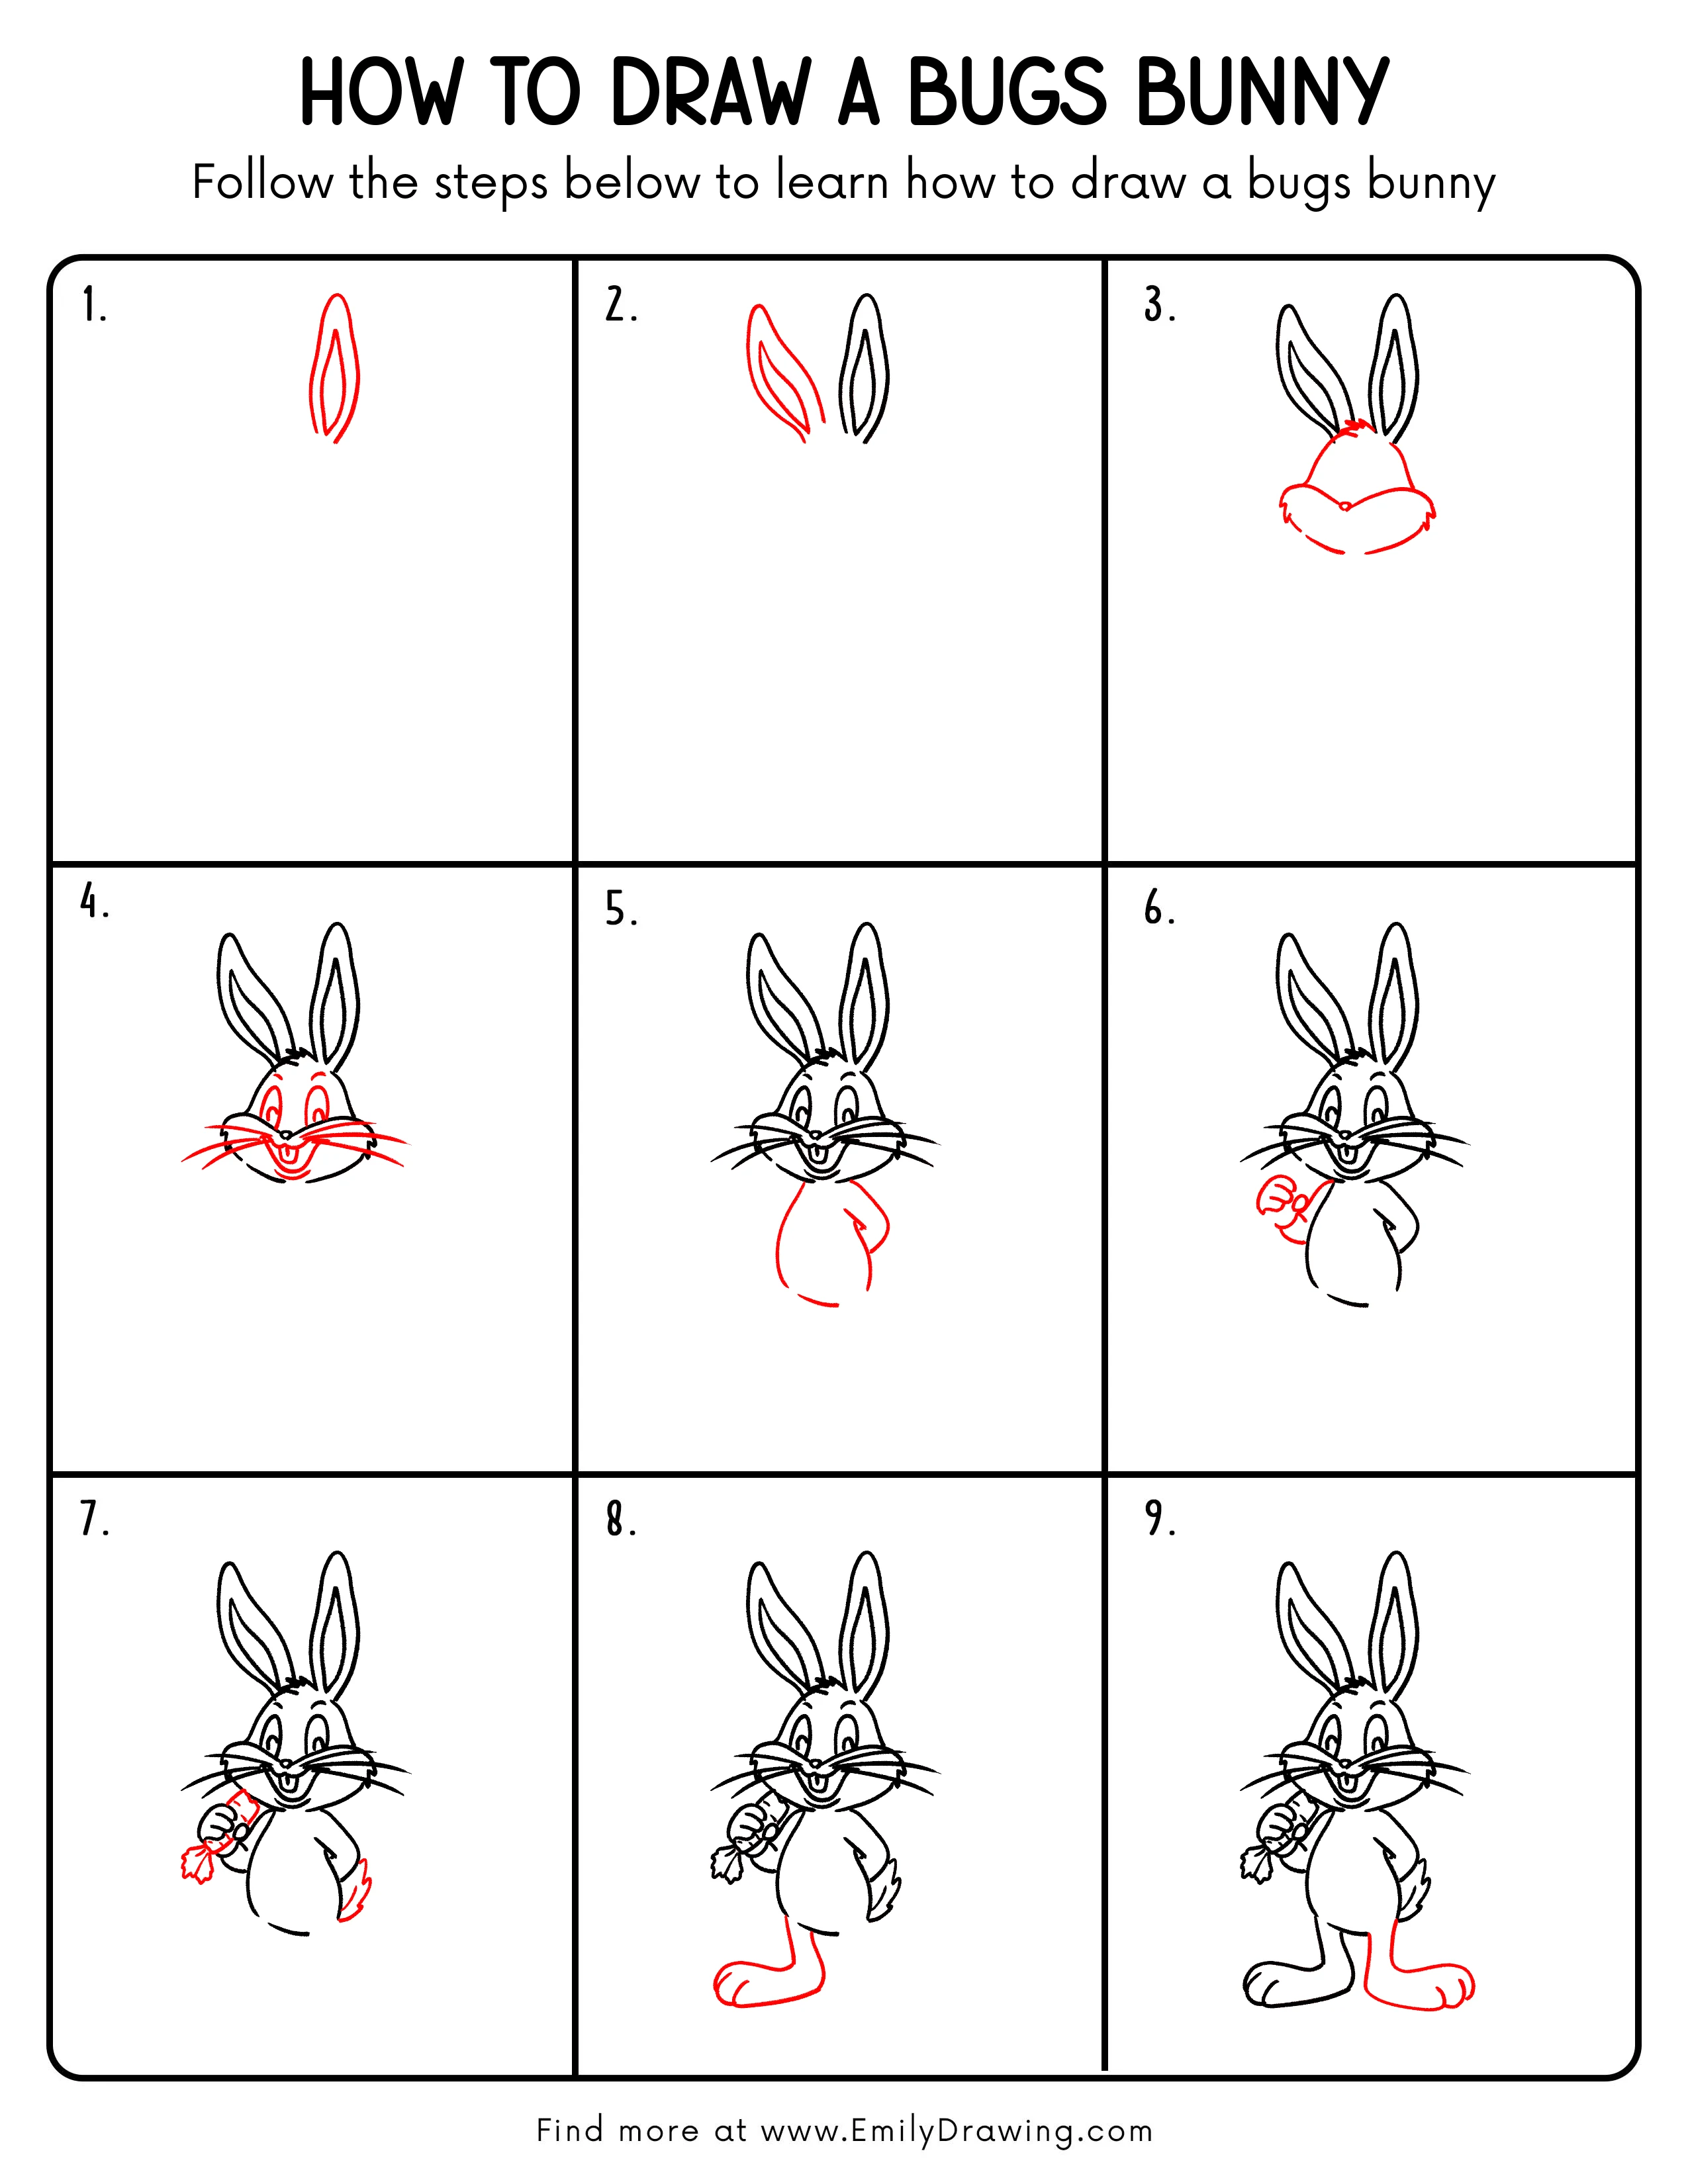
Step 1: Start with One Long Ear
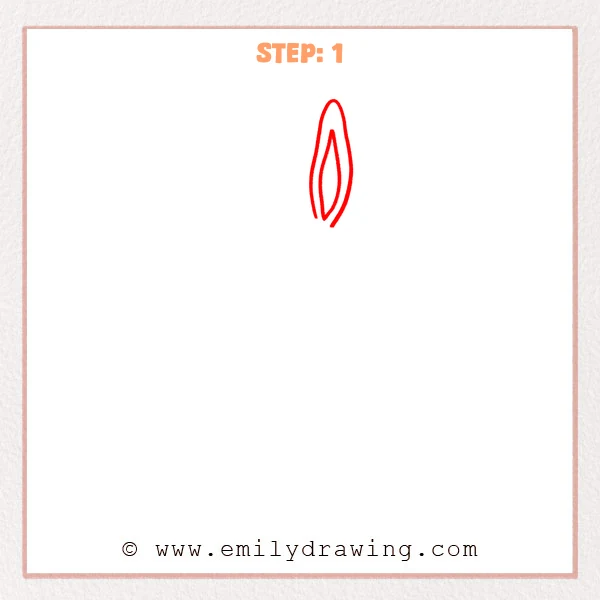
Near the top of your page, sketch a tall teardrop shape for one ear, rounded at the tip and slightly narrower at the base.
Inside it, add a slimmer inner ear outline that follows the outer curve, leaving a small open gap near the bottom.
Pro Tip: Keep the inner line evenly spaced from the outer edge for a clean ear shape.
Step 2: Add the Second Ear
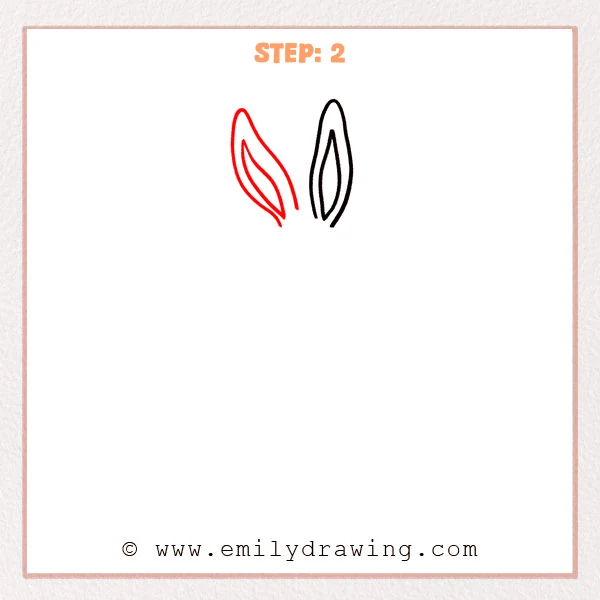
To the left of the first ear, sketch a matching long ear, but tilt it slightly outward so the pair feels open.
Inside, add a slim inner ear line that follows the outer curve to keep the two ears consistent.
Pro Tip: Keep both ears close in height, and let the angles differ a little.
Step 3: Add the Top of the Head and Big Cheeks
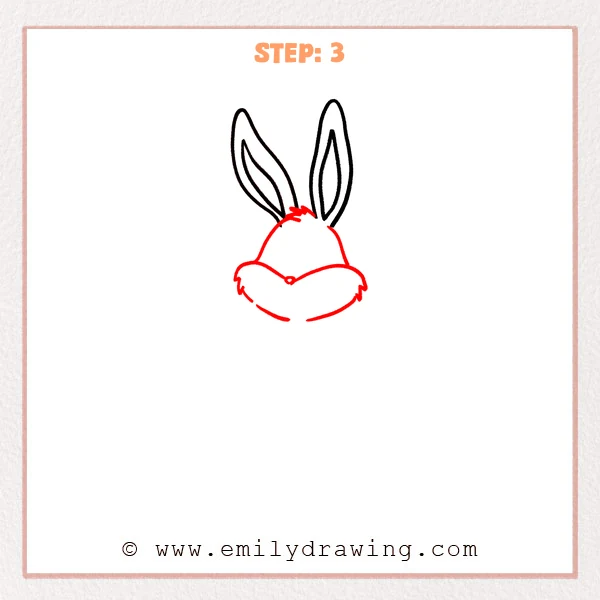
Under the ears, sketch a rounded cap shape to form the top of Bugs Bunny’s head.
Then add the wide cheek-and-muzzle shape below it, letting the two curved sides meet in the middle, and place a tiny nose dot at that center point.
Pro Tip: Make the cheeks wider than the head, and leave a small open gap at the bottom.
Step 4: Add the Face Details and Whiskers
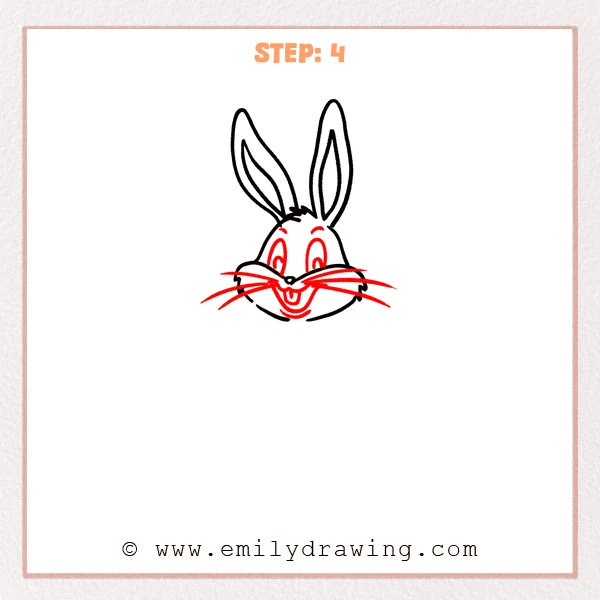
Above the cheeks, draw two tall oval eyes, then add smaller pupil shapes inside to bring Bugs Bunny to life.
Under the nose, shape a smiling open mouth with a curved outline and a simple tongue, then pull long whisker lines outward from both cheeks.
Pro Tip: Start whiskers at the cheek edge and draw each one in a single smooth stroke.
Step 5: Add the Body and One Bent Arm
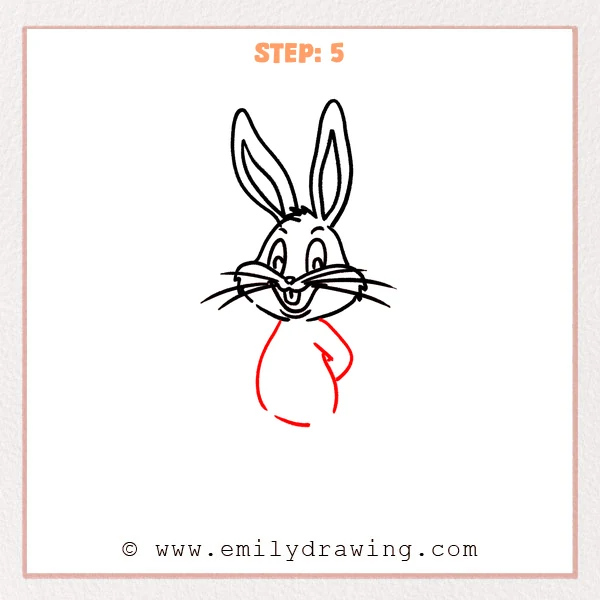
Below the head, sketch a long curved outline to form an oval-shaped torso, leaving a small opening at the bottom for now.
On the right side, add a bent arm that curves inward as if it is tucked behind his back, ending with a small pointed curve for the hand.
Pro Tip: Keep the torso slightly narrower than the head, and let the arm hug the body.
Step 6: Add the Front Arm and Hand
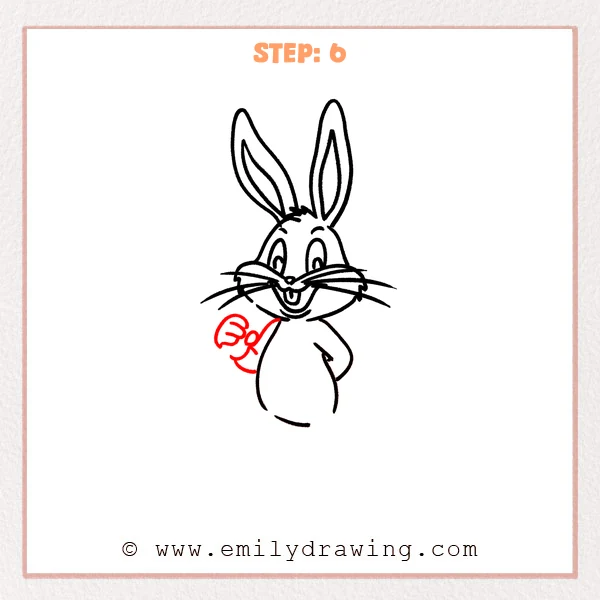
On the left side of the torso, sketch an arm that curves upward toward the chest, like a relaxed gesture.
At the end, draw an oversized cartoon hand using rounded bumps for fingers, and add a small circle to suggest the thumb joint.
Pro Tip: Make the palm a bit wider than the arm so the gesture reads clearly.
Step 7: Add the Carrot and Little Tail
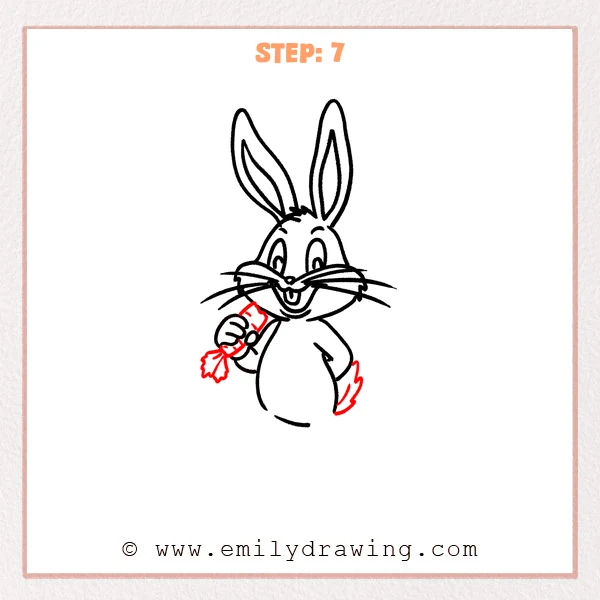
In the raised hand, sketch a carrot by adding a small tilted rectangle shape, then finish it with a jagged leafy end.
On the lower right side of the body, add a fluffy tail using a few short curved bumps.
Pro Tip: Tilt the carrot slightly, and use small points for the leafy end.
Step 8: Add One Long Leg and a Big Foot
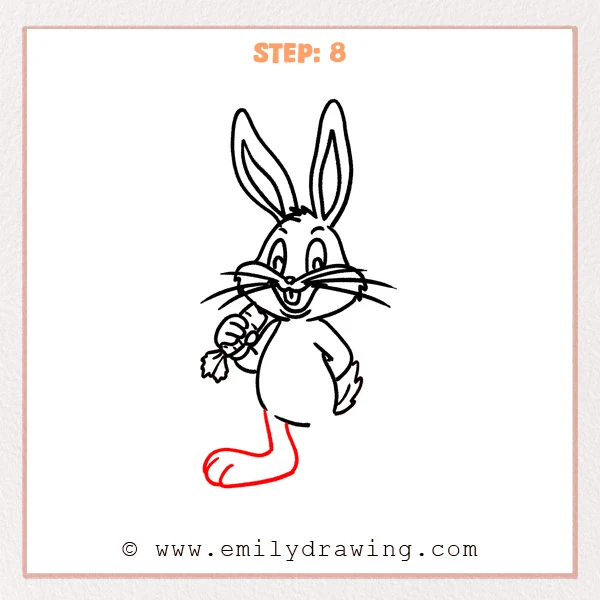
From the bottom of the body, pull down a slim leg line that bends forward in a gentle S-curve.
At the end, add an oversized rounded foot, then place two short curved lines on top to suggest toe sections.
Pro Tip: Make the foot much wider than the leg for a classic cartoon look.
Step 9: Add the Other Leg and Big Foot

From the lower right side of the body, add the second leg dropping down, then attach another oversized foot that stretches to the right.
Place two short curved lines on top of the foot to suggest toe sections, matching the style of the first foot.
Pro Tip: Keep both feet similar in size, but let them point slightly different directions.
Step 10: Color in your drawing!
Fun Facts
- Bugs Bunny is famous for his calm, confident grin and long ears.
- Cartoon characters often have big feet and hands to make poses readable.
- A carrot is Bugs Bunny’s classic prop, so it helps tell the story fast.
Pin it now, Draw later!

You now have a full Bugs Bunny drawing, built step by step from simple shapes.
Go over your final lines with a darker pen, then erase any leftover sketch marks.
For coloring, try light gray for the fur, pink inside the ears, and a soft shadow under the cheeks and feet.
A common beginner mistake is making the cheeks too small, so keep them wide and friendly.
Practice this easy drawing tutorial again, then try drawing Bugs Bunny in a new pose.
Get the FREE Printable Drawing Guide
FREE Download Printable Bugs Bunny Drawing Tutorial
Frequently Asked Questions
How do I make the face look more like Bugs Bunny?
Keep the cheeks wide, the eyes tall, and the smile open and relaxed.
What if my ears look uneven?
That is normal at first. Match the heights, then adjust one ear’s curve gently.
How can I make the drawing cleaner?
Use light pencil lines at the start, and ink only when you like the shapes.