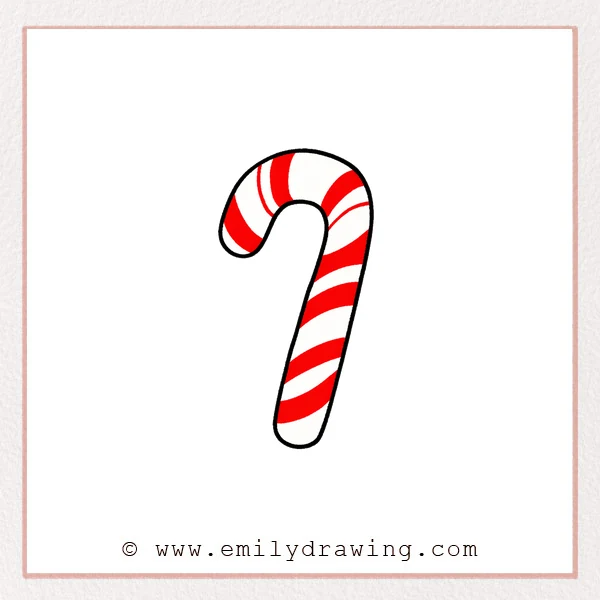
If you want to learn how to draw a candy cane, this step by step drawing guide is a calm place to start. We will build the shape with simple curves, then add classic peppermint stripes. This easy drawing tutorial is designed for drawing for beginners.
What You Will Need
- Pencil
- Eraser
- Black pen or marker
- Red colored pencil or marker
- Paper
Here are my RECOMMENDED Art Supplies!
- Crayola Coloring Set (140 Pieces – Mega Value!)
- 24 Colored Crayon Set
- A4 Printer Paper
- Crayola Coloring Pencils
- HP Home Printer with Instant Ink!
Time needed:
16 minutes.
Step-by-Step Drawing Guide
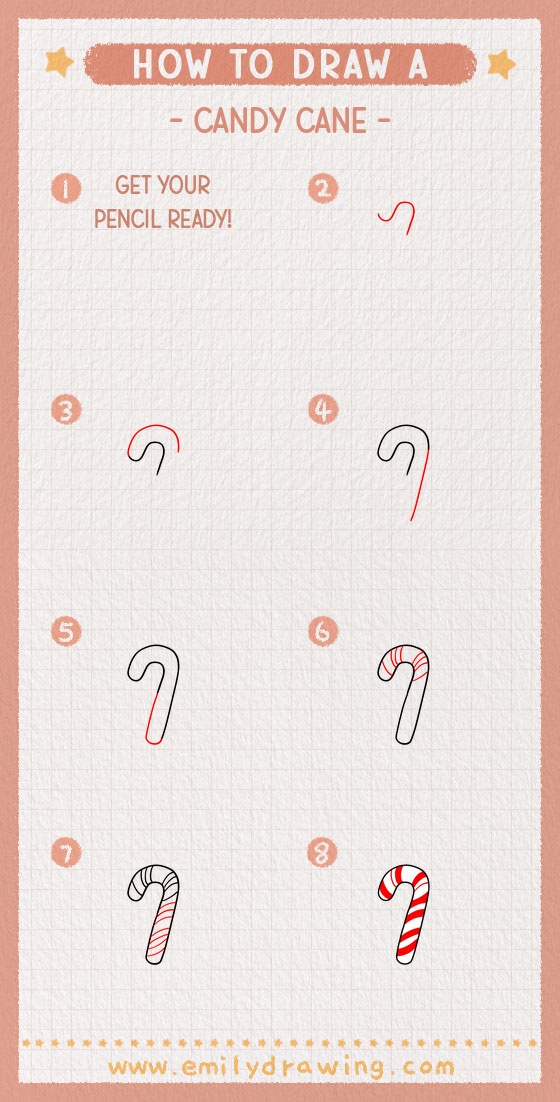
Step 1: Draw the Hooked Top
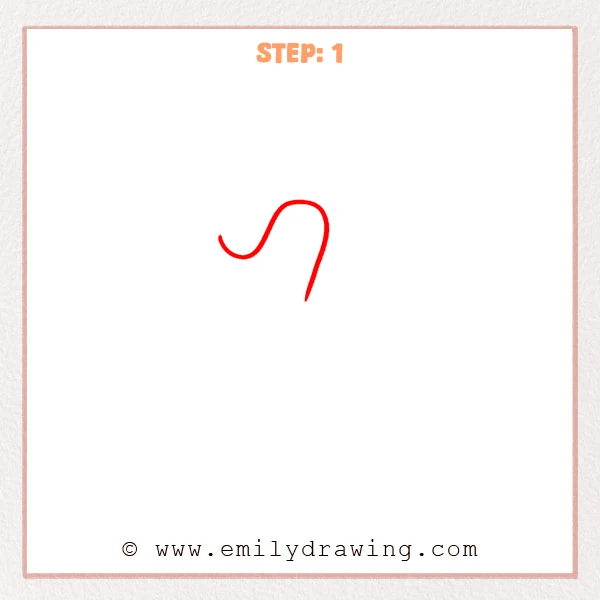
Start with one smooth curved line that looks like a backward “J.” Let the left end curl up softly, then pull a short line down on the right to begin the cane. Keep the stroke light so you can refine it later.
Pro Tip: Keep the hook rounded, not pointy, for a classic candy cane shape.
Step 2: Add the Outer Outline
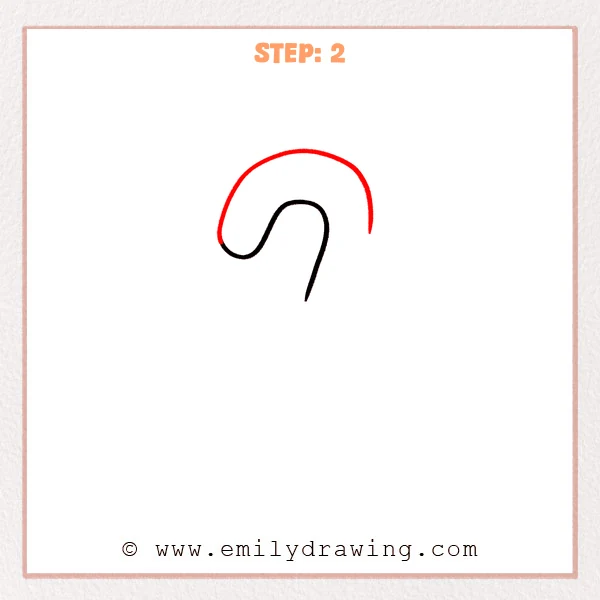
Along the outside of the hook, sketch a larger curved line that wraps from left to right. Keep the spacing between the two lines even so the candy cane looks solid. Stop at the end of the curve for now, before extending downward.
Pro Tip: Steady spacing between the lines makes the candy cane look neat.
Step 3: Extend the Cane Downward
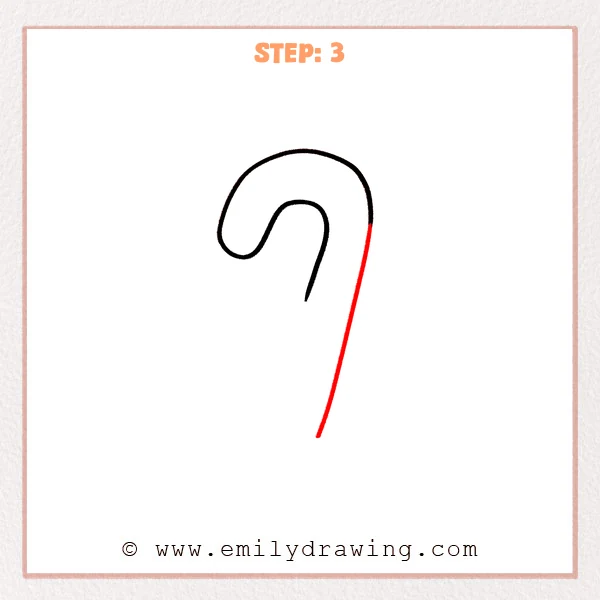
From the right end of the hook, draw a long straight line downward to form the candy cane’s outer side. Let it lean in very slightly so it feels natural. Leave the bottom open for now so you can match the thickness next.
Pro Tip: Keep the line mostly straight, with only a gentle tilt.
Step 4: Add the Inner Side and Rounded Bottom
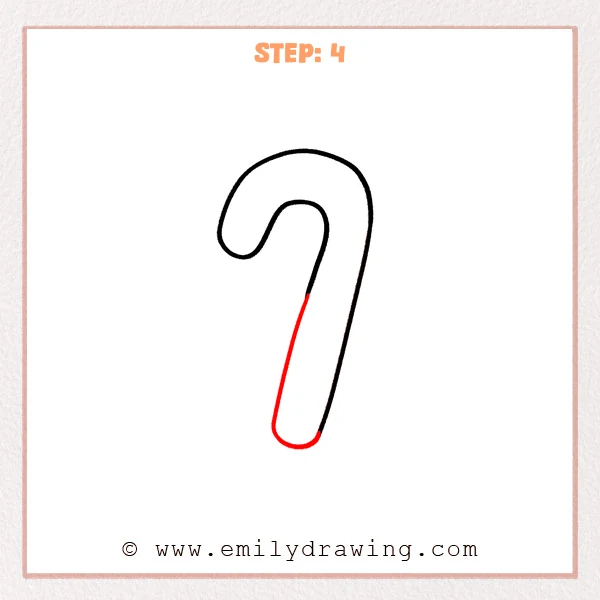
From the lower end of the inner hook, draw a straight line down, parallel to the outer edge. At the bottom, connect both sides with a small rounded curve to close the candy cane neatly. Let the joins feel smooth, not sharp.
Pro Tip: A symmetrical bottom curve makes the candy cane look more realistic.
Step 5: Add Curved Stripes on the Hook
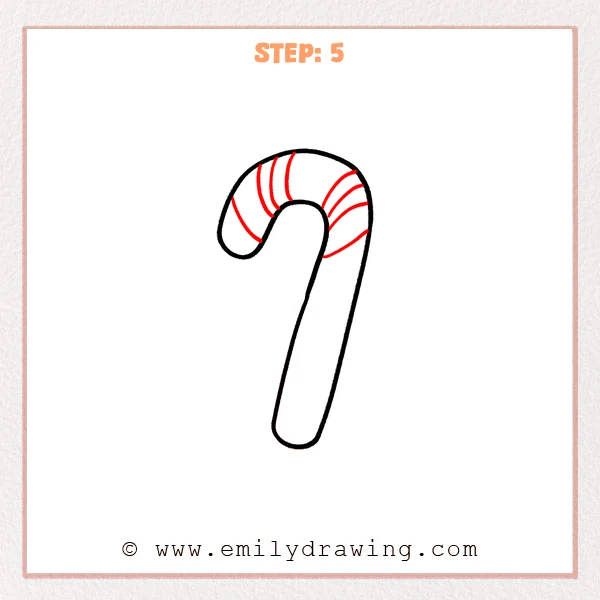
On the curved top, add a few arched diagonal lines that wrap around the hook. Keep the gaps between stripes fairly even, and let the stripes taper slightly near the outer edge. Add stripes only on the hook area for now, leaving the long body plain.
Pro Tip: Make the stripes follow the curve, like they wrap around a cylinder.
Step 6: Extend the Stripes Down the Cane
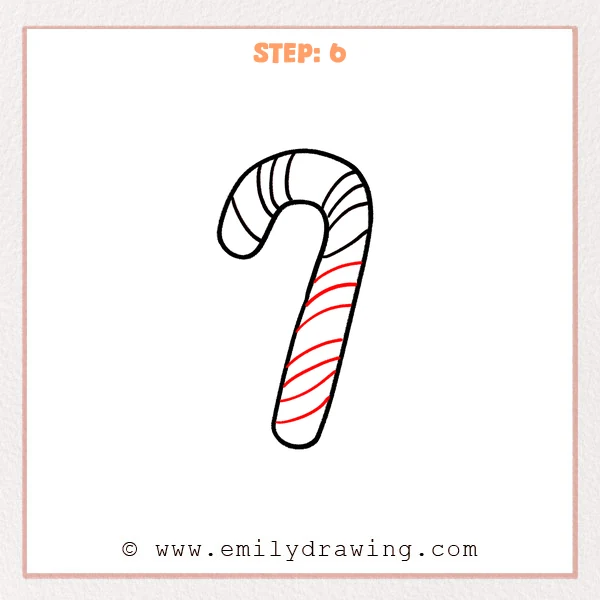
Continue the curved diagonal stripes down the long body, keeping the same slant as the hook. Let each stripe arc from the inner edge to the outer edge so it feels like it wraps around the candy. Keep the spacing steady, and taper the last stripe gently near the rounded bottom.
Pro Tip: Keep every stripe slanting the same way for a clean twist.
Step 7: Color in your drawing!
Fun Facts
- Candy canes are a popular winter treat and a classic holiday decoration.
- The hook shape makes them easy to hang on tree branches or gift bags.
- Red-and-white peppermint is traditional, but candy canes come in many colors today.
Pin it now, Draw later!
Now you have a complete candy cane, from a simple hook to a striped peppermint twist. For coloring, fill the stripes with bright red and keep the white areas clean for strong contrast. To add shine, shade one side lightly with a soft gray and keep the opposite side brighter.
One beginner mistake is changing the stripe direction halfway down. Keep the slant consistent so the twist looks smooth and believable.
Try drawing a second candy cane next to the first one for extra practice. This is a helpful way to improve your step by step drawing skills and build confidence with an easy drawing tutorial.
Get the FREE Printable Drawing Guide

FREE Download Printable Candy Cane Drawing Tutorial
Frequently Asked Questions
How do I keep the candy cane stripes even?
Mark light guide points along the edges, then connect them with curved lines.
What should I do if my candy cane looks too thin?
Widen the space between the inner and outer outlines, especially on the hook.
Can I draw a candy cane in a different style?
Yes. You can make the stripes thicker, add a bow, or draw small sparkles nearby.