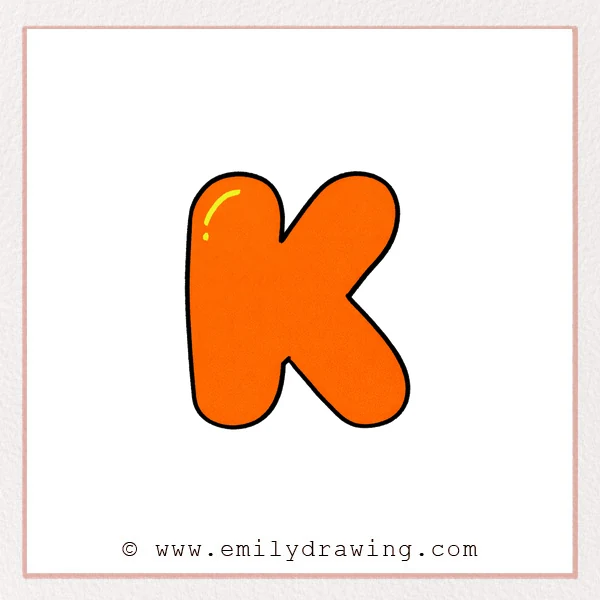
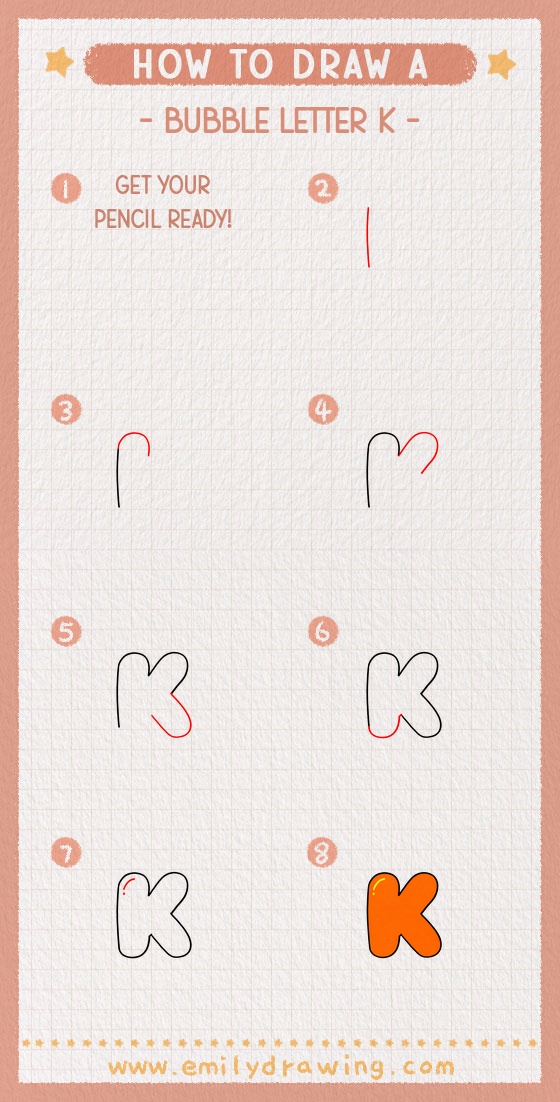
This easy drawing tutorial shows how to draw a bubble letter K step by step. We will build smooth, rounded shapes that feel soft and inflated. Take your time, and let each curve stay gentle.
What You Will Need
- Pencil
- Eraser
- Black marker or pen (optional for final outline)
- Colored pencils or markers (optional)
Here are my RECOMMENDED Art Supplies!
- Crayola Coloring Set (140 Pieces – Mega Value!)
- 24 Colored Crayon Set
- A4 Printer Paper
- Crayola Coloring Pencils
- HP Home Printer with Instant Ink!
Time needed:
17 minutes.
Step-by-Step Drawing Guide
Step 1: Draw the Main Left Stroke
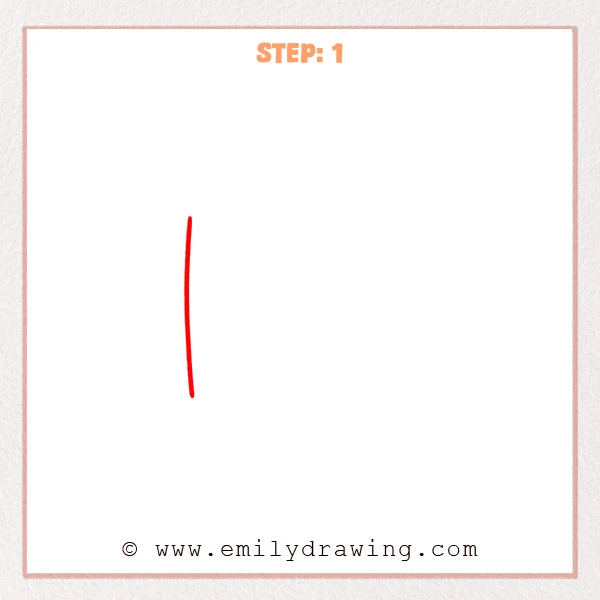
Start near the left side of the page with one tall vertical line. Let it curve slightly to the right to keep the bubble letter feeling soft.
Pro Tip: Keep this line light at first so you can thicken it evenly later.
Step 2: Add a Rounded Top Curve
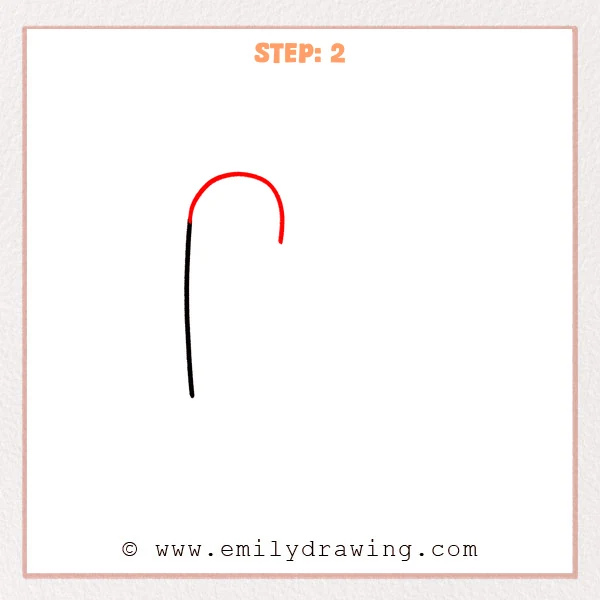
From the top of the vertical stroke, add a smooth curve that swings to the right like half of an upside-down “U.” Let the curve drop gently on the right side, and stop before it reaches the bottom.
Pro Tip: Keep the top curve nicely rounded so the bubble letter looks full.
Step 3: Draw the Long Upper Right Curve
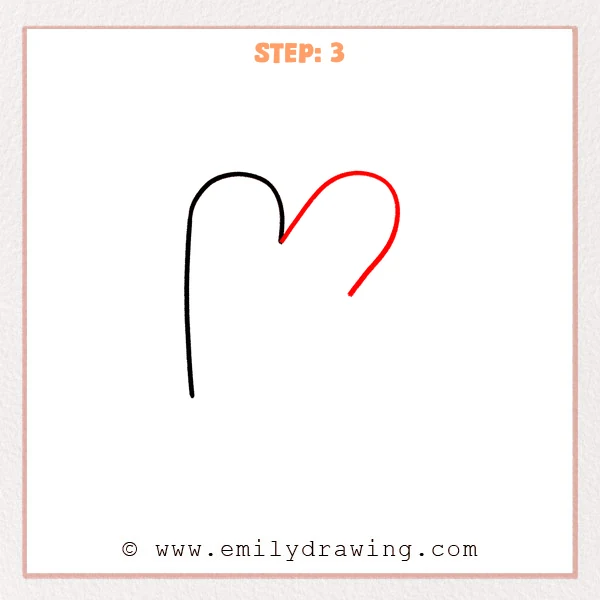
From the inner dip where the top curve ends, sweep a long curve up and to the right. Round it at the far right, then let it drift downward and stop before it reaches the bottom.
Pro Tip: Make this curve wide and roomy so the bubble letter feels inflated.
Step 4: Add the Big Lower Bubble Leg
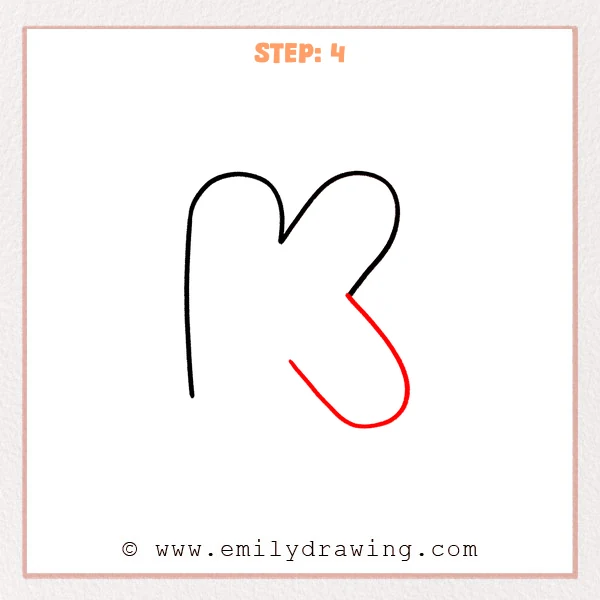
From the mid-right corner, draw a wide curve downward to form a rounded, bulb-like bottom. Bring the line back toward the inside of the K, leaving a small opening so the lower arm feels puffy.
Pro Tip: Make the lower curve a bit wider than the top so the letter feels balanced.
Step 5: Close the Left Bottom and Shape the Inner Turn

At the bottom of the left stroke, add a big rounded curve to make a soft, pill-shaped base. Then pull a short curve up and inward to meet the center junction, so the inside corner feels smooth.
Pro Tip: Match the roundness of the bottom curve to the top for a true bubble look.
Step 6: Add a Bubble Highlight
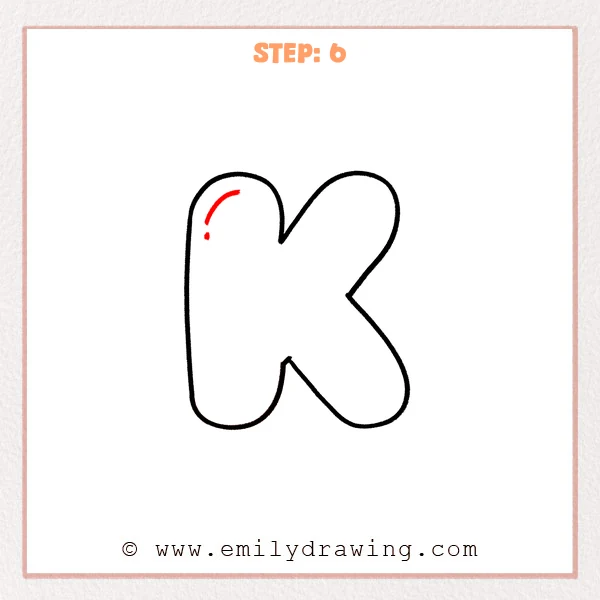
Inside the upper part of the left section, sketch a short curved stroke like a small crescent. Add a tiny dot underneath it to make the bubble letter look shiny.
Pro Tip: Place the highlight close to the edge so the shine reads clearly.
Step 7: Color in your drawing!
Fun Facts
- Bubble letters are also called “balloon letters” because they look puffed up with air.
- A simple highlight can make flat shapes feel more three-dimensional.
- Many sign artists use rounded corners to make letters feel friendly and readable.
Pin it now, Draw later!
You now have a complete bubble letter K with smooth curves and a shiny highlight. If you want more pop, trace the outline with a darker pen, then erase extra pencil marks. For coloring, try a light base color and add a slightly darker shade along one edge to suggest shadow.
One common beginner mistake is making the curves too tight, which can make the letter look pinched. Keep the bends wide and round, and the bubble effect will show up naturally. Practice this step by step drawing a few times, and then try adding patterns like stripes, dots, or a soft shadow behind the letter.
Get the FREE Printable Drawing Guide
FREE Download Printable Bubble Letter K Drawing Tutorial
Frequently Asked Questions
How do I make my bubble letter K look more even?
Lightly sketch first, then adjust curves before tracing with a darker line.
Where should I put shadows on a bubble letter?
Place a darker tone on one side, and keep the highlight area lighter.
Can I draw this bubble letter K in different styles?
Yes, you can make it taller, wider, or add extra thickness while keeping rounded corners.