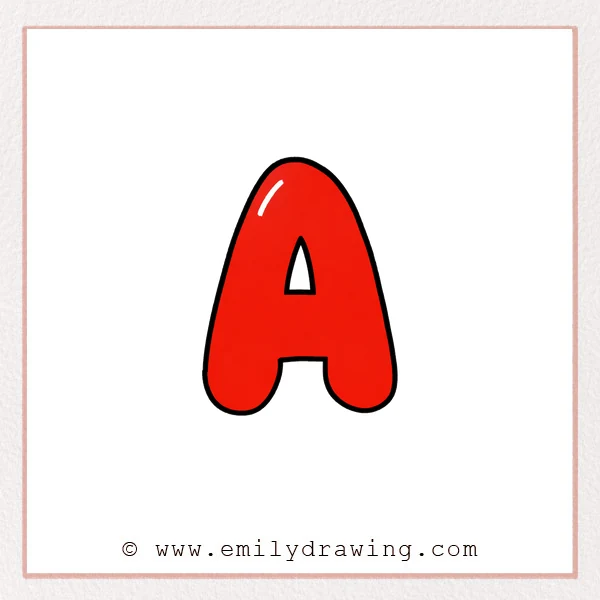
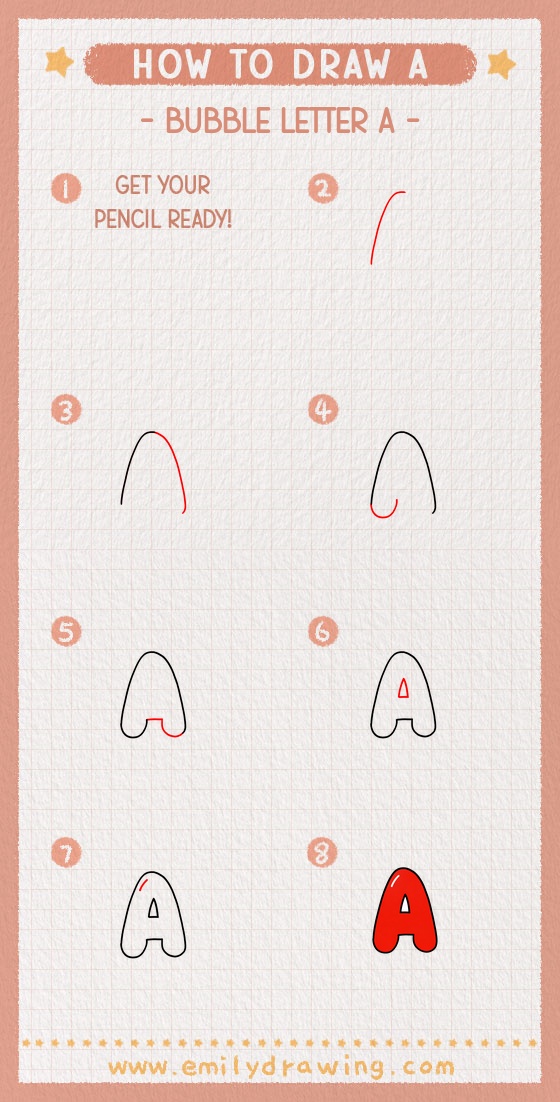
This easy drawing tutorial shows how to draw a bubble letter A step by step.
We will build a soft, rounded shape and add simple details for a shiny look.
Take your time, and let each curve stay smooth and gentle.
What You Will Need
- Pencil
- Eraser
- Black marker or pen
- Colored markers or crayons (optional)
Here are my RECOMMENDED Art Supplies!
- Crayola Coloring Set (140 Pieces – Mega Value!)
- 24 Colored Crayon Set
- A4 Printer Paper
- Crayola Coloring Pencils
- HP Home Printer with Instant Ink!
Time needed:
13 minutes.
Step-by-Step Drawing Guide
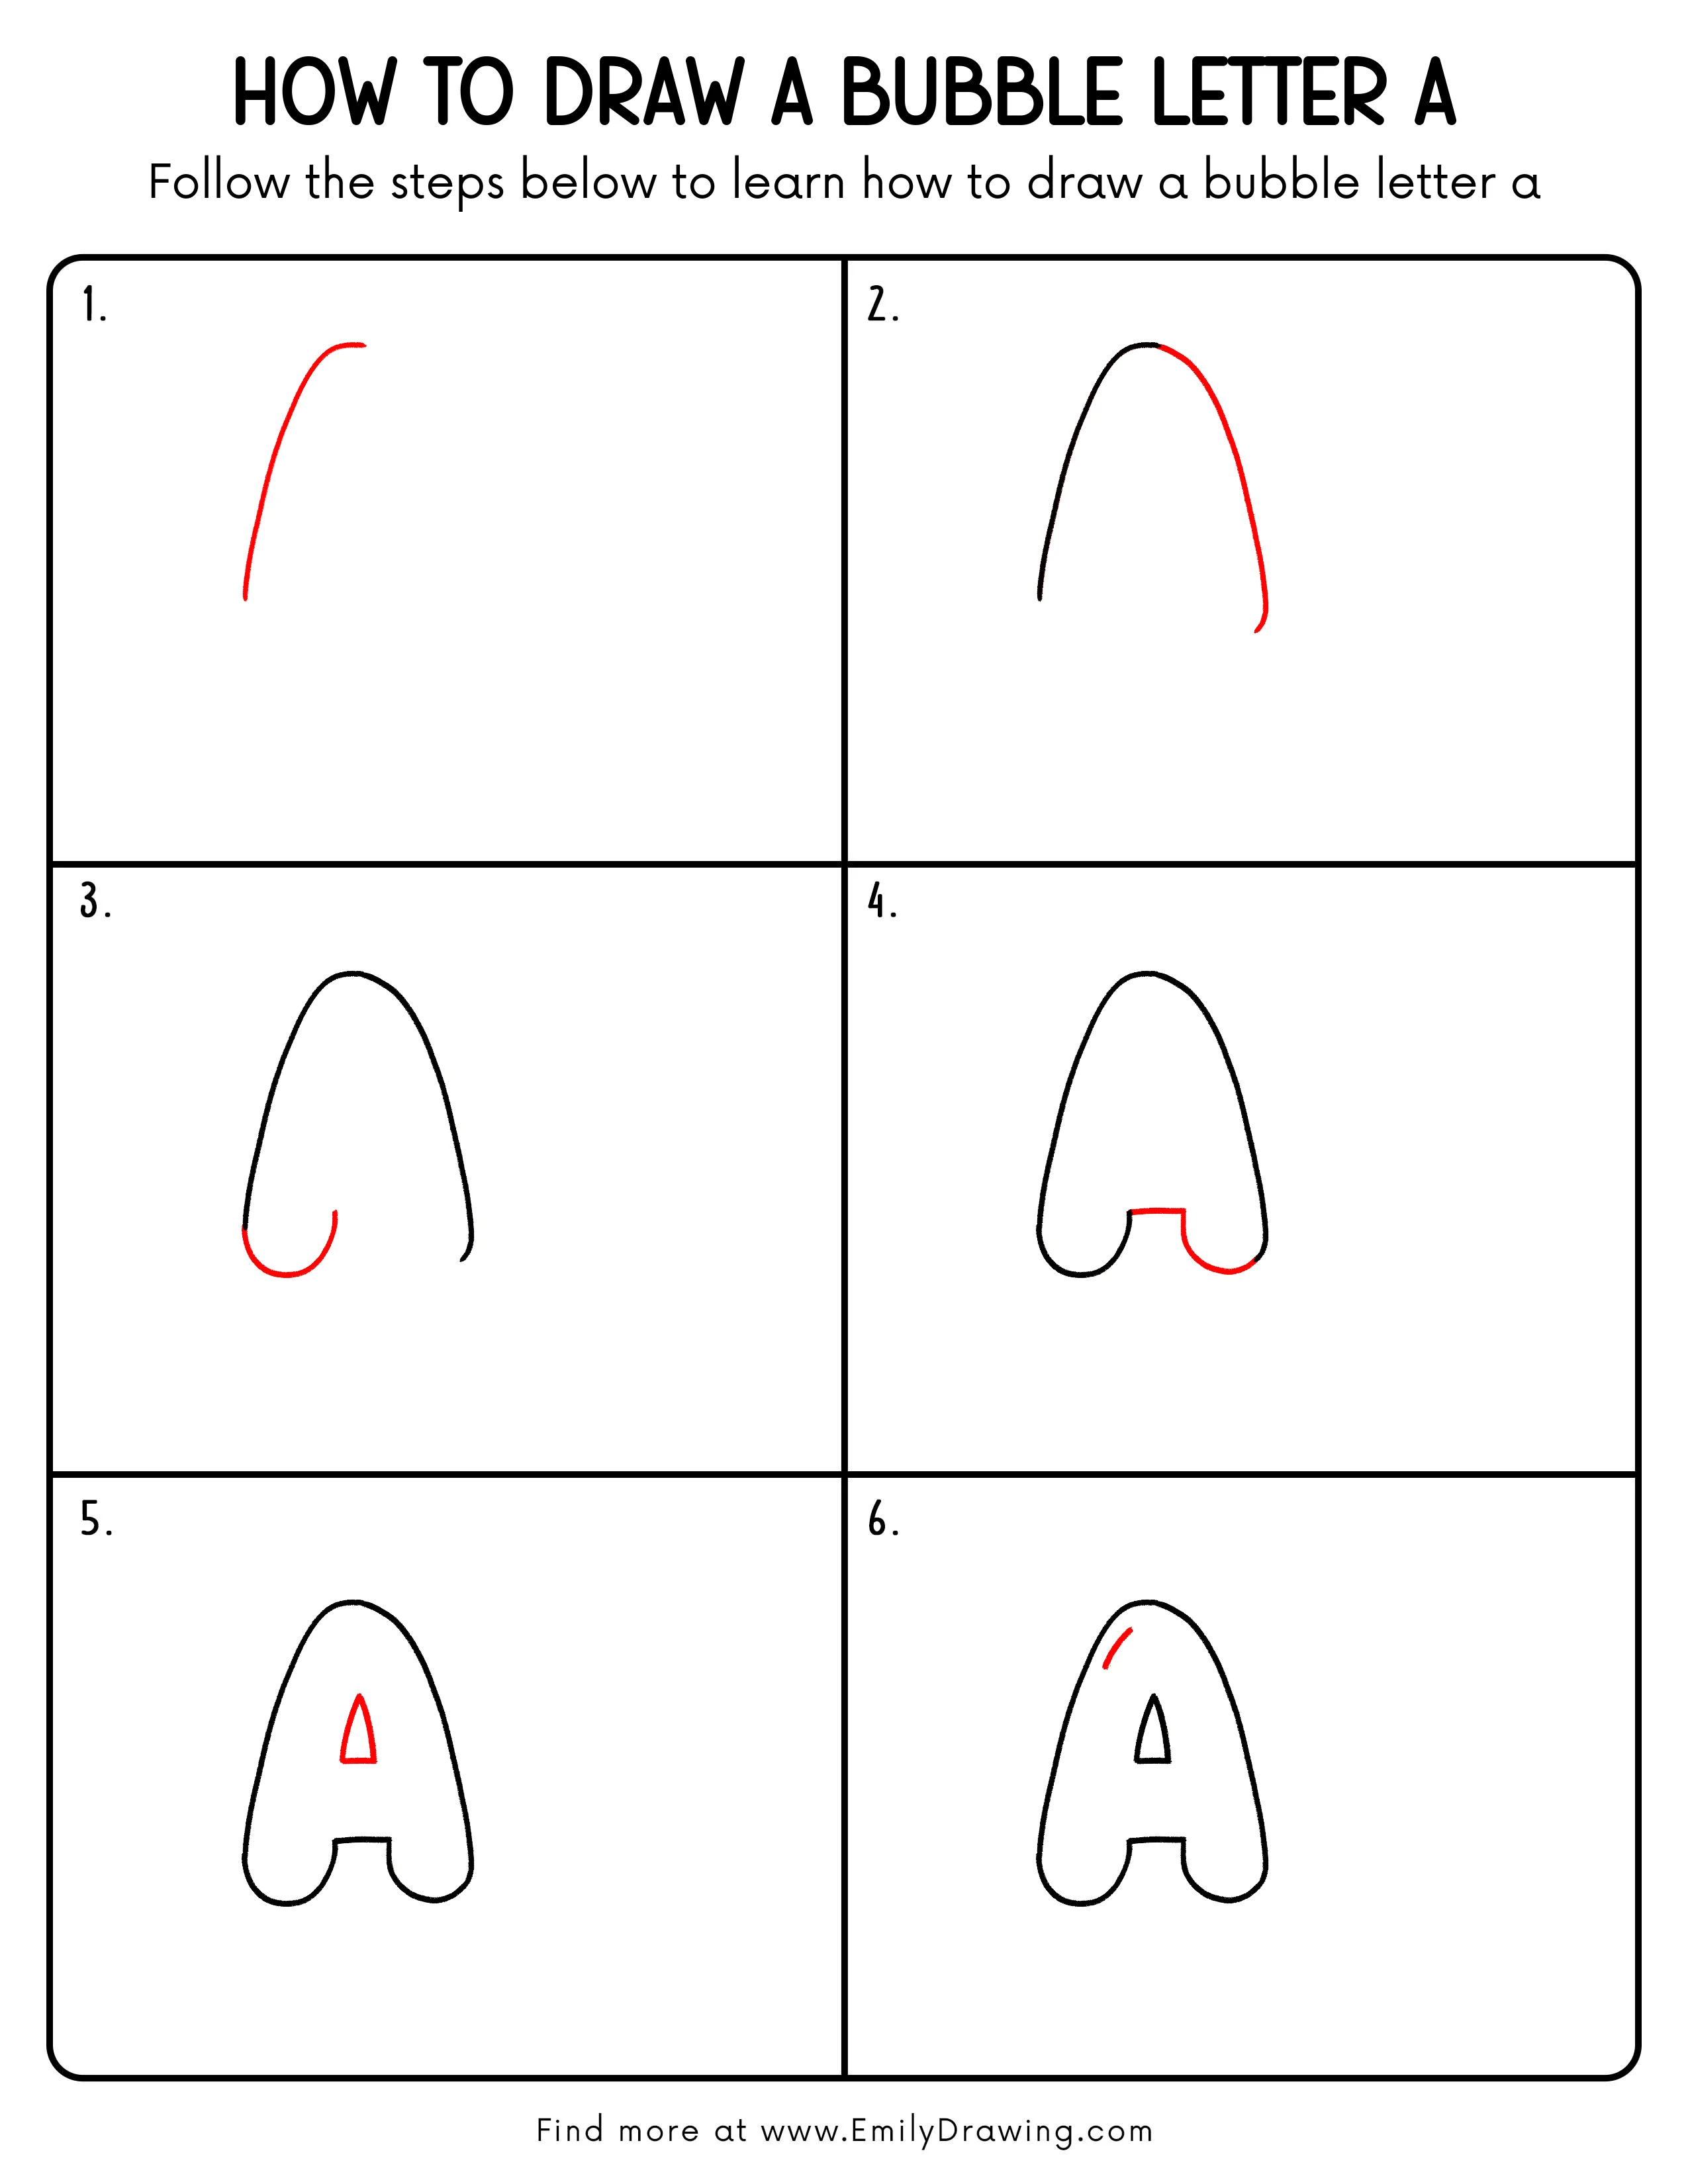
Step 1: Draw the Main Outer Curve
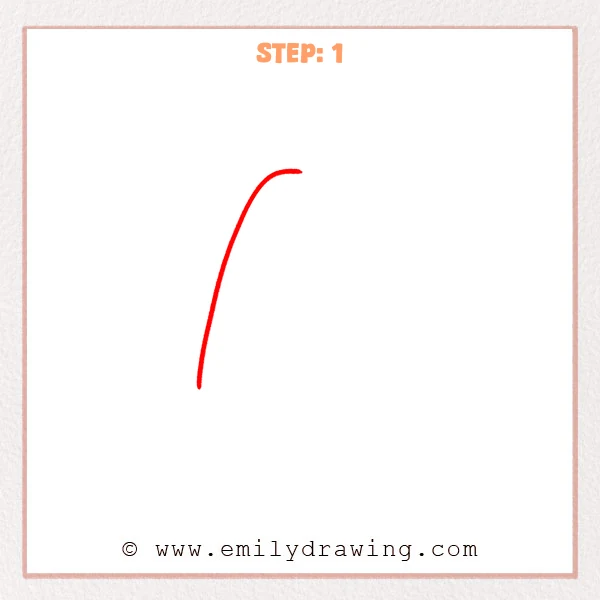
Start with one long curved line that rises from the lower left up to the top.
At the very top, bend the line gently to the right, like a soft turn, to begin the rounded bubble look.
Pro Tip: Keep the curve smooth and avoid any sharp corners.
Step 2: Add the Right Outer Curve
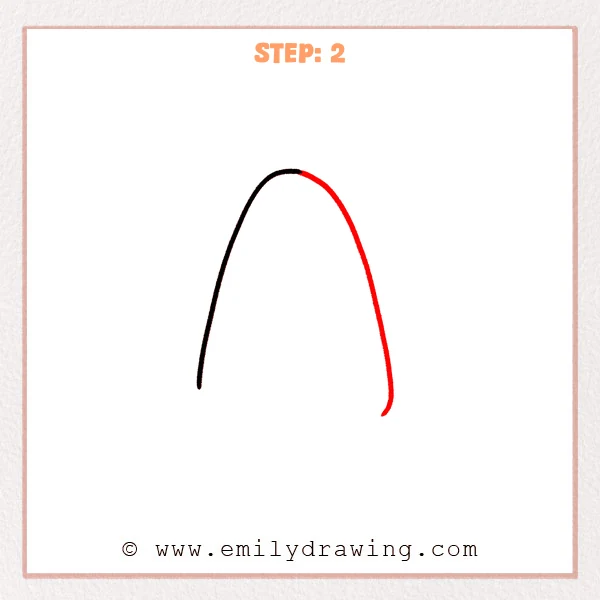
From the top bend, draw a second long curve that goes down to the lower right.
Let the two curves meet in a rounded arch at the top, and keep the bottom open for now.
Pro Tip: Keep the gap between the two curves fairly even for a balanced bubble shape.
Step 3: Add a Rounded Bottom Hook on the Left
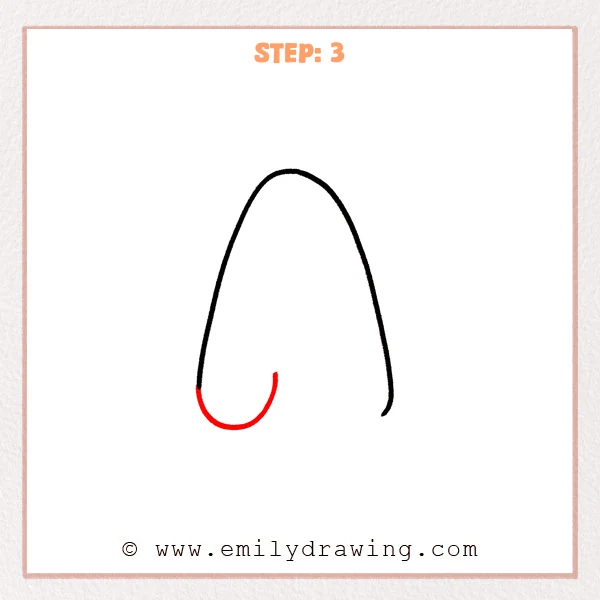
From the bottom end of the left outer line, add a rounded curve that sweeps right like a soft “U.”
Let the curve turn slightly inward and lift upward at the end, leaving room for the inside of the bubble “A.”
Pro Tip: Keep the bottom curve very round, with no pointy turns.
Step 4: Create the Bottom Notch and Right Rounded Base
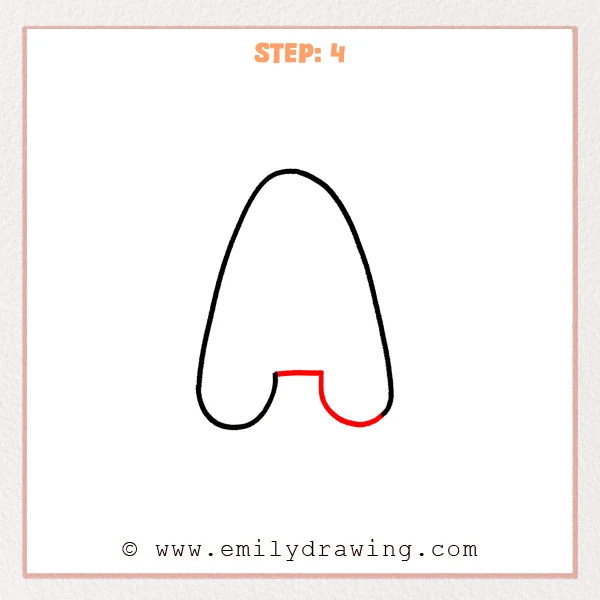
Add a short horizontal line in the middle bottom to form the small inner notch of the bubble “A.”
From its right end, draw a short drop down, then curve into a rounded bump that connects back to the right outer edge.
Pro Tip: Shape the right bottom like a small half-circle, with a smooth connection.
Step 5: Add the Inner Hole Shape
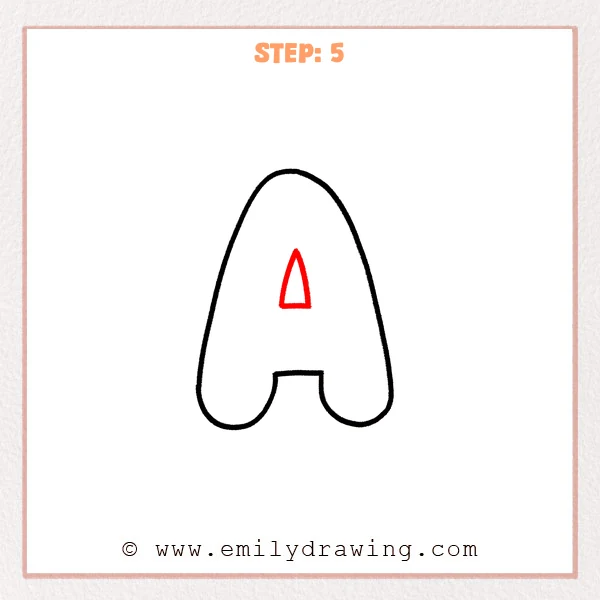
In the upper middle of the letter, draw a small triangle with a pointed top and a short base.
Round the sides slightly so it feels like the soft inner opening of a bubble letter “A.”
Pro Tip: Keep the inner hole small so the outer bubble border stays thick.
Step 6: Add a Small Highlight Curve
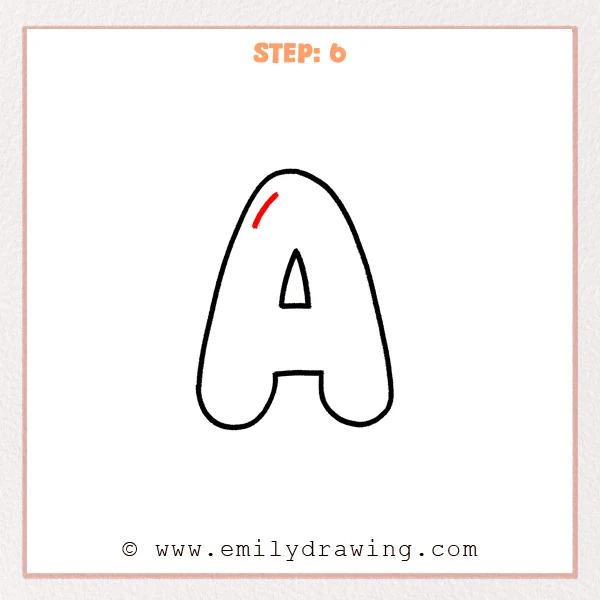
Inside the upper left area of the letter, add a short curved stroke.
Follow the same curve as the outer edge so it feels like a shiny highlight on the bubble letter “A.”
Pro Tip: Leave a small gap from the outline so the highlight looks reflective.
Step 7: Color in your drawing!
Fun Facts
- The letter A is the first letter of the English alphabet.
- Bubble letters are also called “graffiti-style” letters because they look puffy and bold.
- A small highlight mark can make a flat drawing look more 3D.
Pin it now, Draw later!
You now have a clean bubble letter A with a rounded outline and a simple inner opening.
Try coloring the letter with a light-to-dark blend, then add a soft shadow on one side.
A common beginner mistake is making corners too pointy, so keep every turn smooth.
Practice drawing a few more bubble letters, and try changing the thickness for new styles.
Get the FREE Printable Drawing Guide
FREE Download Printable Bubble Letter A Drawing Tutorial
Frequently Asked Questions
How do I make my bubble letter A look more even?
Keep the space between the left and right outer curves similar from top to bottom.
If one side feels wider, erase and redraw that curve a little closer.
Can I draw a bubble letter A without a marker?
Yes, a pencil works well for a soft look.
You can darken the final lines by tracing them again carefully.
What is the easiest way to add shading?
Pick one light direction, like top left.
Shade lightly on the opposite side, and keep the highlight area brighter.