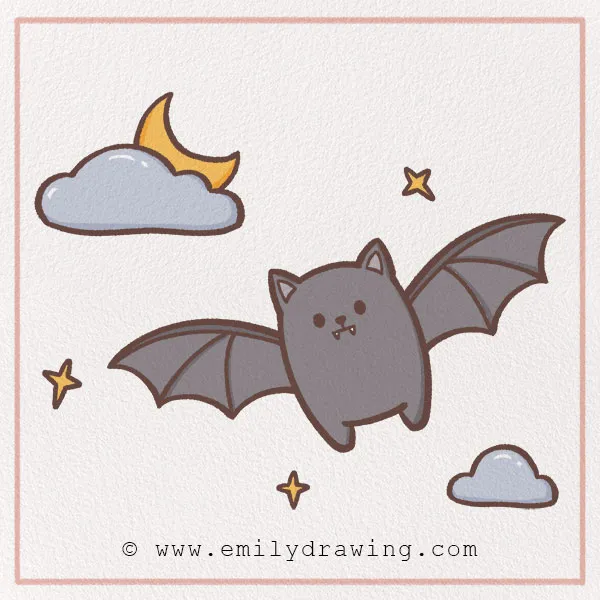
You’ve found our easy bat drawing tutorial—perfect for kids and beginners! This step-by-step tutorial will guide you through how to draw this unique creature.
Bats, like any animal, have fascinating facts about them. Although we often think of them as spooky, there’s more to them than that! First off—unlike turkeys and owls, which are birds—bats are actually mammals.
Bats also use something called echolocation—it sounds fancy, but it’s simply the term for how bats locate food by emitting high-pitched sounds and interpreting the frequency of returning echoes. Crazy, right? And, did you know that some bats can fly up to 60 miles per hour, and live up to 30 years old?
Bats, unfortunately, are on the list of endangered species, so it’s better now than ever before to learn about them.
Are you ready to start your step-by-step bat drawing? Let’s get started! Grab some art supplies and let’s go!
Materials:
- a piece of paper
- a pencil for the guiding lines and sketching
- an eraser
- a black sharpie or a pen for the outlines
- markers or colored pencils for coloring
- our printable drawing guide (Join my Email List below to get this Tutorial)
Here are my RECOMMENDED Art Supplies!
- Crayola Coloring Set (140 Pieces – Mega Value!)
- 24 Colored Crayon Set
- A4 Printer Paper
- Crayola Coloring Pencils
- HP Home Printer with Instant Ink!
Time needed:
14 minutes.
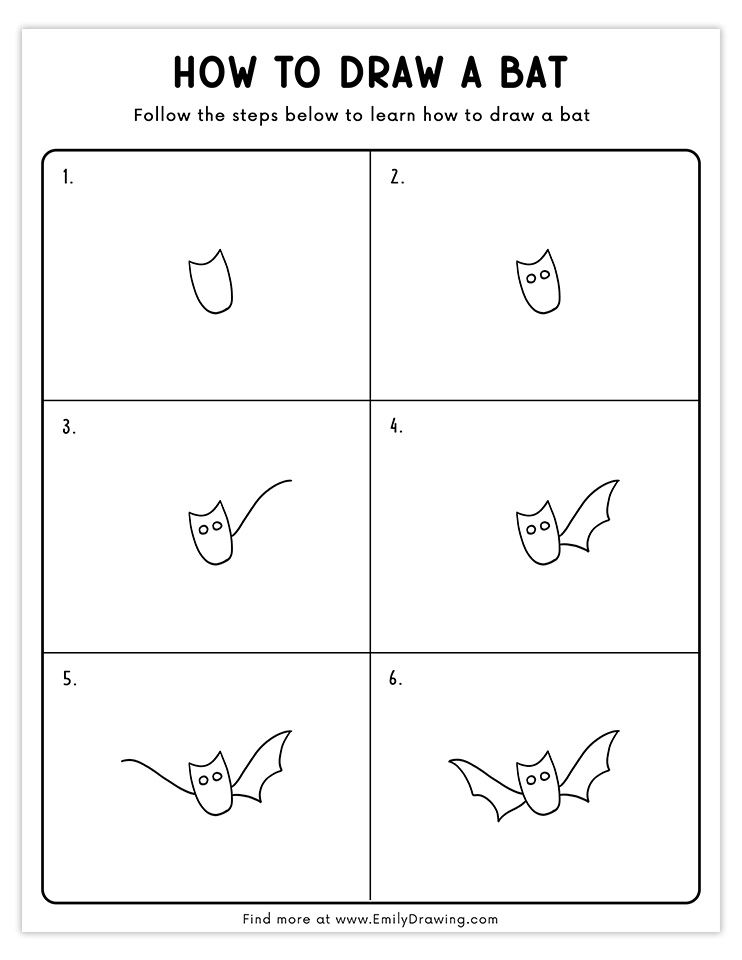
How to Draw a Bat — Let’s get started!
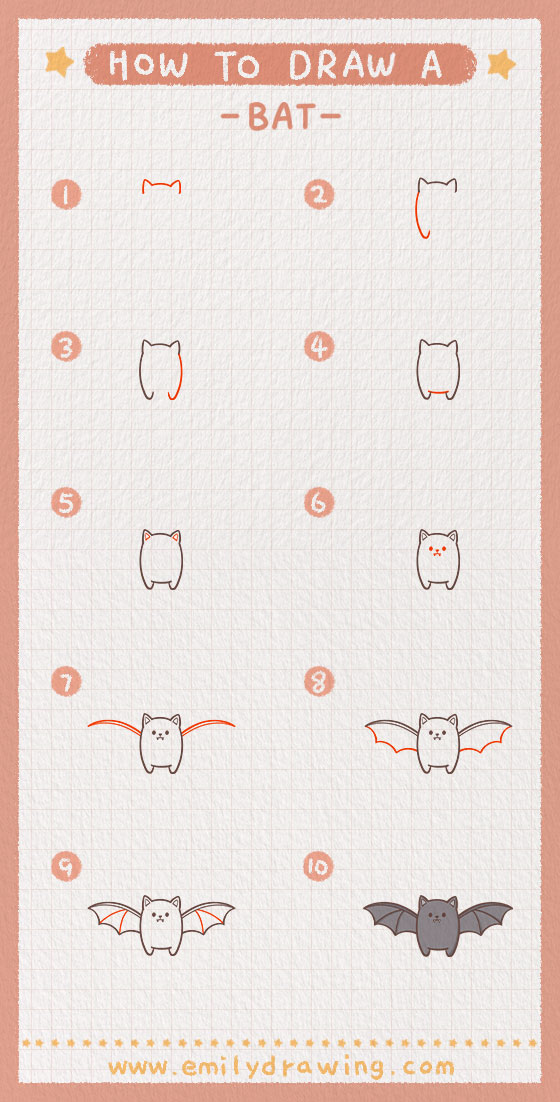
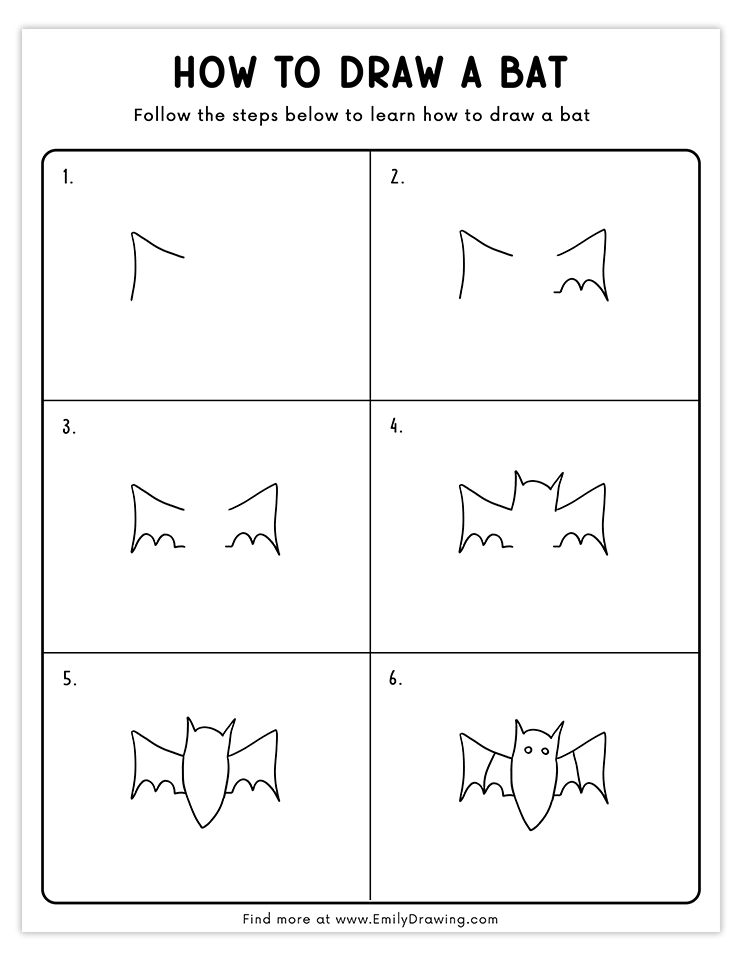
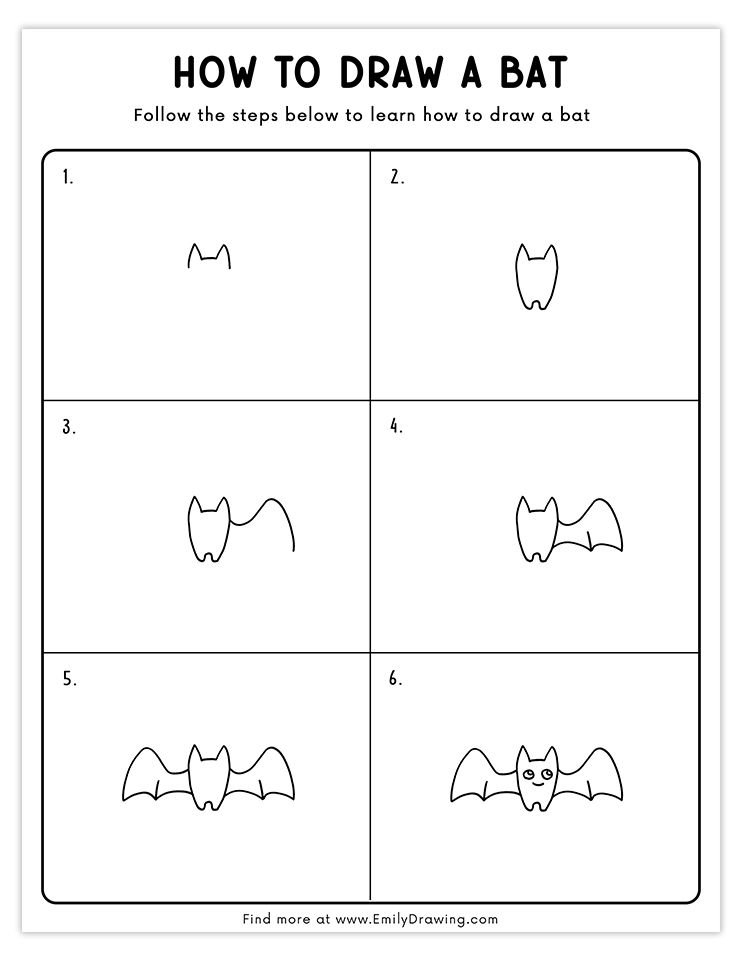
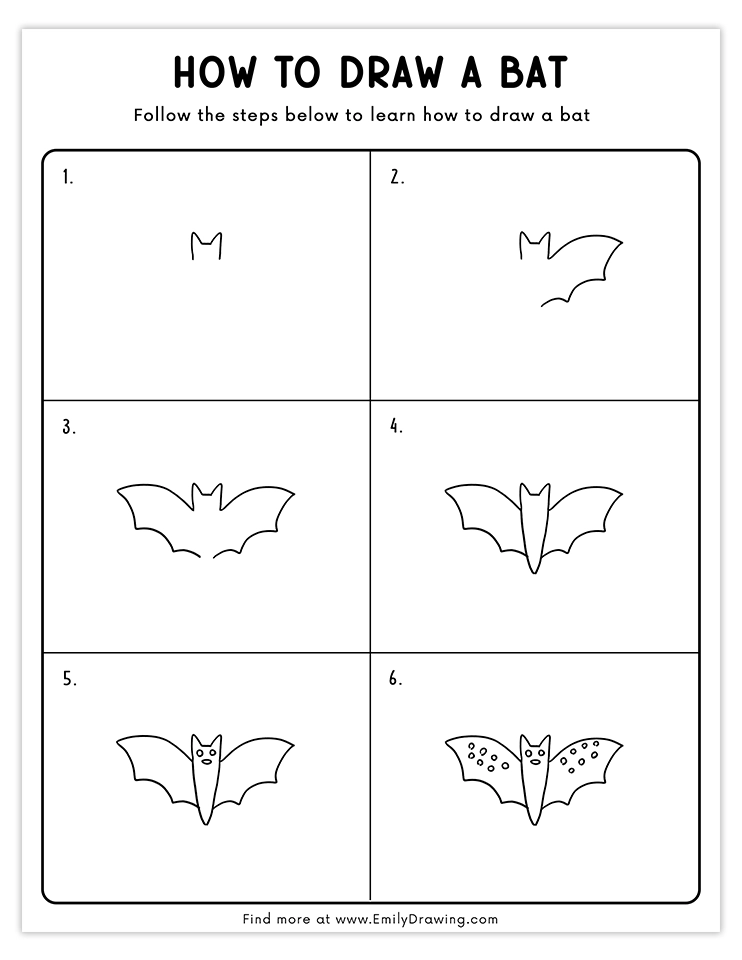
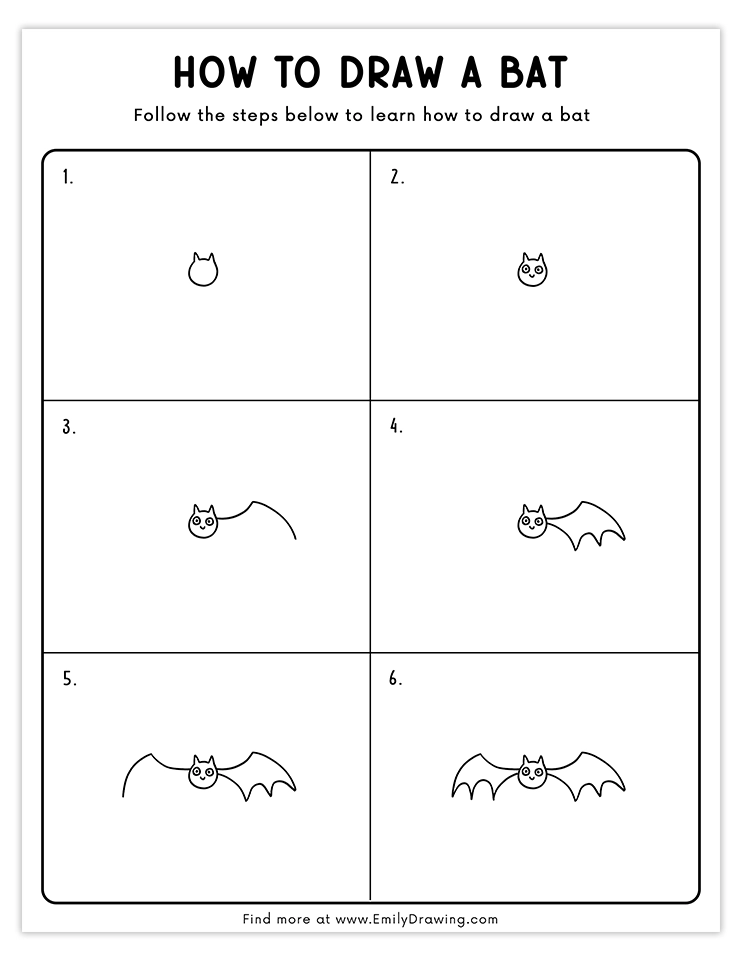
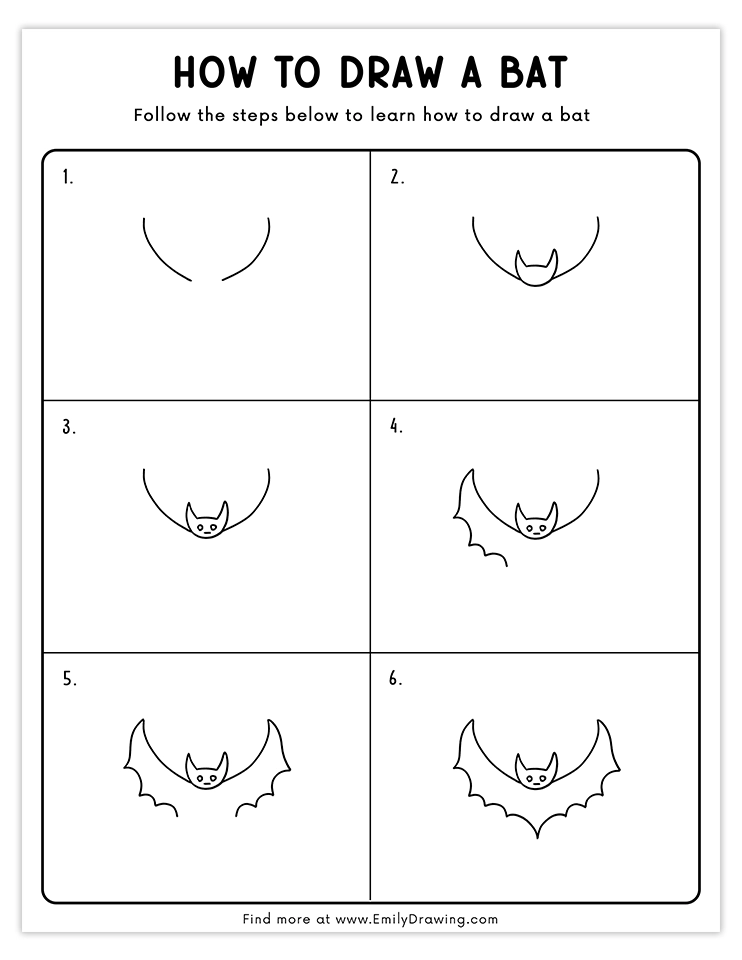
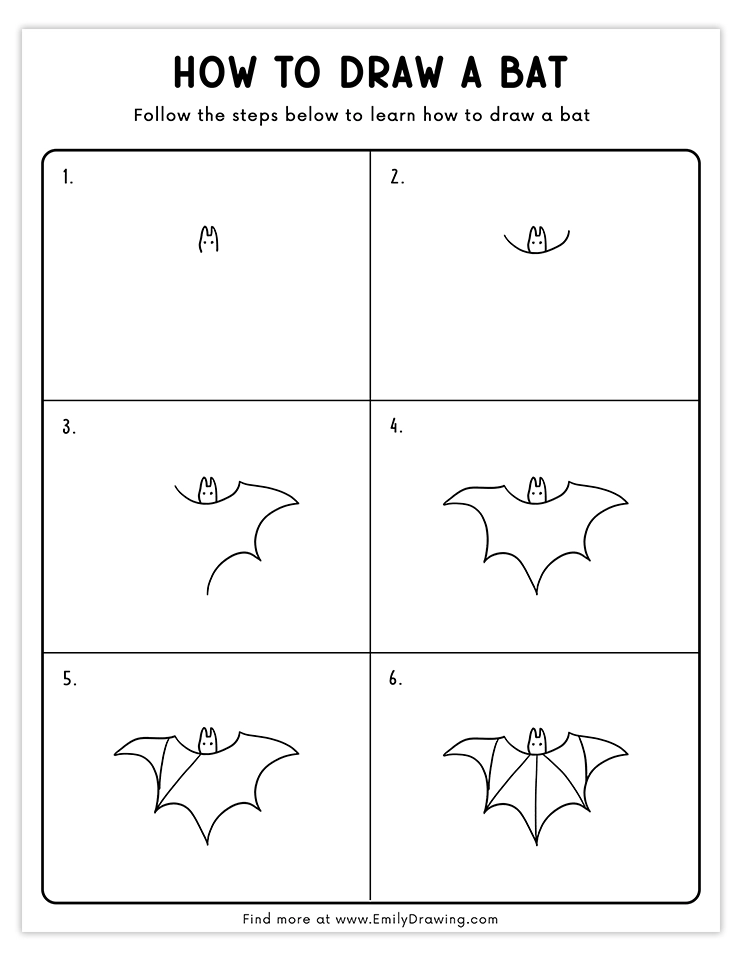
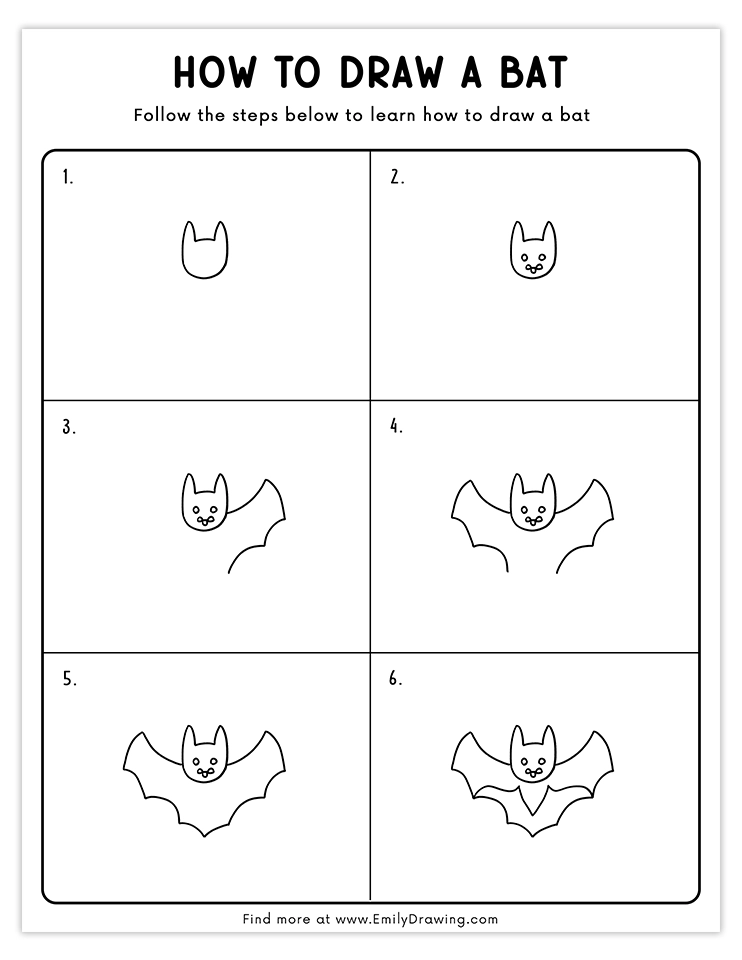
Step 1 – Draw the top of the bat’s head.
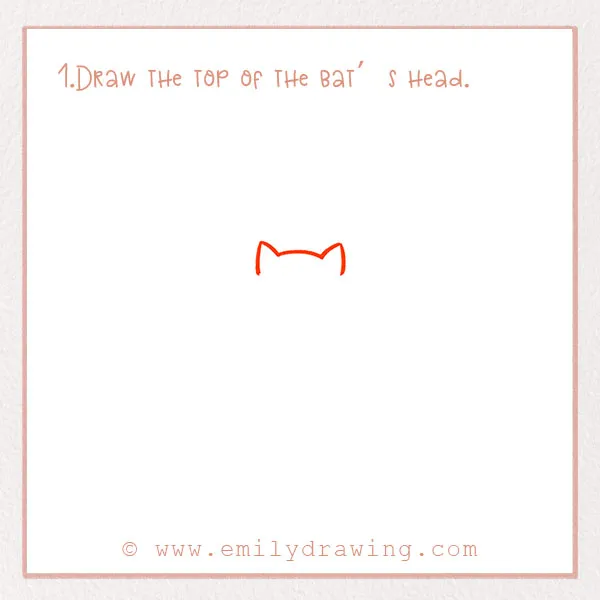
Centered near the middle of the page, let’s start to draw the bat’s head. Make two ear shapes close together. Connect them with a curved line.
Step 2 – Draw the left side of the body.
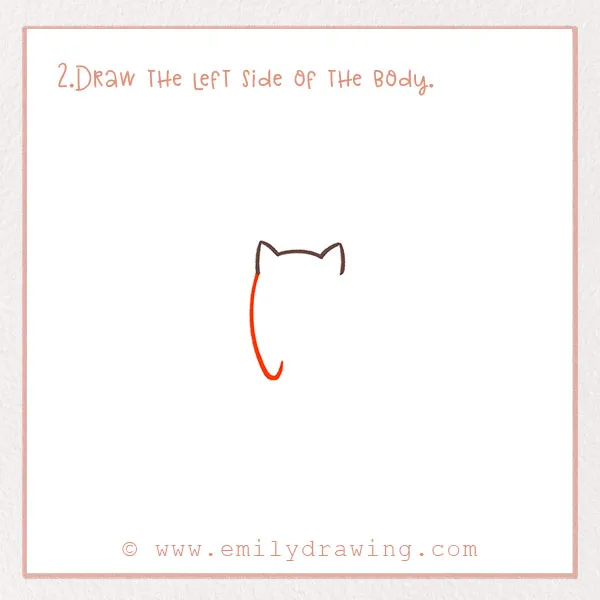
Go to the left ear you drew. From the bottom of the ear, draw a long curved line. Make it hook a little bit at the end to form the feet.
Step 3 – Draw the right side of the body.
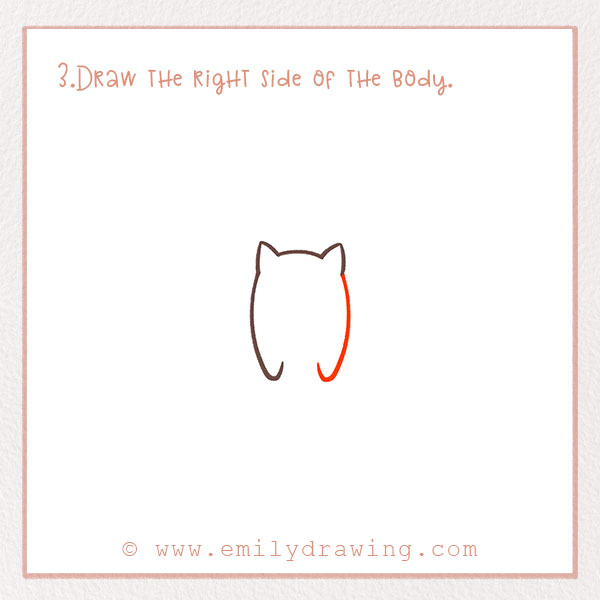
Do the exact same thing as Step 2, but this time do it on the other side of the body. This will form the right side. It should be completely symmetrical!
Step 4 – Connect the feet of the bat.
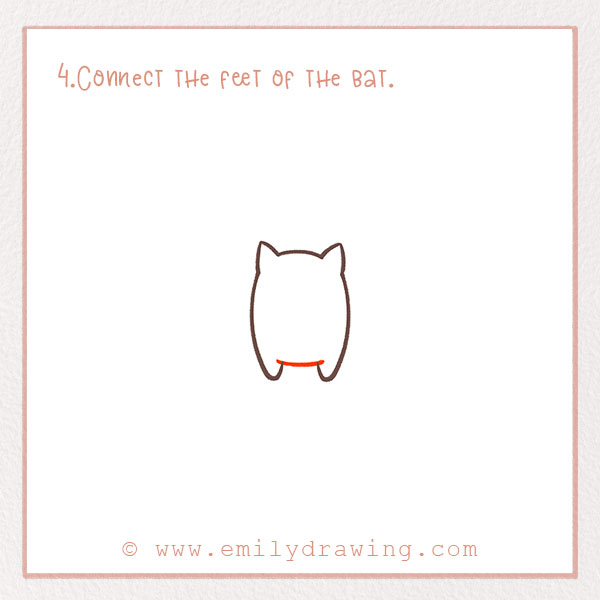
Draw a small curved line connecting the feet that we drew! Now we have the main shape of the body.
Step 5 – Add more detail to the ears.
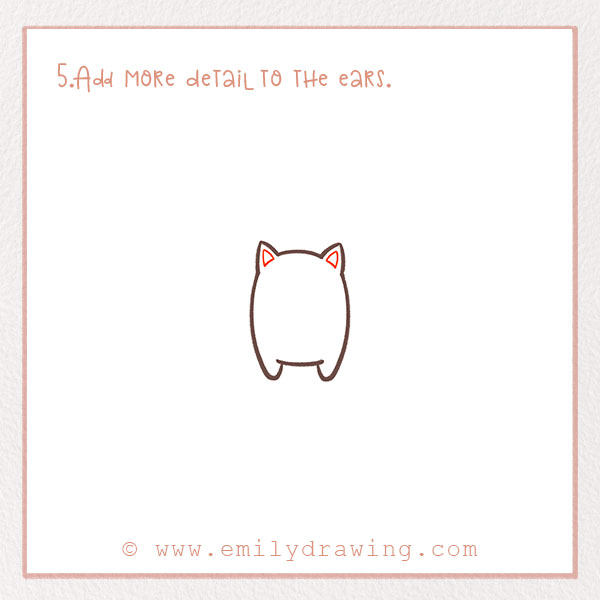
Bats, like we mentioned in the introduction, have amazing hearing! Let’s spend some more time adding detail to the ears.
Draw two small triangular shapes inside each ear.
Step 6 – Draw a face on our bat!
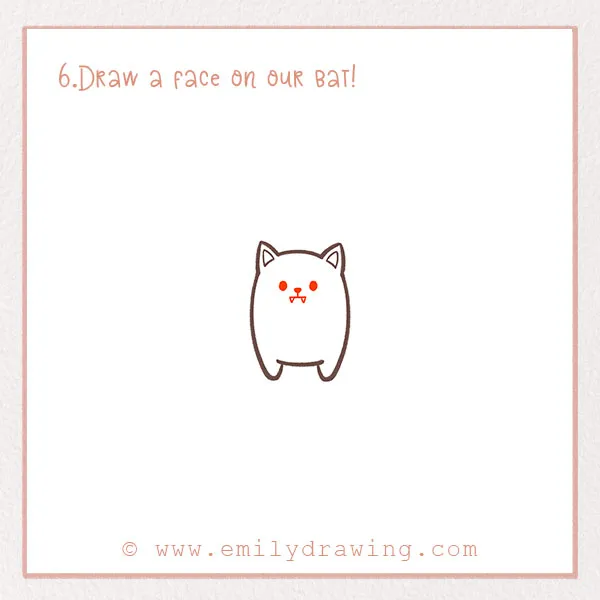
We need to add a face, of course! Sometimes people have the misconception that bats are blind, but they aren’t! They actually have decent vision, although they rely on other senses as well.
So, with all that said, let’s add two eyes, a nose, and a mouth to our bat. Draw two small ovals about an inch below the ear. Then, in between the dots (which are the eyes) draw an upside down triangle. Add a few lines below, like in the photo, to draw the mouth.
Lastly, add two upside down triangles for the teeth!
Good job!
For more animal drawing guides, check out How to Draw a Cat and How to Draw a Dog.
Step 7 – Start to draw the wings.
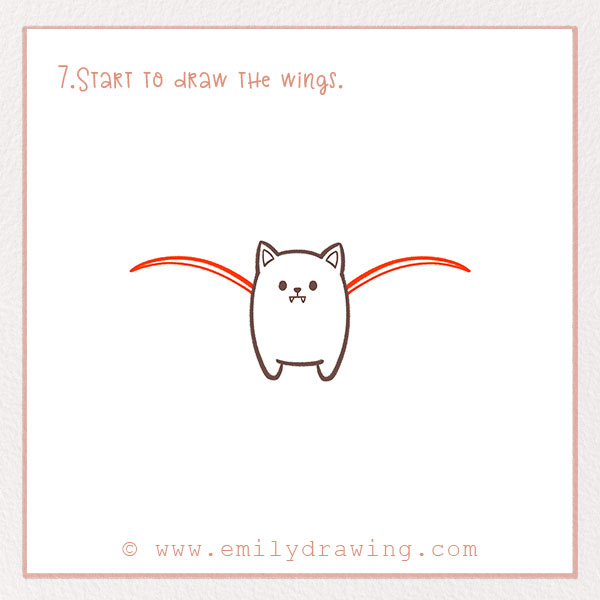
Of course, our bat has to be able to fly! We’re going to add wings next! Let’s start to do that now.
At the same level of the nose on either side of the body, we’re going to draw two long curves facing downwards. They should be even, so that the wings are the same size.
Close the shapes by adding another curved line below—refer to the photo to see what we mean!
Step 8 – Add the rest of the wings’ shapes.
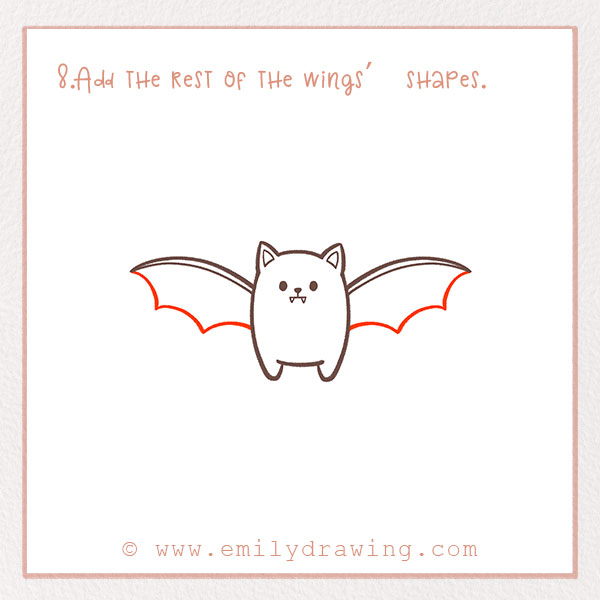
Bats have really distinctively shaped wings.
Coming from the outer edge of the curves you just drew, draw three upside down curved lines. It should look like a scalloped line. Connect it back to the body. Make sure to do this on both sides. The wings are almost done!
Step 9 – Draw more detail in the wings.
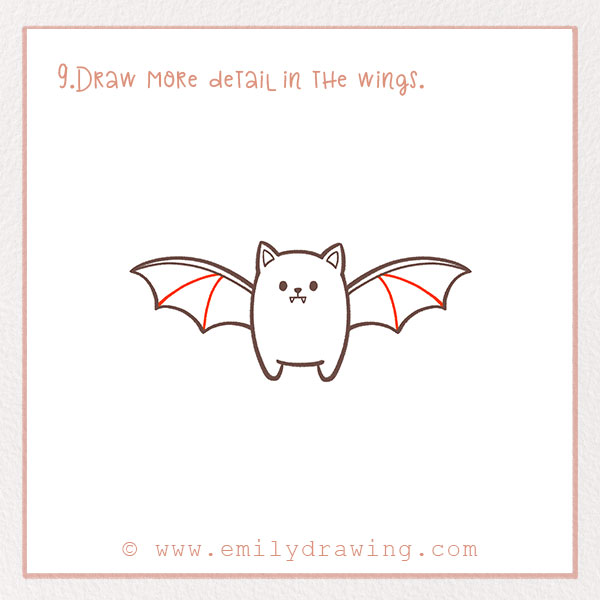
Add two lines in each wing. To do this, add curved lines that go from the middle of the top of the wing to each of the corners of the bottom of the wing. This is a little bit funky of a shape—check out the photo if you need help.
Step 10 – Color in your new creation!
Good job! You’ve made it to the final step: coloring! Add some style to your bat. Have fun and be creative!
Now that you’ve drawn your bat, you might enjoy our Halloween Coloring Page to add a spooky touch to your art collection.
There you go! You’ve masterfully completed our step-by-step drawing tutorial! Thanks for coming to our art website and following along!
Now, hopefully, you have a new artwork you love—hang it up so people can see! You can also share it by using the social icons on this page. We hope you enjoyed this chance to learn to draw a bat and discover fun facts too. Share this tutorial with friends who you think might enjoy drawing a bat, too.
If you’re interested in drawing more animals, you might also enjoy our tutorials on How to Draw a Bird and How to Draw an Owl.
Pin it now, Draw later!
Get the FREE Printable Drawing Guide

FREE Download Printable Bat Drawings Tutorials


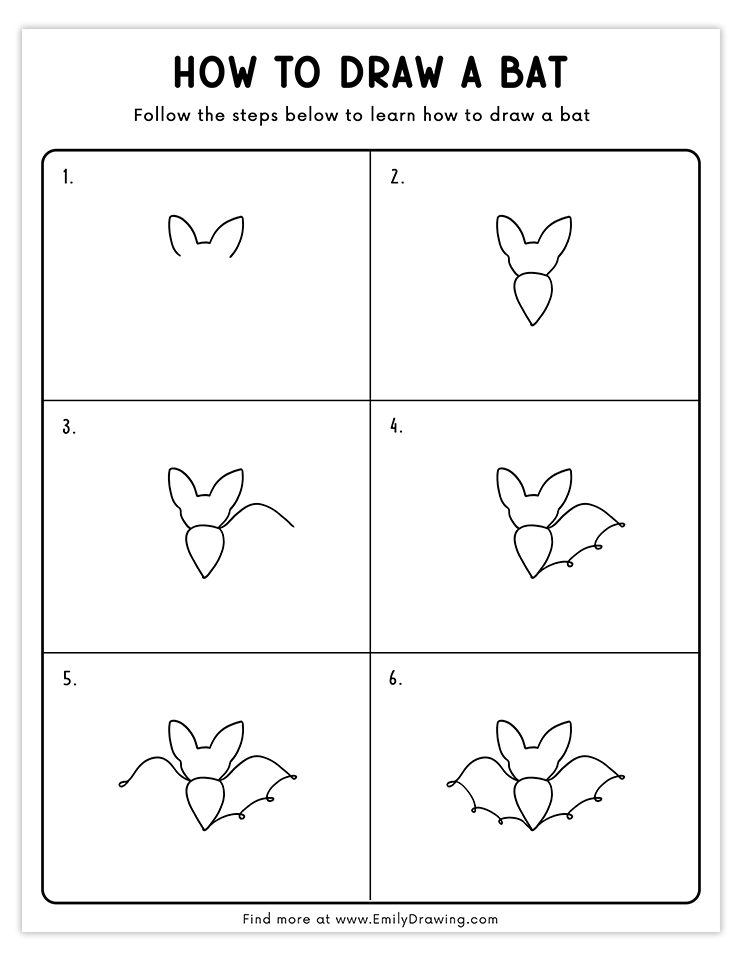
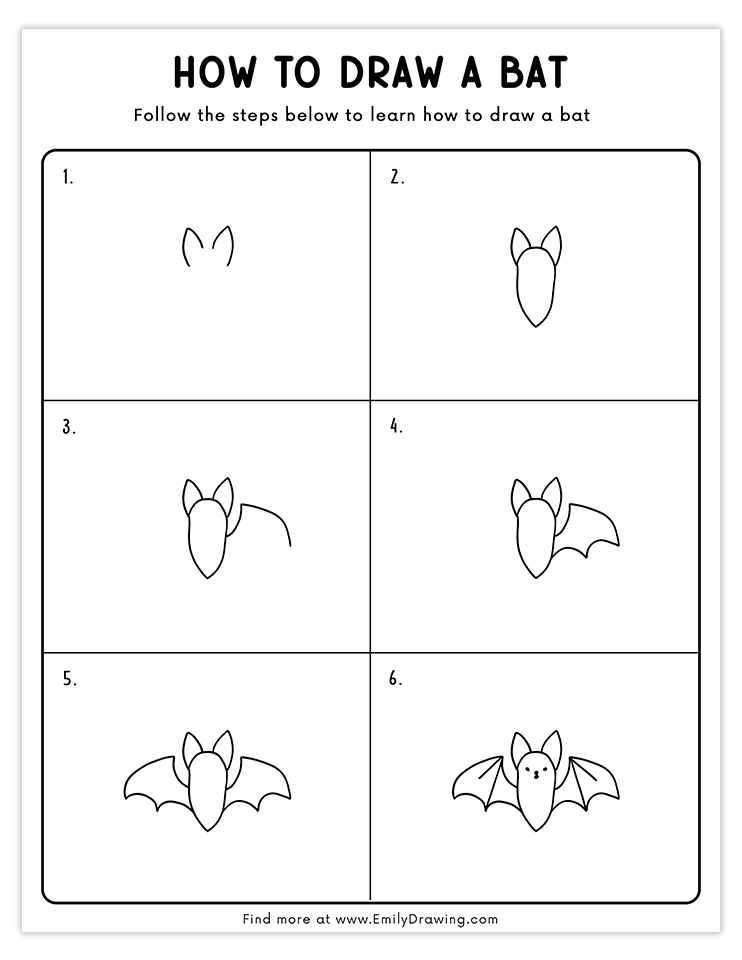
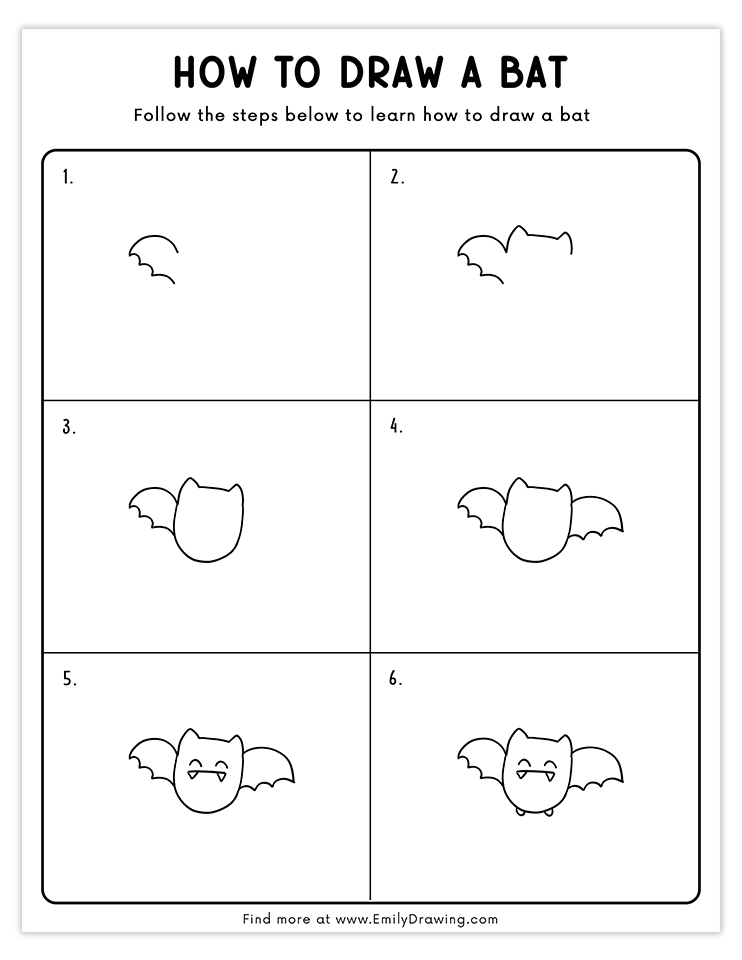
A bit tricky but after perseverance it looks really good.