Hello, and welcome to another fun, easy-to-follow tutorial on our site! Today, we are going to learn how to draw a shark in this fun and easy shark drawing tutorial, featuring clear steps for beginners!
There are so many things to learn about this sometimes misunderstood creature—they have some amazing qualities that make them such unique ocean dwellers. First off, “sharks” is a broad category—there are actually over 500 species of them!
You might have found shark teeth on the beach before, or have bought a shark tooth necklace. This is because sharks can lose more than 20,000 teeth during their life! These can be found on the shore sometimes. They also have very distinctive skin—it feels like sandpaper! And, they can also travel thousands of miles in just one year!
So, let’s get started on this easy shark drawing tutorial! Are you ready? Grab some art materials, and happy drawing!
Materials:
- a piece of paper
- a pencil for the guiding lines and sketching
- an eraser
- a black sharpie or a pen for the outlines
- markers or colored pencils for coloring
- our printable drawing guide (Join my Email List below to get this Tutorial)
Here are my RECOMMENDED Art Supplies!
- Crayola Coloring Set (140 Pieces – Mega Value!)
- 24 Colored Crayon Set
- A4 Printer Paper
- Crayola Coloring Pencils
- HP Home Printer with Instant Ink!
Time needed:
14 minutes.
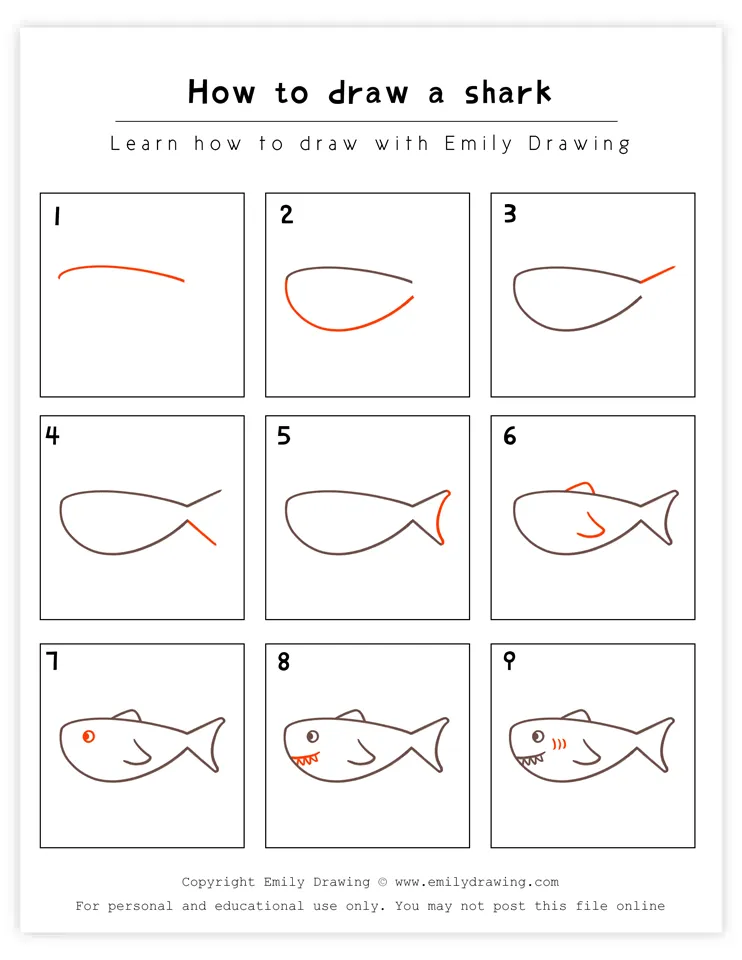
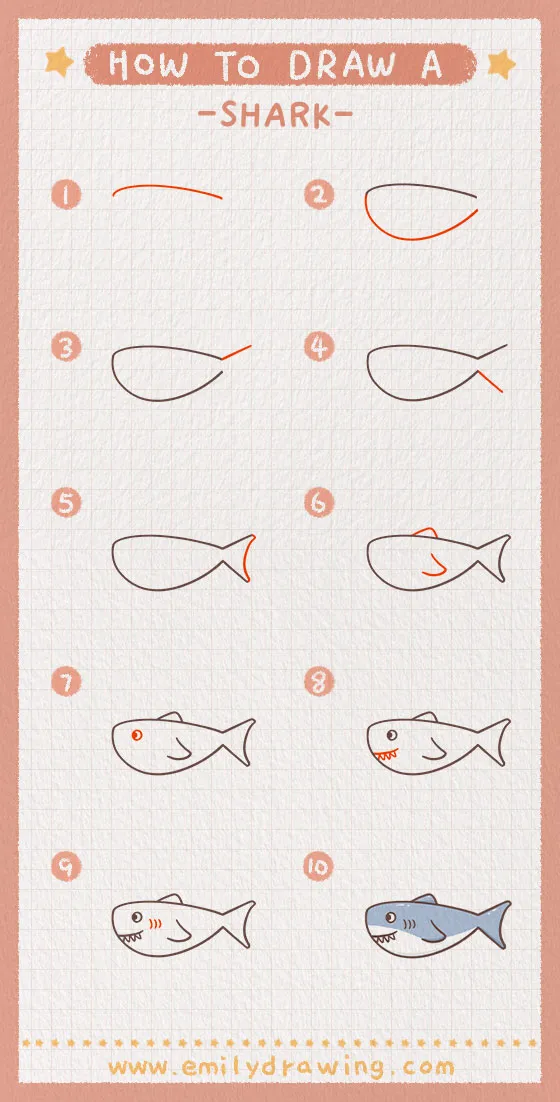
How to Draw a Shark — Let’s get started!
Step 1 – Draw the top of the shark.
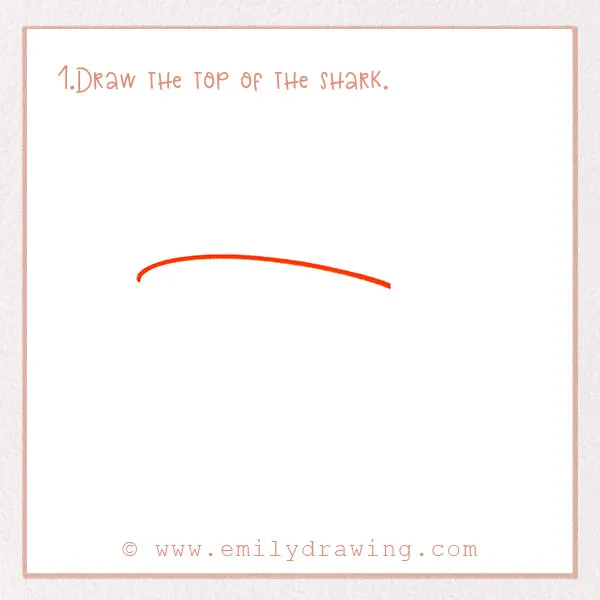
Let’s get started by drawing the top of the shark’s body!
About three-quarters of the way up the page and a little bit towards the left, draw a long and slightly curved line. Leave a few inches on the right side of the curve because that is where the tail will go.
Step 2 – Draw the bottom of the shark.
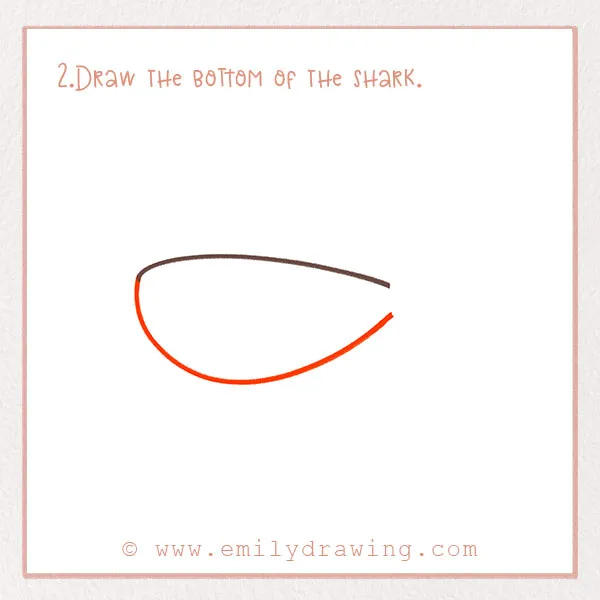
We’re going to draw the bottom outline of the shark’s body—draw a more curved line that connects to the line in Step 1. It should be deeper on the left side, because that side will be the head. Refer to the image to see what we mean!
Step 3 – Start to draw the tail.
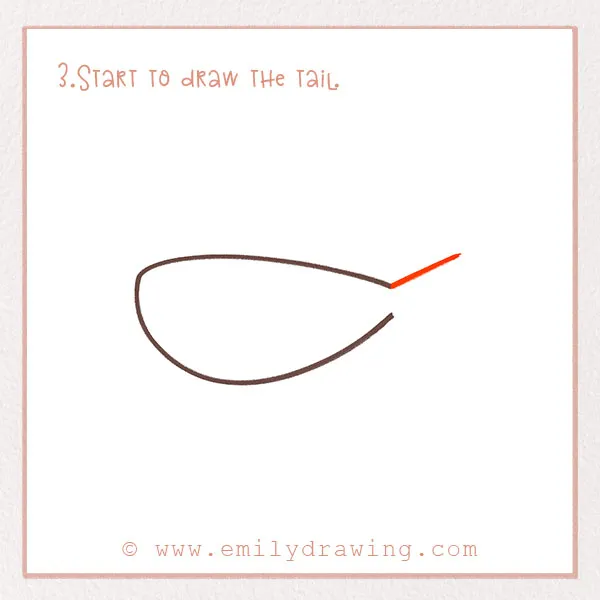
Sharks have to have tails to swim those thousands of miles! Let’s start to add the shark’s tail now.
Draw a short diagonal line extending upwards from the top of the body on the right side. It should be a few inches long and go nearly to the end of the page.
Step 4 – Draw the bottom of the shark’s tail.
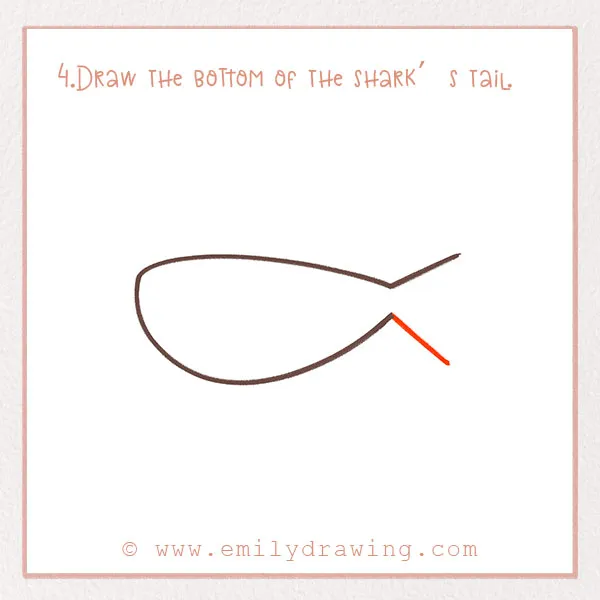
Make a similar line for the bottom of the tail, but this time, make it extend downwards. We’re almost done with the tail now.
Step 5 – Finish the tail!
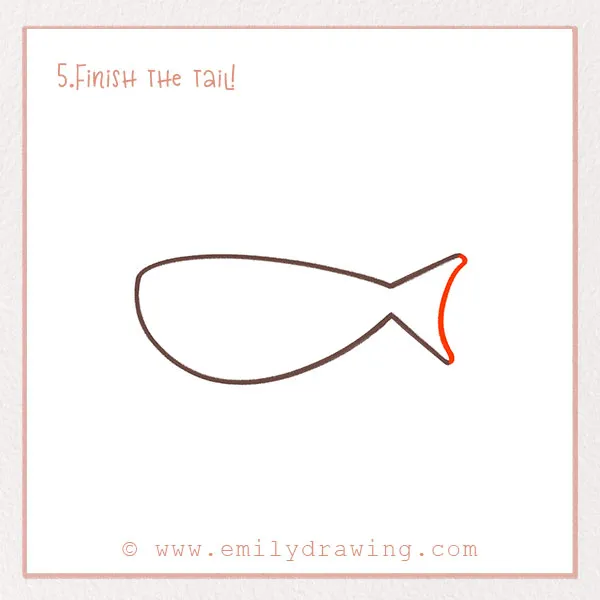
Connect the lines from the past two steps with a slightly curved line. This completes the tail. Good job!
Step 6 – Draw more fins.
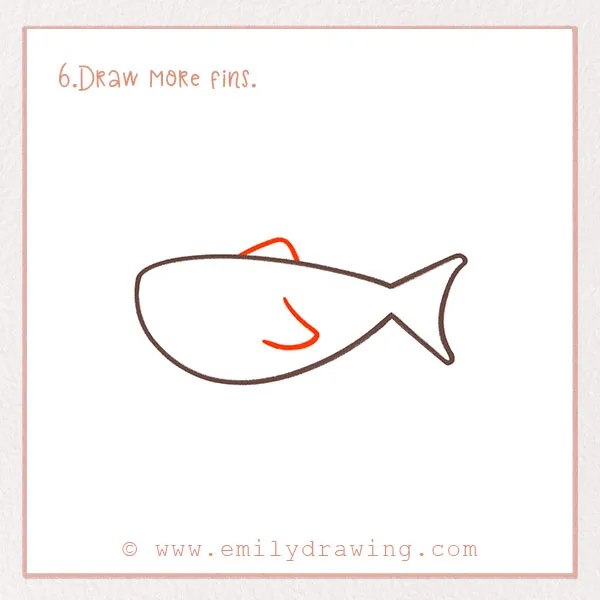
The fins of a shark, in addition to its tail, help it to move through the ocean. The dorsal fin—which is what the fin on the top of the shark is called—helps it conserve energy by helping it balance and swim in a straight line.
So, let’s add some more fins to our shark. First, draw a rounded triangular shape on the top of the body. This should look like it’s on the other side of the body.
Then, add another fin in the middle of the shark’s body. Refer to the photo for this step!
Step 7 – Add an eye!
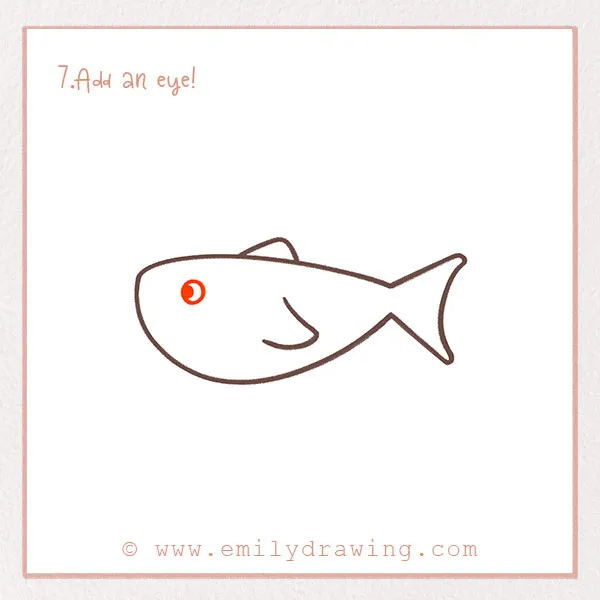
This shark is drawn from the side, also called the profile, so we can only see one of its eyes. Let’s add the eye now. Towards the left of the body, draw a small circle. Inside it, add another smaller circle on the left side to show its pupil looking forward.
Step 8 – Draw the shark’s teeth.
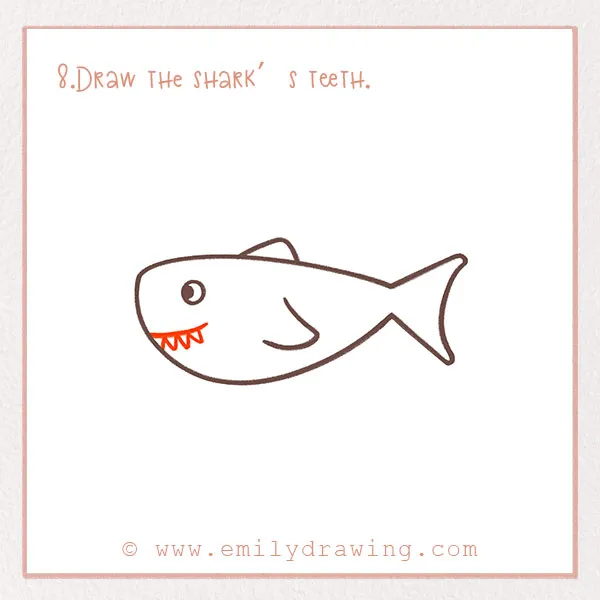
Draw a curved line going slightly upwards from the left side of the body (the head of the shark). It should be about an inch or two long. Then, add four small triangles below it to draw its teeth.
Step 9 – Add detail to the shark’s body.
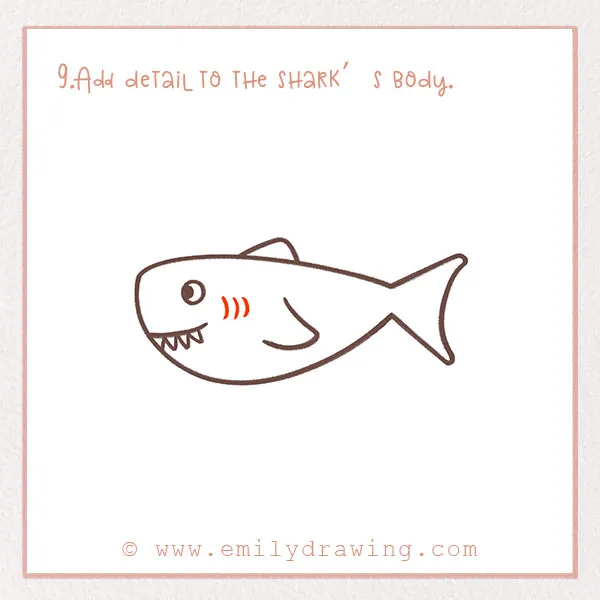
Just right of the eye, draw three small vertical lines. They should be slightly curved.
Good job! You’ve finished forming the shape of the shark. Only one more step to go!
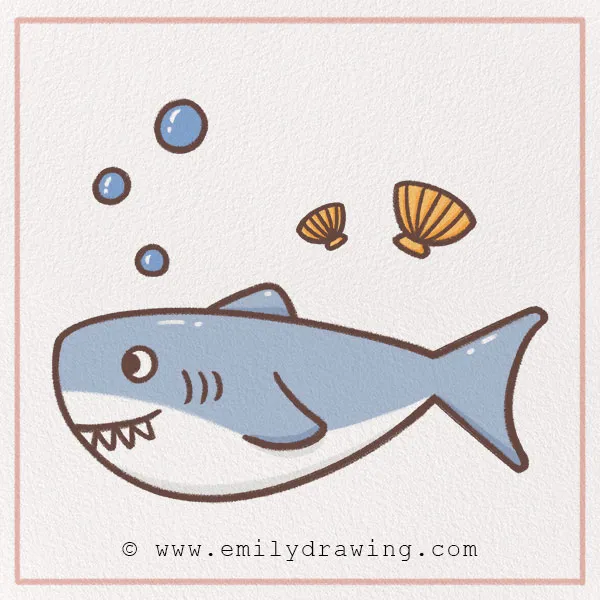
Step 10 – Color in your drawing!
Last but not least, of course we have to color! Fill in your shark and add some color to the background, too. If your shark is in the ocean, find some blues to show water! Have fun with it!
All done? Great job! We hope you enjoyed our step-by-step shark drawing tutorial and are happy with your masterpiece and are happy with your newly-created masterpiece. Show it to your friends and family! Maybe share some fun-facts about sharks that you learned, too!
Did you enjoy this tutorial? Did you learn new drawing techniques? Comment what you loved most about it below! If you liked this animal-themed project and want to learn how to draw a shark for kids, check out our other sea creature tutorials on the site, such as how to draw a starfish or dolphin.
Pin it now, Draw later!
Get the FREE Printable Drawing Guide