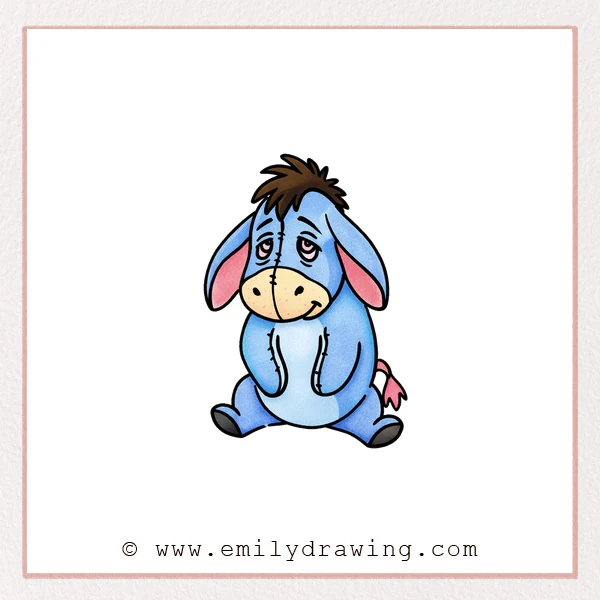
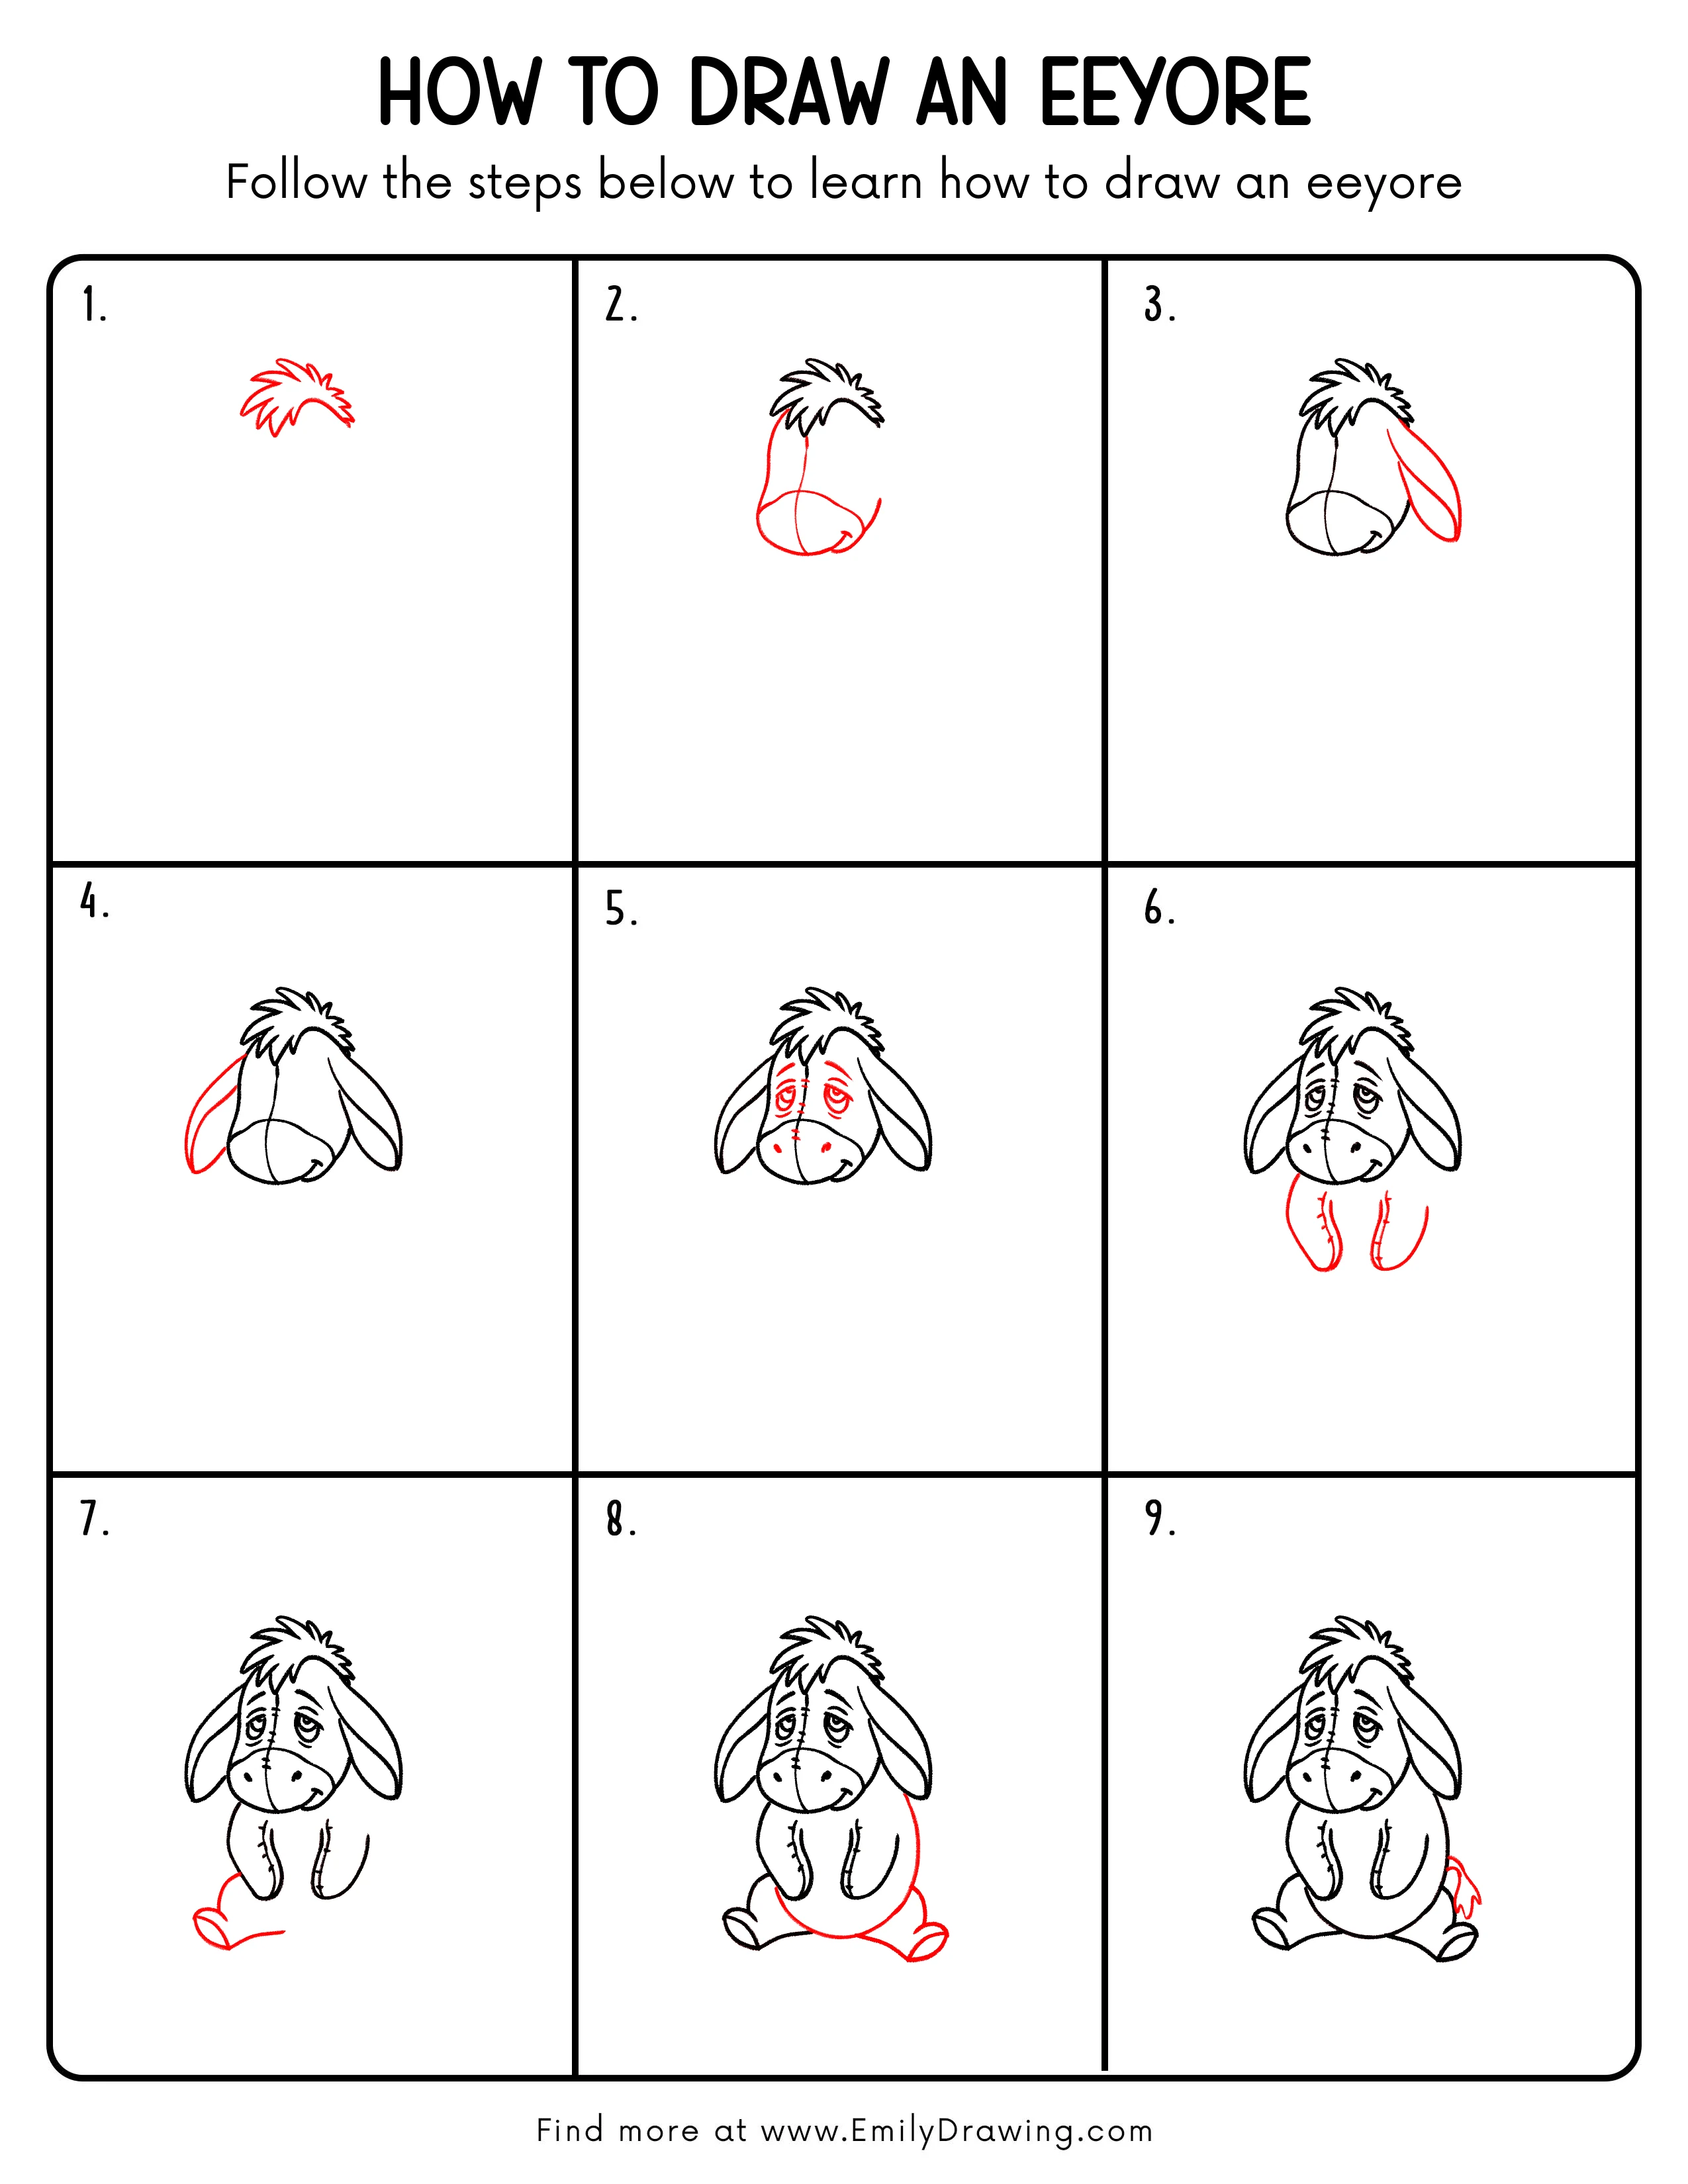
Learning how to draw Eeyore can be a calm and enjoyable activity for children and beginners. In this easy drawing tutorial, you will build his gentle face, long ears, round body, and small tail one step at a time. Take your time with each line, and let the shapes stay soft and simple.
What You Will Need
- Pencil
- Eraser
- Black pen or marker
- Paper
- Colored pencils, crayons, or markers
Here are my RECOMMENDED Art Supplies!
- Crayola Coloring Set (140 Pieces – Mega Value!)
- 24 Colored Crayon Set
- A4 Printer Paper
- Crayola Coloring Pencils
- HP Home Printer with Instant Ink!
Time needed:
21 minutes.
Step-by-Step Drawing Guide
Step 1: Sketch the Top Tuft of Hair
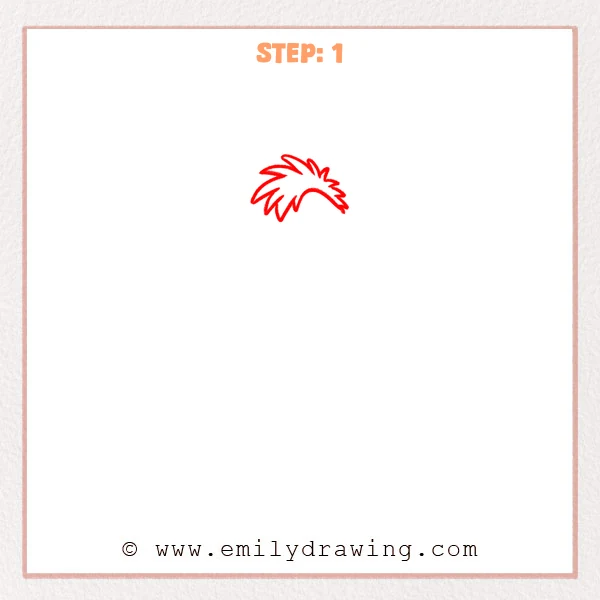
Start near the upper middle of the page and make a soft curved line for the base of the hair. Then add a cluster of pointed tufts above it, changing the length a little so the shape feels fluffy and slightly messy, like Eeyore’s little top mane.
Pro Tip: Let the tips lean in slightly different directions so the hair looks more natural.
Step 2: Add the Main Shape of the Face
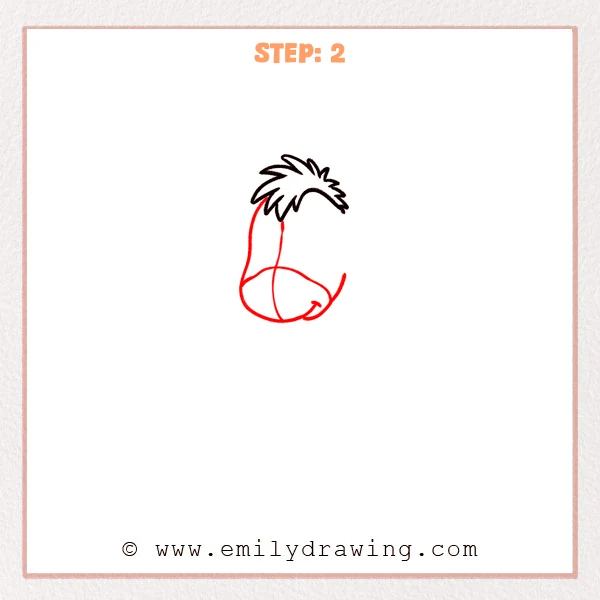
From both sides of the hair, extend two long curved lines downward to build Eeyore’s droopy face shape. Then add a rounded muzzle at the bottom, using one vertical guide line and one soft curved guide across the muzzle to help place the facial features later.
Pro Tip: Keep the guide lines light so it is easier to adjust the face balance and muzzle placement.
Step 3: Add One Long Drooping Ear
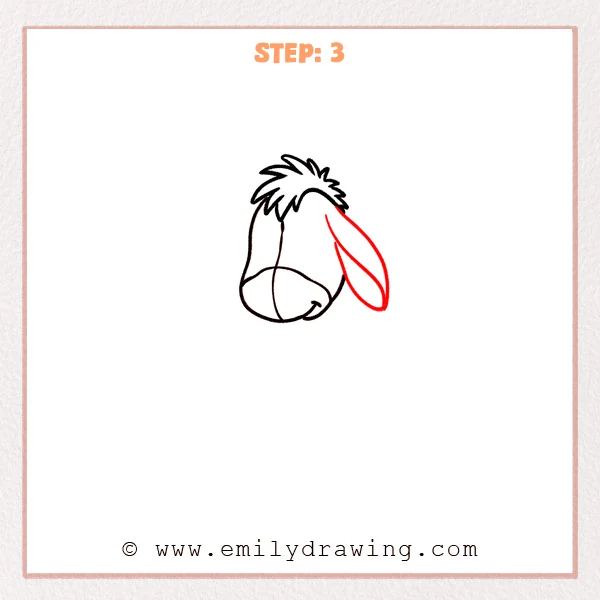
On the right side of the head, add one long ear that falls gently downward from beside the hair. Start with the outer shape, then place a soft inner curve to show the inside of the ear and give it that familiar Eeyore look.
Pro Tip: Keep the end of the ear rounded so the shape feels soft and natural.
Step 4: Add the Second Drooping Ear

On the left side of the head, sketch the second long ear so it hangs naturally from beside the hair. Add a soft inner curve inside the ear to match the other side and help the whole face feel balanced and gentle, just like Eeyore.
Pro Tip: The two ears do not need to match exactly, and a small difference in height will look more natural.
Step 5: Add the Gentle Facial Features
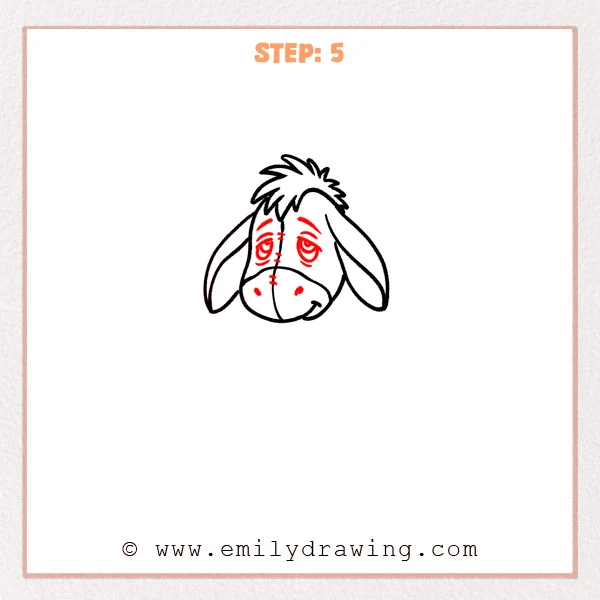
Place two droopy eyes in the middle of the face, with the upper lids resting low so the expression feels calm and a little sleepy. Then add the short brow lines, two small nostrils on the muzzle, and a few tiny marks along the center line to complete Eeyore’s soft, wistful look.
Pro Tip: Keep both eyes close to the same height so the expression stays balanced and natural.
Step 6: Add the Front Legs Below the Head
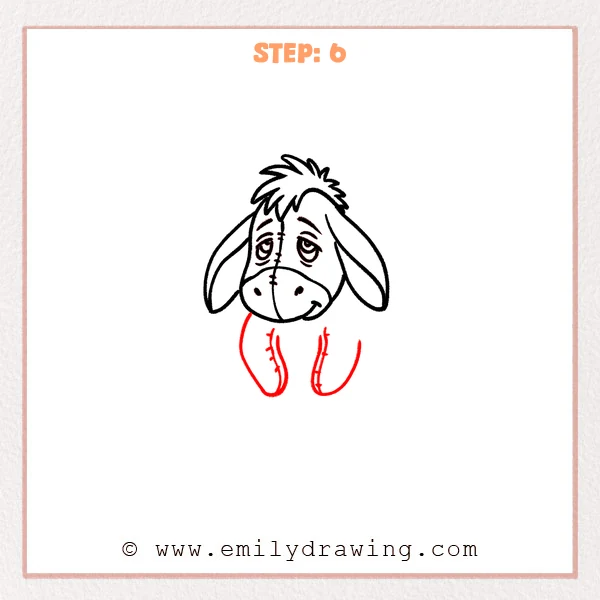
Start just under the head and sketch two long front legs hanging down in a relaxed way. Let each leg end with a soft rounded hoof shape, then add a few short stitch lines along the inner edges to give Eeyore that gentle stuffed-toy look.
Pro Tip: Leave a little space between the two front legs so the pose feels relaxed and the body is easier to add next.
Step 7: Start Adding the Left Back Leg and Foot
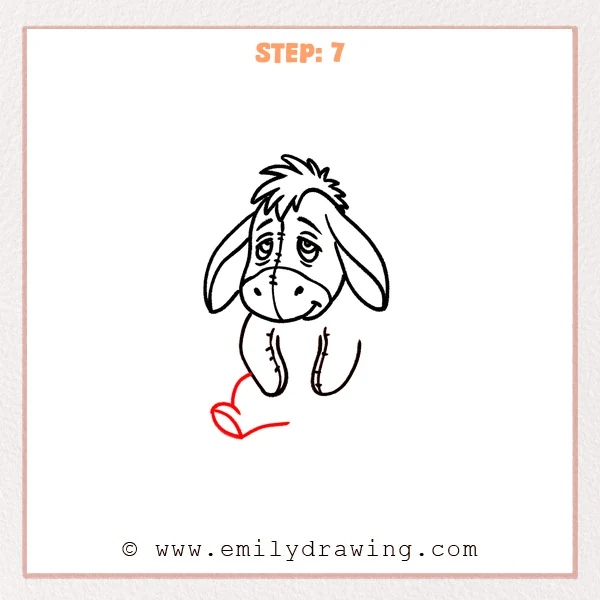
From the lower left side of the body, sketch a curved back leg that comes slightly forward to suggest a seated pose. Then add a soft rounded foot at the end, with one inner line to separate the shape and make the lower body easier to read.
Pro Tip: Keep the back leg a little short and rounded so the sitting pose feels stable and gentle.
Step 8: Connect the Body and Add the Other Back Leg
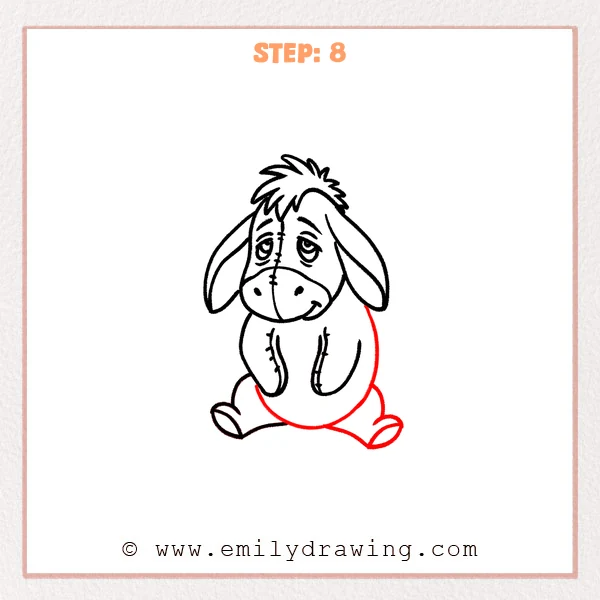
Start under the head and bring a rounded body line down along the right side so the belly rests softly on the ground. Then add the other back leg and foot on the lower right, using a gentle bottom curve to connect both sides and complete Eeyore’s seated body.
Pro Tip: Keep the body outline smooth and rounded so the sitting pose feels calm and natural.
Step 9: Add the Small Tail on the Side
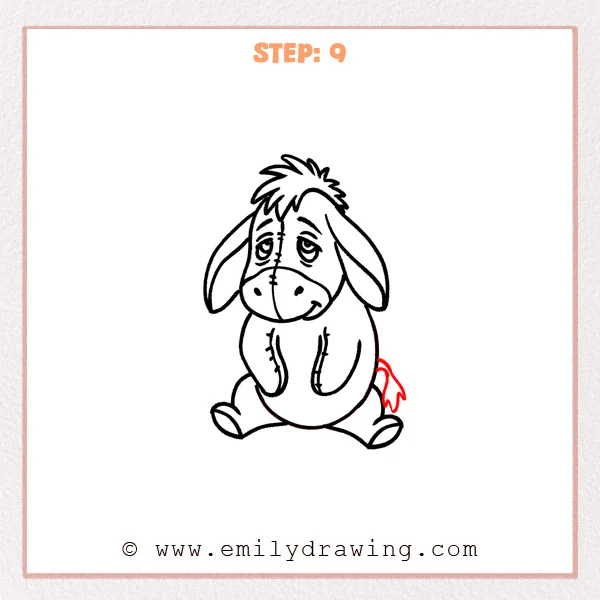
On the lower right side of the body, sketch a thin tail that curves gently outward. Finish it with a small uneven tuft at the end so Eeyore’s narrow, floppy tail starts to show clearly.
Pro Tip: Keep the tail fairly thin so it matches Eeyore’s gentle and simple shape.
Step 10: Color in your drawing!
Fun Facts
- Eeyore is known for his soft voice and thoughtful personality.
- His long ears and small tail help make his shape easy to recognize.
- Drawing characters with simple rounded forms is a great way to practice drawing for beginners.
Pin it now, Draw later!
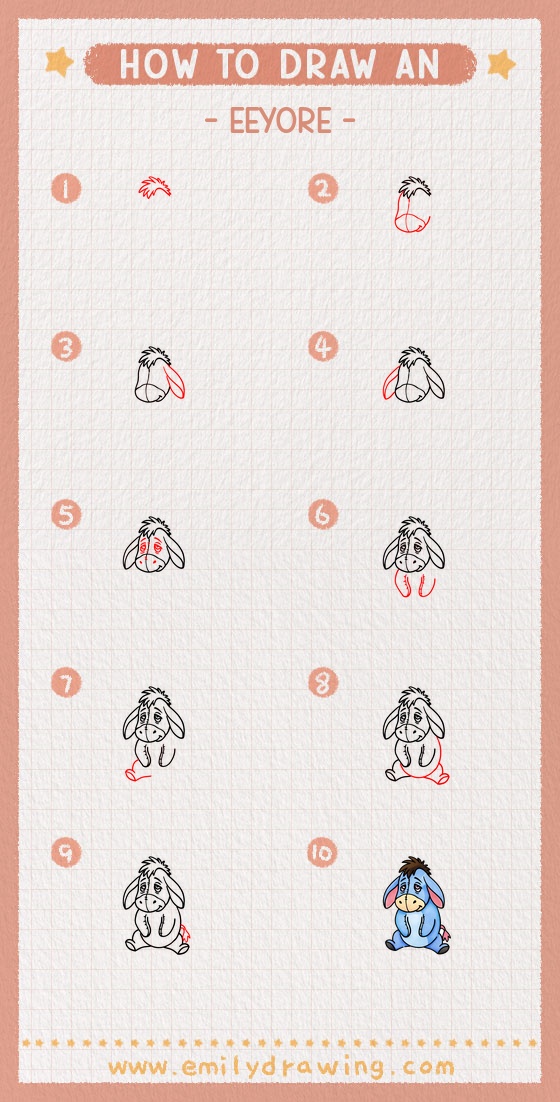
You now have a full step by step drawing of Eeyore, built from soft shapes and gentle details. Add light gray or blue-gray color to his body, use a pale pink inside the ears, and keep the shading soft under the head, ears, and belly for a calm finished look. One common beginner mistake is making the ears too short, which can change Eeyore’s familiar appearance. Keep practicing this easy drawing tutorial, and try more character drawings to build your confidence one step at a time.
Get the FREE Printable Drawing Guide
FREE Download Printable Eeyore Drawing Tutorial
Frequently Asked Questions
How do I make Eeyore look sad but gentle?
Lower the upper eyelids slightly and keep the eyebrows soft and curved.
What is the easiest part to draw first?
The messy tuft of hair is a simple place to begin because it sets the top of the head.
Can children follow this Eeyore drawing tutorial?
Yes. The steps use simple shapes and clear lines, so it works well for young beginners and adults drawing with them.