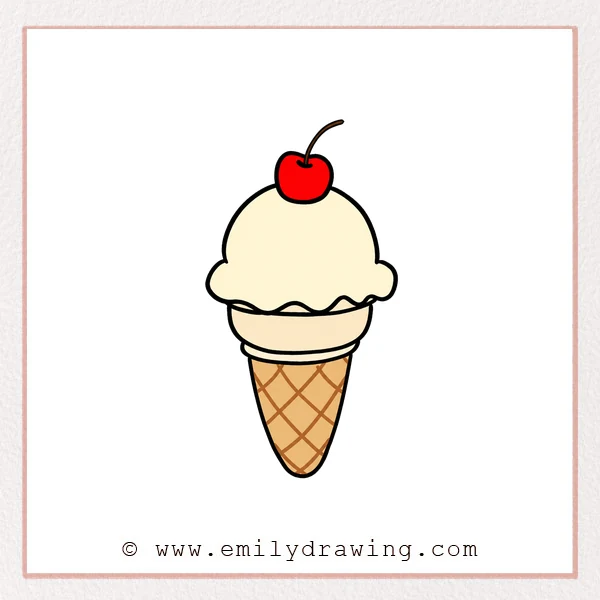
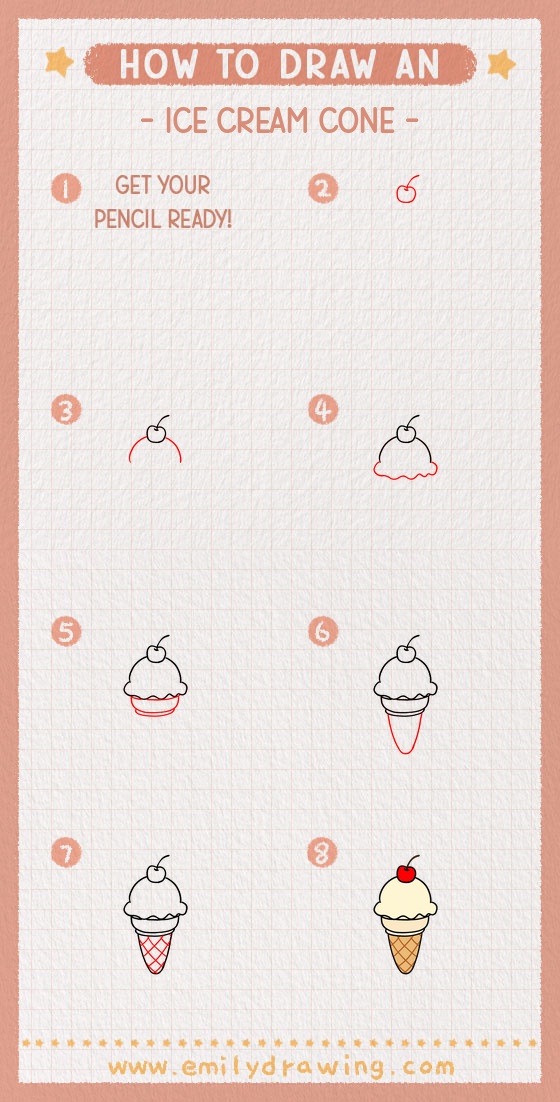
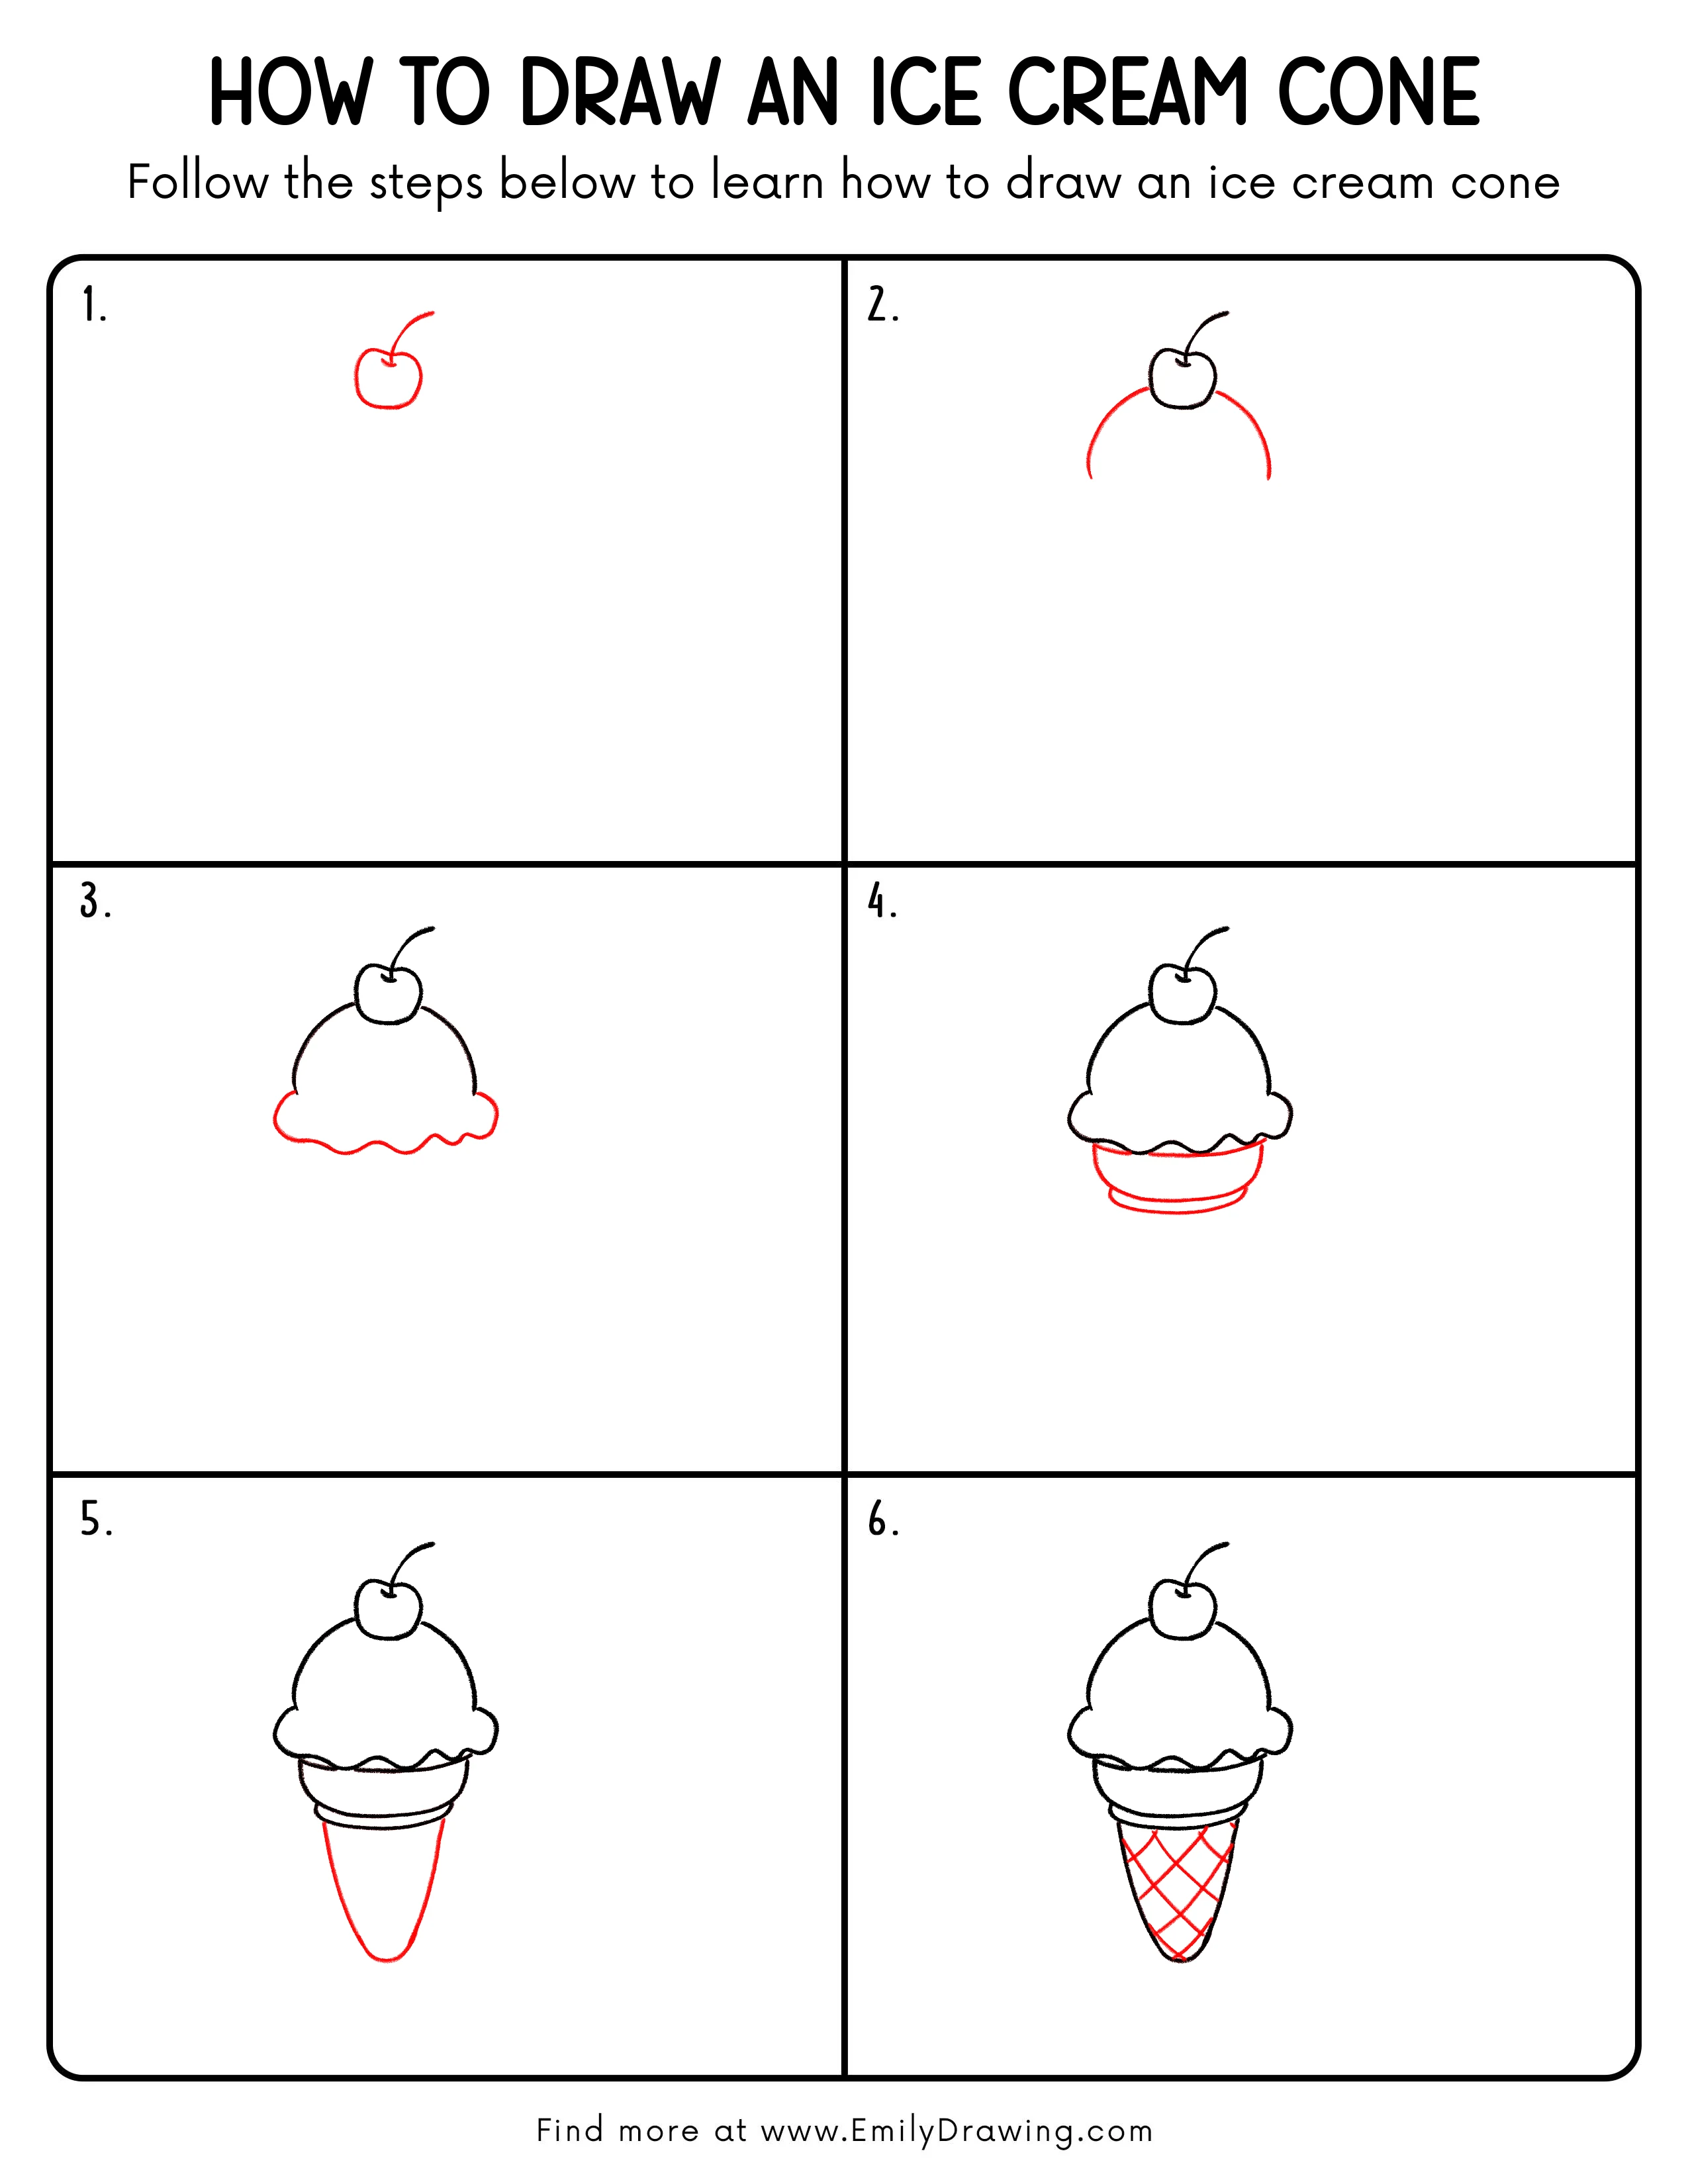
In this easy drawing tutorial, you will learn how to draw an ice cream cone with a cherry on top. This step by step drawing is simple enough for beginners and fun for young artists. Take your time with each shape, and enjoy building the picture one part at a time.
What You Will Need
- A pencil
- An eraser
- Drawing paper
- A black marker or pen
- Coloring tools, such as crayons, markers, or colored pencils
Here are my RECOMMENDED Art Supplies!
- Crayola Coloring Set (140 Pieces – Mega Value!)
- 24 Colored Crayon Set
- A4 Printer Paper
- Crayola Coloring Pencils
- HP Home Printer with Instant Ink!
Time needed:
20 minutes.
Step-by-Step Drawing Guide
Step 1: Draw the Small Top Decoration
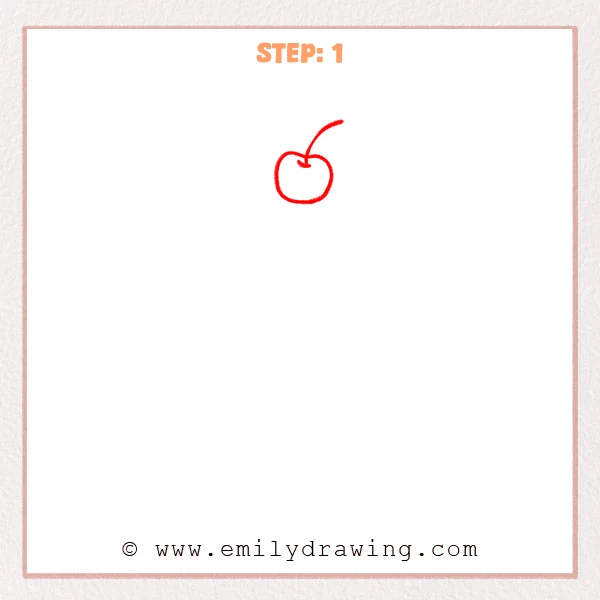
Start with a small rounded fruit shape near the top of the page. Add a thin curved line from the top, like a gently bending stem.
Pro Tip: Keep the small fruit rounded and simple, leaving enough room for the ice cream cone below.
[Alt Text: The first sketch step for an ice cream cone, showing a small cherry-like topping with a curved stem.]
Step 2: Draw the Ice Cream Scoop Arc
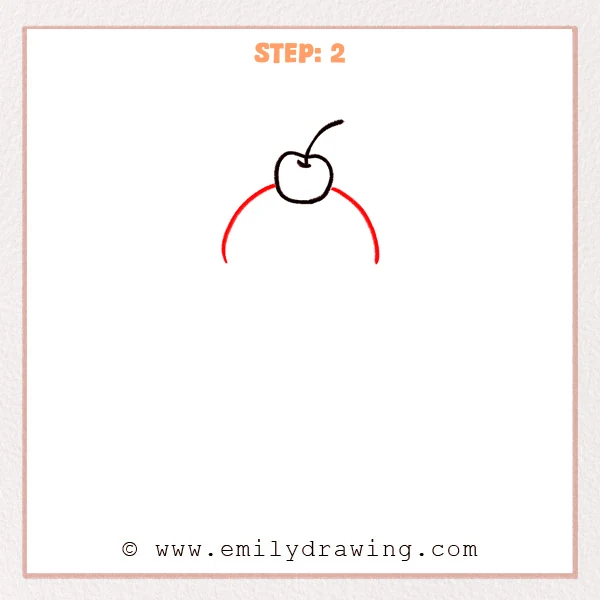
Add a large curved line starting from both sides below the small fruit. Let the arc form a wide half-circle for the outside of the ice cream scoop.
Pro Tip: Keep both sides at a similar height so the ice cream scoop looks balanced.
[Alt Text: The second sketch step for an ice cream cone, adding a wide curved outline beneath the cherry-like topping to begin the ice cream scoop.]
Step 3: Add the Melting Cream Edge
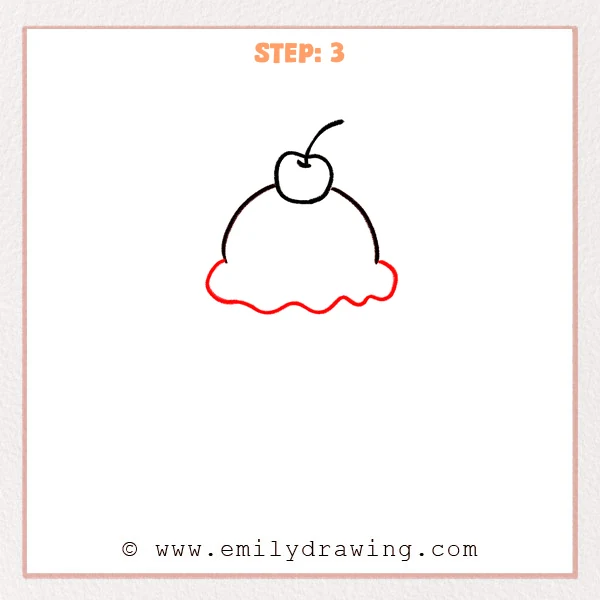
Draw a wavy line across the bottom of the scoop, joining the two side arcs. Make some waves larger and some smaller, like soft ice cream gently drooping down.
Pro Tip: Do not make the waves too even, because natural height changes look more like melting ice cream.
[Alt Text: The third sketch step for an ice cream cone, refining the ice cream scoop with a wavy melting edge beneath the cherry topping.]
Step 4: Draw the Cone Rim and Bottom
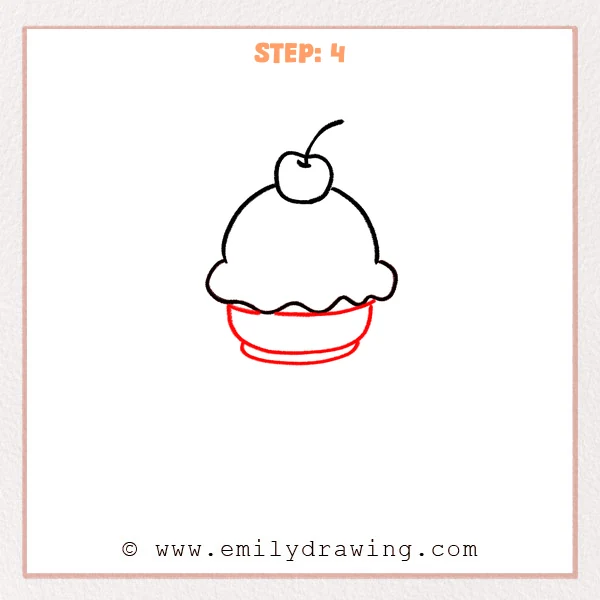
Add a slightly curved horizontal line under the scoop, then draw a rounded lower outline beneath it. Next, add a smaller curved line at the very bottom so the cone section looks more complete and layered.
Pro Tip: Make the lower shape slightly narrower than the scoop so the whole ice cream cone looks stable and cute.
[Alt Text: The fourth sketch step for an ice cream cone, adding the curved rim and rounded lower base beneath the scoop under the cherry topping.]
Step 5: Draw the Main Cone Shape
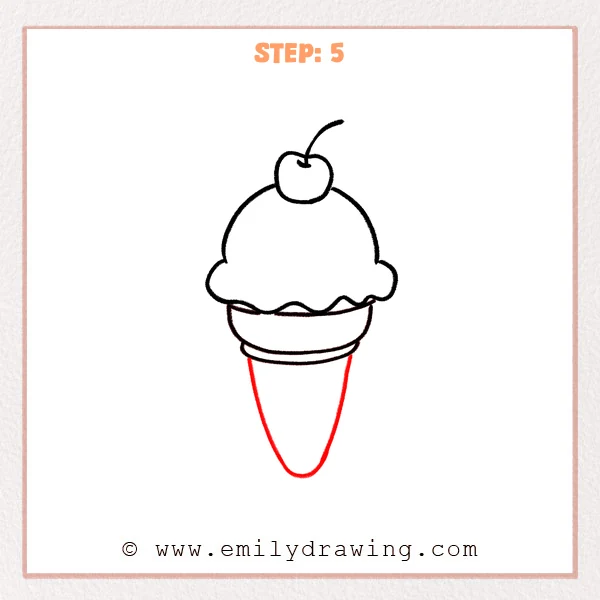
Draw two slanted lines down from the left and right sides of the lower ring, then connect them with a rounded curve at the bottom. This creates a long cone body with a soft, rounded tip.
Pro Tip: Keep the two slanted sides as even as possible so the cone looks neat and balanced.
[Alt Text: The fifth sketch step for an ice cream cone, adding the long tapered cone body below the scoop and cherry.]
Step 6: Add the Cone Waffle Pattern
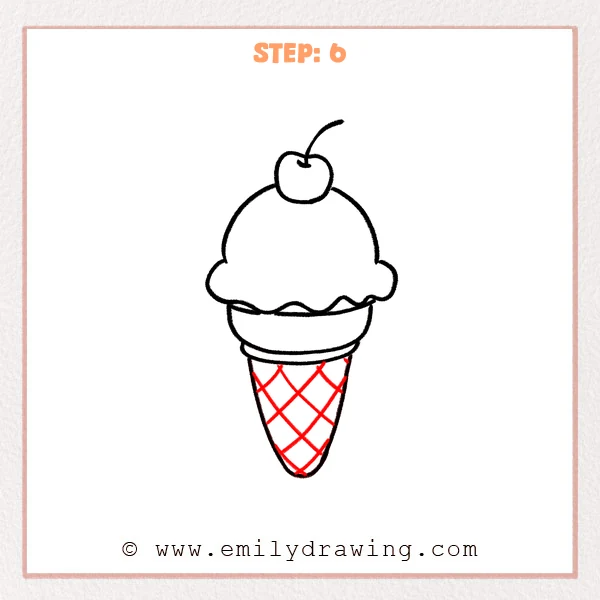
Draw several diagonal lines inside the cone, all leaning in one direction first. Then add another set of diagonal lines in the opposite direction, crossing them to make diamond shapes.
Pro Tip: Let the pattern narrow with the cone, making the diamonds smaller near the bottom.
[Alt Text: The sixth sketch step for an ice cream cone, adding a crisscross waffle pattern inside the cone below the scoop and cherry.]
Step 7: Color in your drawing!
Fun Facts
- Ice cream cones became popular because they are easy to hold and eat.
- Waffle cones often have a crisscross pattern, just like the one in this drawing.
- A cherry on top is a classic decoration for many ice cream desserts.
Pin it now, Draw later!
Now you have learned how to draw an ice cream cone using simple shapes, curved lines, and a waffle pattern. You can trace the final lines with a marker, erase extra pencil marks, and color the scoop, cherry, and cone. Try adding sprinkles, chocolate sauce, or a second scoop to make your drawing even more fun.
Get the FREE Printable Drawing Guide
FREE Download Printable Ice Cream Cone Drawing Tutorial
Frequently Asked Questions
Is this ice cream cone drawing good for beginners?
Yes, this drawing for beginners uses simple curves, soft shapes, and easy diagonal lines. Each step adds one clear part of the ice cream cone.
How can I make my ice cream cone look more colorful?
You can color the cherry red, the scoop pink or white, and the cone light brown. Add sprinkles or syrup for extra detail.
What should I do if my cone is not symmetrical?
That is completely okay. Use light pencil lines first, then adjust the sides before tracing the final outline.