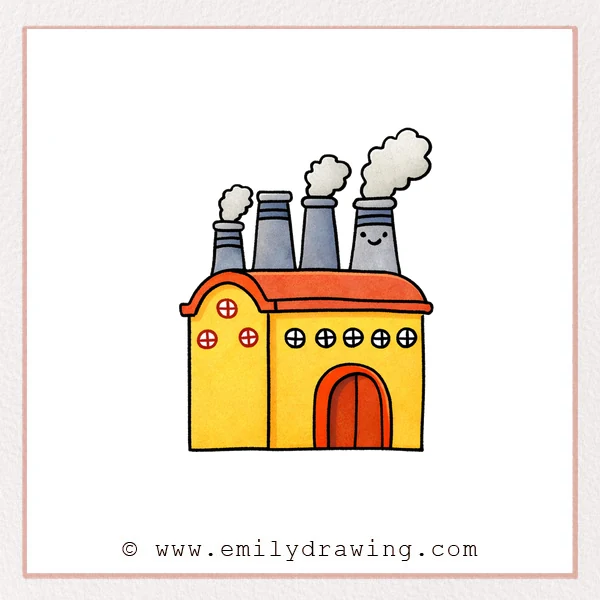
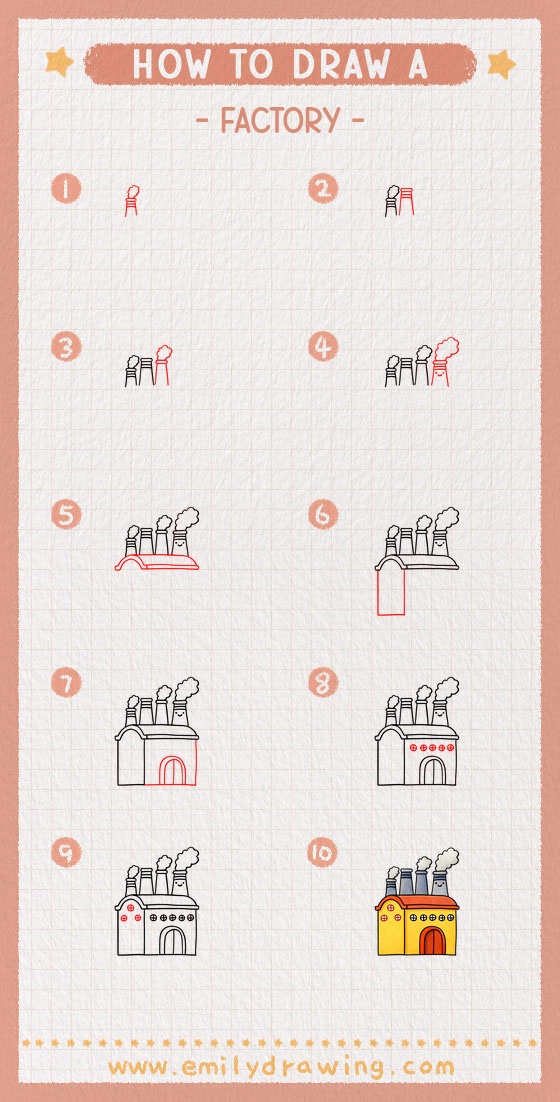
This easy step-by-step drawing tutorial shows you how to draw a factory in a simple and friendly way. You will build the drawing slowly, starting with tall chimneys and ending with windows, doors, and soft smoke shapes. It is a calm drawing for beginners and a nice way to practice simple building forms.
What You Will Need
- Drawing paper
- Pencil
- Eraser
- Black pen or marker
- Crayons or colored pencils
Here are my RECOMMENDED Art Supplies!
- Crayola Coloring Set (140 Pieces – Mega Value!)
- 24 Colored Crayon Set
- A4 Printer Paper
- Crayola Coloring Pencils
- HP Home Printer with Instant Ink!
Time needed:
21 minutes.
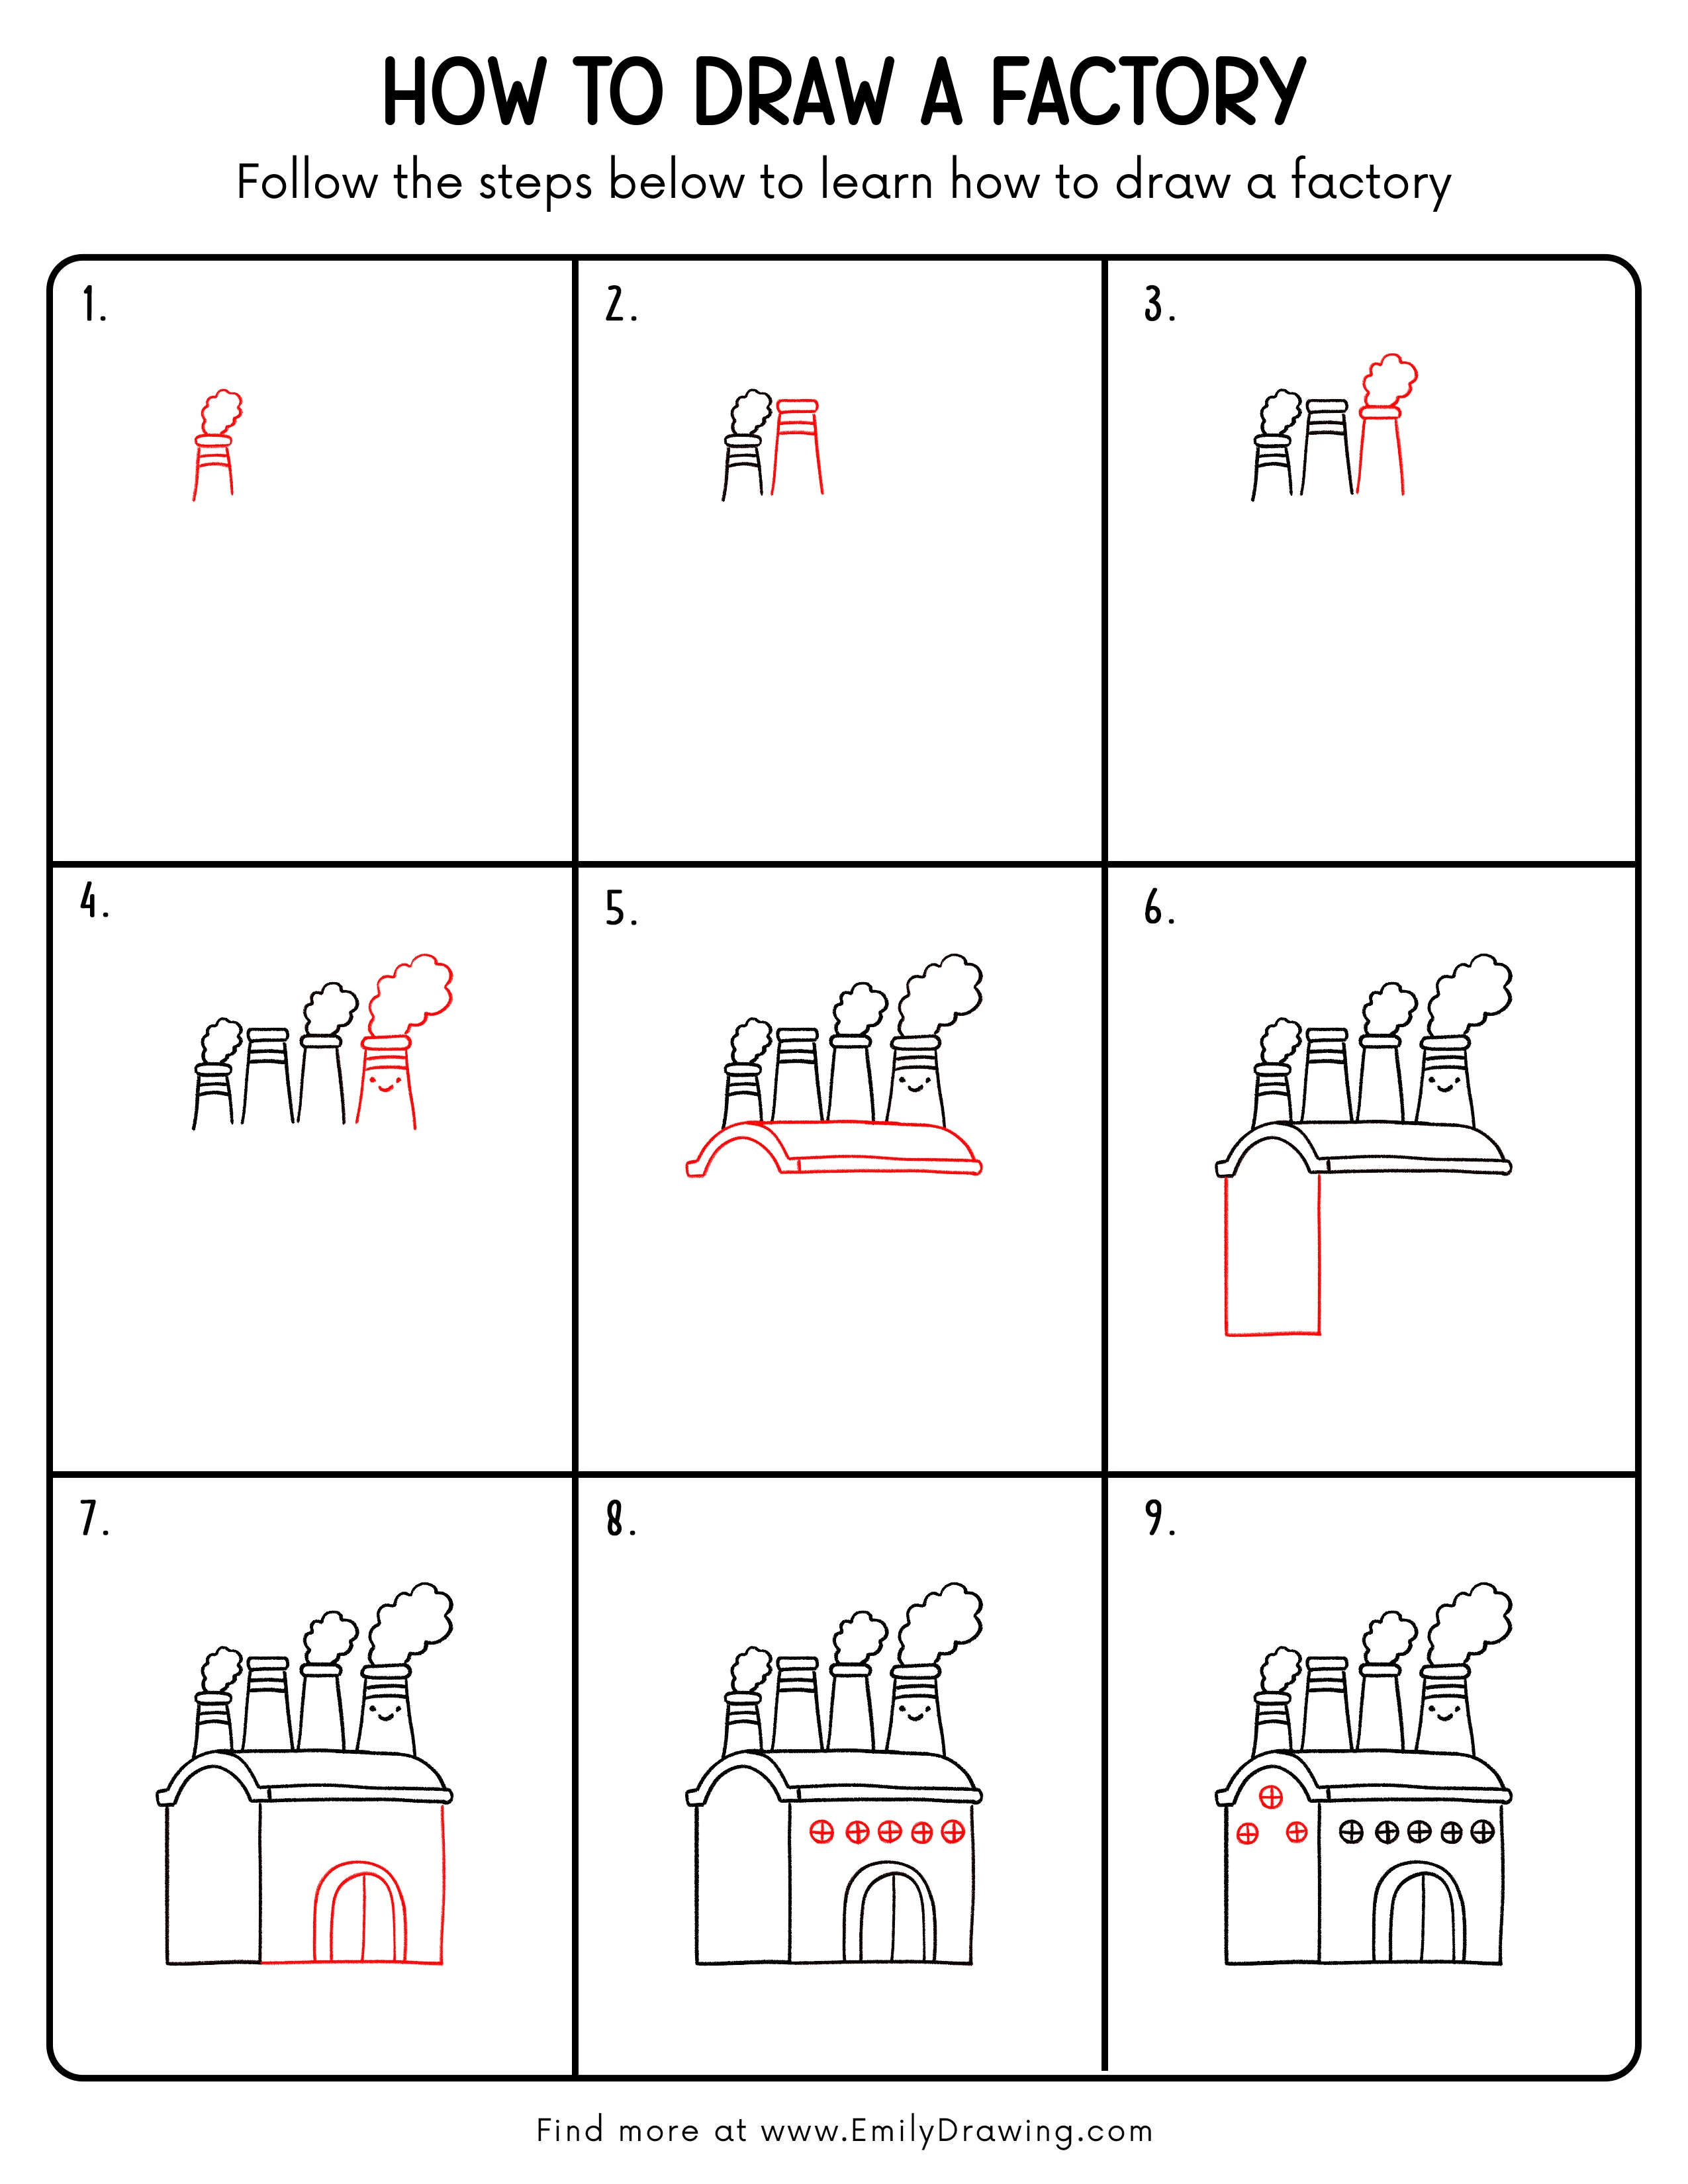
Step-by-Step Drawing Guide
Step 1: Draw the First Chimney

Start with a tall, narrow chimney a little left of center. Add a flat oval at the top and a soft puff of smoke rising from it.
Pro Tip: Let the chimney sides open slightly outward so it feels steady.
Step 2: Add a Second Larger Chimney
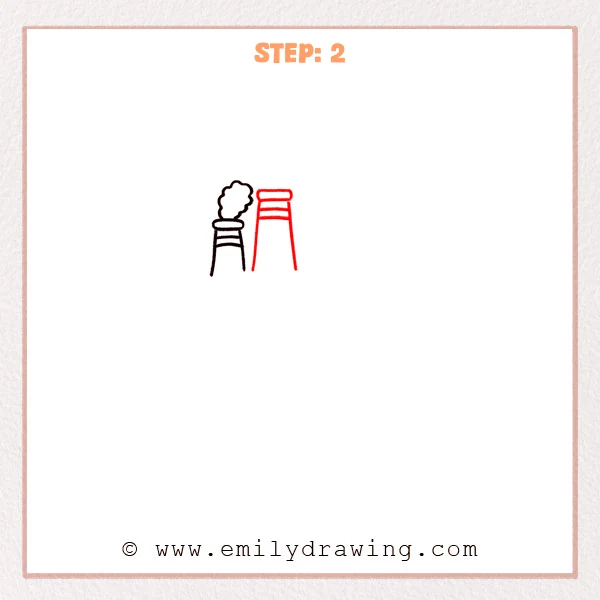
Place a second chimney to the right of the first one. Make it taller and wider, then add the same oval top and two curved bands across the stack.
Pro Tip: A clear height difference helps the two chimneys feel balanced.
Step 3: Add a Third Tall Chimney

Sketch another smokestack to the right of the second one. Make this one even taller, and add a larger puff of smoke above it.
Pro Tip: Slightly widening the tallest chimney helps it stand out.
Step 4: Add More Smoke and a Friendly Face
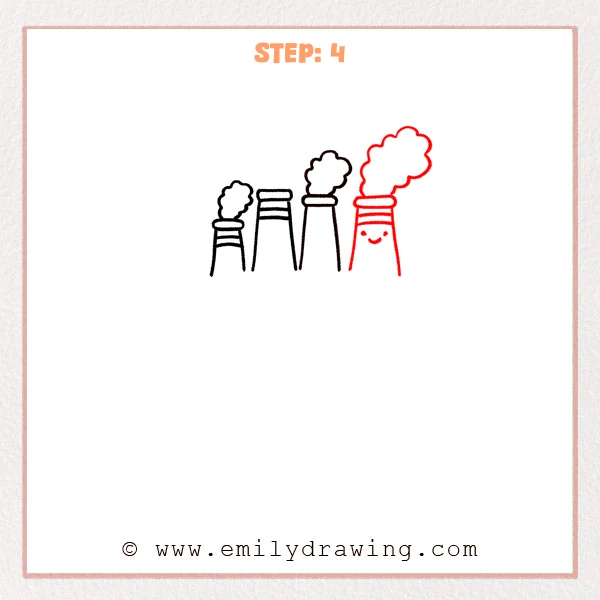
Place a puff of smoke above the next chimney so the row looks more complete. Then add two small eyes and a curved smile on the tallest chimney for a cute touch.
Pro Tip: Keep the face small and centered so it looks neat.
Step 5: Draw the Main Front Building
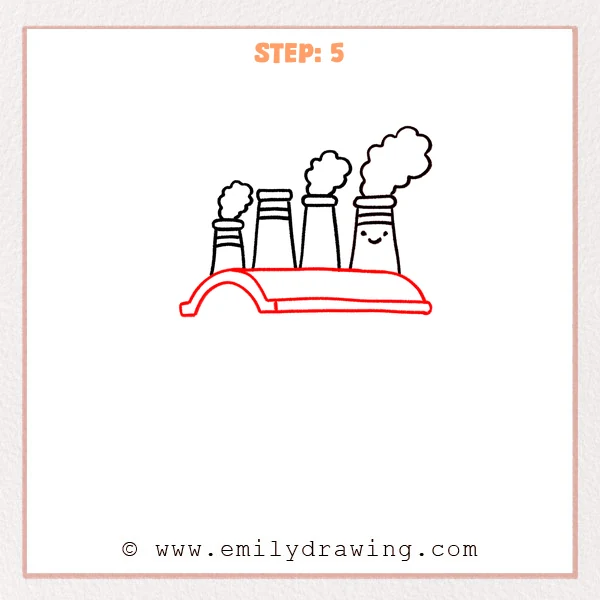
Start a long rounded building beneath the chimneys. Add a curved section on the left so the factory begins to look like one connected structure.
Pro Tip: A smooth top edge will make the chimneys look neatly placed.
Step 6: Add the Tall Left Wall
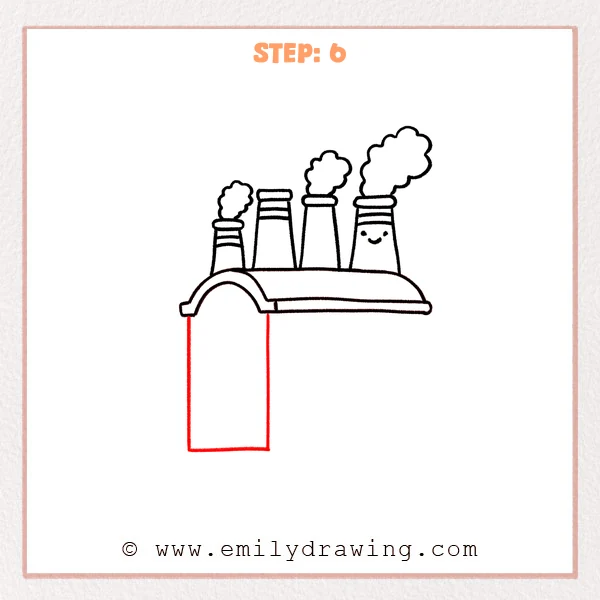
From the curved left section, extend two straight lines downward to make a tall rectangular wall. Close the bottom with a horizontal line.
Pro Tip: Keep the side lines parallel for a tidy wall shape.
Step 7: Add the Right Building and Door
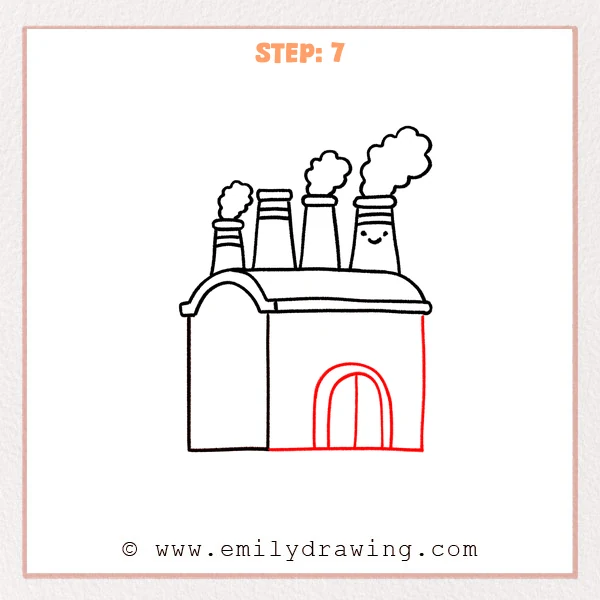
Draw a large rectangular wall under the right side of the roof. Add a tall arched doorway in the center with an inner frame and a middle line.
Pro Tip: Place the doorway near the center to keep the front balanced.
Step 8: Add a Row of Round Windows
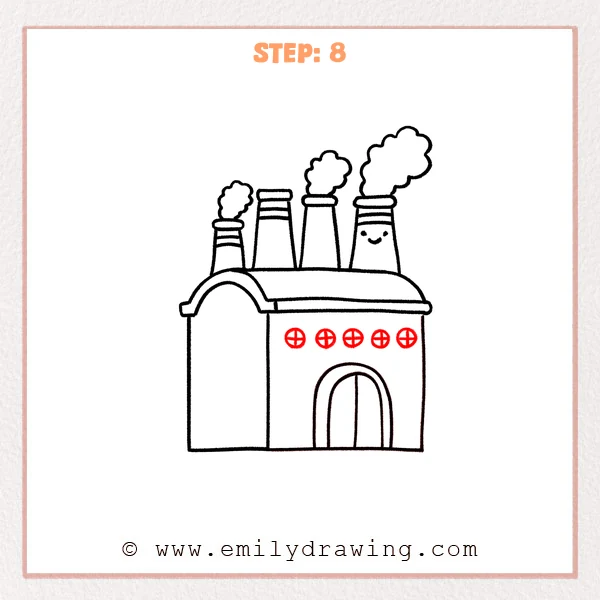
Sketch a neat row of small circular windows across the upper part of the right building. Add one vertical line and one horizontal line inside each window.
Pro Tip: Try to keep the windows close in size and spacing.
Step 9: Add Windows to the Left Building
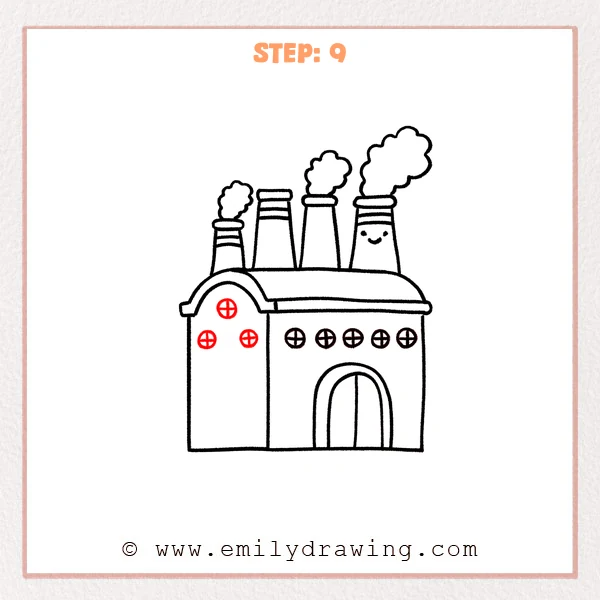
Place three small round windows on the tall left section. Put one higher up and two below it, then add simple cross lines inside each one.
Pro Tip: Mark the window spots lightly first to help the circles line up well.
Step 10: Color in your drawing!
Fun Facts
- Many factories have tall chimneys to guide smoke high into the air.
- Factory buildings often use simple shapes like rectangles, arches, and cylinders.
- Drawing buildings is a good way to practice straight lines and balanced shapes.
Pin it now, Draw later!
Now your easy factory drawing is complete, with tall smokestacks, soft smoke, round windows, and a large front door. You can color the walls gray, brown, or blue, and use lighter shades on one side for simple shading. A common beginner mistake is making the windows uneven, so take your time with spacing. Keep practicing this step-by-step drawing and try more easy drawing tutorials for beginners.
Get the FREE Printable Drawing Guide
FREE Download Printable Factory Drawing Tutorial
Frequently Asked Questions
Is this factory drawing good for beginners?
Yes, it uses simple shapes and clear steps, so it works well for beginners.
How can I make my factory drawing look better?
Try keeping your lines neat and your windows evenly spaced. Light coloring and soft shading can also help.
Can I add more details to the factory?
Yes, you can add extra doors, pipes, clouds, or more chimneys once the main shape is finished.