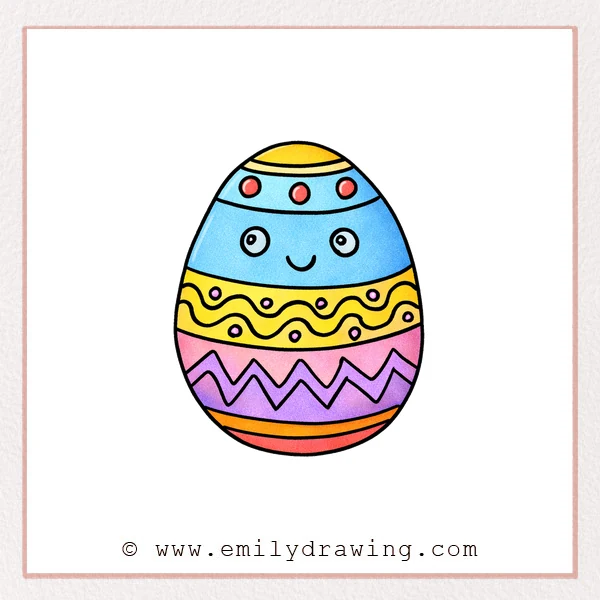
Drawing a cheerful Easter egg is a calm and enjoyable activity for beginners. This easy step by step drawing tutorial will show you how to build a cute Easter egg design with simple shapes, playful patterns, and a friendly face.
What You Will Need
- Drawing paper
- Pencil
- Eraser
- Black pen or marker
- Colored pencils or crayons
Here are my RECOMMENDED Art Supplies!
- Crayola Coloring Set (140 Pieces – Mega Value!)
- 24 Colored Crayon Set
- A4 Printer Paper
- Crayola Coloring Pencils
- HP Home Printer with Instant Ink!
Time needed:
23 minutes.
Step-by-Step Drawing Guide
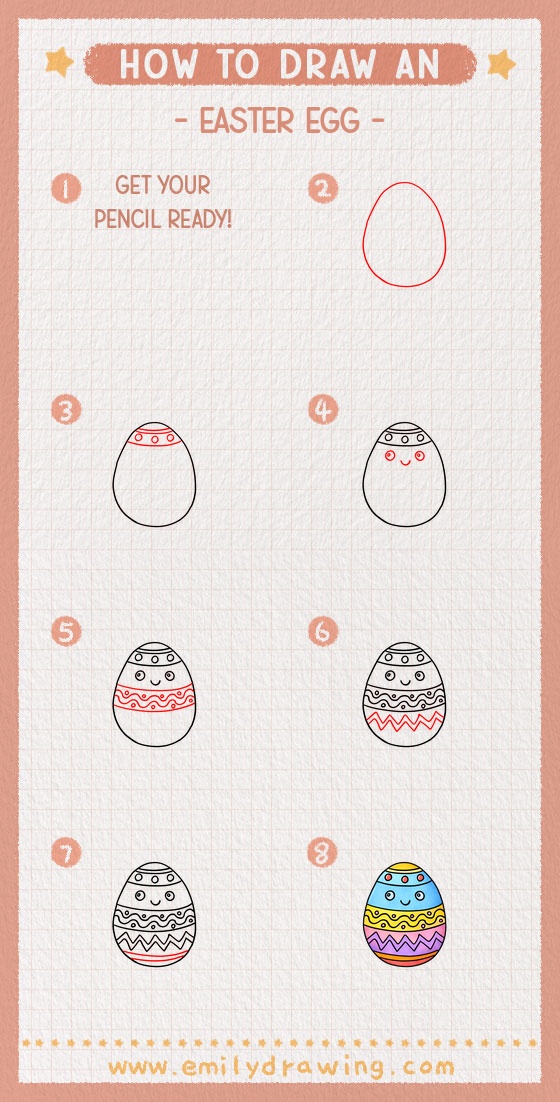
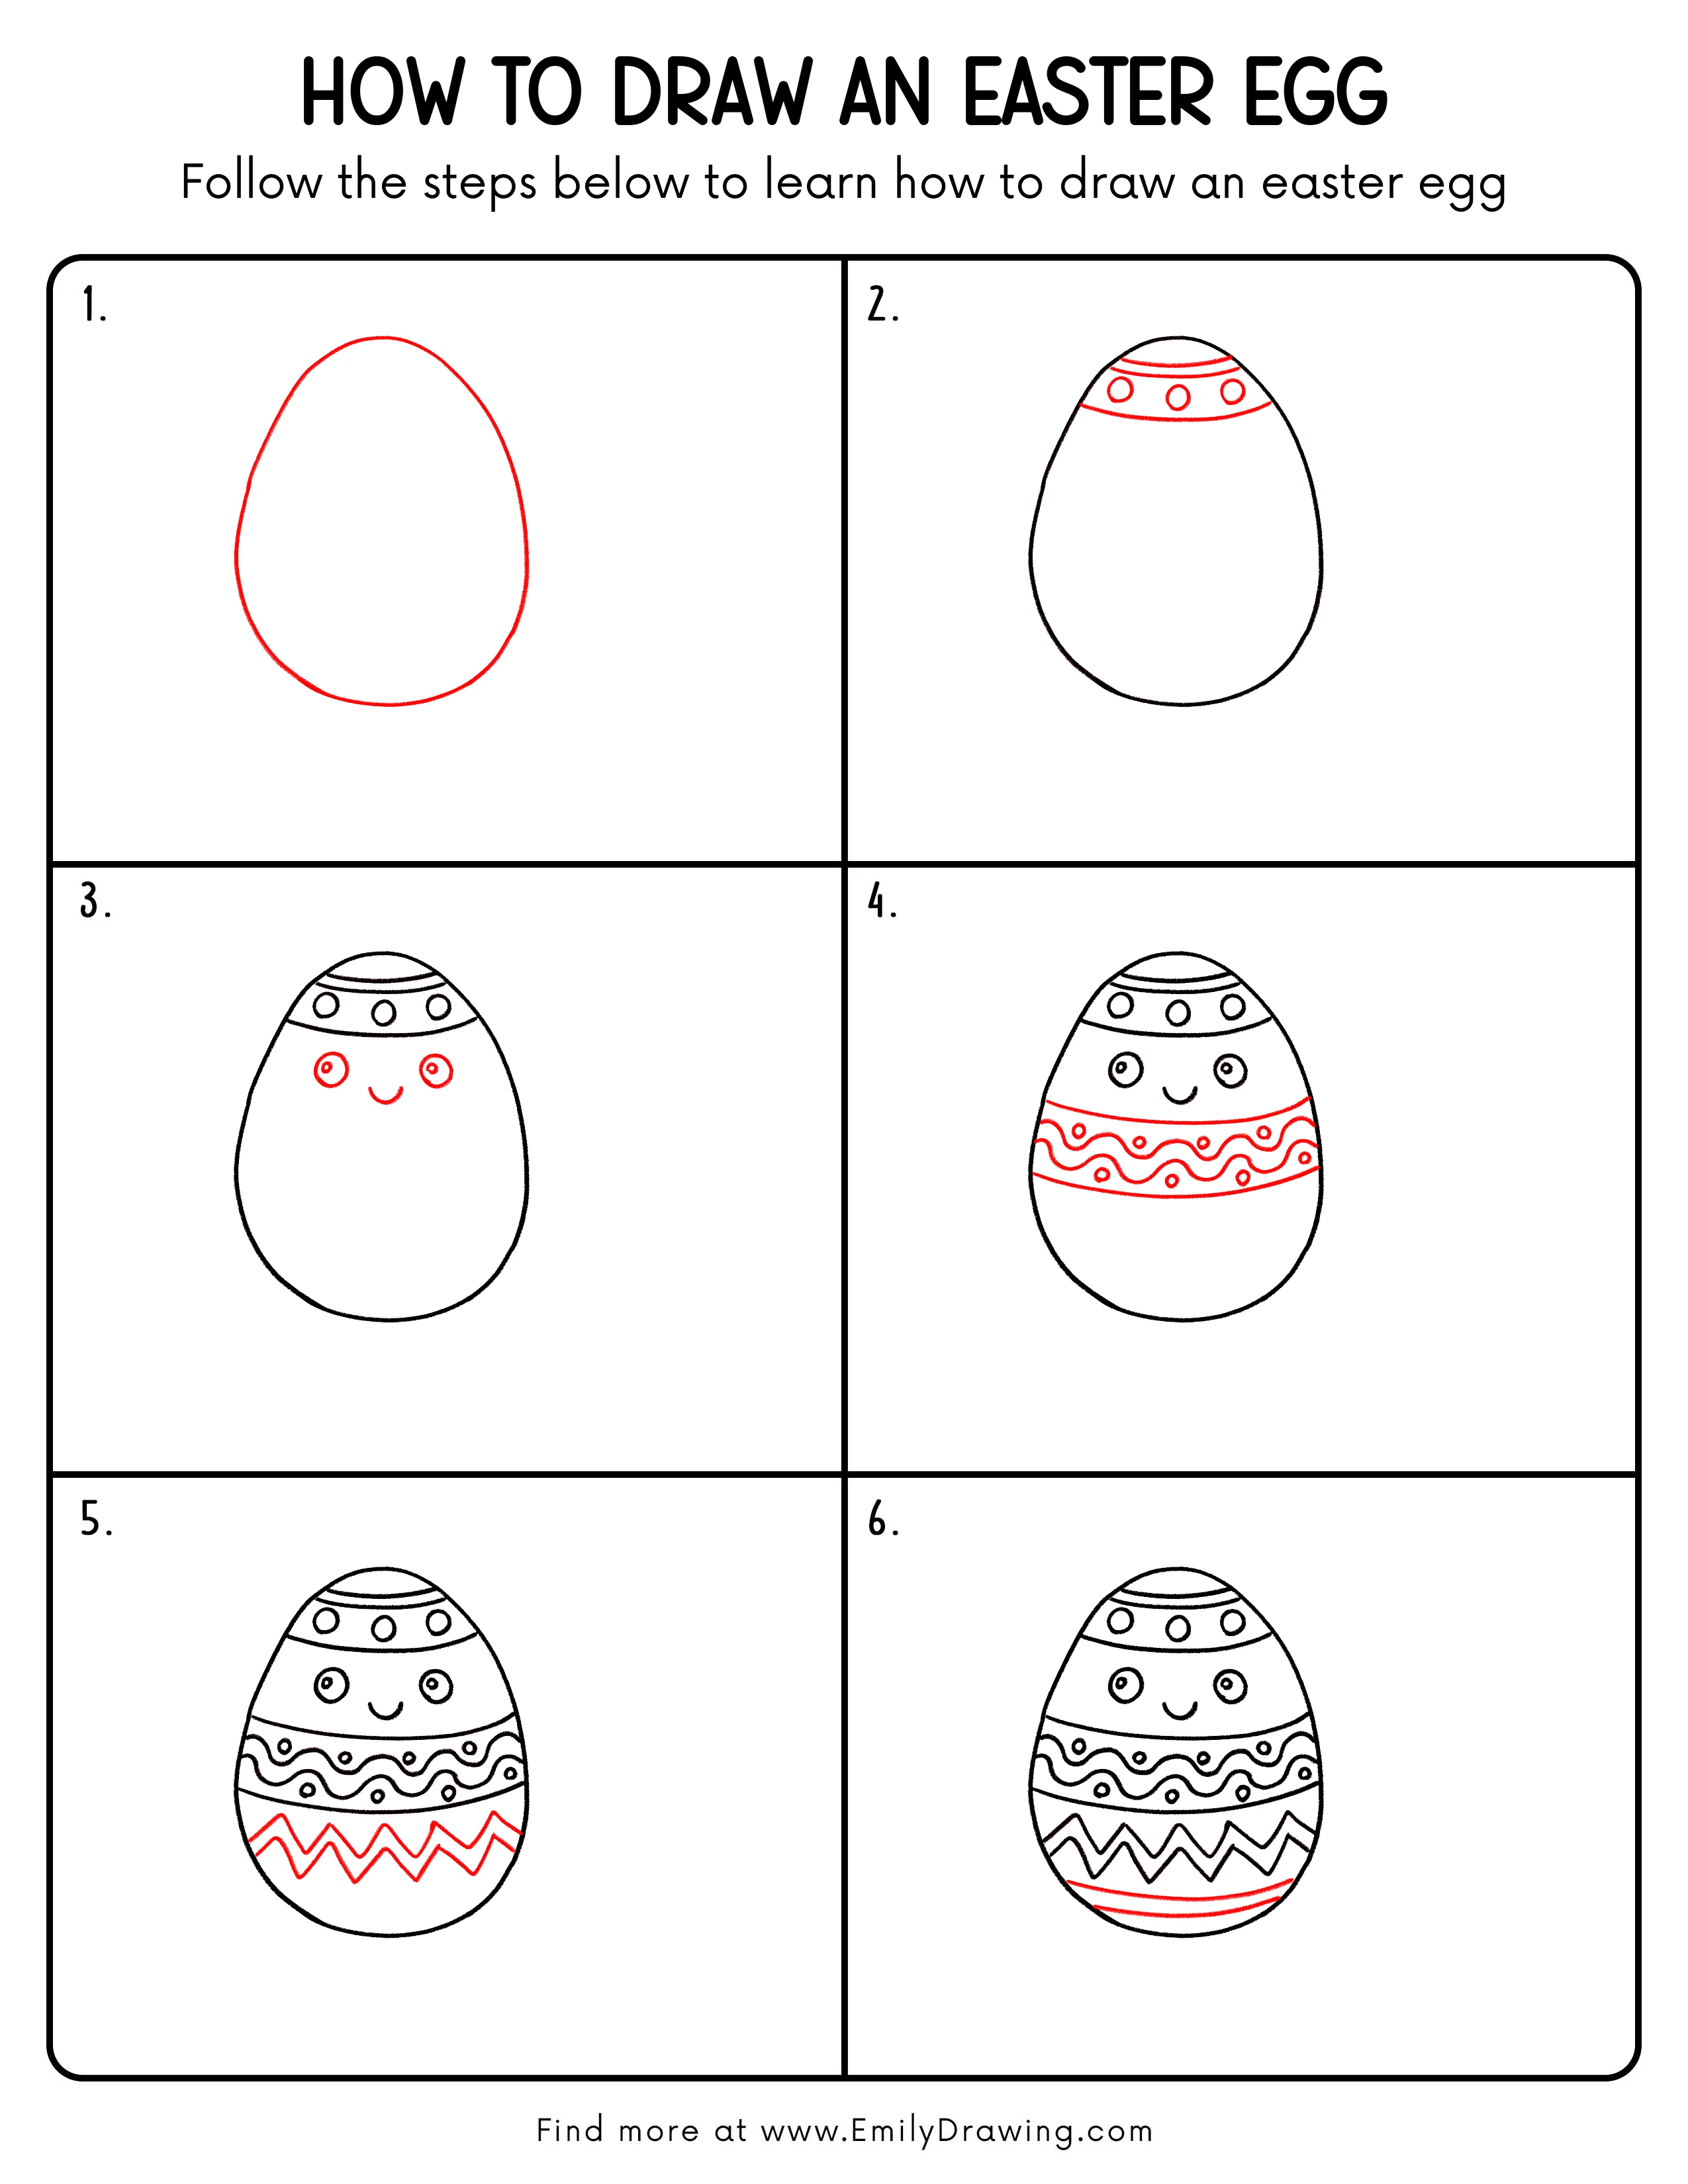
Step 1: Draw the Basic Egg Shape
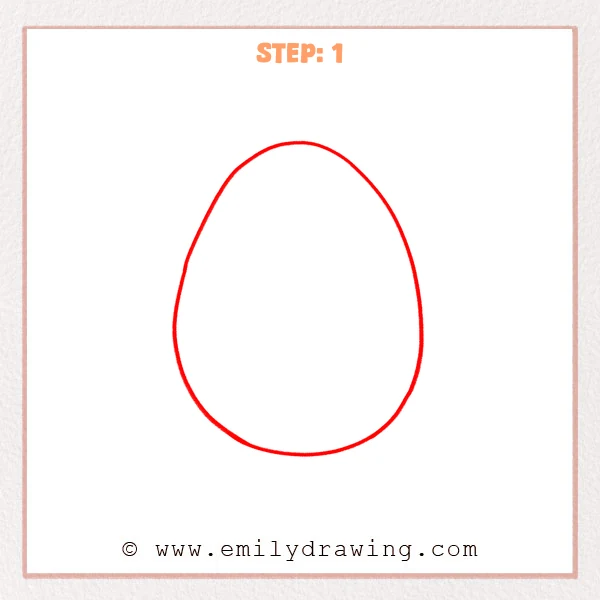
Start with a large egg outline in the middle of the page. Keep the top nicely rounded and the bottom soft as well, so the shape feels like a gentle Easter egg instead of a sharp oval.
Pro Tip: Use light lines at first so it is easier to adjust the balance on both sides.
Step 2: Add the Top Decorative Band
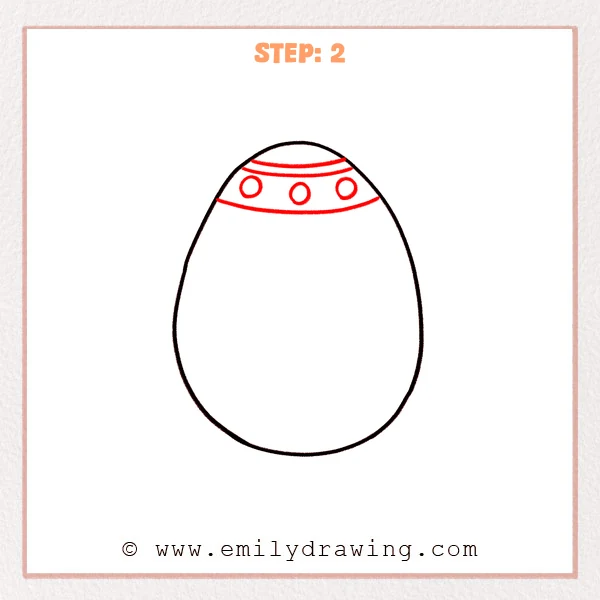
Add a curved decorative band across the upper part of the Easter egg, letting it follow the round surface naturally. Start with two slim curved lines near the top, then place a wider curved line below them and add three small circles across the middle for simple decoration.
Pro Tip: Let each curved line dip gently with the egg shape so the pattern feels more natural on the rounded surface.
Step 3: Add a Cute Face
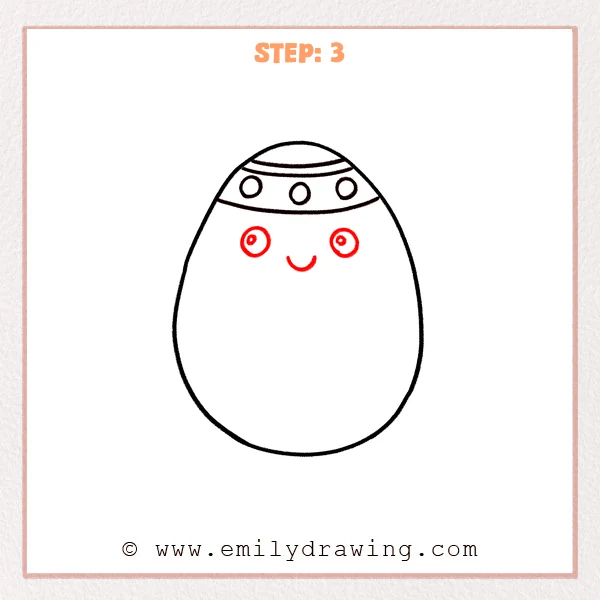
Add a simple face in the middle of the Easter egg to give it a sweet and cheerful look. Place one large round eye on each side, add a tiny highlight inside each one, and then draw a small curved smile below the center.
Pro Tip: Keep the eyes on the same level so the face looks more balanced and friendly.
Step 4: Add the Middle Pattern Band
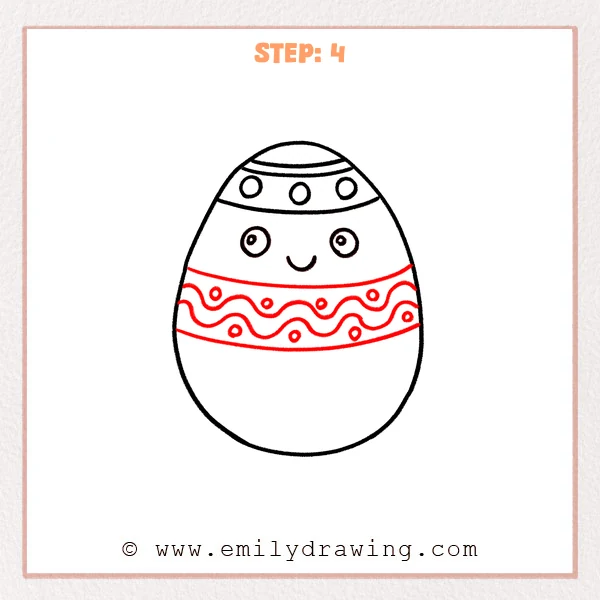
Add a wide decorative section below the face to give the Easter egg more detail. Start with two curved border lines, then place two wavy lines across the middle and scatter small circles between them to make the band feel playful and balanced.
Pro Tip: Keep the waves evenly spaced so the whole pattern band looks neat and steady.
Step 5: Add the Bottom Zigzag Pattern
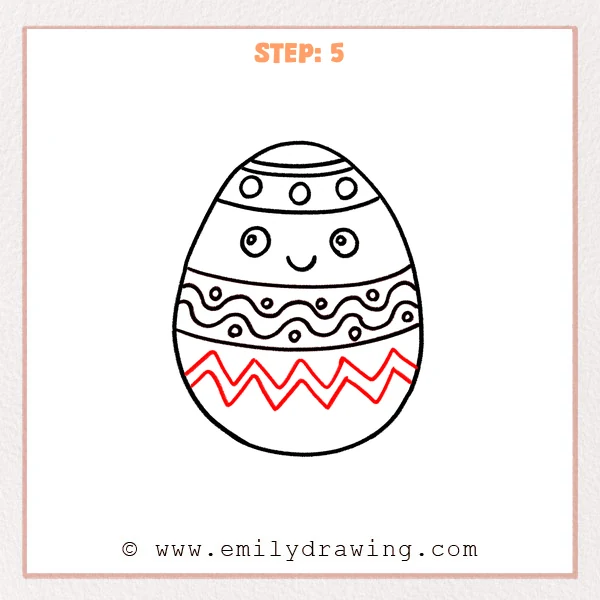
Add a pointed zigzag band across the lower part of the Easter egg to create more variety near the bottom. Sketch one row of connected peaks and valleys under the patterned section, then add a second similar zigzag line inside it to build a neat double-layer design.
Pro Tip: Keep the peaks and valleys close in size so the zigzag band looks even and tidy.
Step 6: Add the Bottom Curved Stripes
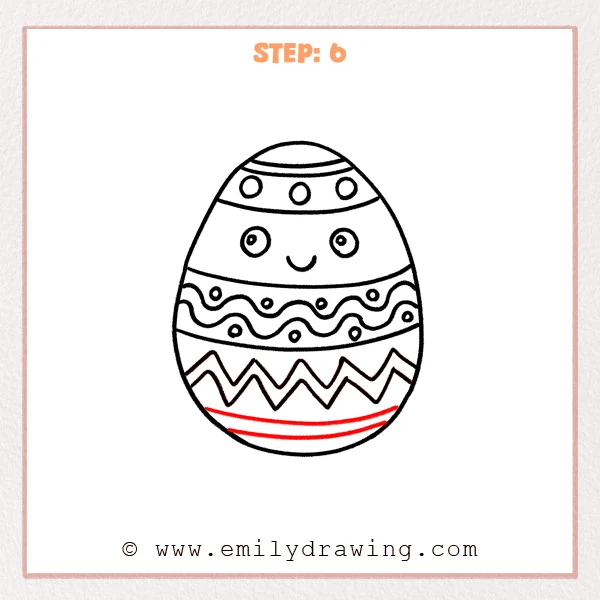
Add two soft curved stripes near the bottom of the Easter egg to finish this lower section. Let both lines follow the round shape of the egg gently, so they contrast nicely with the zigzag pattern above and make the design feel more complete.
Pro Tip: Keep the space between the curved lines even so the bottom decoration looks clean and balanced.
Step 7: Color in your drawing!
Fun Facts
- Easter eggs are often decorated with bright colors and simple patterns.
- Egg designs can include dots, stripes, waves, and zigzags.
- Many artists begin an easy drawing tutorial with one basic shape.
Pin it now, Draw later!
You now have a complete Easter egg drawing built step by step from a simple outline. Add color to each pattern section, and try light shading along one side to give the egg a rounder look. One common beginner mistake is making the decorations uneven from side to side, so take your time and compare both halves as you work. Keep practicing this drawing for beginners, and try creating more Easter egg designs with your own patterns.
Get the FREE Printable Drawing Guide
FREE Download Printable Easter Egg Drawing Tutorial
Frequently Asked Questions
How do I make my Easter egg look more even?
Start with light sketch lines and check both sides before tracing the final outline.
What colors should I use for an Easter egg drawing?
You can use pastel colors, bright spring colors, or any color combination you enjoy.
Is this step by step drawing good for beginners?
Yes, this easy drawing tutorial uses simple shapes and clear decorations that are great for beginners.