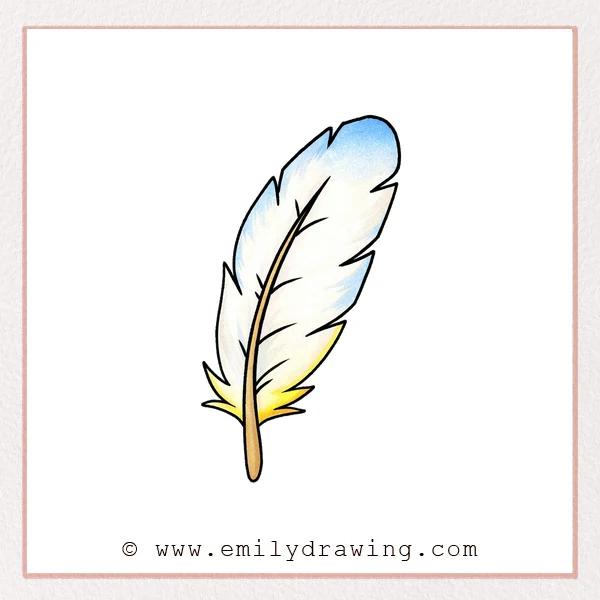
Learning how to draw a feather can be a calm and enjoyable activity. This easy drawing tutorial breaks the process into small, gentle steps, so beginners can build the shape slowly and confidently. With a few simple lines, you can create a soft feather that looks light, balanced, and natural.
What You Will Need
- Pencil
- Eraser
- Black pen or marker
- Paper
- Colored pencils or crayons
Here are my RECOMMENDED Art Supplies!
- Crayola Coloring Set (140 Pieces – Mega Value!)
- 24 Colored Crayon Set
- A4 Printer Paper
- Crayola Coloring Pencils
- HP Home Printer with Instant Ink!
Time needed:
21 minutes.
Step-by-Step Drawing Guide
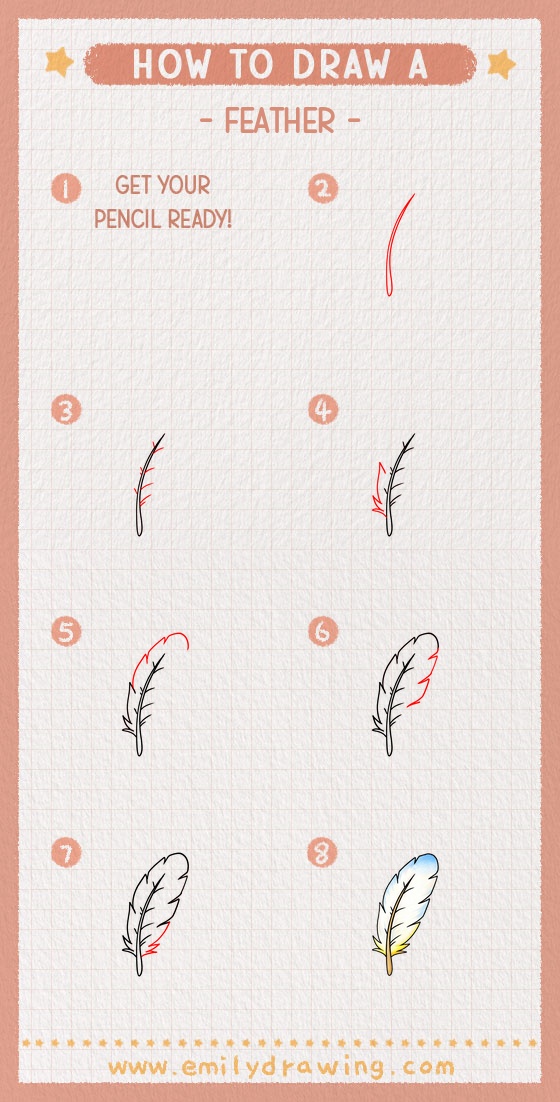
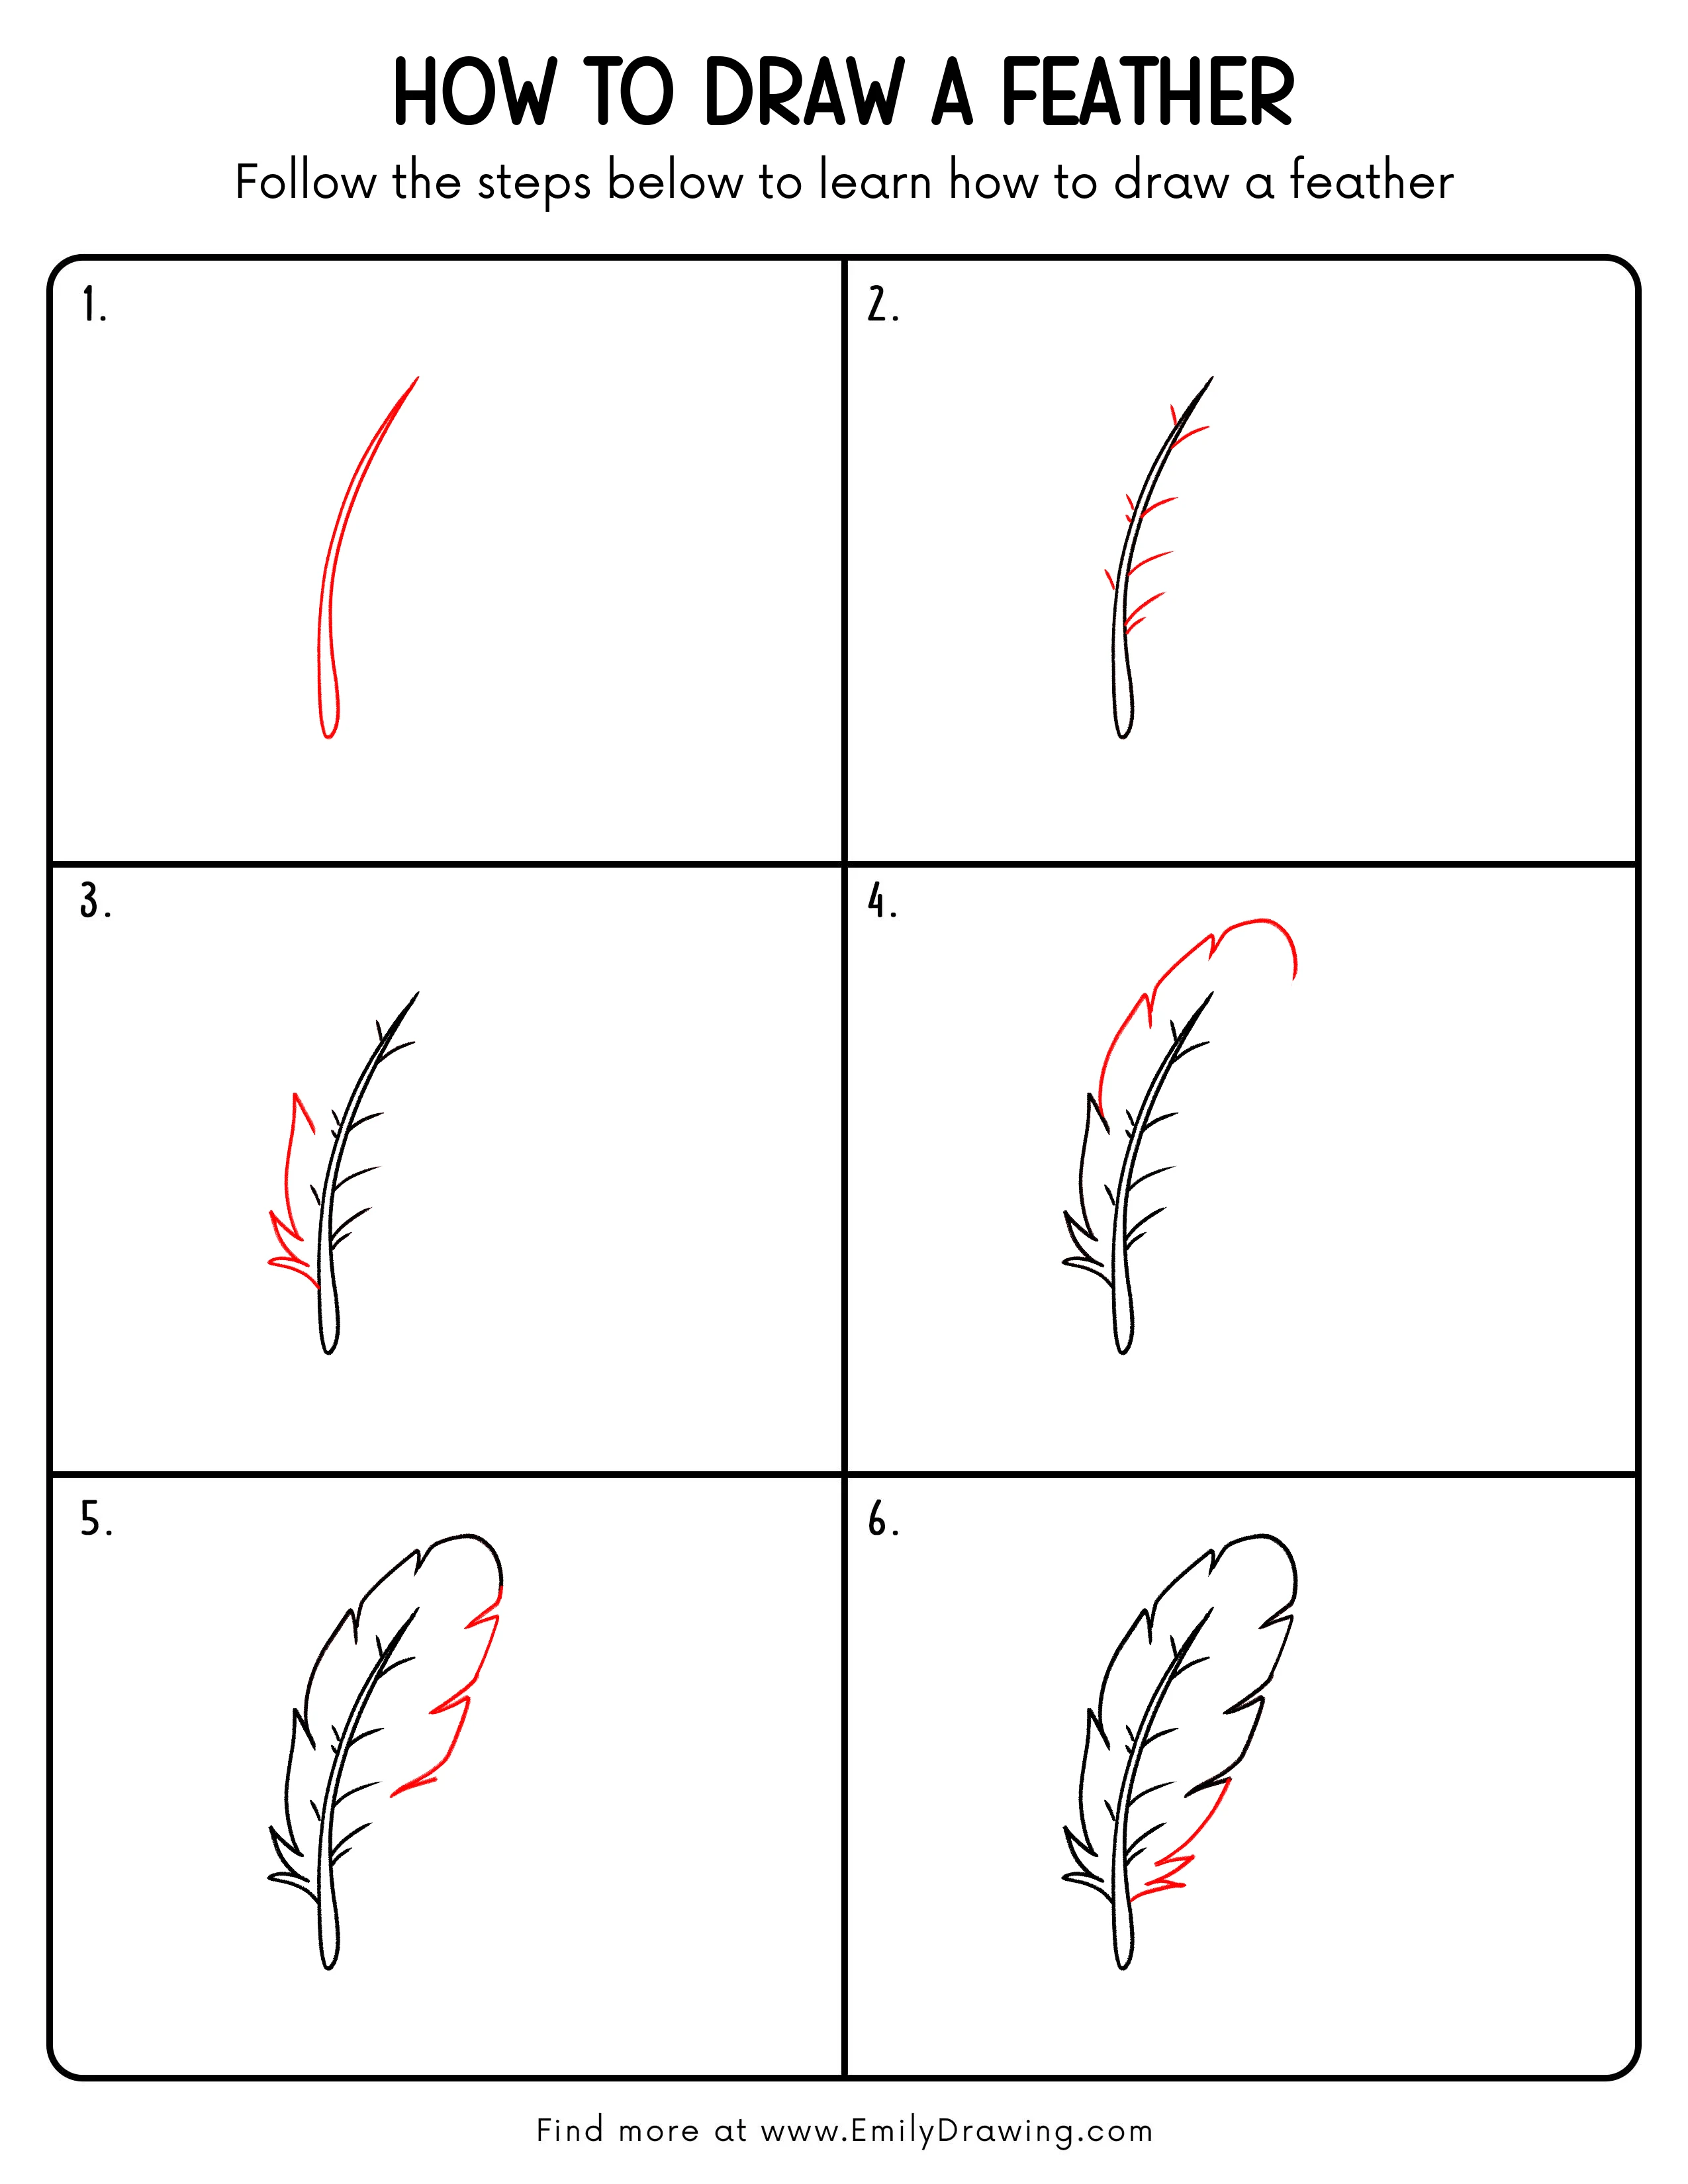
Step 1: Sketch the Basic Feather Shape
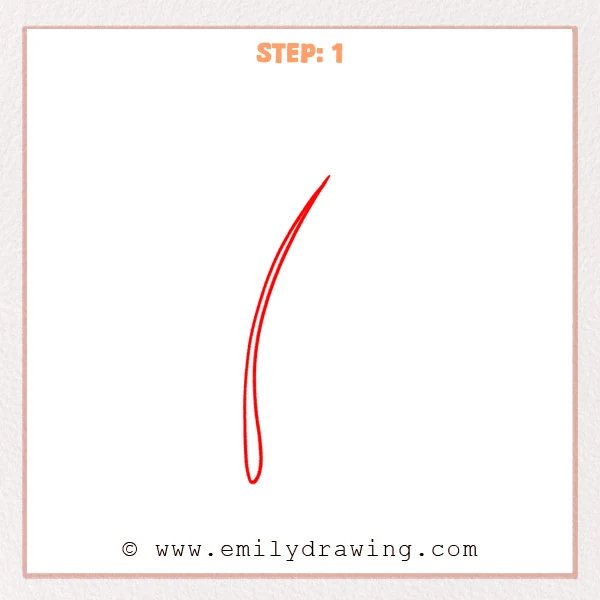
Start near the lower part of the page with a long, gentle curve rising upward. Add a second curved line close beside it, then let the bottom round off softly to create a slim feather outline. This central shape will guide the rest of your drawing.
Pro Tip: Keep the gap between the two lines gentle and even so the feather looks light and smooth.
Step 2: Add the Small Feather Barbs
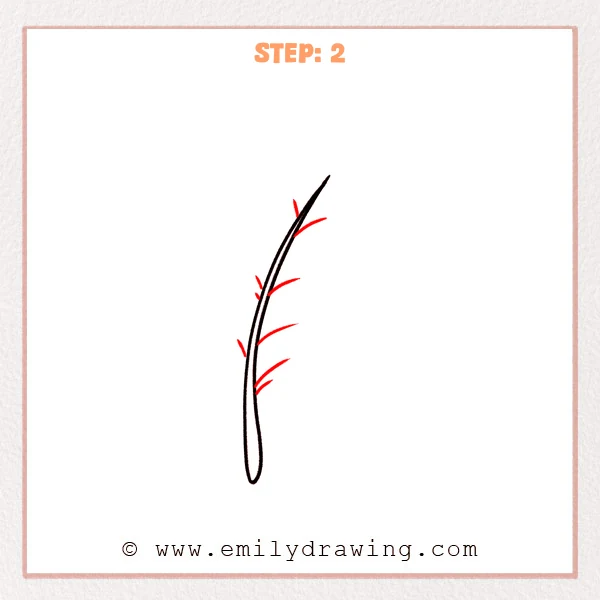
Along one side of the feather, add a few short curved strokes reaching outward. Let each one follow the direction of the main shape so the feather begins to look soft and layered. These small marks help suggest texture without filling the whole feather yet.
Pro Tip: Let the small barbs vary a little in length so the feather feels more natural.
Step 3: Add the Longer Feather Barbs on the Other Side
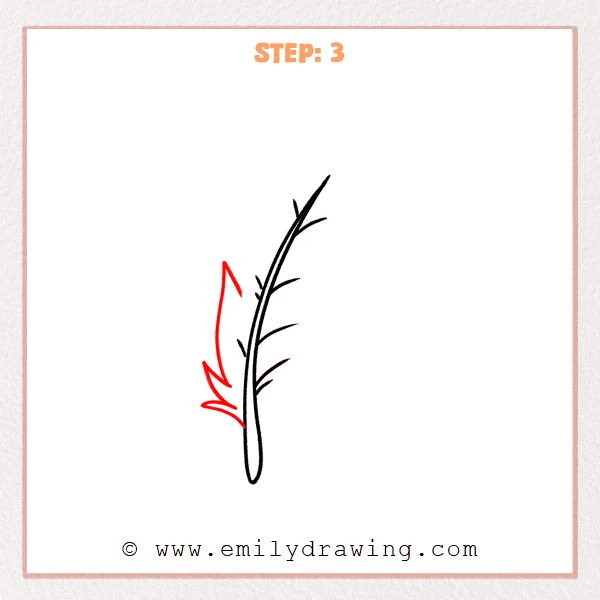
Now add a few longer curved strokes on the opposite side to build out the feather. Start with an open shape near the lower part, then continue upward with a longer barb so both sides begin to feel light and balanced. This gives the feather a fuller look.
Pro Tip: Let this side extend a little farther so the feather has a softer, fuller look.
Step 4: Shape the Upper Feather Edge
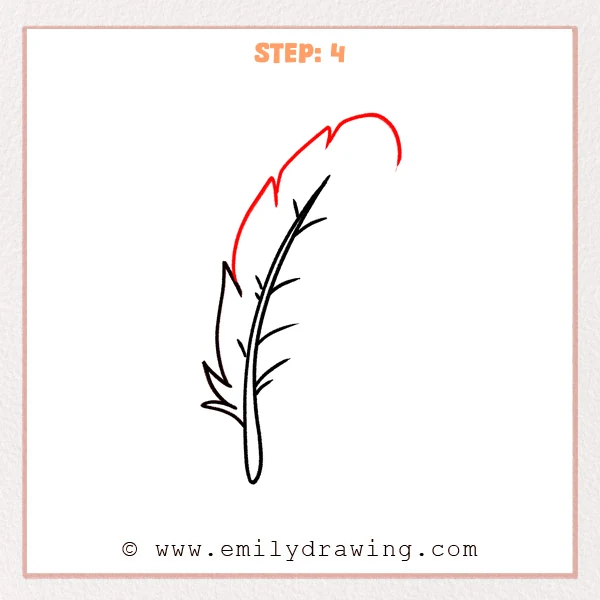
At this stage, add a broader outer curve along the upper part of the feather. Let the line rise gently and round over at the top so the feather starts to feel full, soft, and complete. Keep the edge flowing rather than stiff.
Pro Tip: Keep the upper outer curve smooth and relaxed so the feather feels light and natural.
Step 5: Add the Jagged Edge on the Right Side
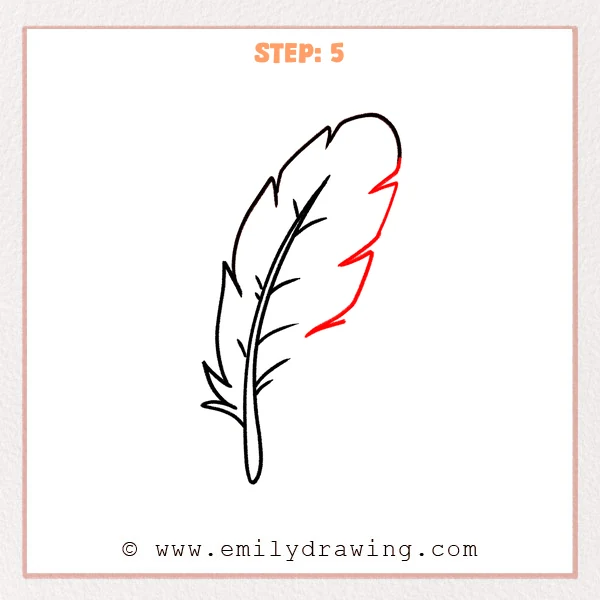
Now continue the outer edge down the right side with a few gentle points and dips. Let each section move outward slightly, then curve back in, so the feather looks soft, airy, and naturally uneven. This kind of edge helps the drawing feel more realistic.
Pro Tip: Keep the small points soft rather than sharp so the feather feels more natural.
Step 6: Finish the Lower Right Edge
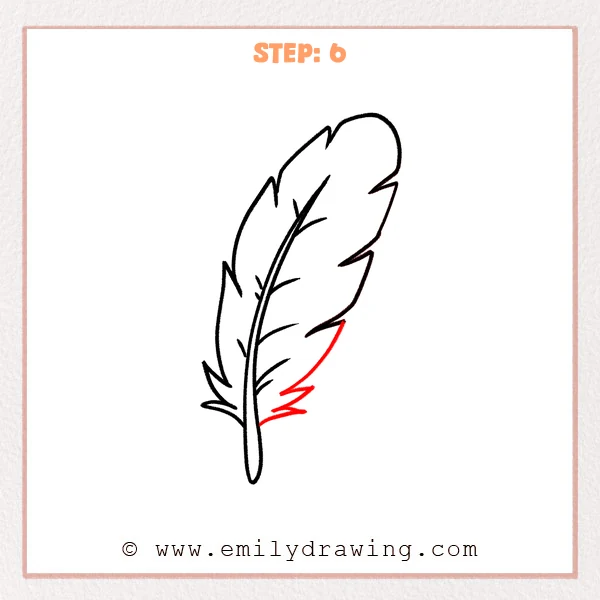
Now connect the open space on the lower right side with a soft outer curve. Let it move outward and then return inward, adding a few small points near the bottom so the feather looks light and complete. At this point, the full feather shape is in place.
Pro Tip: Keep the lower edge a little shorter than the upper area so the feather stays balanced.
Step 7: Color in your drawing!
Fun Facts
- Feathers help birds fly, stay warm, and protect their bodies.
- Not all feathers are the same shape. Some are long and smooth, while others are fluffy.
- Artists often study feathers to practice soft lines and gentle texture.
Pin it now, Draw later!
You have now completed a simple step by step drawing of a feather. Start with the center shaft, then build each side little by little until the whole shape feels soft and balanced.
For coloring, try light gray, cream, brown, or pale blue. You can also add soft shading along the center shaft and near the edges to give the feather more depth.
One common beginner mistake is making every edge too sharp or even. Small changes in length and curve will make the feather look more natural.
Keep practicing this easy drawing tutorial, and try drawing more feathers in different sizes and shapes to build your confidence.
Get the FREE Printable Drawing Guide
FREE Download Printable Feather Drawing Tutorial
Frequently Asked Questions
Is this feather drawing good for beginners?
Yes. This drawing for beginners uses simple curves and small details, so it is easy to follow step by step.
Do I need to draw every feather barb?
No. You only need enough lines to suggest the texture and shape. A few well-placed strokes can look very effective.
How can I make my feather look more realistic?
Use softer curves, vary the edge shapes slightly, and add light shading near the center and lower edges.