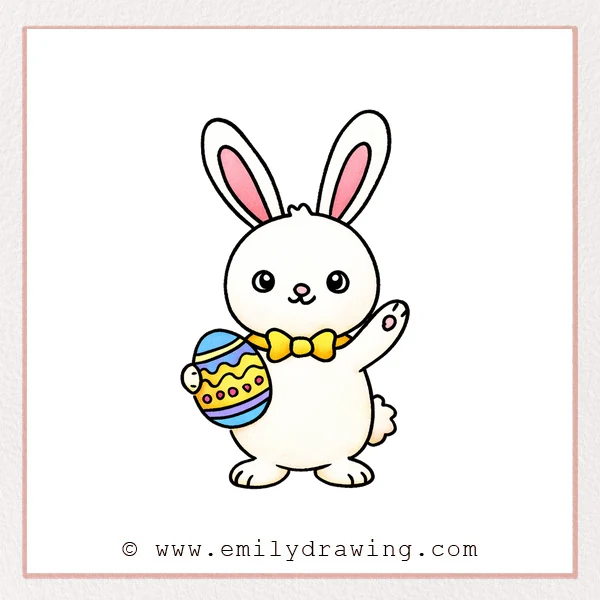
Drawing an Easter bunny is a calm and cheerful way to practice simple shapes. This easy drawing tutorial shows how to draw an Easter bunny step by step, using soft lines and beginner-friendly details.
What You Will Need
- Drawing paper
- Pencil
- Eraser
- Black pen or marker
- Colored pencils or crayons
Here are my RECOMMENDED Art Supplies!
- Crayola Coloring Set (140 Pieces – Mega Value!)
- 24 Colored Crayon Set
- A4 Printer Paper
- Crayola Coloring Pencils
- HP Home Printer with Instant Ink!
Time needed:
22 minutes.
Step-by-Step Drawing Guide
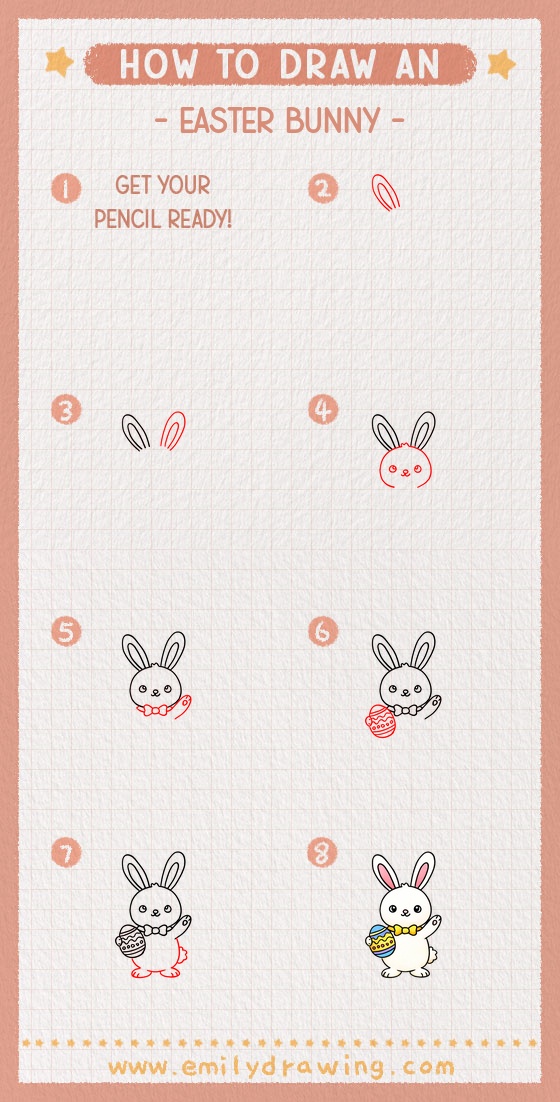
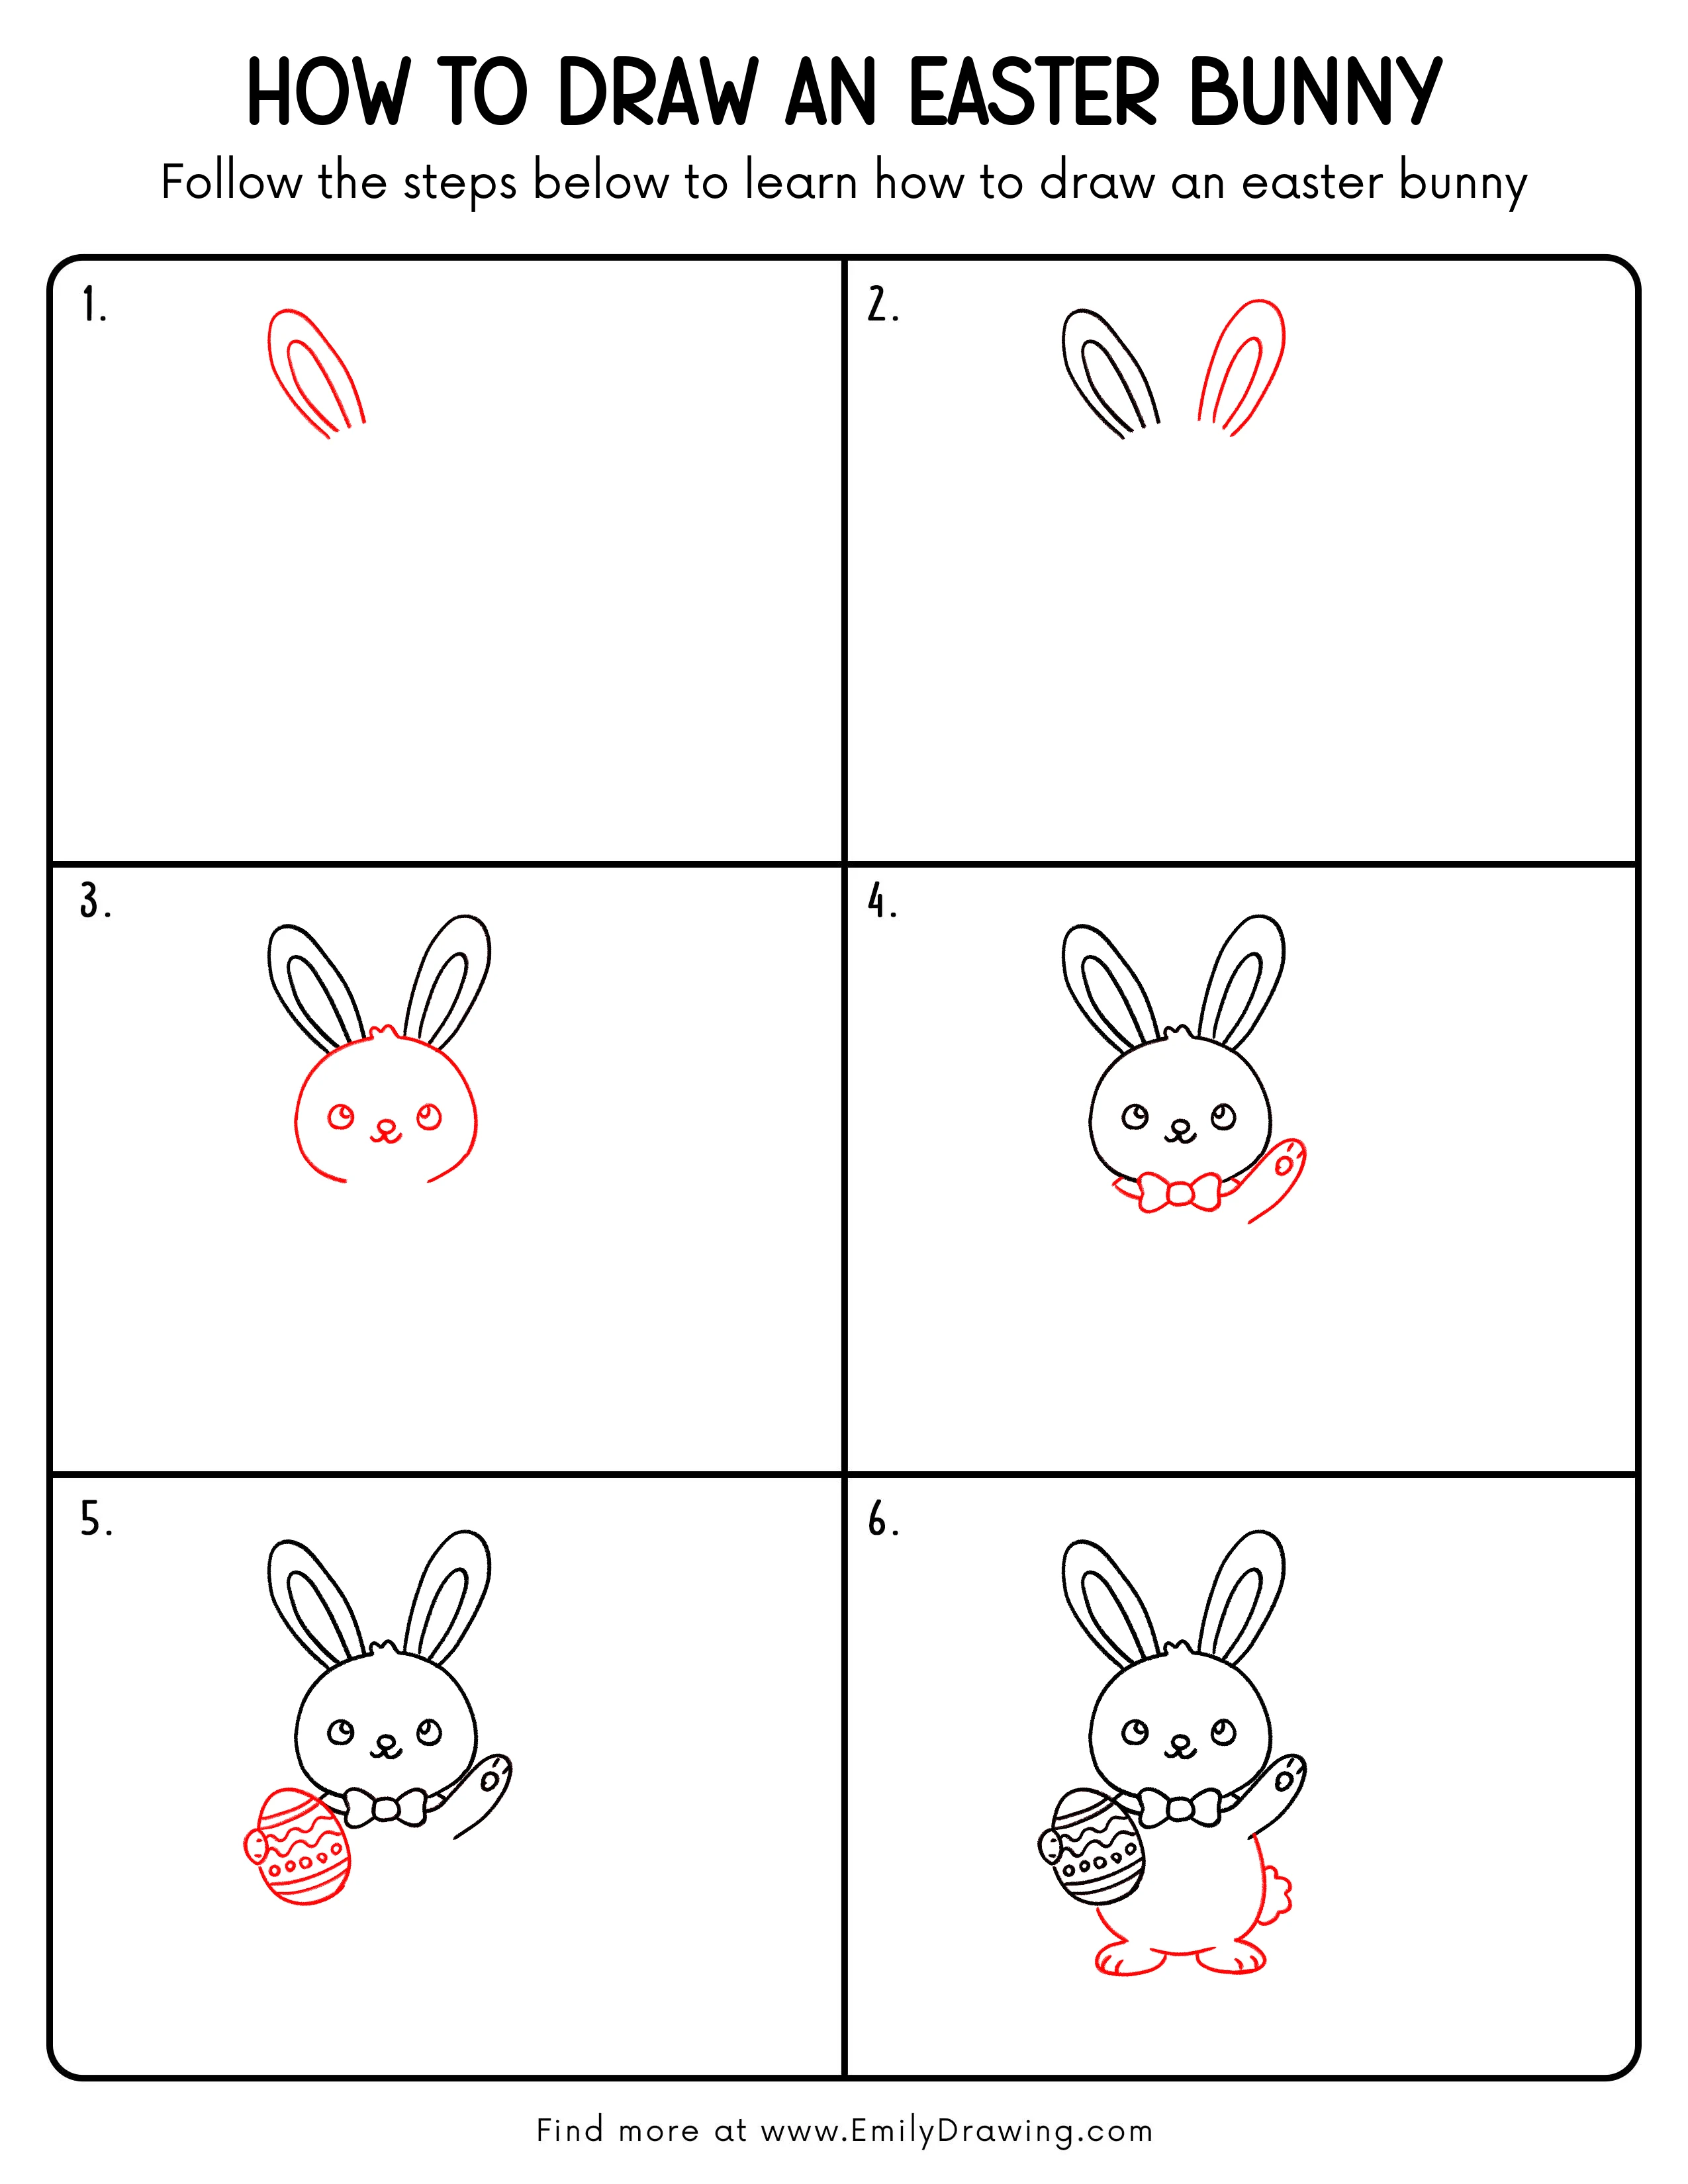
Step 1: Draw the First Long Ear
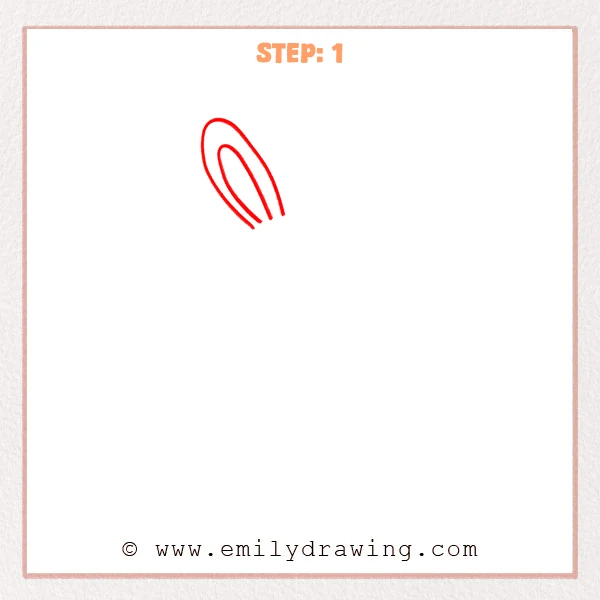
Start near the upper left area of the page with a long, narrow oval shape for one outer ear. Then add a similar inner line that curves down inside it, leaving a soft center section for the inside of the ear.
Pro Tip: Keep the inner line slightly shorter than the outer edge for a more natural ear shape.
Step 2: Add the Second Ear
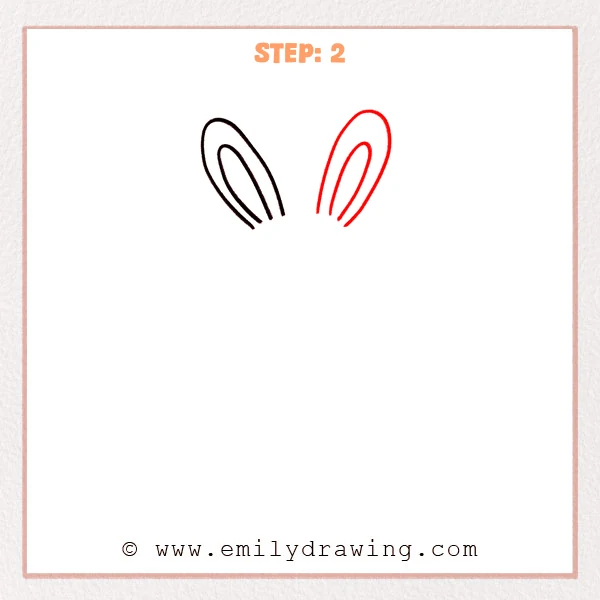
Leave a small space to the right of the first ear, then sketch a second long outer ear shape. Add a curved inner line inside it, and keep this ear close in size so both ears rise up in a balanced way.
Pro Tip: The two ears do not need to match exactly, but similar height and width will look balanced.
Step 3: Draw the Round Face and Cute Features
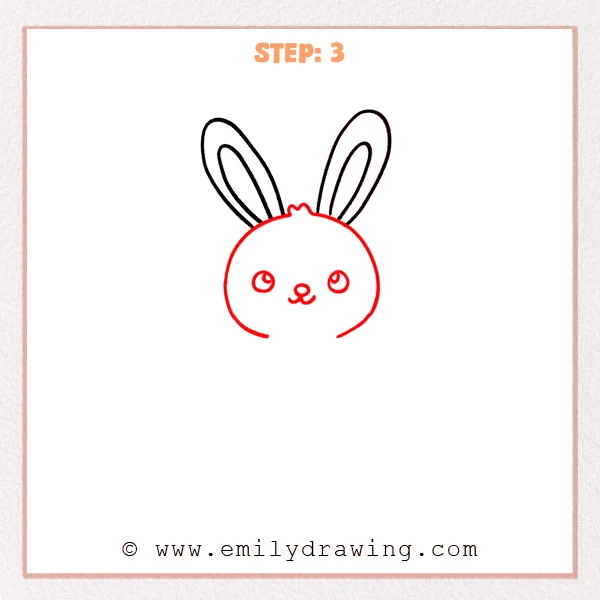
Under the ears, add a large round face shape, letting the top connect softly between the ears. Then place two round eyes, a small oval nose, and a tiny curved mouth, and add a little tuft of fur at the top center for a sweeter look.
Pro Tip: Place the facial features slightly below the center of the face for a softer bunny expression.
Step 4: Add the Bow and Front Paw
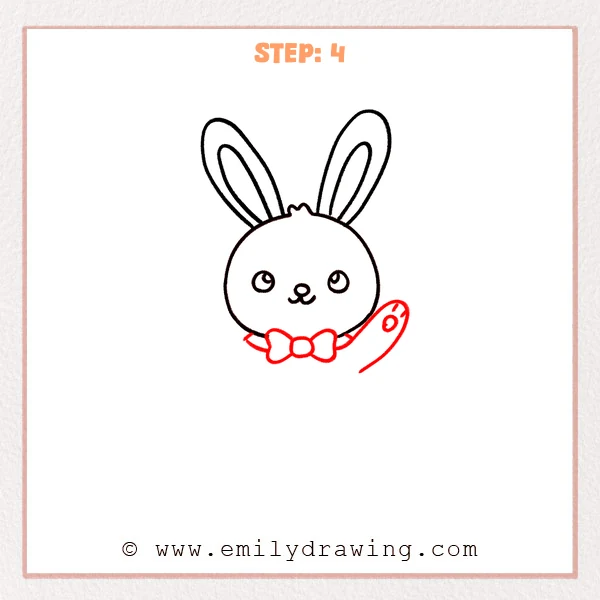
Under the head, add a small bow tie in the center to give the bunny a sweet Easter look. Then extend a curved front paw on the lower right, add a few small paw pad shapes near the tip, and place short body lines beside it.
Pro Tip: Make the bow slightly wide so the head connects more naturally to the lower body area.
Step 5: Add the Easter Egg

On the lower left side of the bunny, add a large egg shape close to the body so it looks like the bunny is holding it. Then decorate the egg with curved stripes, wavy bands, and small dots, and place a tiny bow on the side for a festive Easter touch.
Pro Tip: Let the egg patterns follow the curve of the shape so it looks more rounded.
Step 6: Color in your drawing!
Fun Facts
- Rabbits are often used as Easter symbols because they represent spring and new life.
- Easter eggs are a popular decoration and can be painted in many bright patterns.
- Bunny ears can show emotion in drawings, so tall ears often make the character look alert and sweet.
Pin it now, Draw later!
You now have a cute Easter bunny with long ears, a soft face, a bow, and a decorated egg. Try adding light pink inside the ears, gentle shading under the head, and bright colors on the egg to bring the drawing to life. One common beginner mistake is making the ears very uneven, so take your time and compare both sides as you draw. Keep practicing this step by step drawing, and enjoy trying more easy drawing tutorials for beginners.
Get the FREE Printable Drawing Guide
FREE Download Printable Easter Bunny Drawing Tutorial
Frequently Asked Questions
Is this Easter bunny drawing good for beginners?
Yes, this drawing uses simple shapes and soft details, so it is great for beginners.
How can I make my bunny look cuter?
Try drawing larger eyes, a smaller nose, and a rounder face shape.
What colors should I use for the Easter egg?
You can use pastel shades like pink, yellow, blue, and green for a classic Easter look.