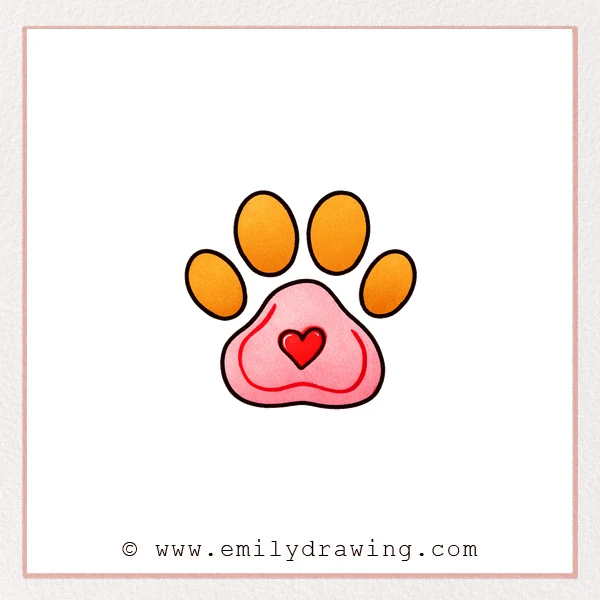
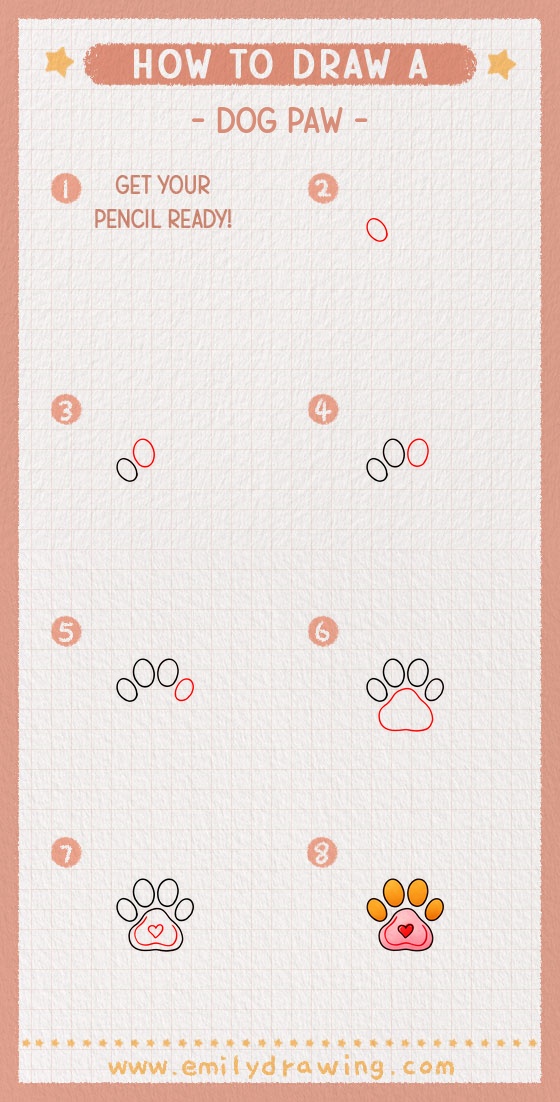
This easy drawing tutorial shows how to draw a dog paw step by step using simple shapes. Take your time and enjoy building the paw pads one calm line at a time. It is a friendly drawing for beginners, and it works well for cards, stickers, or notebooks.
What You Will Need
- Pencil
- Eraser
- Black marker or pen (optional, for outlining)
- Coloring tools (optional): crayons, colored pencils, or markers
- Plain paper
Here are my RECOMMENDED Art Supplies!
- Crayola Coloring Set (140 Pieces – Mega Value!)
- 24 Colored Crayon Set
- A4 Printer Paper
- Crayola Coloring Pencils
- HP Home Printer with Instant Ink!
Time needed:
26 minutes.
Step-by-Step Drawing Guide
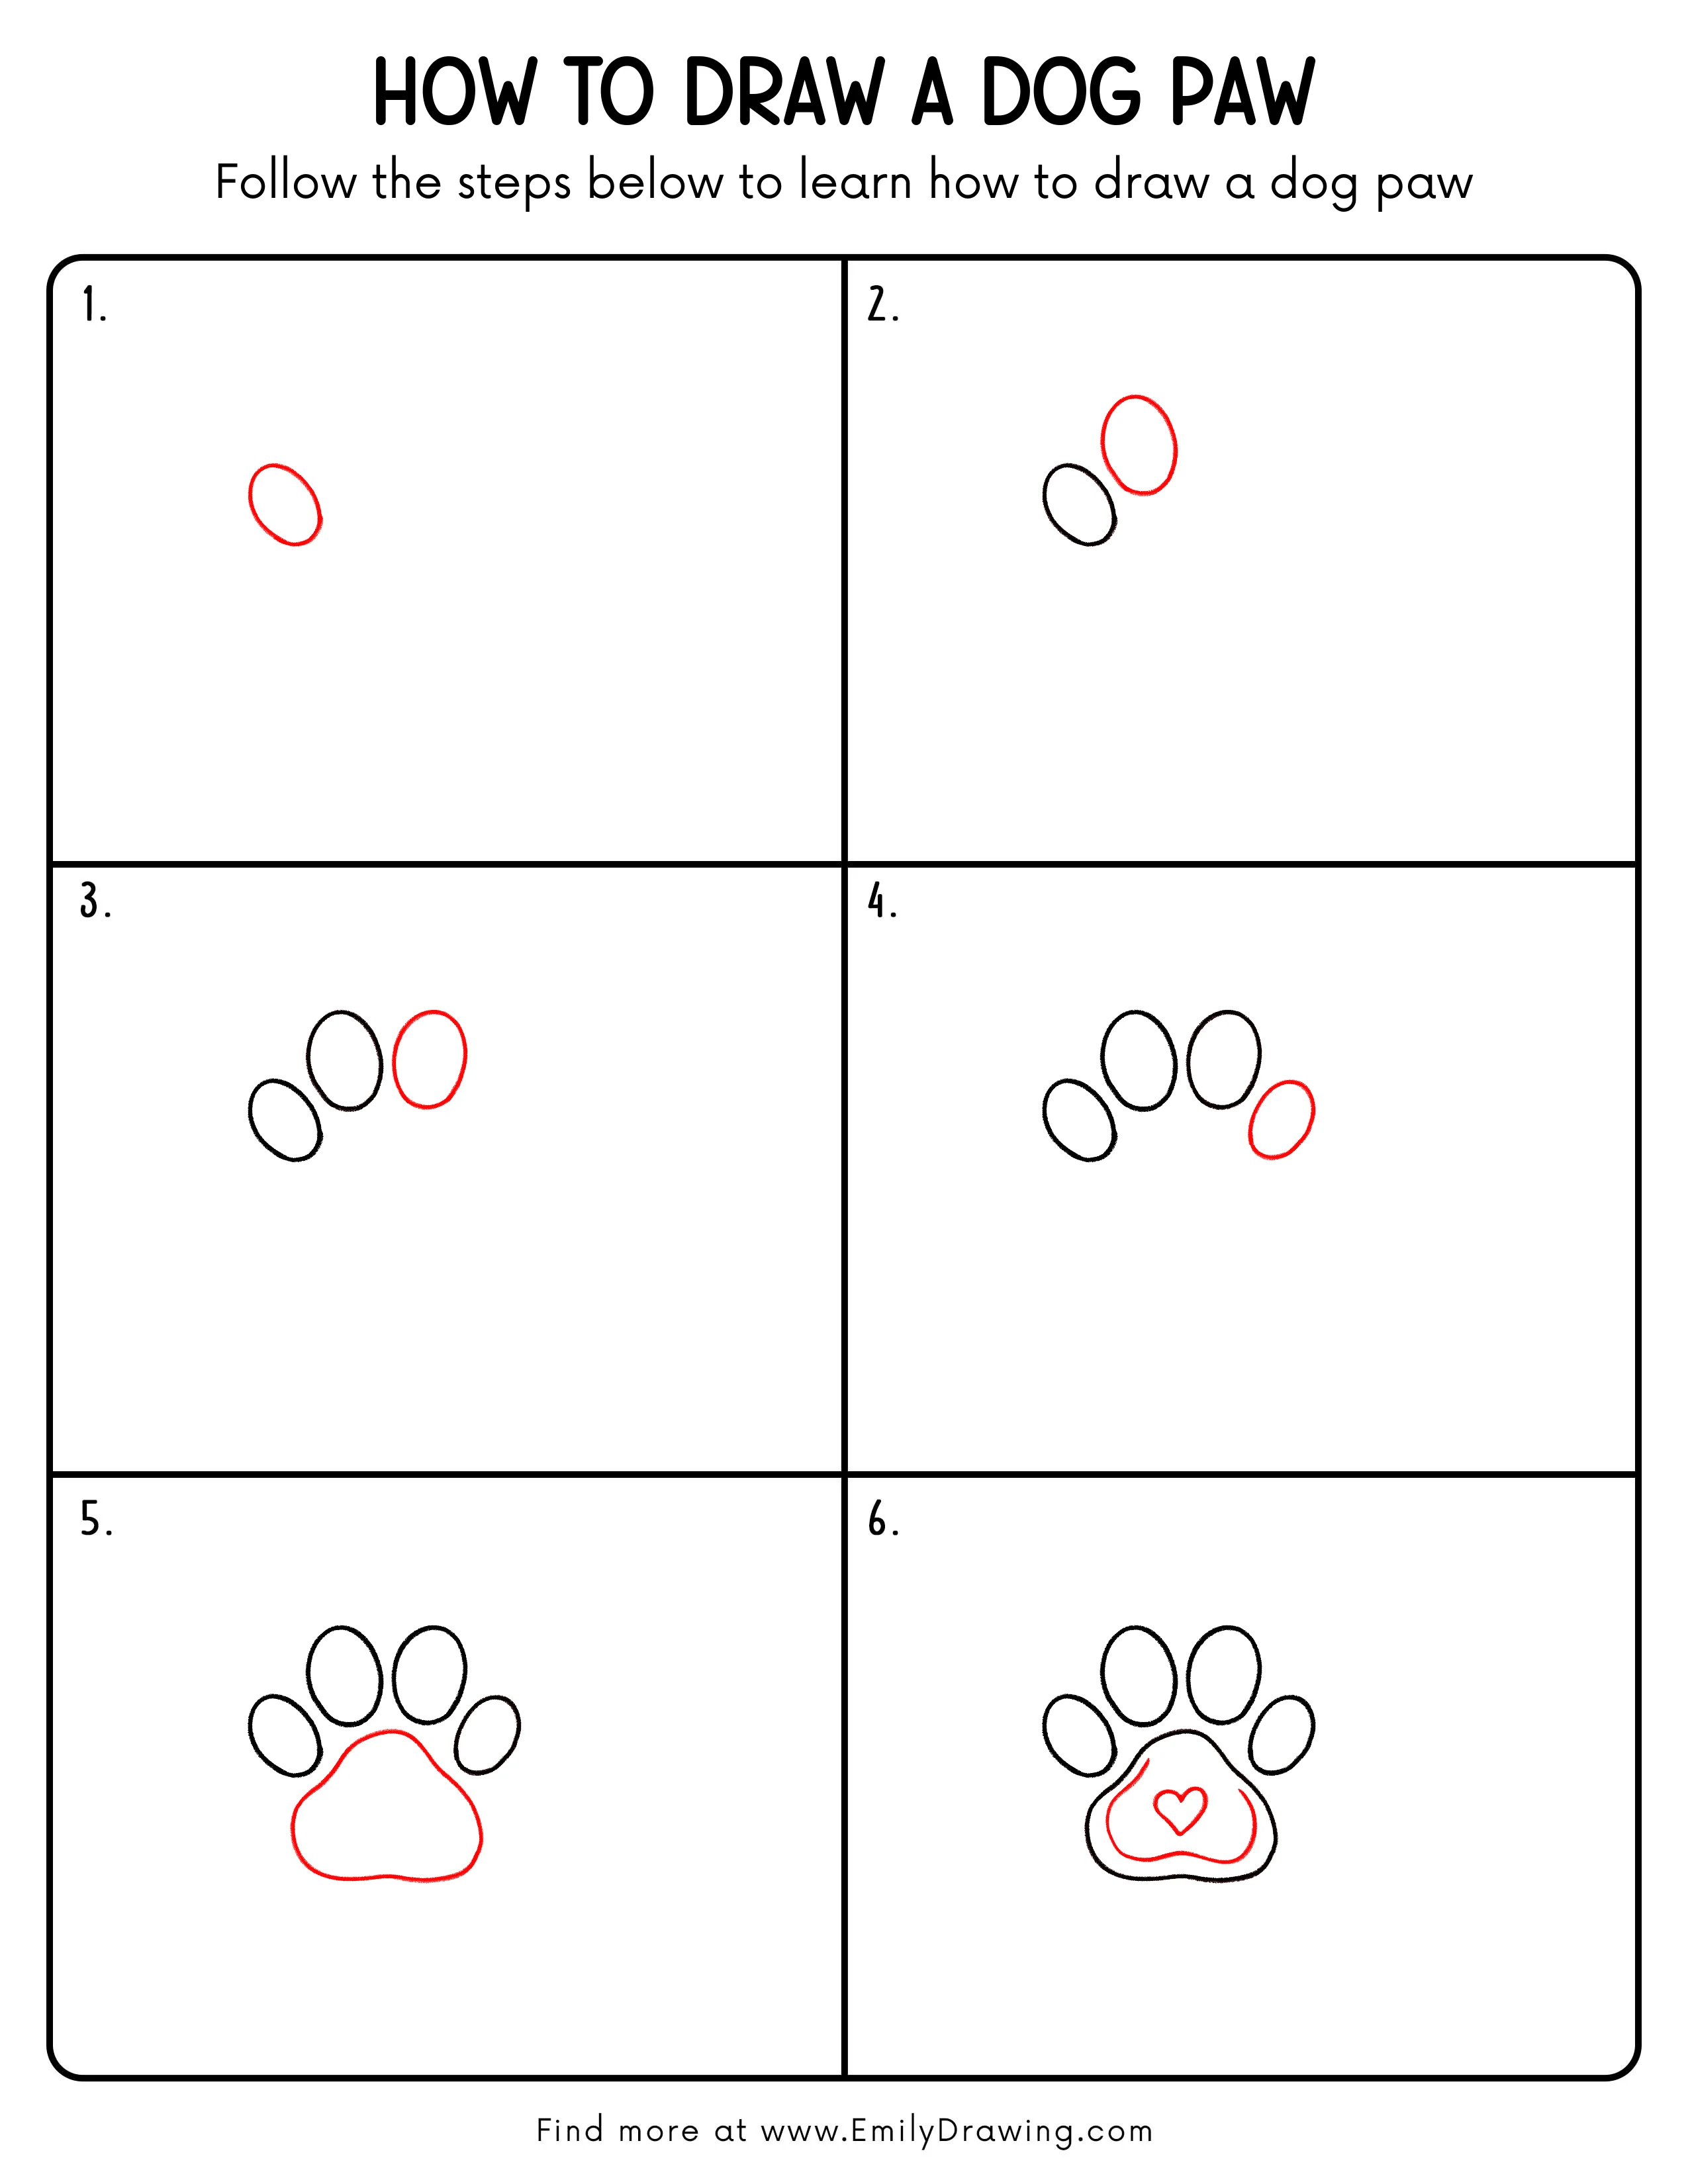
Step 1: Draw the Base Oval for the Paw Pad
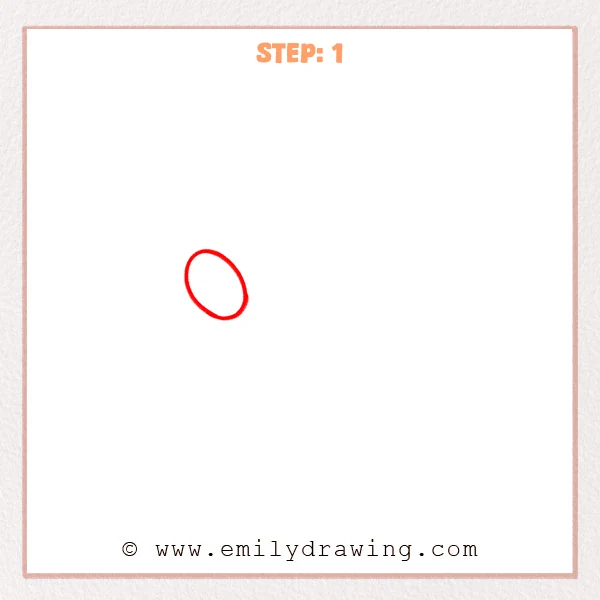
Start with a slightly tilted oval placed a bit left of center. Keep the curve smooth and closed, since this will be the main paw pad shape. Let the ends stay softly rounded.
Pro Tip: Avoid pointy ends; keep both ends gently rounded for a paw pad look.
Step 2: Add a Second Smaller Oval as a Guide
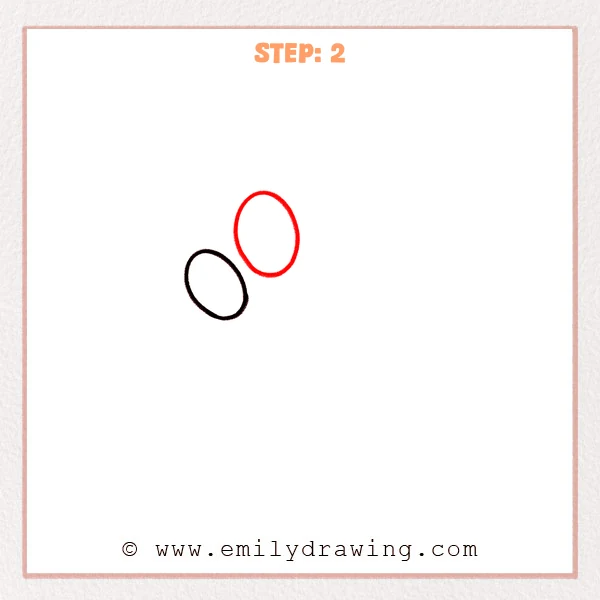
Below and to the left of the first oval, sketch a smaller oval. Tilt it slightly too, and leave a small gap from the first shape to map out the paw pad layout. This begins the curve of the toe pads.
Pro Tip: Leave a little breathing room between the ovals for a cleaner shape.
Step 3: Add a Third Oval on the Right for Balance

Draw a third oval on the upper-right side, close in size to the first oval. Keep it a bit more upright, and leave a small gap from the middle shape. The row should start to feel like a gentle arc.
Pro Tip: Don’t place it too close; a small gap helps the pads feel separate.
Step 4: Add the Fourth Toe Pad Oval on the Far Right
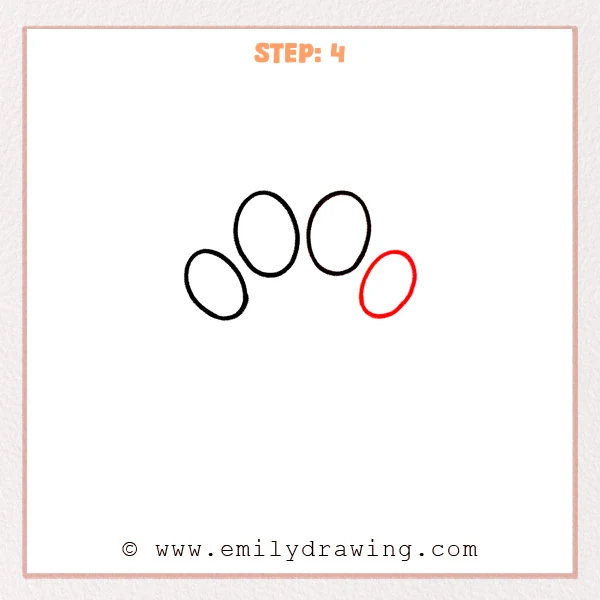
In the open space on the right, sketch one more smaller oval with a gentle down-right tilt. Keep a small gap from the oval beside it, so the toe pads feel evenly spaced. Aim for a soft curve across all four pads.
Pro Tip: Make this right oval slightly smaller to keep the curve looking natural.
Step 5: Outline the Large Main Paw Pad
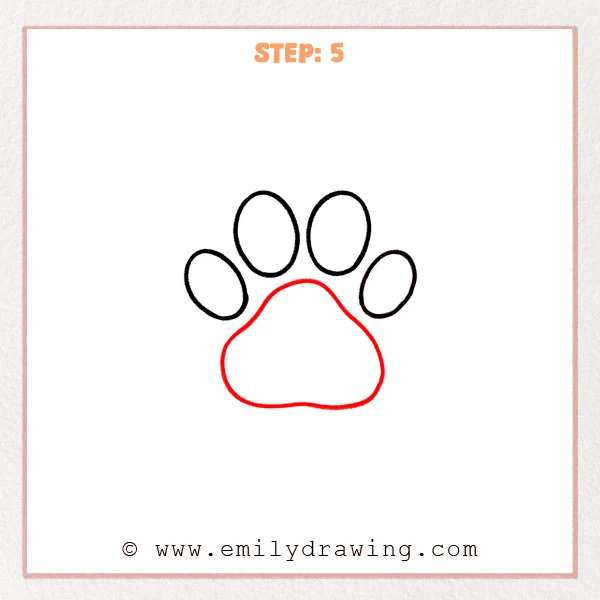
Below the four small ovals, draw one big cloud-like outline with a smooth, continuous curve. Let the top edge rise gently, round out the sides, and finish with a soft curved bottom. This creates the big central pad of the dog paw.
Pro Tip: Use longer curves for the big pad edge, so it feels soft and cushiony.
Step 6: Add an Inner Pad Line and a Heart Detail
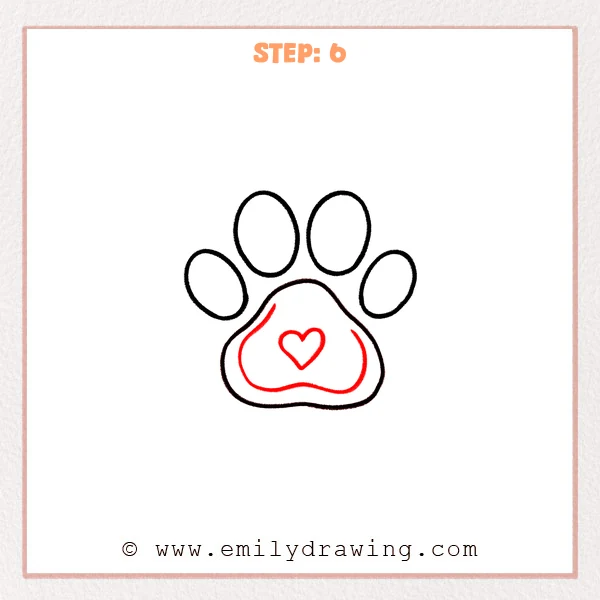
Inside the big paw pad, draw a smaller curved outline that follows the shape, leaving a thin border. Then place a small heart in the center of the pad for a sweet detail. Keep your lines light so you can adjust them easily.
Pro Tip: Keep the inner line evenly spaced from the outer edge for a neat look.
Step 7: Color in your drawing!
Fun Facts
- Dogs have paw pads that help absorb shock when they run and jump.
- Paw pads also help dogs grip slippery surfaces like tile or ice.
- Many dogs have four toes on each paw, with an extra “dewclaw” higher up.
Pin it now, Draw later!
You built your dog paw by placing toe pads first, then adding the main pad, and finishing with inner details. If you want a clean style, trace your favorite lines with a black pen and erase the pencil marks. For coloring, try a warm pink or soft brown for the pads, then add gentle shading along the lower edges to make them look rounded.
One common beginner mistake is making the toe pads touch the main pad, which can flatten the paw shape. Leave a small gap so each pad feels separate and clear. Keep practicing this step by step drawing, and try changing the heart into a star, a letter, or a tiny bone to make it your own. When you are ready, explore another easy drawing tutorial and build a whole page of pet-themed doodles.
Get the FREE Printable Drawing Guide
FREE Download Printable Dog Paw Drawing Tutorial
Frequently Asked Questions
How do I keep the toe pads evenly spaced?
Use small gaps that look the same size, and line them up in a gentle arc. If one looks too close, erase and slide it a little.
Can I draw a dog paw without perfect ovals?
Yes. Slightly uneven ovals can still look cute and natural. Focus on smooth curves and clear spacing.
How can I make the paw look more 3D?
Add light shading on one side of each pad and a slightly darker shadow under the main pad. Keep the shading soft so it still looks friendly.