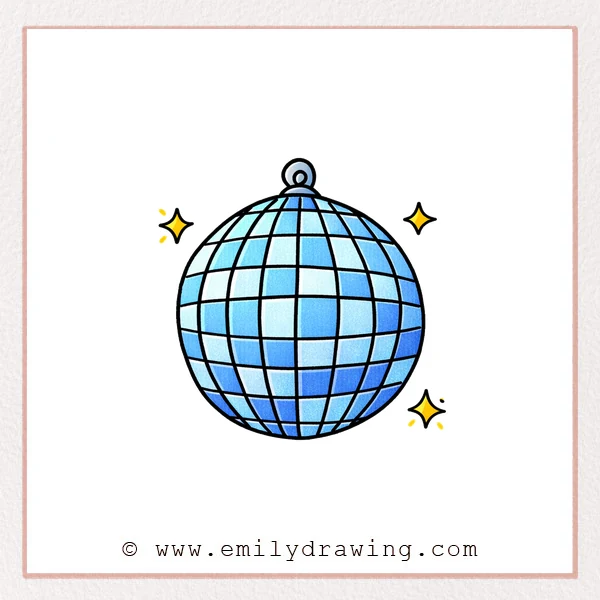
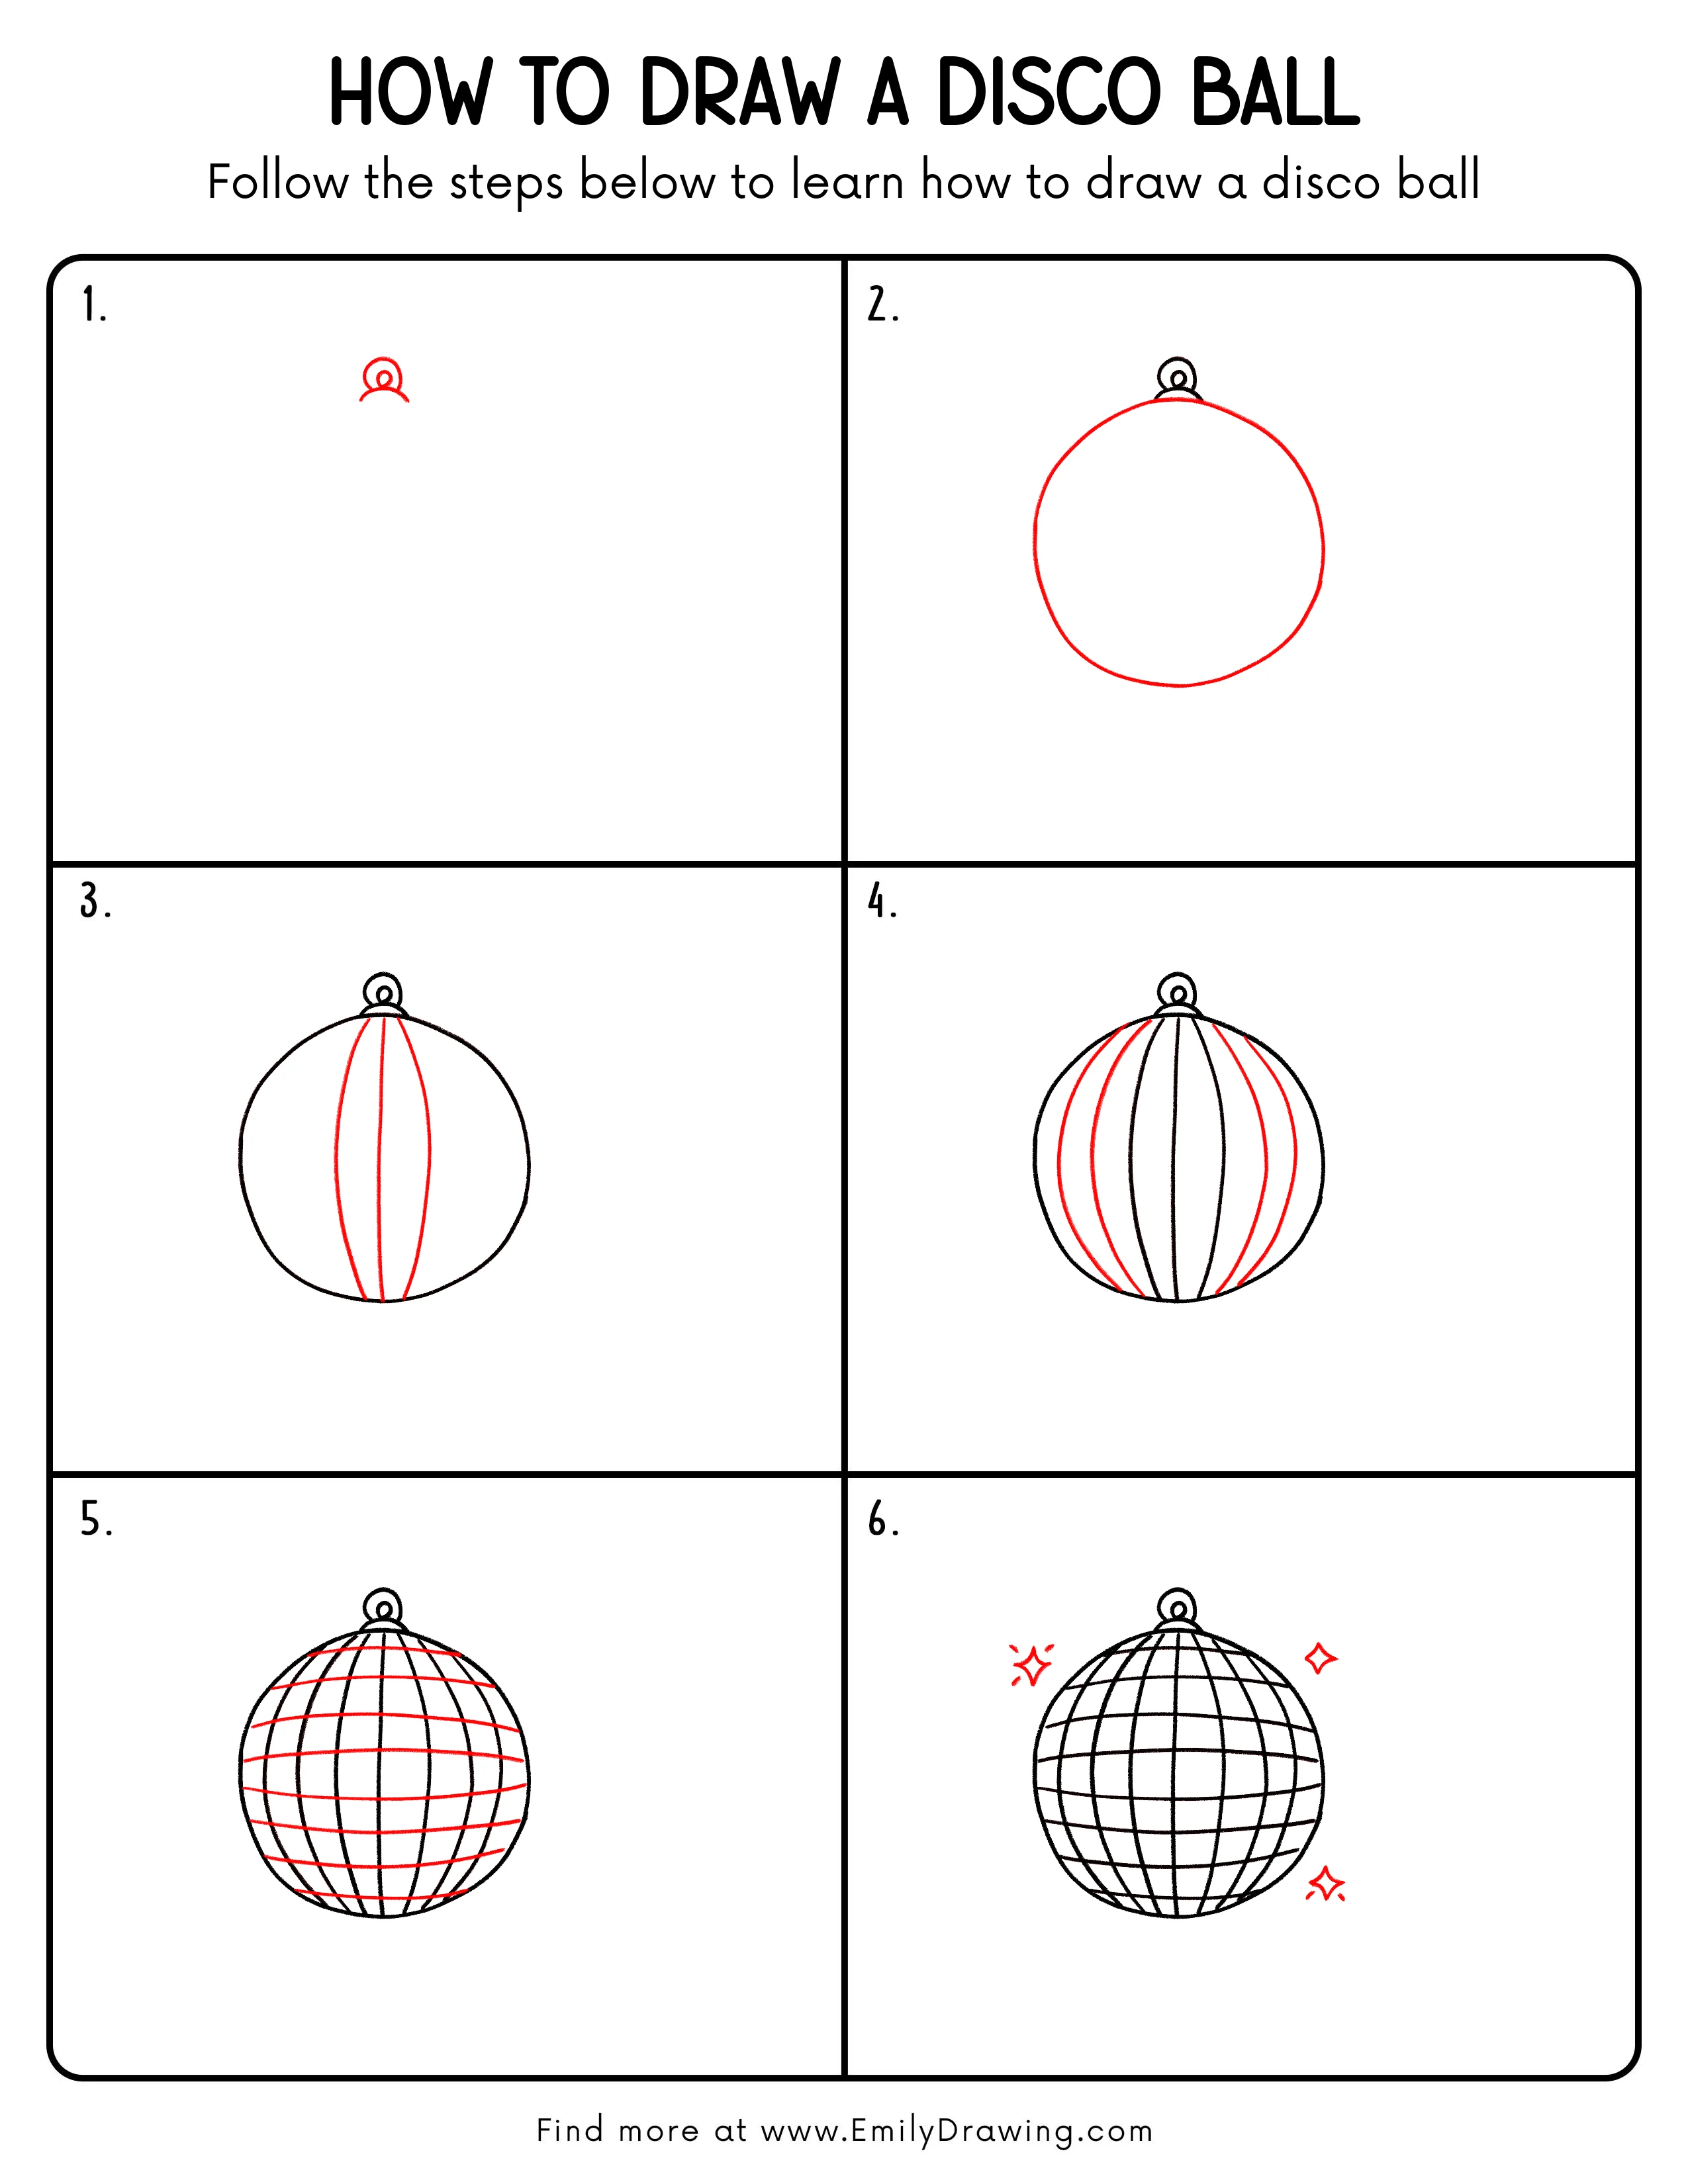
This easy drawing tutorial shows how to draw a disco ball step by step. We will build the shape slowly, then add curved grid lines for a shiny, round look. Take your time, and enjoy watching your disco ball come to life.
What You Will Need
- Pencil
- Eraser
- Black marker or pen (optional for outlining)
- Coloring tools (colored pencils, markers, or crayons)
Here are my RECOMMENDED Art Supplies!
- Crayola Coloring Set (140 Pieces – Mega Value!)
- 24 Colored Crayon Set
- A4 Printer Paper
- Crayola Coloring Pencils
- HP Home Printer with Instant Ink!
Time needed:
19 minutes.
Step-by-Step Drawing Guide
Step 1: Build the Top Circle Base

Start near the top of your page with a small circle as the center. Draw a larger circle around it so it looks like a target. Add a gentle curved line under the circle, like a soft support.
Pro Tip: Keep the two circles centered to make the disco ball feel round and steady.
Step 2: Add the Big Disco Ball Circle

Under the small top loop, draw a large circle to form the main ball. Let the top of this circle gently touch the curved base above, so it looks like it is hanging. Keep the line smooth and round.
Pro Tip: Turn your paper as you draw the circle to keep it even.
Step 3: Add Vertical Curved Panels
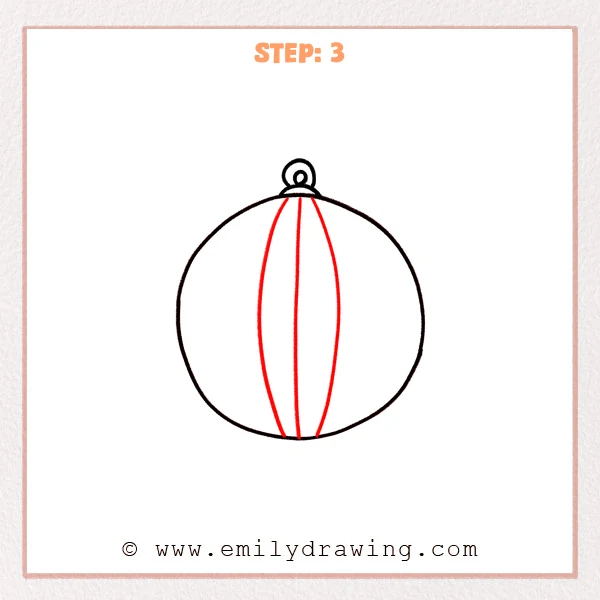
From the top connector, draw three long curved lines down the ball. The middle one is almost straight, and the two side lines bow outward before coming back in near the bottom. This makes the disco ball look round and three-dimensional.
Pro Tip: Keep the side curves symmetrical so the ball feels balanced.
Step 4: Fill In More Vertical Panel Lines
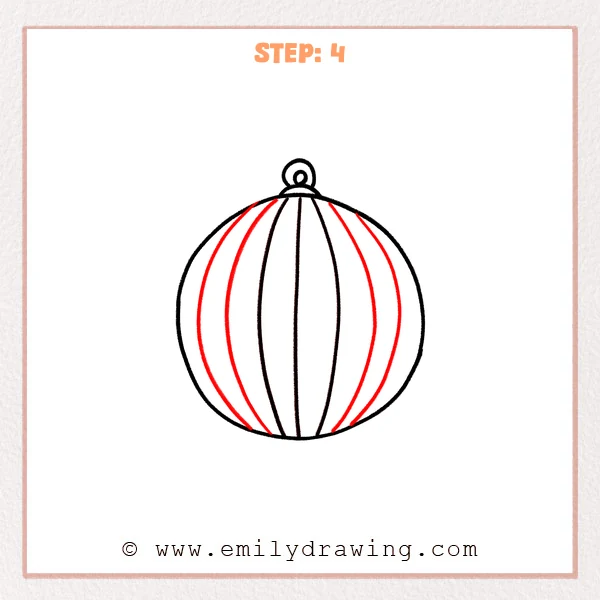
Add a few more curved vertical lines on both sides of the center panels. Make the outer lines curve more as they move toward the edge, almost hugging the circle. This gives the disco ball a fuller, layered roundness.
Pro Tip: The closer a line is to the edge, the more it should curve.
Step 5: Add Curved Horizontal Bands for a Grid
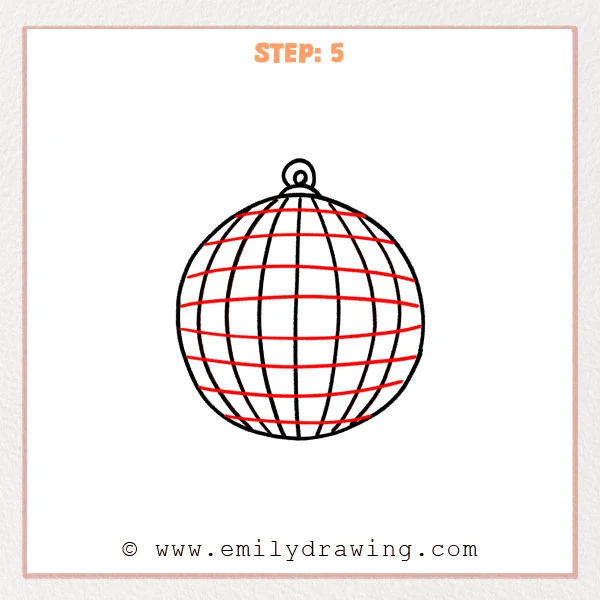
Draw several curved horizontal lines across the disco ball, like belts wrapping around it. Make the lines curve more near the top and bottom, and look straighter across the middle. When these cross the vertical lines, the sphere feels more real.
Pro Tip: Avoid perfectly straight bands; a gentle curve makes them wrap the sphere.
Step 6: Add Sparkle Stars Around the Ball
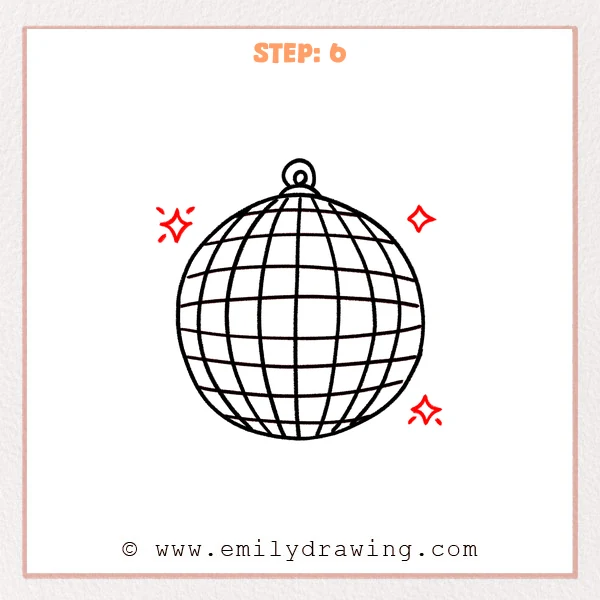
In the empty space around the disco ball, draw two or three small sparkle shapes, like diamond stars. Give each one four pointed corners, and leave a tiny open space in the middle so it feels bright. You can add a few short lines nearby to show extra shine.
Pro Tip: Keep the sparkles small so they decorate without cluttering the ball.
Step 7: Color in your drawing!
Fun Facts
- Disco balls are covered with many tiny mirrors that reflect light around a room.
- The curved grid lines in your drawing help your disco ball look round, even on flat paper.
- Sparkle shapes around the ball suggest bright reflections without adding lots of details.
Pin it now, Draw later!

You built the disco ball shape, then added curved lines to make a round, shiny grid. For coloring, try light gray or pale blue on one side and leave the other side lighter for a bright highlight. Add a little darker shading near the edges and under the top hanger to make it look like it is glowing.
A common beginner mistake is drawing the horizontal bands as straight lines, which can make the ball look flat. Keep those bands gently curved, and your disco ball will feel more three-dimensional. Practice this step by step drawing a few times, and try making a bigger or smaller disco ball next.
Get the FREE Printable Drawing Guide
FREE Download Printable Disco Ball Drawing Tutorial
Frequently Asked Questions
How do I make my disco ball look more shiny?
Leave a few small areas uncolored for highlights, and add darker shading near the edges.
Why do my grid lines look uneven?
Try spacing the lines slowly and lightly first, then darken them after you like the placement.
Can I draw a disco ball without a ruler?
Yes, the lines are meant to be curved and soft, so freehand works well for a beginner.