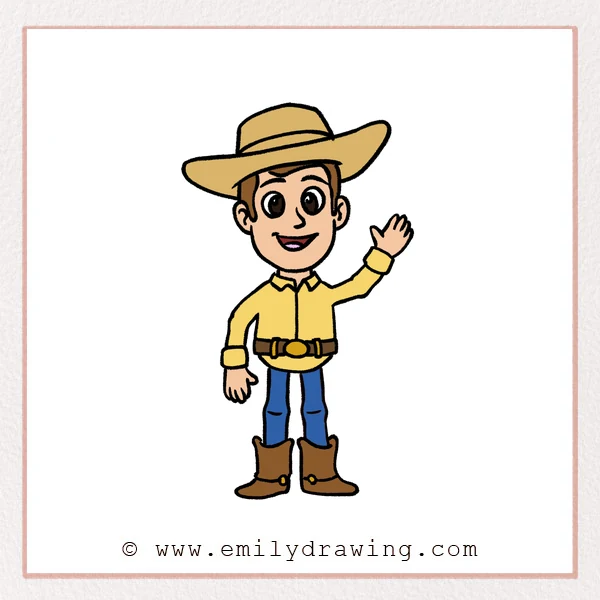
Learning how to draw Woody is a fun way to practice simple cartoon shapes. This step by step drawing guide breaks his cowboy look into clear parts, from the hat to the boots. Take your time, and enjoy building the character one small detail at a time.
What You Will Need
- Pencil
- Eraser
- Drawing paper
- Black marker or pen
- Colored pencils or crayons
Here are my RECOMMENDED Art Supplies!
- Crayola Coloring Set (140 Pieces – Mega Value!)
- 24 Colored Crayon Set
- A4 Printer Paper
- Crayola Coloring Pencils
- HP Home Printer with Instant Ink!
Time needed:
27 minutes.
Step-by-Step Drawing Guide
Step 1: Draw Woody’s Hat Outline
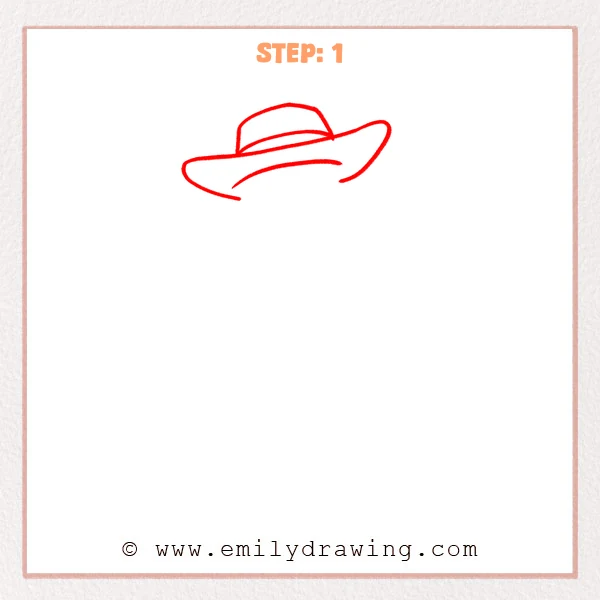
Start with a long curved line for the brim, letting both ends lift slightly. Then draw the rounded crown above it, and add one curved band line across the hat.
Pro Tip: Keep the brim much wider than the crown so Woody’s cowboy hat feels easy to recognize.
Step 2: Add the Face Shape and Ears
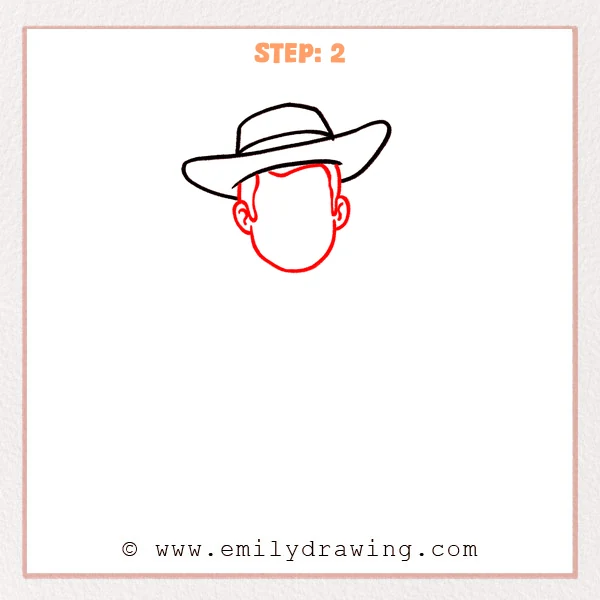
Draw Woody’s face outline under the brim, keeping the chin softly rounded. Then add ears on both sides, with small curved lines inside each ear.
Pro Tip: Keep both ears at nearly the same height so the face looks balanced.
Step 3: Draw the Facial Features
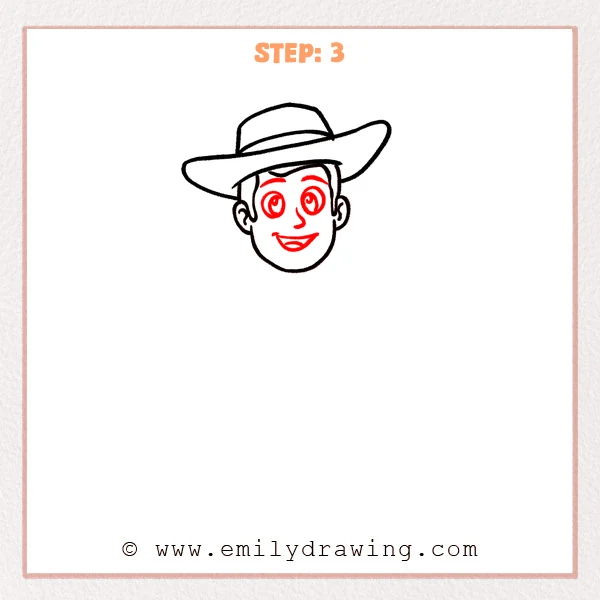
Add two round eyes in the middle of the face, then draw the eyebrows to make the expression lively. Next, add a small nose and a smiling mouth so Woody looks friendly and cheerful.
Pro Tip: Line up the eyes first, then place the nose and mouth so the expression feels natural.
Step 4: Draw the Upper Body and Arms
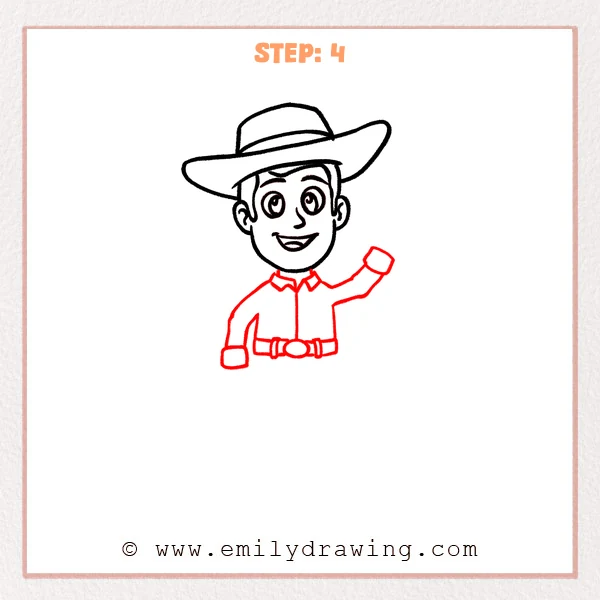
Add the shirt collar, body outline, and center button line below the head. Then draw two curved arms, with simple squared hands at the sleeve ends.
Pro Tip: Keep the body a little narrower than the head so Woody’s cartoon proportions look cute.
Step 5: Add the Hands and Waist Line
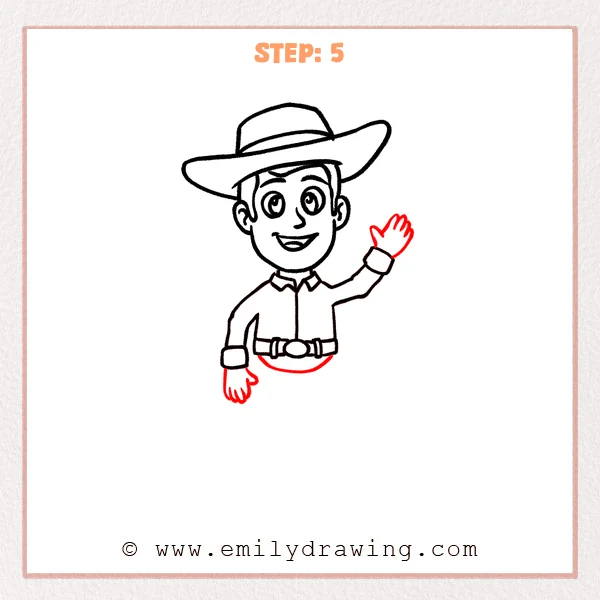
Complete both hands, making the right hand open in a waving pose and the left hand hang naturally at the side. Then add a curved line below the belt to show the body continuing downward.
Pro Tip: Keep the fingers short and rounded, and they do not need to match perfectly.
Step 6: Start the Pant Legs
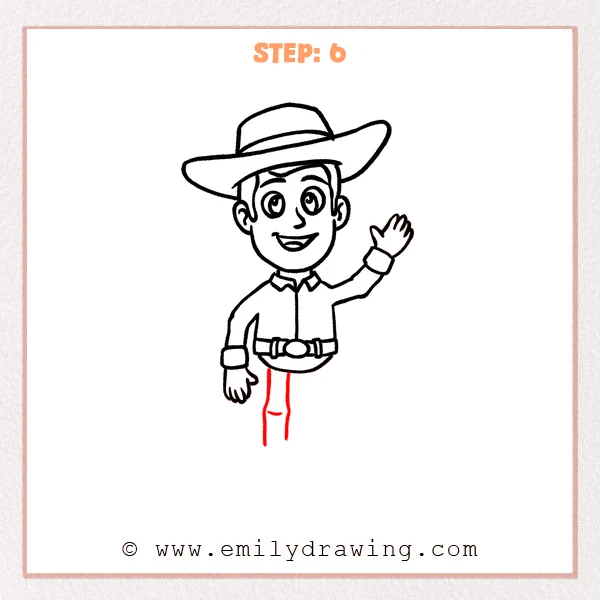
Draw two long lines downward from below the waist to place Woody’s pant legs. Then add a small curved line on one pant leg to suggest the knee and fabric bend.
Pro Tip: Keep the pant leg lines mostly vertical so the standing pose feels steady.
Step 7: Complete the Other Pant Leg
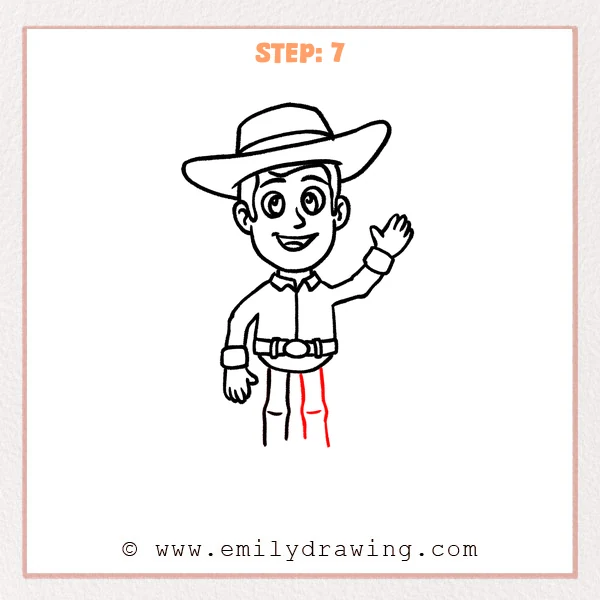
Continue drawing the second pant leg on the right, letting it extend naturally down from the waist. Then add a small knee curve so both pant legs show a gentle fabric bend.
Pro Tip: The pant legs can be slightly different widths, but keep their lower direction consistent.
Step 8: Draw the First Boot
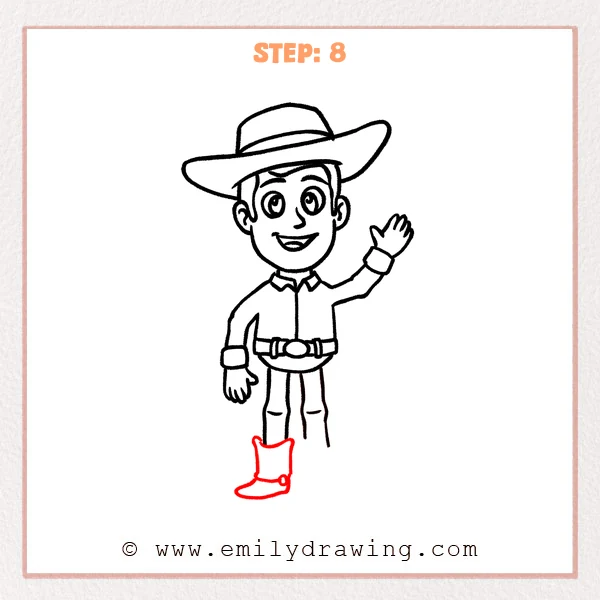
Draw a tall boot at the bottom of the left pant leg, with the top opening slightly wider and curled at both sides. Then add the forward sole and a small round spur detail.
Pro Tip: Make the bottom of the boot wider so Woody looks steady when standing.
Step 9: Complete the Second Boot
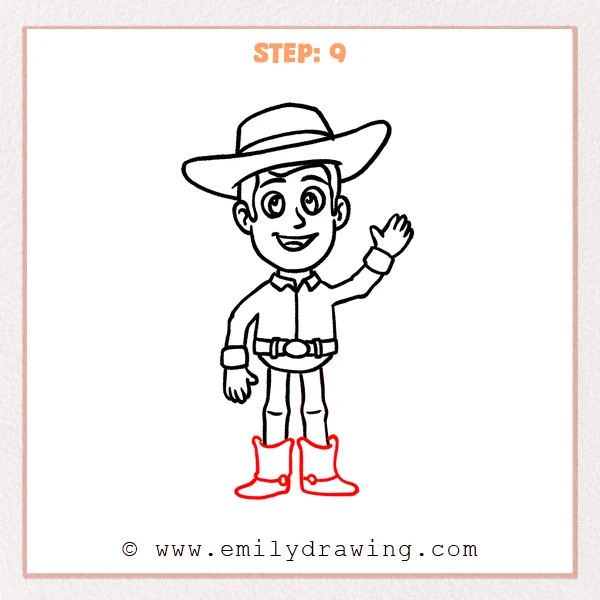
Draw the other tall boot at the bottom of the right pant leg, keeping the opening and sole shape similar. Then add a small round spur so both cowboy boots share matching details.
Pro Tip: Keep both boots close in height, but let the toes point slightly different ways.
Step 10: Color in your drawing!
Fun Facts
Woody is known for his wide cowboy hat, cheerful smile, and friendly waving pose. His boots, belt, and shirt collar make him a great character for drawing for beginners. These clear costume details help young artists recognize each part as they draw.
Pin it now, Draw later!
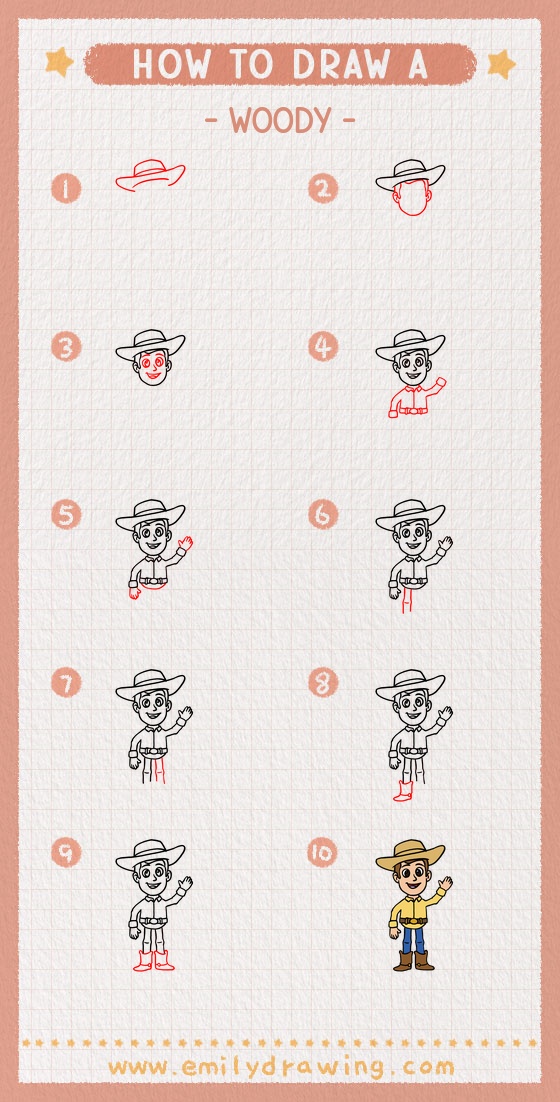
Now you have finished an easy drawing tutorial for Woody from hat to boots. Trace your best lines with a marker, then erase any light pencil marks. Add color to the hat, shirt, pants, and boots, and keep practicing this step by step drawing to build confidence.
Get the FREE Printable Drawing Guide
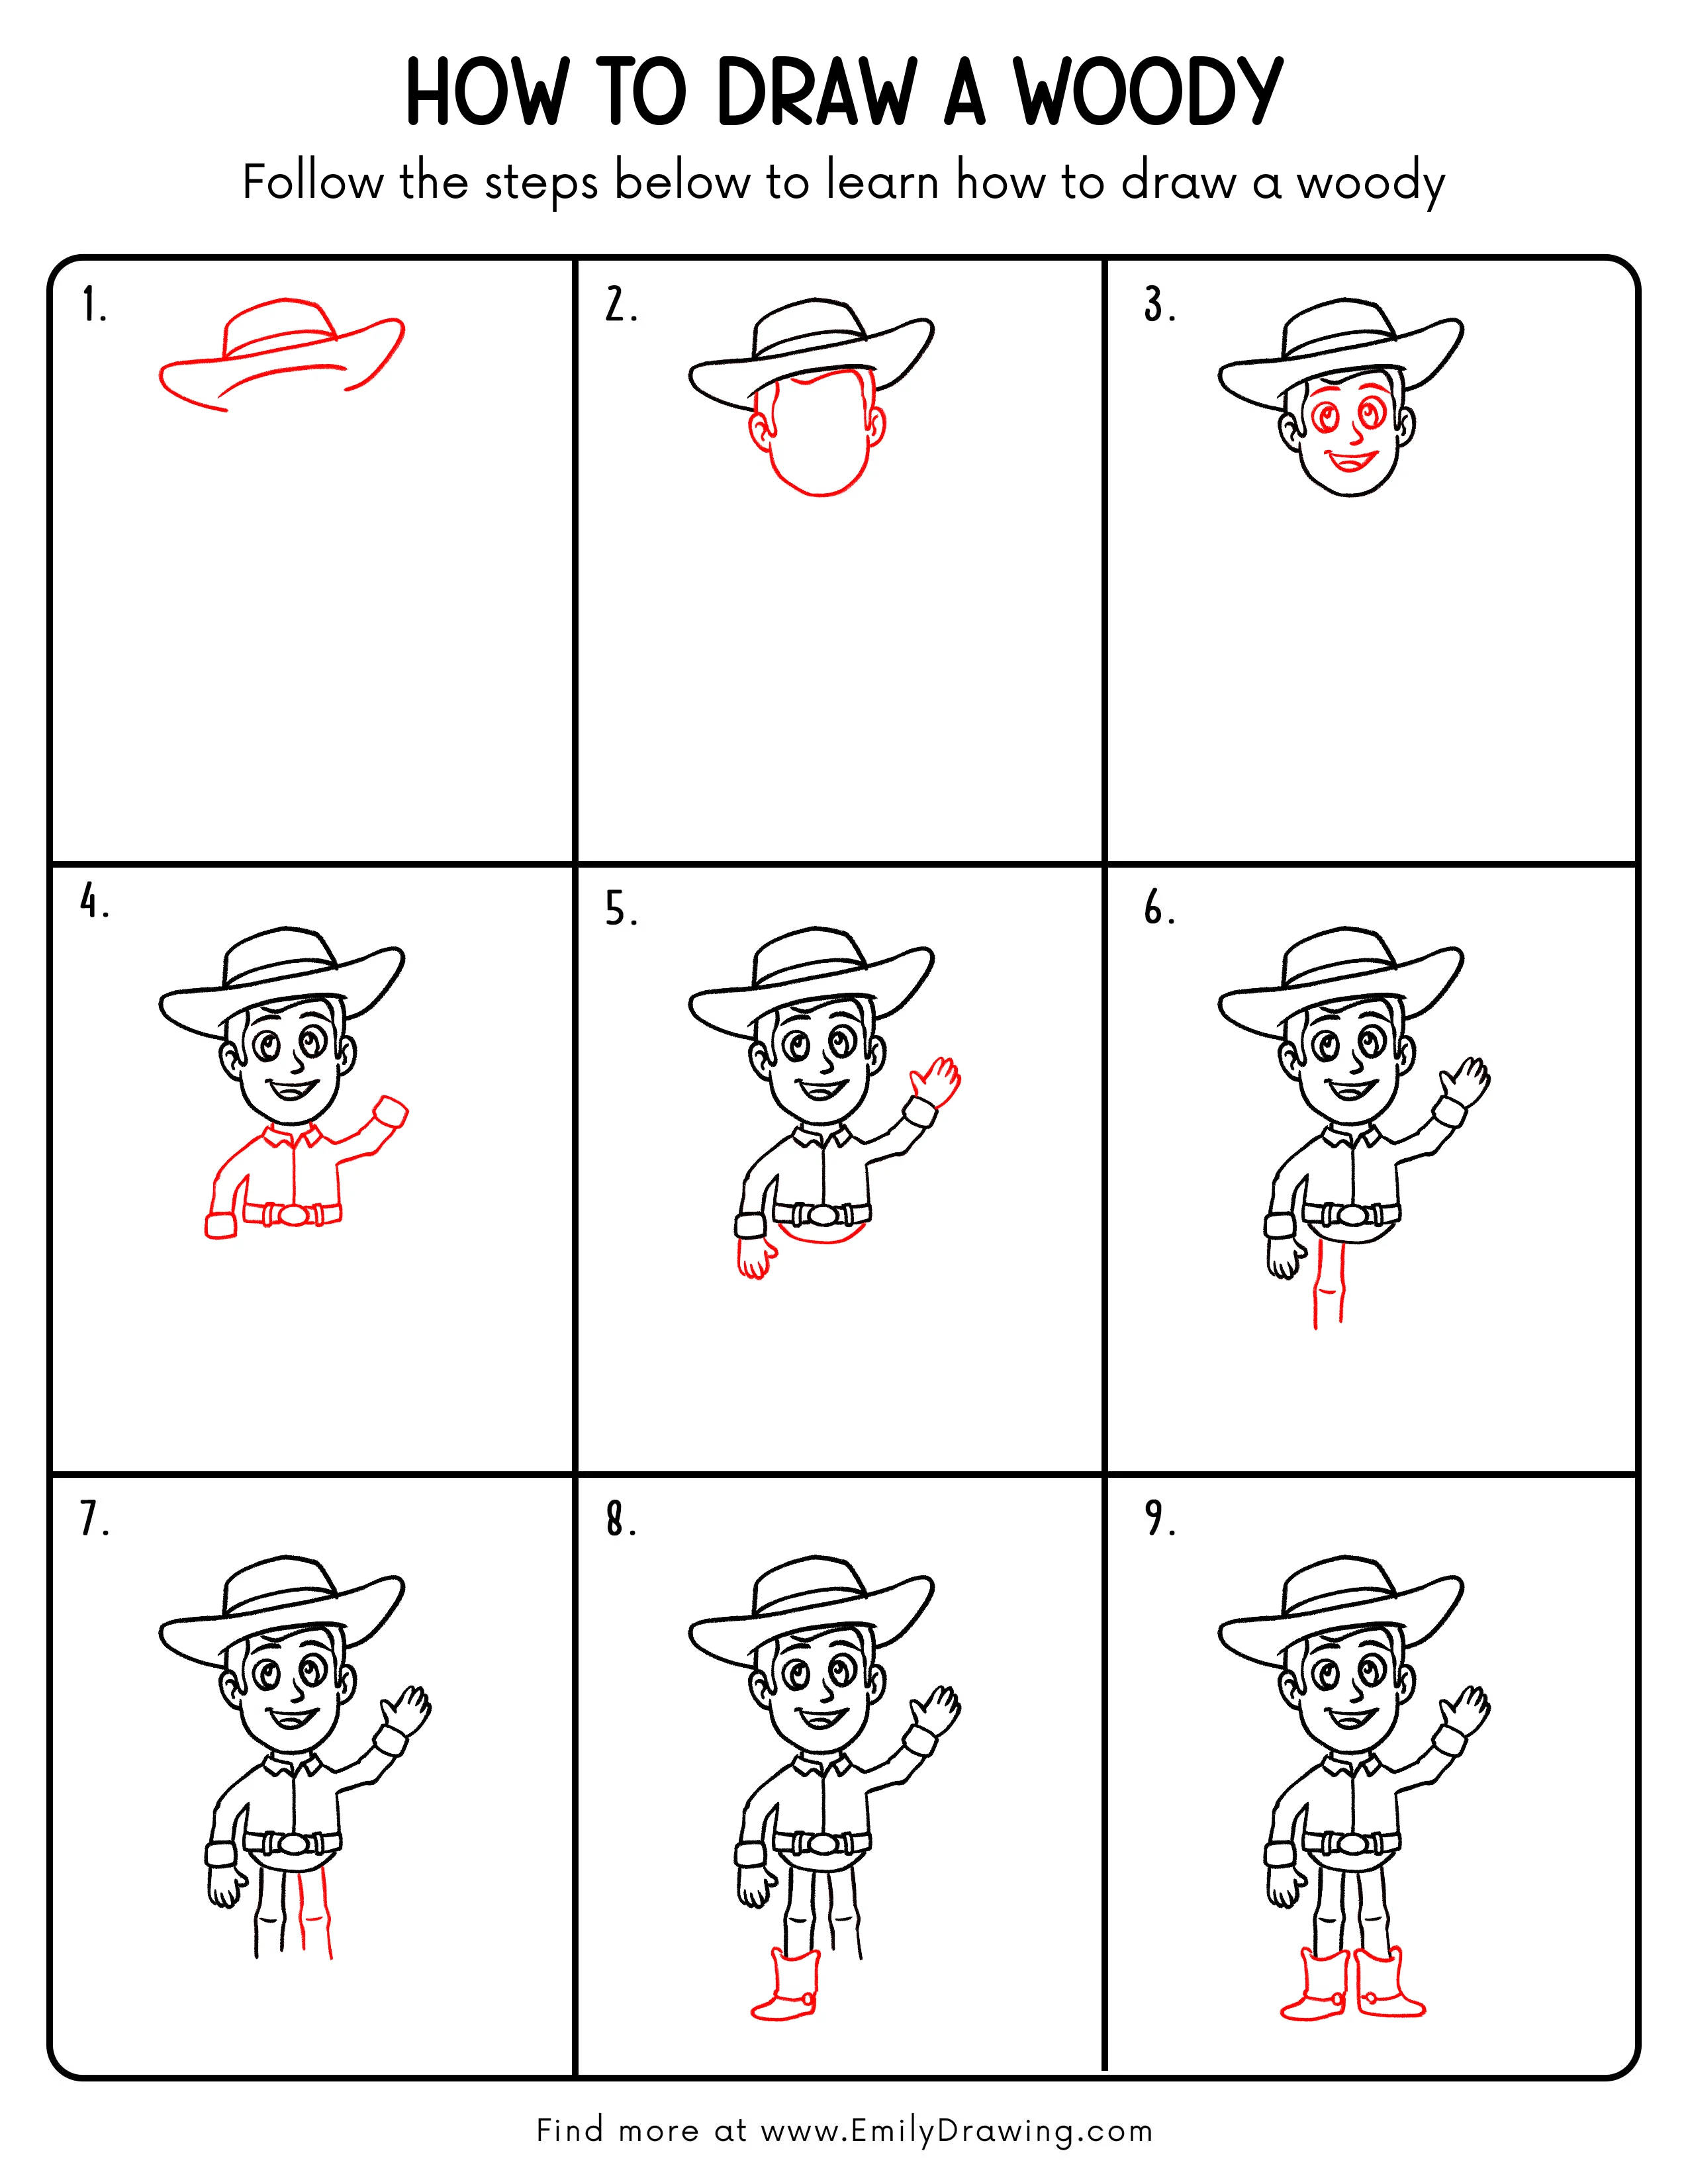
FREE Download Printable Woody Drawing Tutorial
Frequently Asked Questions
Is this Woody drawing good for beginners?
Yes, this how to draw Woody guide uses simple curves, circles, and basic clothing shapes. Each step adds only a few new lines.
What part should I draw first?
Start with the cowboy hat because it sets the size of the head and body. The wide brim also helps make Woody easy to recognize.
Can I color the drawing after finishing?
Yes, coloring is a great final step. Use warm browns for the hat and boots, blue for the pants, and bright colors for the shirt details.