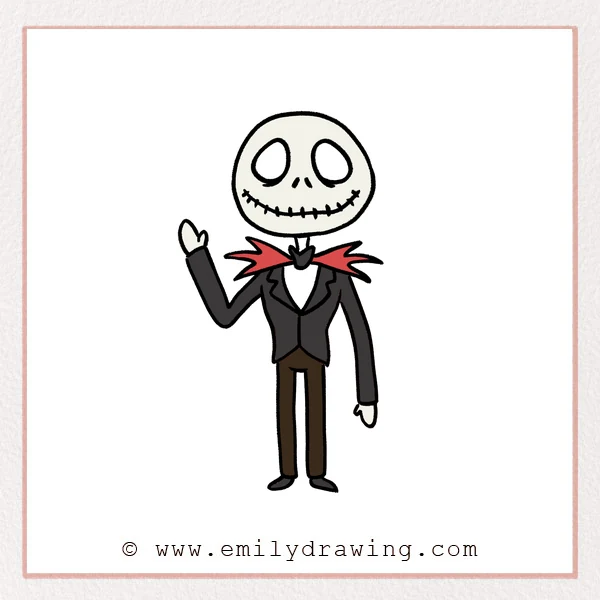
Learn how to draw nightmare before christmas with a calm, simple approach. This step by step drawing guide builds the character from the face to the full body. It is an easy drawing tutorial for beginners who want clear shapes and steady progress.
What You Will Need
- A pencil
- An eraser
- Drawing paper
- A black marker or pen
- Colored pencils or markers, if you want to add color
Here are my RECOMMENDED Art Supplies!
- Crayola Coloring Set (140 Pieces – Mega Value!)
- 24 Colored Crayon Set
- A4 Printer Paper
- Crayola Coloring Pencils
- HP Home Printer with Instant Ink!
Time needed:
30 minutes.
Step-by-Step Drawing Guide
Step 1: Draw the Eyes and Nostrils
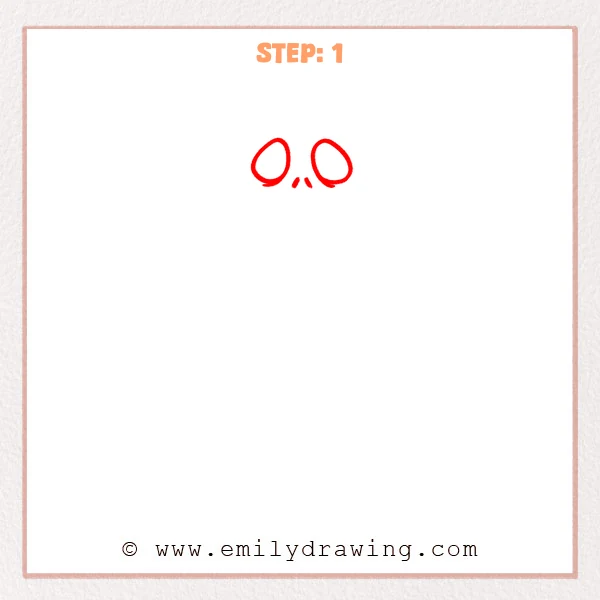
Start with two tilted oval shapes for the large eye outlines of the nightmare before christmas character. Add two small curved marks below and between the eyes to form simple nostrils.
Pro Tip: Keep both eyes similar in size, and tilt them slightly toward the center.
Step 2: Add the Head Outline and Stitched Smile
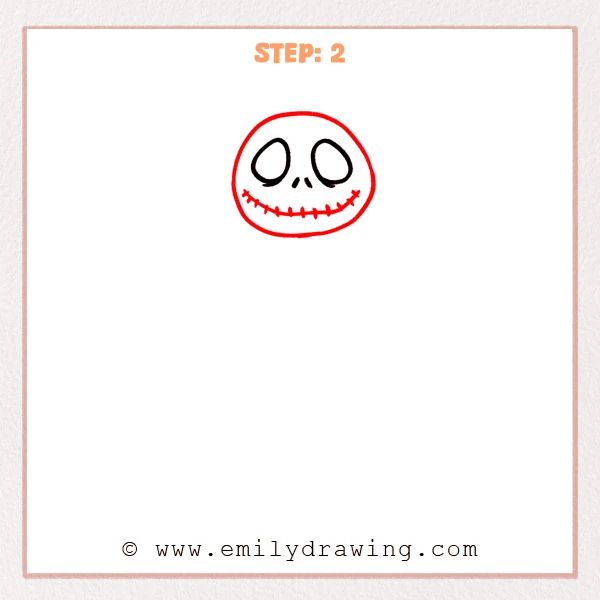
Draw a wide round head around the eyes, keeping the bottom slightly flatter. Add a curved smile across the lower face, then place short vertical marks along it for stitches.
Pro Tip: Keep the smile curve near the lower head, but do not let it touch the outer outline.
Step 3: Draw the Bat-Shaped Bow Tie
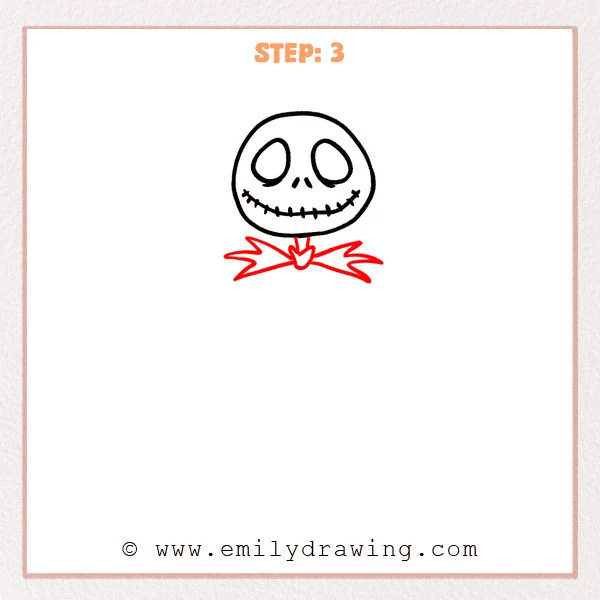
Draw a small center knot below the head, connecting it to the neck area. Extend pointed lines outward on both sides to form the bat-shaped bow tie for the nightmare before christmas character.
Pro Tip: Keep the pointed sides close in length so the bow tie looks balanced.
Step 4: Add the Body and Left Arm
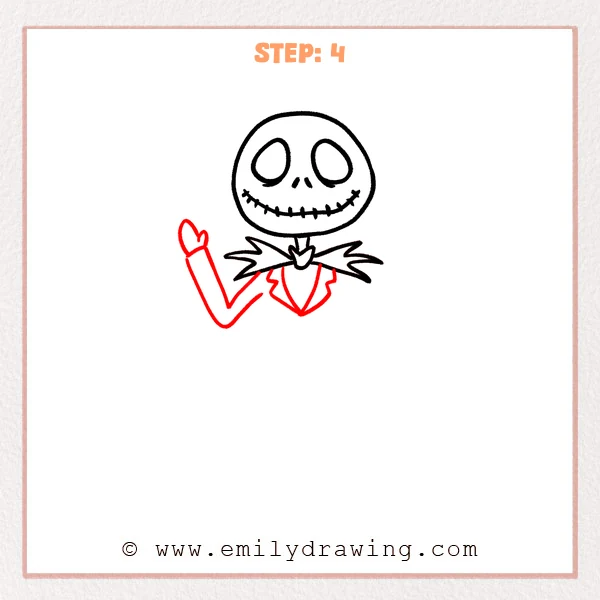
Draw a pointed suit body below the bow tie, bringing the center down into a sharp point. Extend a curved arm from the left shoulder, then add a simple waving hand shape at the top.
Pro Tip: Align the body’s center point with the bow tie so the character feels steady.
Step 5: Complete the Coat and Right Arm
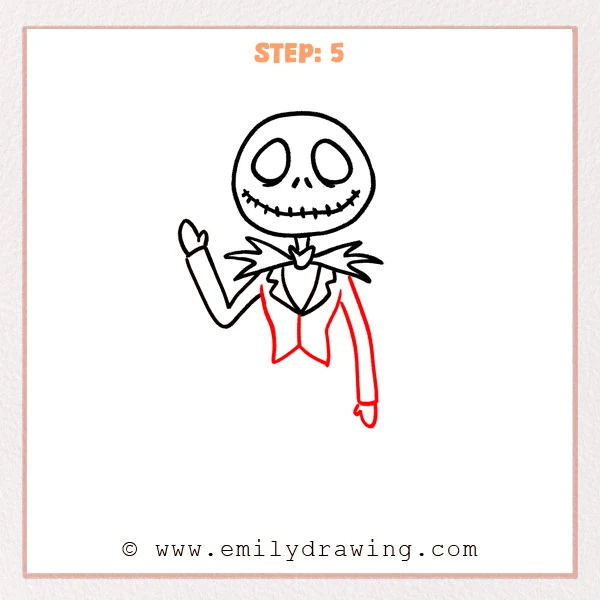
Extend two coat tails below the body, leaving an upward split in the center. Draw a long arm downward from the right shoulder, then add a small hand shape at the end.
Pro Tip: Make the right arm slim and long to match the tall, thin feeling of the nightmare before christmas character.
Step 6: Draw the Long Legs and Shoes
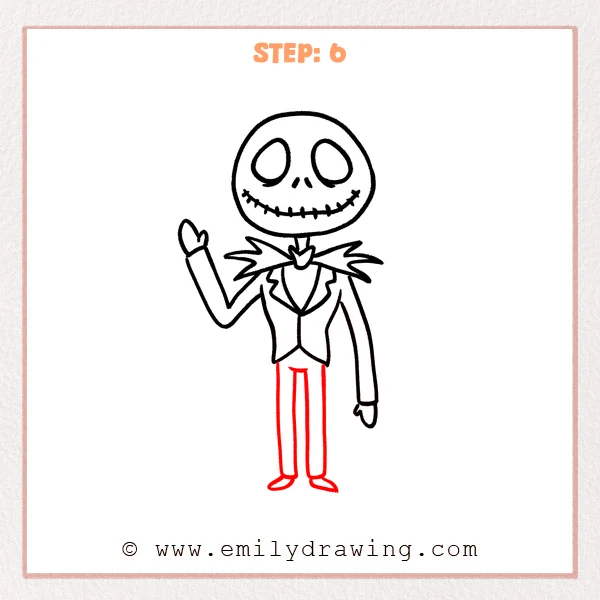
Draw two straight, slim pant legs below the coat, keeping them mostly parallel. Add small shoes at the bottom of each leg, with the toes gently pointing outward.
Pro Tip: Make the legs longer than the body to show the tall, thin proportions of the nightmare before christmas character.
Step 7: Color in your drawing!
Fun Facts
Nightmare before christmas characters often use long, thin shapes to create a dramatic look. Big eyes, narrow limbs, and sharp costume edges help make the design recognizable. This makes the character a great drawing for beginners who want to practice bold outlines.
Pin it now, Draw later!
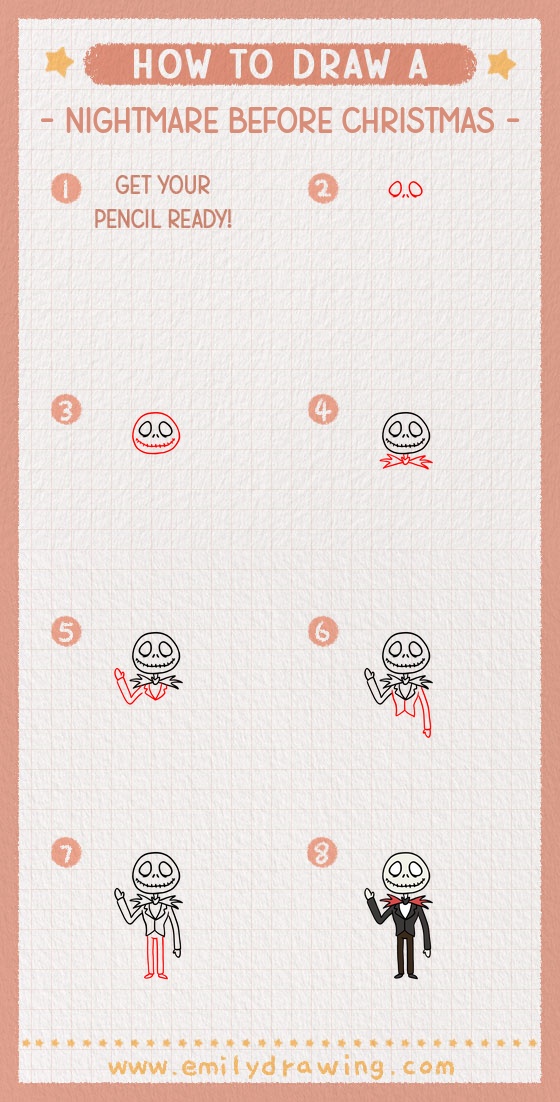
Trace the final lines with a black marker when you are happy with the sketch. Erase extra pencil marks, then add light shading around the suit and bow tie. Take your time, and try the step by step drawing again to build confidence.
Get the FREE Printable Drawing Guide
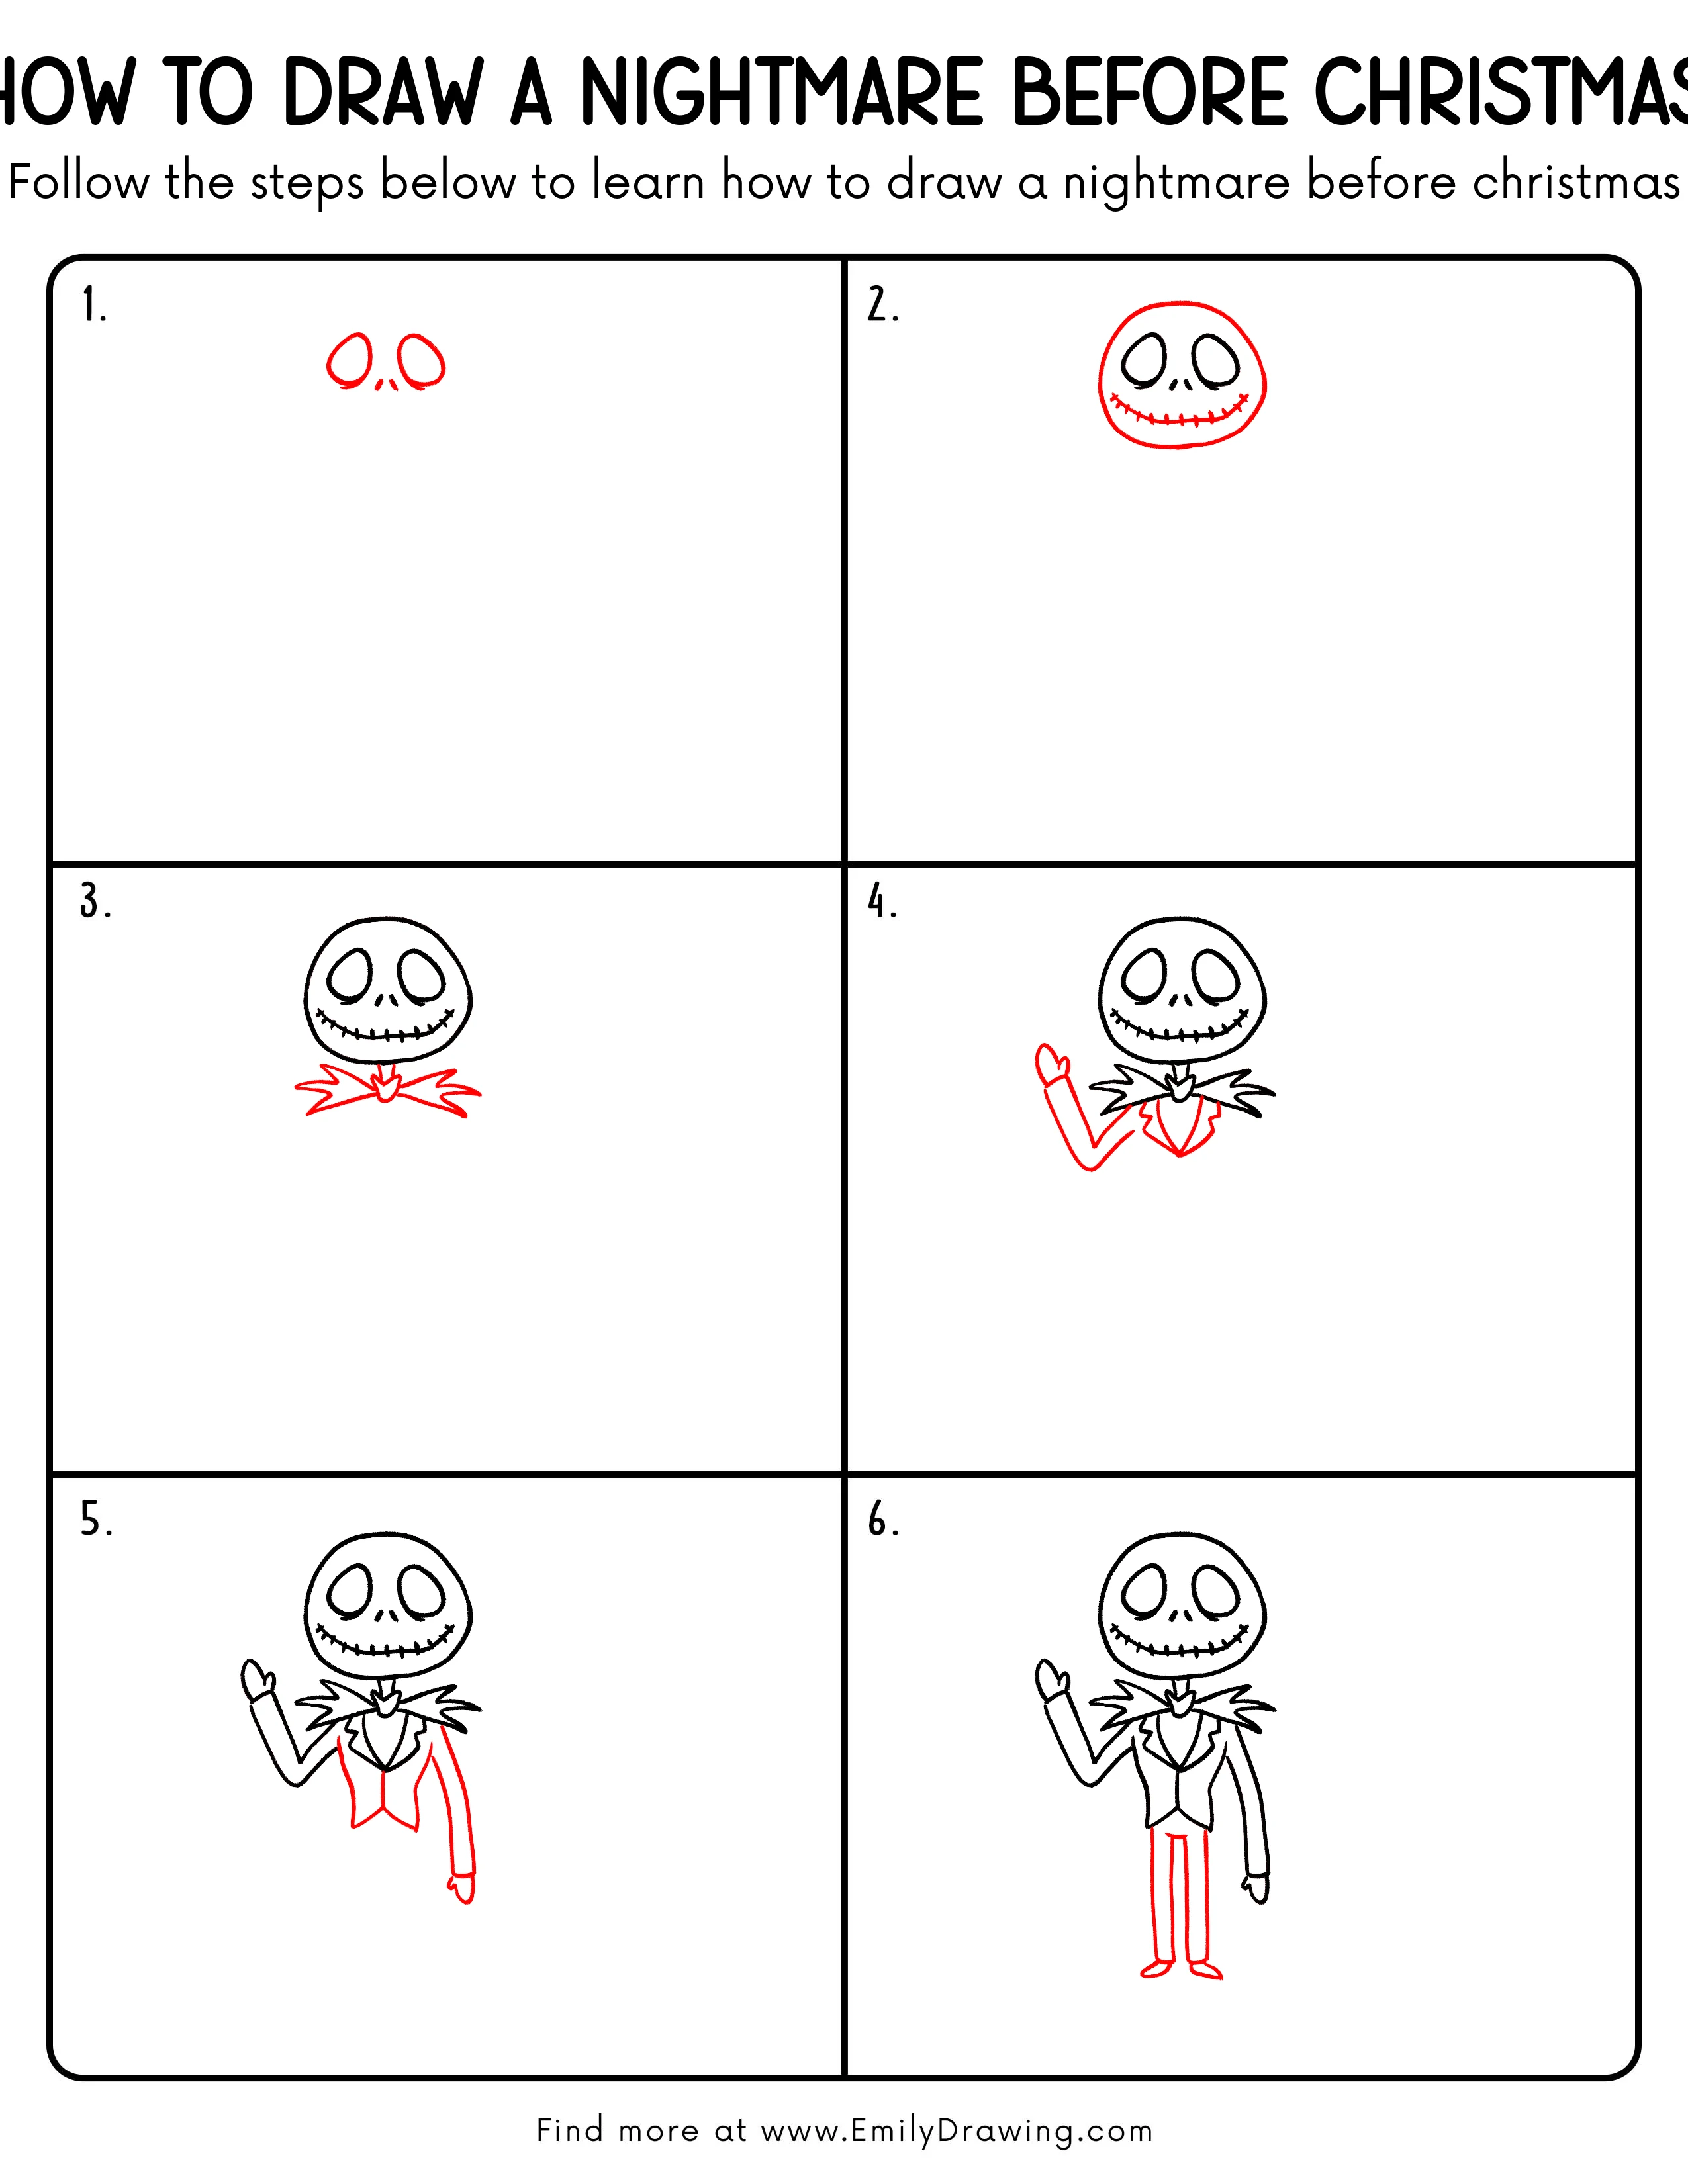
FREE Download Printable Nightmare Before Christmas Drawing Tutorial
Frequently Asked Questions
Is this nightmare before christmas drawing good for beginners?
Yes, this easy drawing tutorial uses simple ovals, curves, and straight lines. Beginners can follow each step slowly and adjust the shapes as needed.
How can I make the character look taller?
Make the arms and legs longer while keeping the head large and round. This helps create the slim nightmare before christmas style.
Should I color the drawing?
You can keep it black and white for a classic look. You can also add soft gray shading to the suit for more depth.