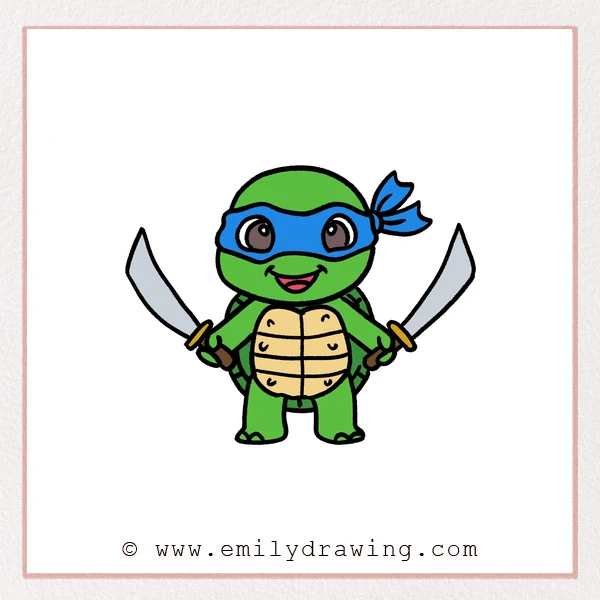
In this easy drawing tutorial, you will learn how to draw ninja turtle in a cute beginner-friendly style.
Each step adds one clear part, so you can build the drawing slowly and confidently.
Take your time with the shapes, and keep your lines light at first.
What You Will Need
- A pencil
- An eraser
- Drawing paper
- A black marker or pen
- Colored pencils, crayons, or markers
Here are my RECOMMENDED Art Supplies!
- Crayola Coloring Set (140 Pieces – Mega Value!)
- 24 Colored Crayon Set
- A4 Printer Paper
- Crayola Coloring Pencils
- HP Home Printer with Instant Ink!
Time needed:
23 minutes.
Step-by-Step Drawing Guide
Step 1: Draw the Head Shape and Eyes
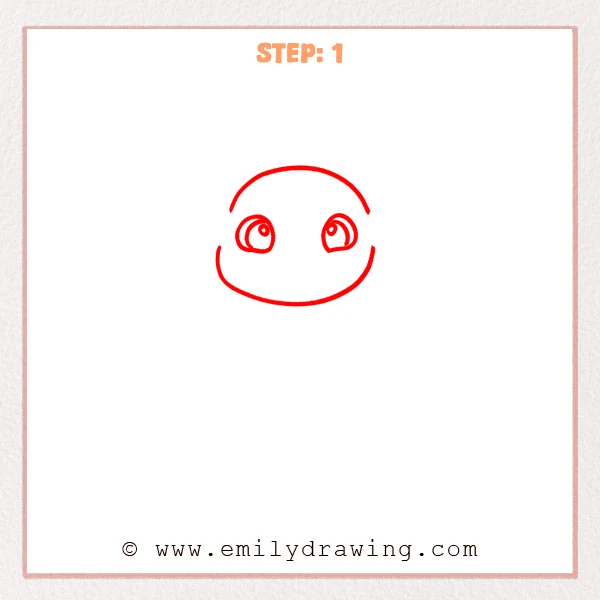
Start with a wide, rounded head outline, keeping the top and bottom curves soft.
Add two large eyes in the middle, using curved eye shapes and small highlight circles for a bright look.
Pro Tip: Keep both eyes balanced and place them near the center line of the head.
Step 2: Add the Mask and Smile
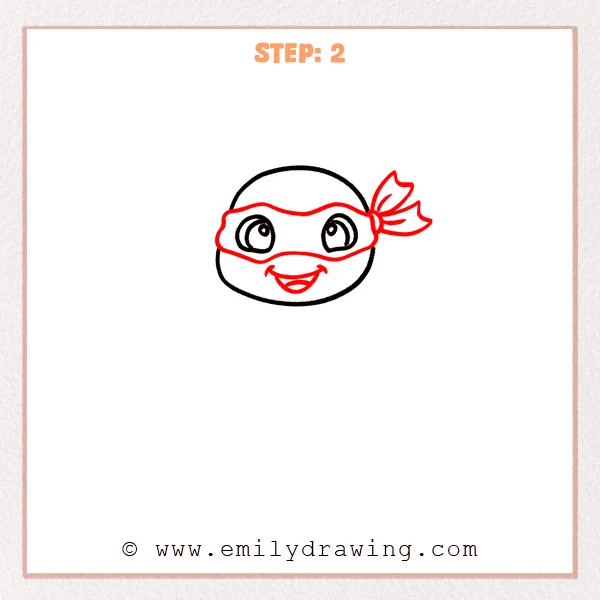
Draw the ninja turtle mask around the eyes, using gently wavy lines on the top and bottom edges.
Add the tied knot and flowing bandana tails on the right side to make the character recognizable.
Then draw a curved smiling mouth and an open mouth shape for a cheerful expression.
Pro Tip: Keep the mask balanced on both sides, and place the mouth directly below the eyes for a natural look.
Step 3: Draw the Arms and Two Swords
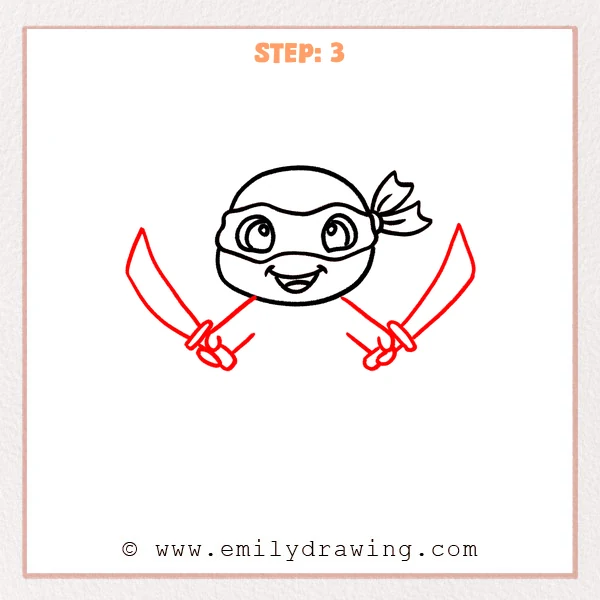
From both lower sides of the head, draw arms stretching outward to make the pose feel strong.
Add simple finger shapes on each hand, then draw two long swords pointing upward.
Build each blade with long curved lines and pointed tips, keeping both sides mostly balanced.
Pro Tip: Place the sword handles first, then draw the blades so their directions are easier to control.
Step 4: Add the Body and Turtle Shell
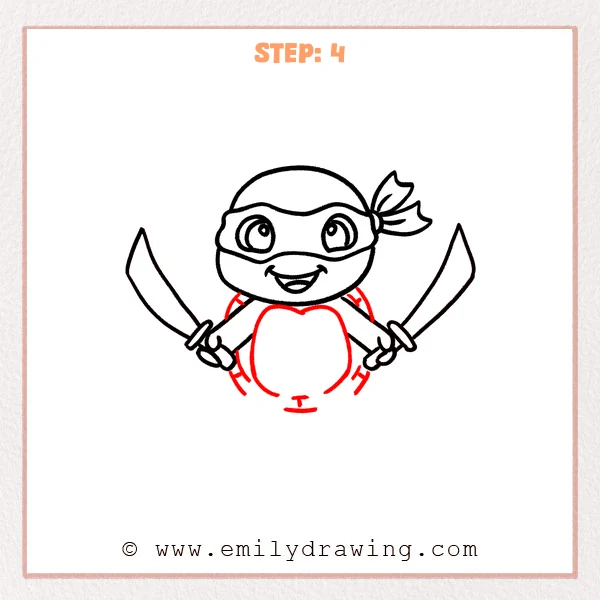
Under the head, draw a rounded body and add a large shell plate in the center.
Add shoulder shapes and side body lines so the arms connect more naturally.
Place a few short lines near the bottom to prepare space for the legs and belt.
Pro Tip: Keep the body slightly narrower than the head so the ninja turtle looks cute and balanced.
Step 5: Refine the Chest Shell Pattern
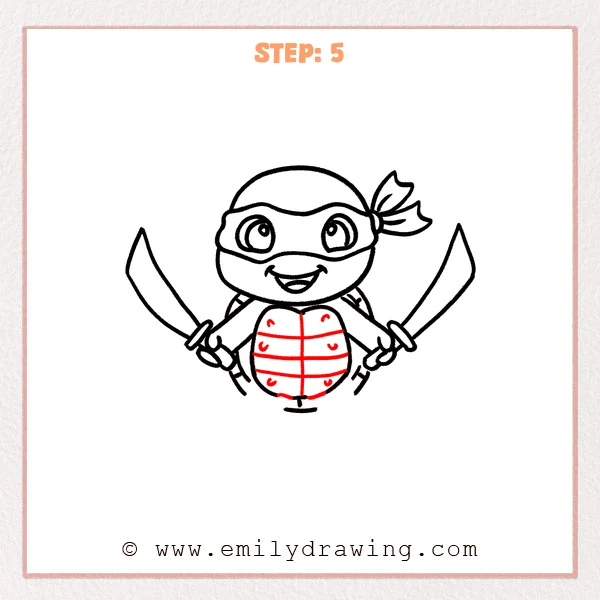
Draw one vertical line down the middle of the chest shell to divide it into two sides.
Add several horizontal curved lines to create neat armor sections.
Place small curved marks inside the sections to give the shell more detail.
Pro Tip: Let the horizontal lines curve gently with the shell shape instead of making them too straight.
Step 6: Draw the Legs and Feet
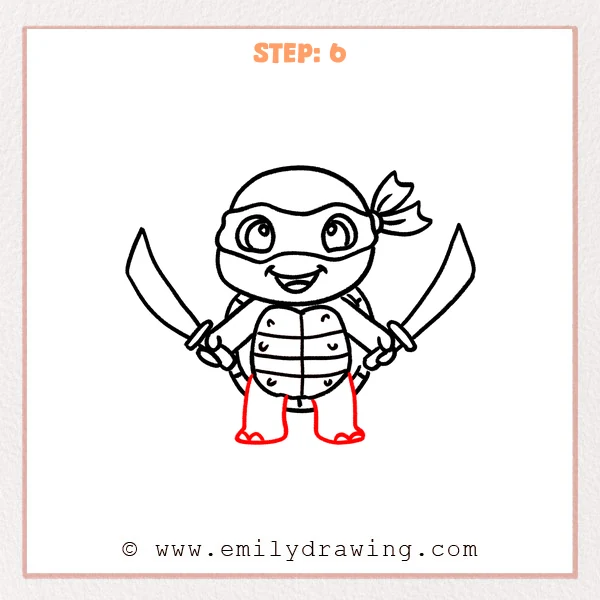
Under the body, draw two short legs standing slightly apart.
Shape each foot as a wide rounded form, then add simple toes at the front.
Let the leg lines bend outward a little so the ninja turtle looks steady.
Pro Tip: Keep both soles on the same level so the character does not look tilted.
Step 7: Color in your drawing!
Fun Facts
Ninja turtle characters are often shown with masks, action poses, and brave expressions.
A turtle shell can be simplified into rounded armor shapes for drawing for beginners.
Swords and bandana tails help make the pose feel active and full of energy.
Pin it now, Draw later!
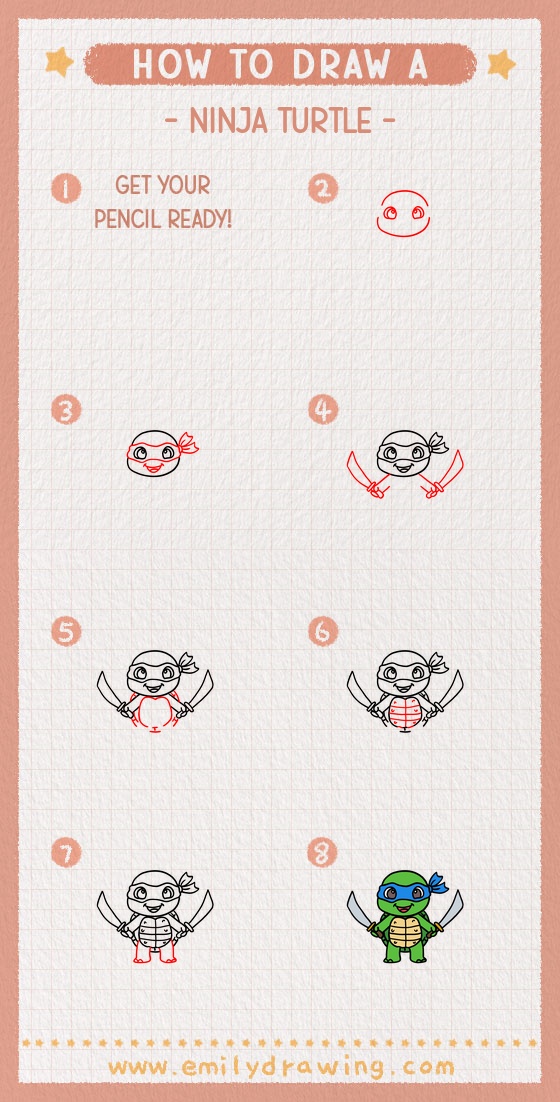
Trace your final lines with a black marker when you are happy with the sketch.
Erase extra pencil marks, then color the mask, shell, body, and swords carefully.
Now you know how to draw ninja turtle using a simple step by step drawing method.
Try drawing another pose next, or create your own ninja turtle adventure scene.
Get the FREE Printable Drawing Guide
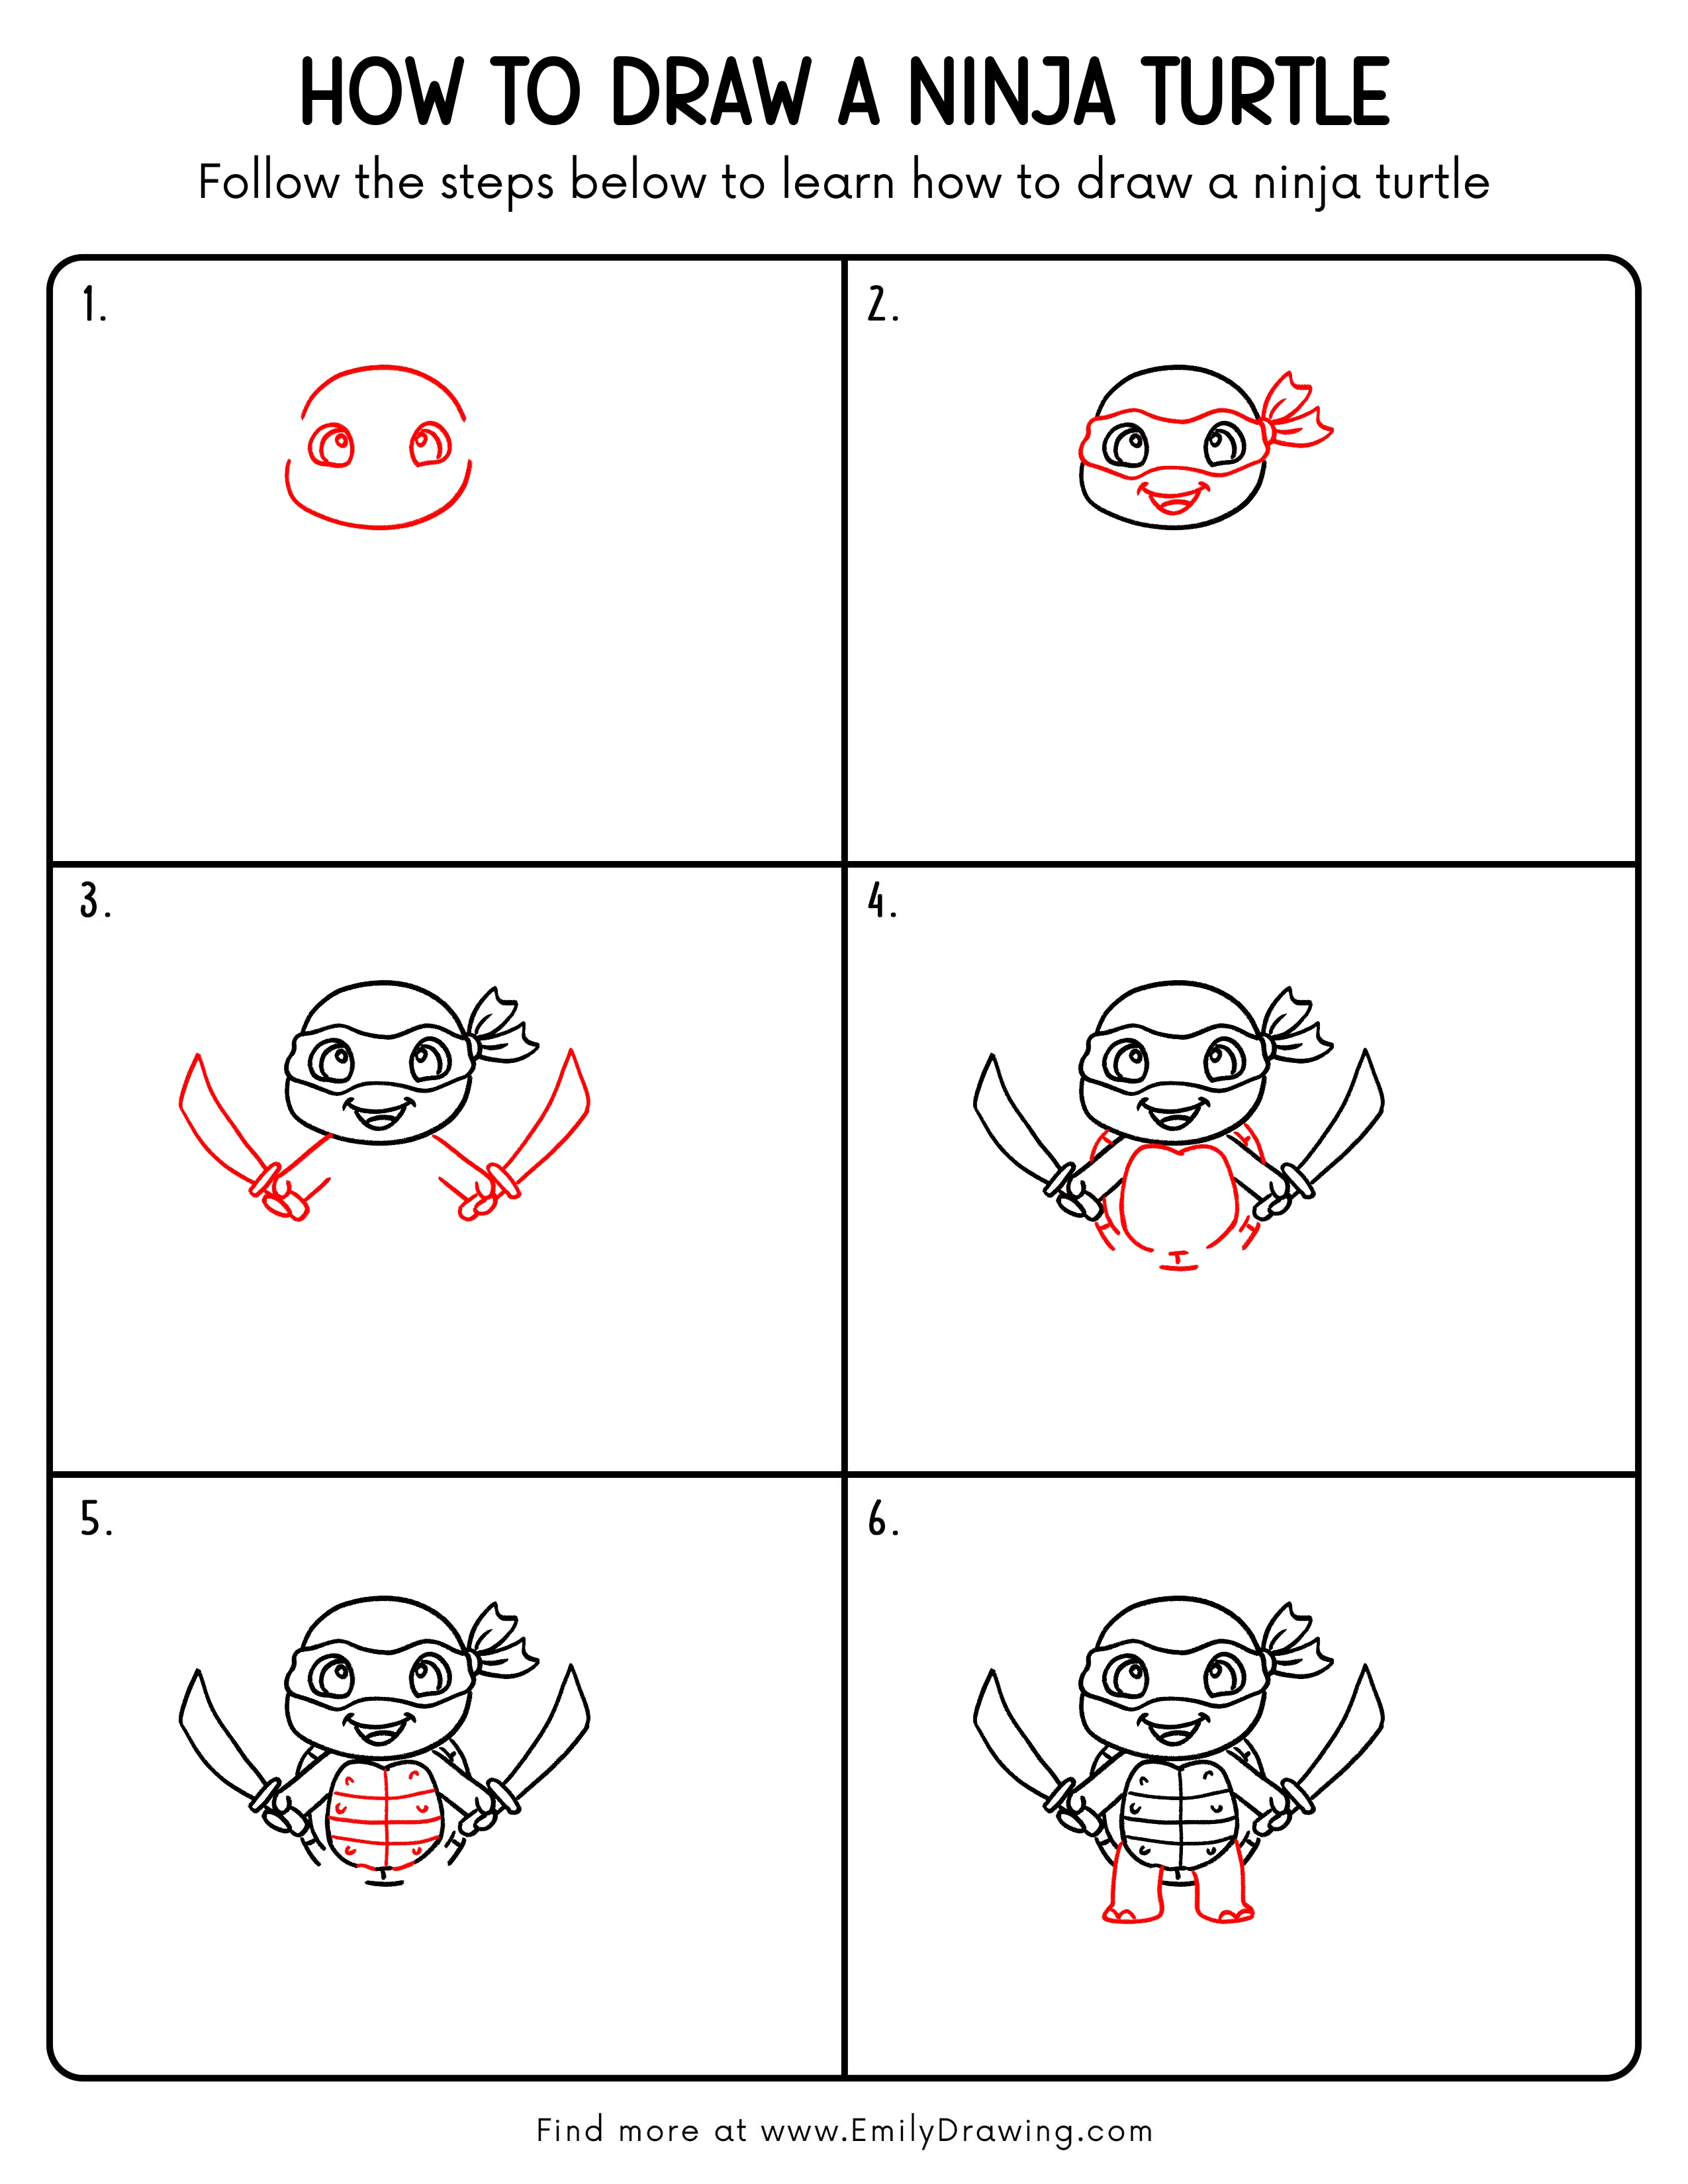
FREE Download Printable Ninja Turtle Drawing Tutorial
Frequently Asked Questions
Is this ninja turtle drawing good for beginners?
Yes, this easy drawing tutorial uses simple curves, rounded shapes, and clear details.
Beginners can follow each step slowly and adjust the lines as needed.
How can I make my ninja turtle look more balanced?
Keep the eyes, arms, and feet at similar heights on both sides.
Use light pencil lines first, then darken the shapes after checking the proportions.
What colors should I use for a ninja turtle drawing?
Use green for the body, a darker green or brown for the shell, and a bright color for the mask.
You can also add gray or silver to the swords for a clean finished look.