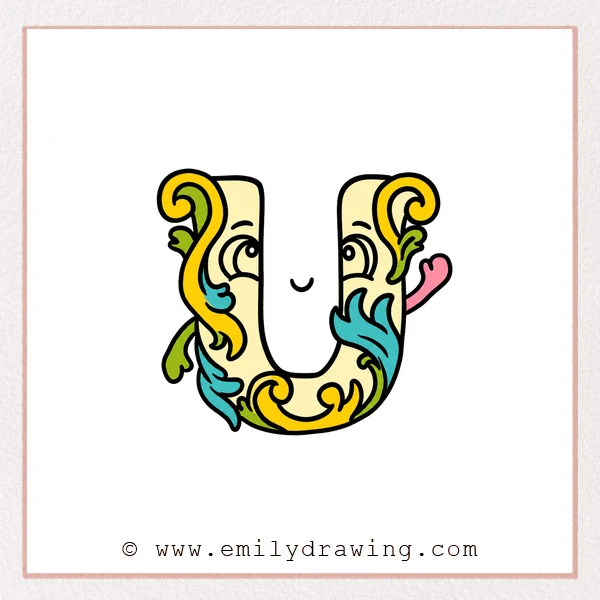
Learn how to draw fancy letter U with rich leaf curls, heart accents, and a friendly face. This step by step drawing practices a deep rounded bend and balanced side decorations.
What You Will Need
- Drawing paper
- Pencil and eraser
- Black pen or marker
Here are my RECOMMENDED Art Supplies!
- Crayola Coloring Set (140 Pieces – Mega Value!)
- 24 Colored Crayon Set
- A4 Printer Paper
- Crayola Coloring Pencils
- HP Home Printer with Instant Ink!
Time needed:
24 minutes.
Step-by-Step Drawing Guide
Step 1: Draw the Inner U
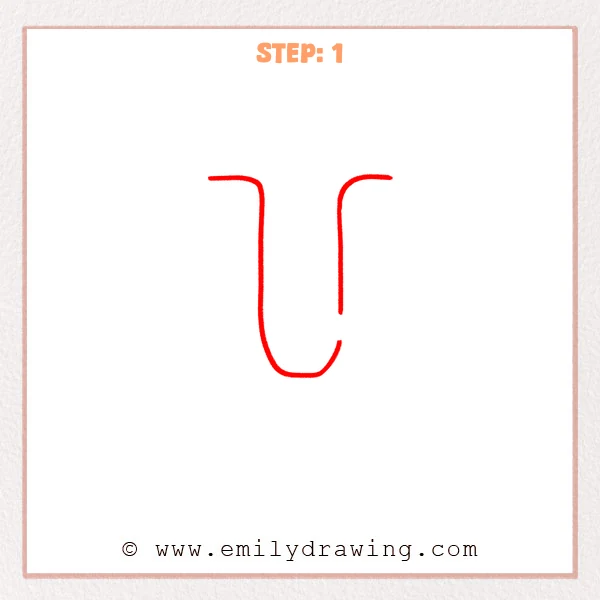
Draw two tall vertical curves with short outward hooks at their tops. Join their lower ends with a broad rounded bend, leaving a small gap on the right.
Pro Tip: Keep both upright sides similar in height and spacing.
Step 2: Begin the Right Ornament
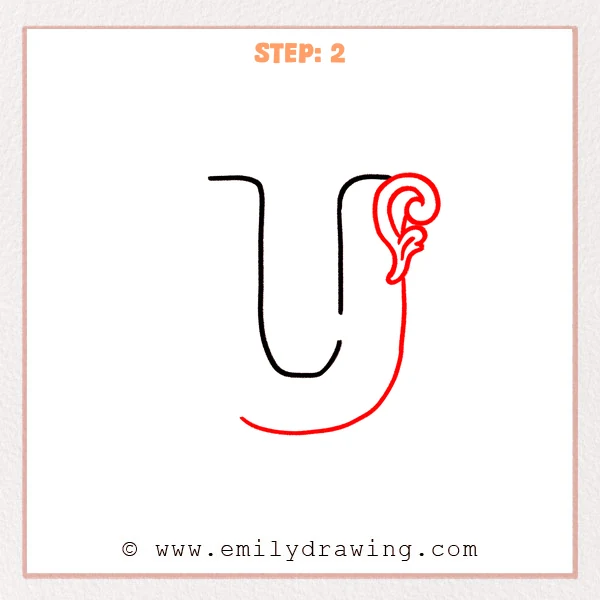
Add a large spiral leaf around the upper-right side. Continue its outer edge down and around the bottom in one long sweeping curve.
Pro Tip: Leave a broad border between the inner U and outer curve.
Step 3: Decorate the Lower Right
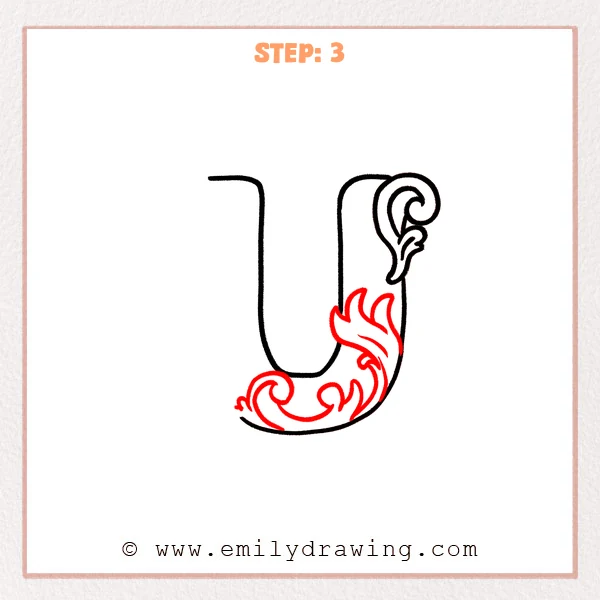
Fill the lower-right border with layered pointed leaves and curling stems. Extend the pattern into two inward curls along the bottom.
Pro Tip: Aim the pointed leaves upward to follow the right stem.
Step 4: Add the Upper Left Flourish
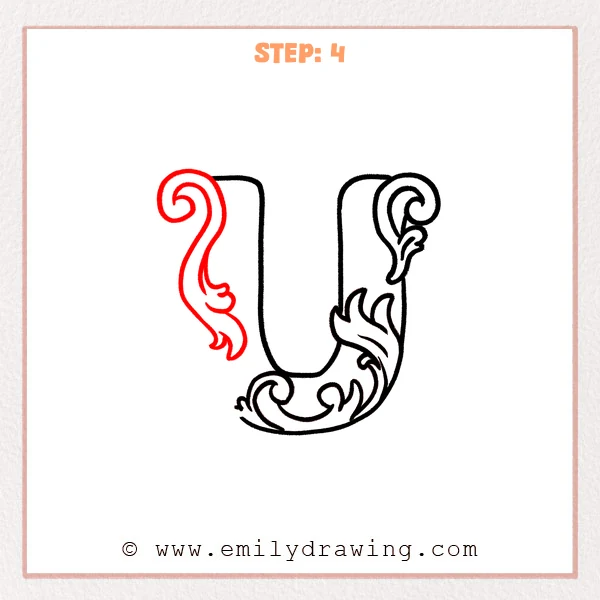
Draw a matching large spiral along the upper-left stem. Sweep it downward into layered leaf shapes that taper toward the middle.
Pro Tip: Match the visual weight of the ornament on the opposite side.
Step 5: Add Outer Heart Leaves
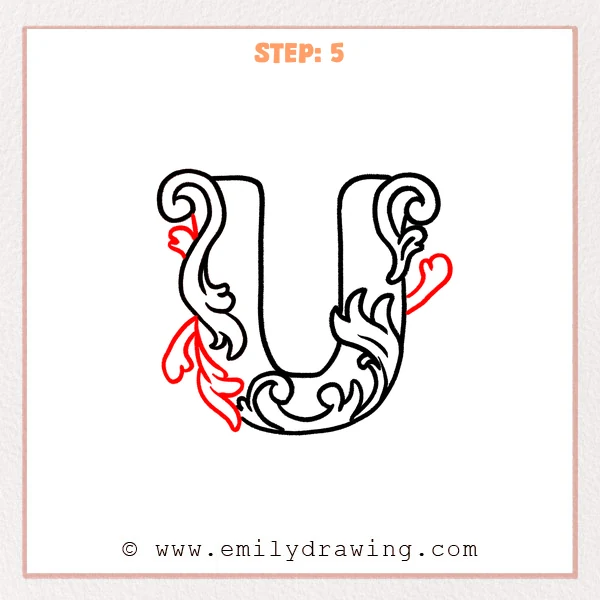
Attach several long heart-tipped leaves outside the lower-left flourish. Place one larger heart-shaped leaf beside the middle-right border.
Pro Tip: Point the outer leaves away from the letter to open the design.
Step 6: Draw the Face
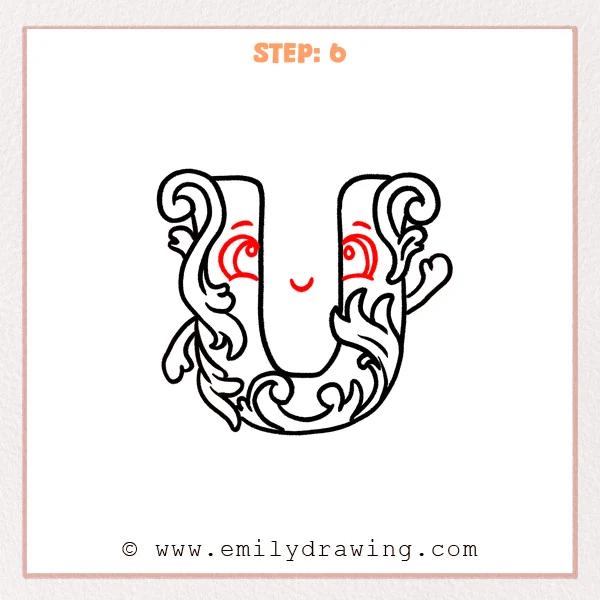
Place two shining eyes inside the open upper area of the U. Add curved eyebrows and a small upward smile between them.
Pro Tip: Keep the face clear of the dense ornamental border.
Step 7: Color in your drawing!
Fun Facts
- The uppercase U is defined by two upright sides and a rounded bottom.
- Mirrored side ornaments can balance a letter without matching exactly.
- Leaf-shaped flourishes follow curves naturally and emphasize their direction.
Pin it now, Draw later!
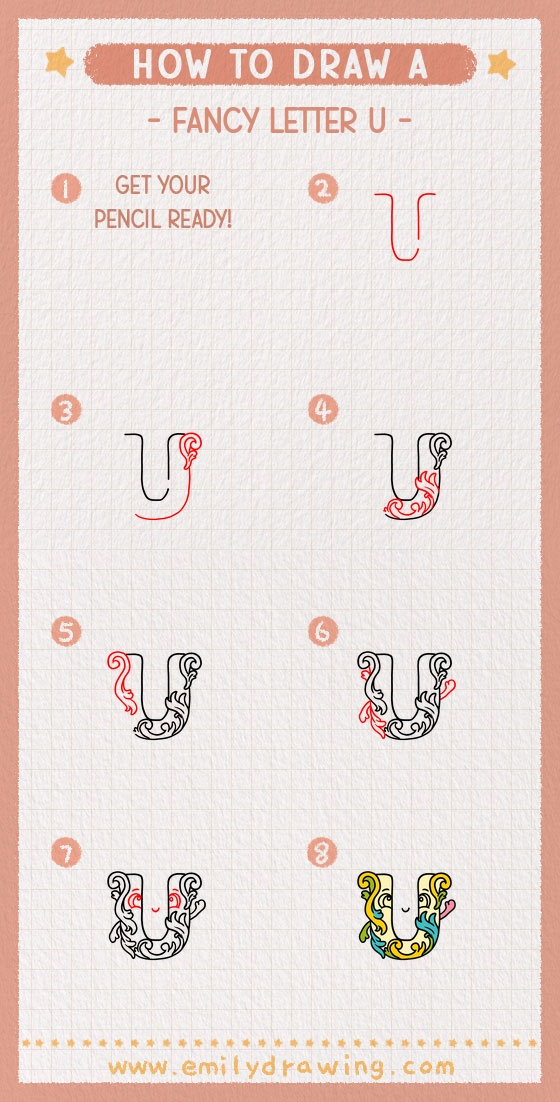
Erase construction lines and refine the rounded U, layered leaves, curls, hearts, and face. Your step by step fancy letter U drawing is complete, so add contrasting colors to reveal each ornament.
Get the FREE Printable Drawing Guide
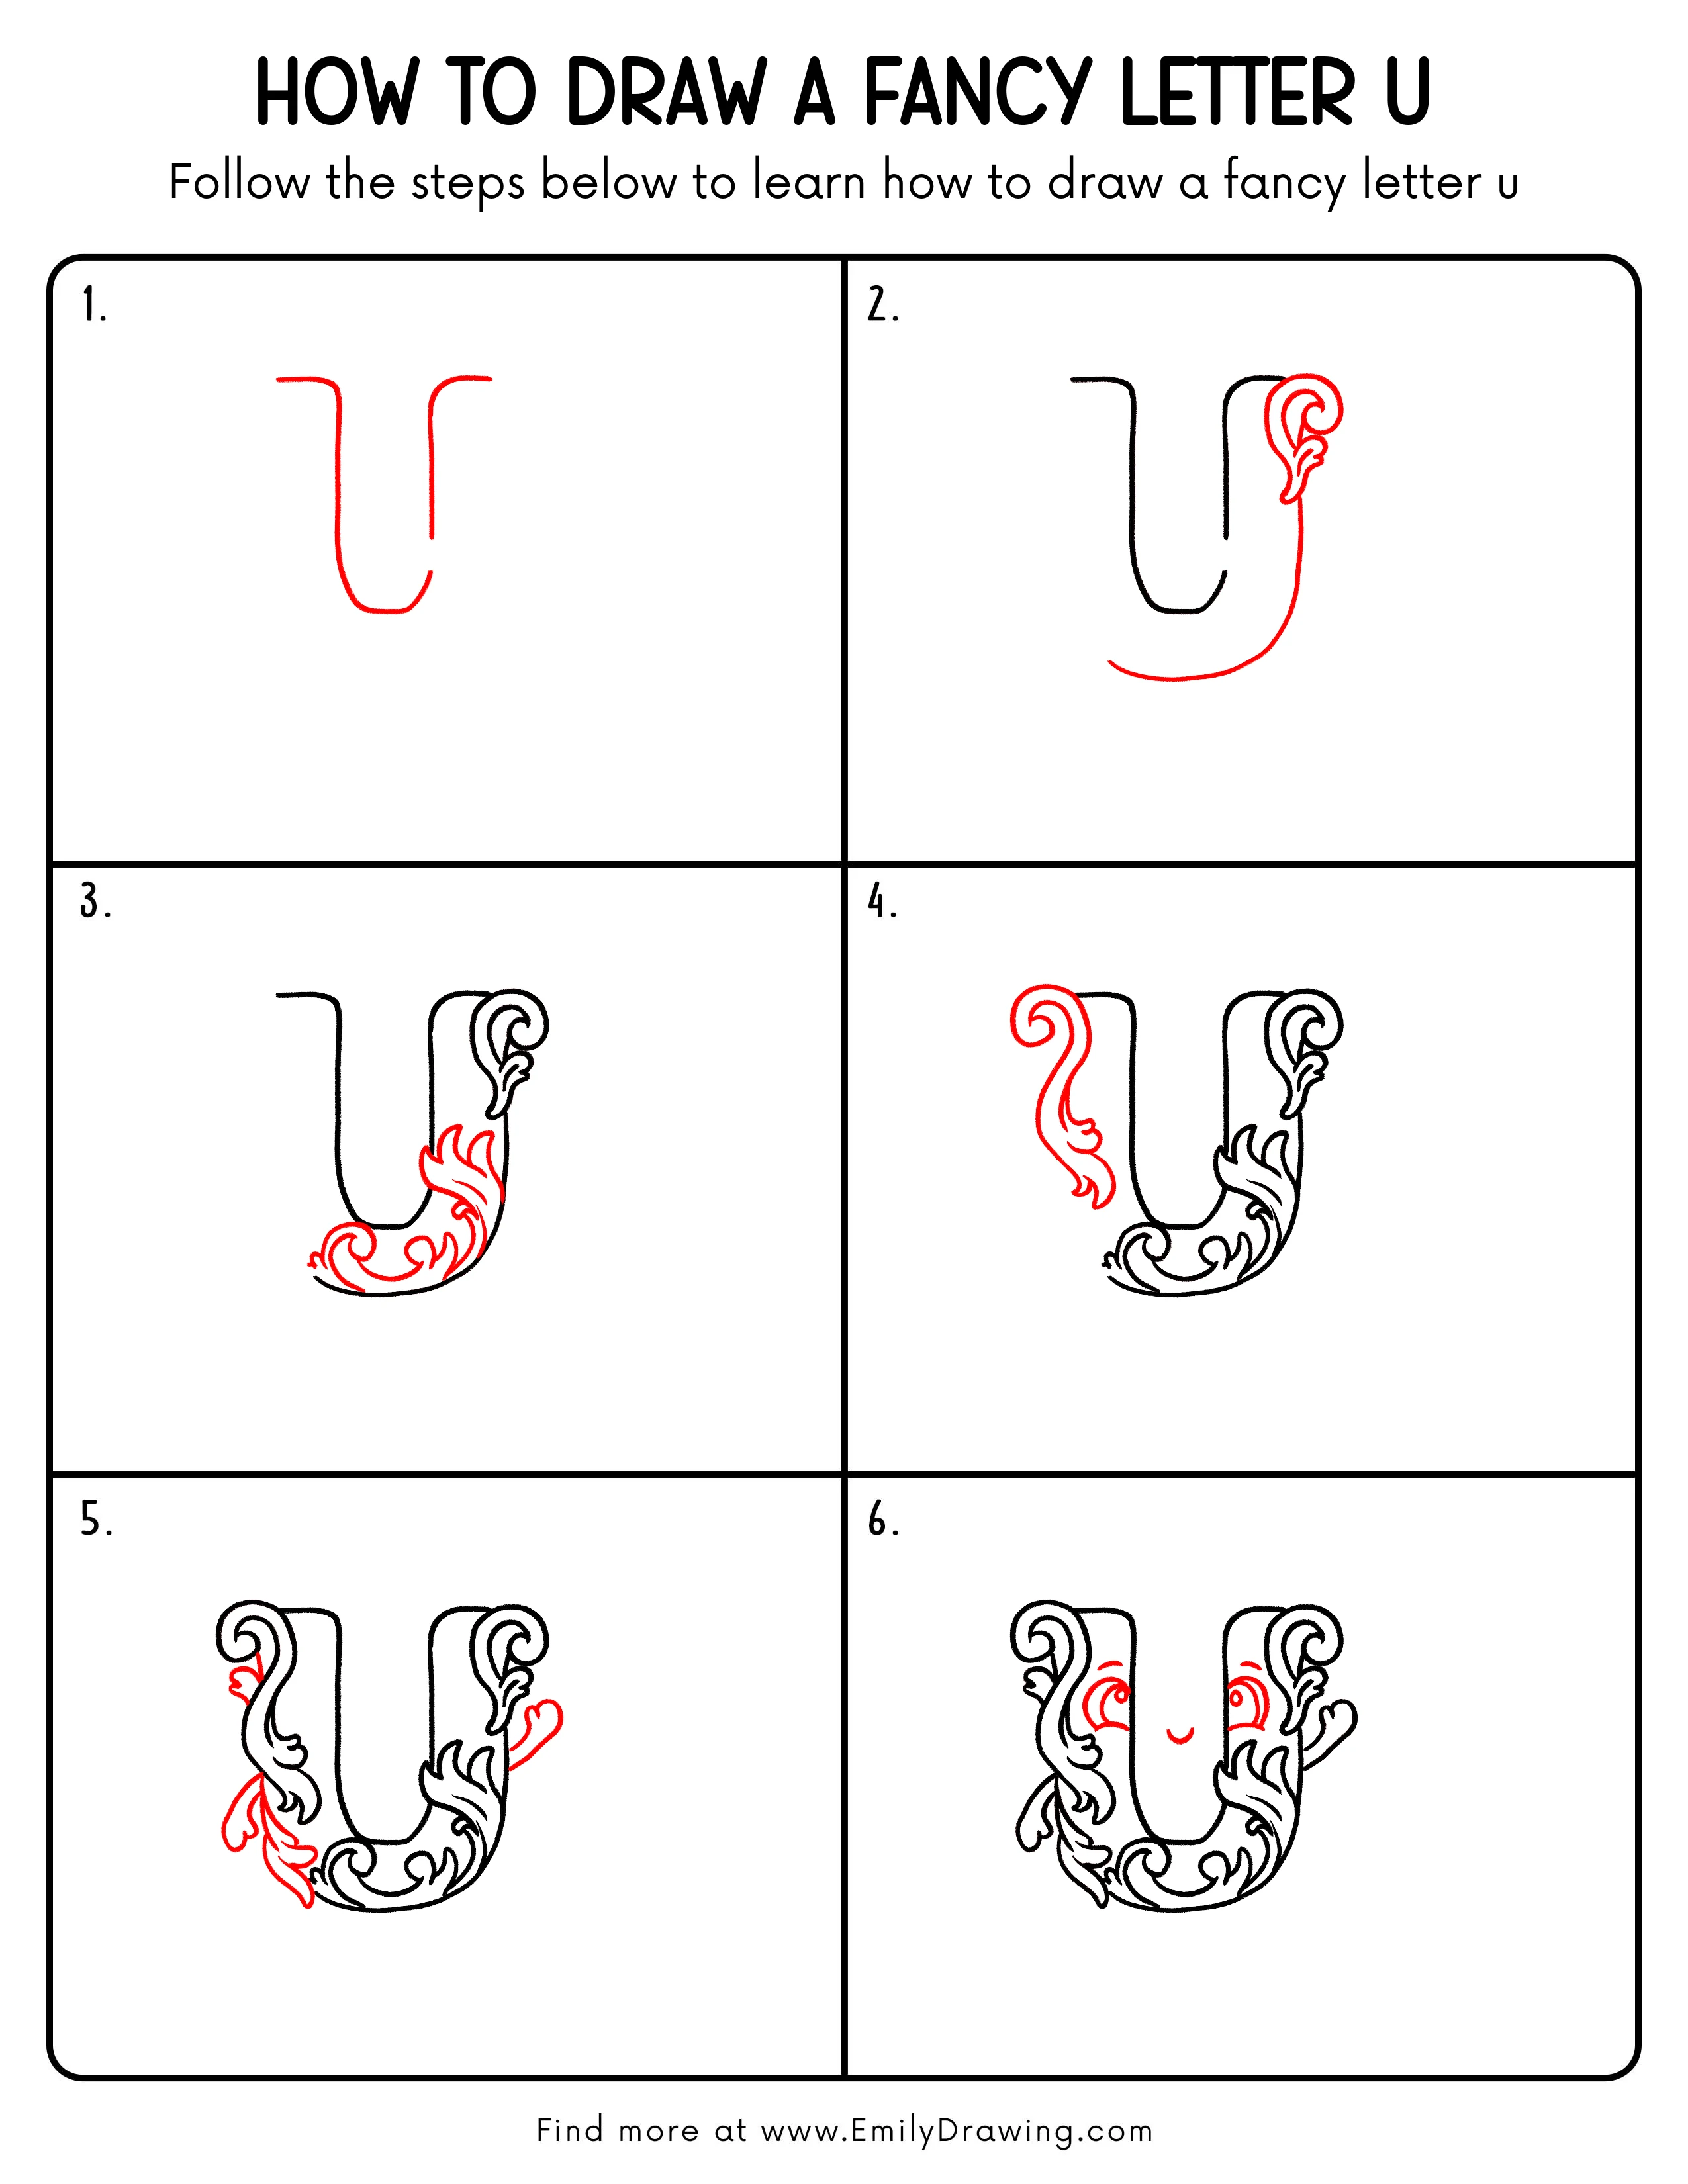
FREE Download Printable Fancy Letter U Drawing Tutorial
Frequently Asked Questions
How do I make the bottom smoothly rounded?
Turn the curve gradually and keep its lowest section nearly horizontal.
Must both side ornaments match?
No, similar size and density create balance even when details differ.
Can I simplify the leaf patterns?
Yes, keep one spiral on each side and omit the smaller branches.